Introduction
This manual provides detailed instructions for the installation, operation, and maintenance of your aigo AF12 3-in-1 ARGB Fan Kit. Please read this manual thoroughly before use to ensure proper functionality and longevity of the product.
Продукт өзгөчөлүктөрү
The aigo AF12 3-in-1 ARGB Fan Kit offers efficient cooling and customizable lighting for your computer system. Key features include:
- Модел: AF123IN1-BK
- Күйөрмандардын саны: 3 x 120 мм желдеткичтер
- желдеткич ылдамдыгы: 800-2000 RPM (±10%)
- Fan Noise Level: ≤30dBA
- Аба агымы: 86.6 CFM
- Статикалык басым: 1.27mm-H²O
- Working Current (Motor): ≤0.2A (12V)
- Working Current (Light): ≤0.48A (5V)
- Өлчөмдөрү: 120 x 120 x 25 мм
- ARGB жарыктандыруу: Addressable RGB lighting for customizable effects.
Пакеттин мазмуну
Төмөндө тизмеленген нерселердин баары пакетиңизде бар экенин текшериңиз:
- 3 x aigo AF12 ARGB Fans
- Монтаждоо бурамалар
- ARGB Controller (if included in kit)
- Cables (Power, ARGB Sync)
Орнотуу боюнча колдонмо
Follow these steps to properly install your aigo AF12 ARGB fans into your computer case.
- Системаңызды даярдаңыз: Power off your computer and disconnect it from the power source. Open your computer case.
- Орнотуу жерлерин аныктоо: Determine the desired locations for your fans (e.g., front, top, rear, bottom of the case). Ensure proper airflow direction.
- Күйөрмандарды тоо: Position each fan in its chosen location. Use the provided mounting screws to secure the fans to the case. Ensure the fan blades are not obstructed.
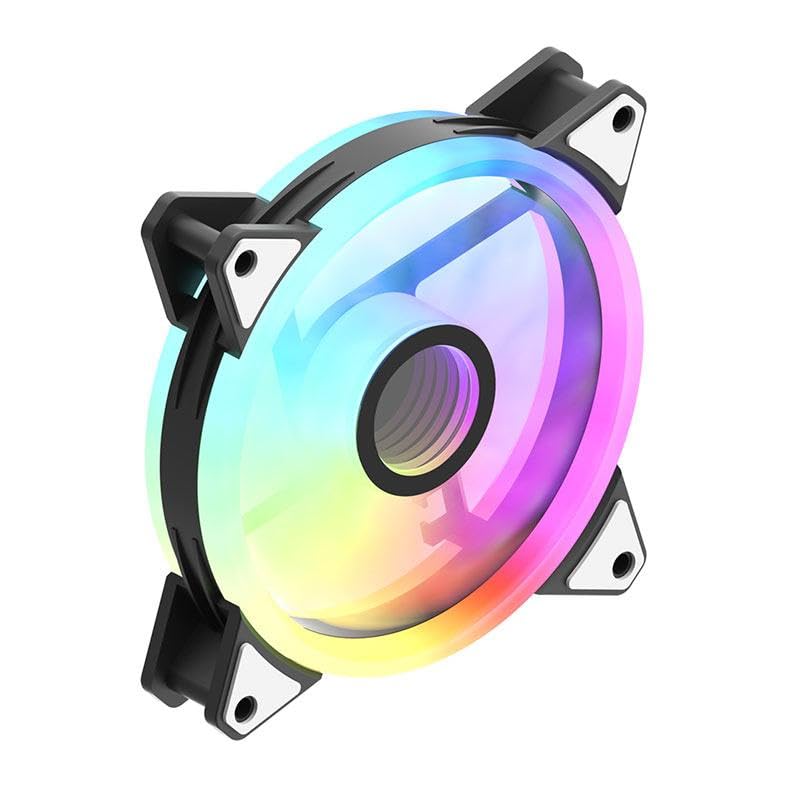
Image: An aigo AF12 fan viewed from an angle, highlighting the mounting points on its corners. This illustrates how the fan is secured.
- Электр кабелдерин туташтыруу: Connect the 3-pin power connector from each fan to an available fan header on your motherboard or fan controller.
- Connect ARGB Cables: Connect the ARGB cable from each fan to the ARGB controller (if applicable) or directly to a compatible 5V 3-pin ARGB header on your motherboard. Ensure correct pin orientation to avoid damage.
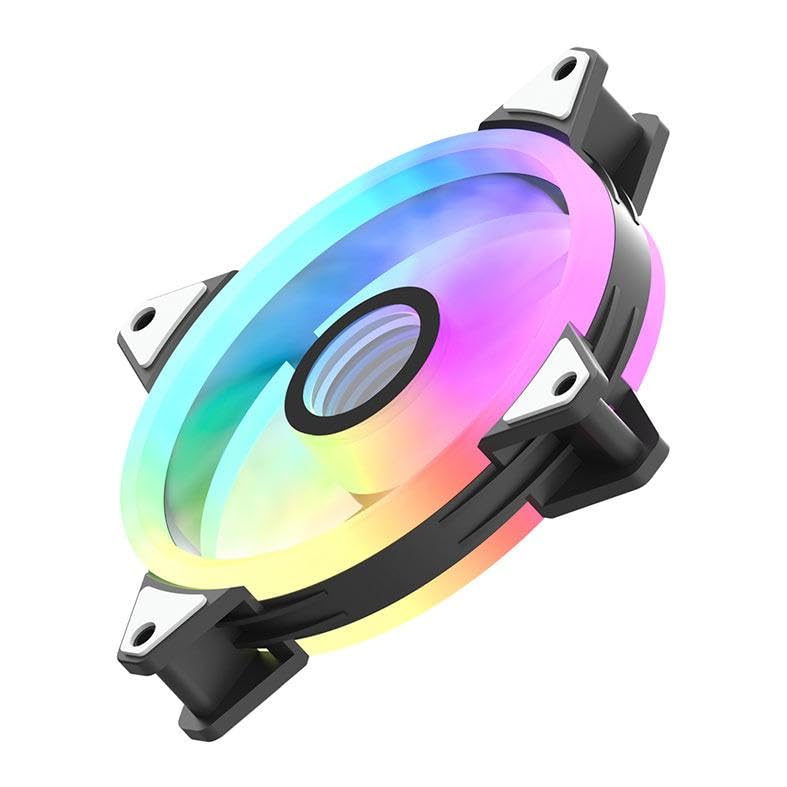
Сүрөт: А тарап профессионалfile of the aigo AF12 fan, illustrating the thickness and potential locations for cable connections on the frame.
- Кабелдик башкаруу: Route cables neatly to prevent interference with other components and to improve airflow.
- Капты жаап, күйгүзүү: Компьютериңиздин корпусун жаап, кубатту кайра туташтырыңыз жана тутумуңузду күйгүзүңүз.
Иштөө нускамалары
Once installed, your aigo AF12 ARGB fans will operate automatically based on your system's fan control settings. The ARGB lighting can be controlled via your motherboard's software or a dedicated ARGB controller.
Желдетүүчү ылдамдыкты көзөмөлдөө
Fan speed can typically be adjusted through your motherboard's BIOS/UEFI settings or through fan control software provided by your motherboard manufacturer. Refer to your motherboard manual for specific instructions.
ARGB жарыкты башкаруу
If connected to a 5V 3-pin ARGB header on your motherboard, use your motherboard's ARGB synchronization software (e.g., ASUS Aura Sync, MSI Mystic Light Sync, GIGABYTE RGB Fusion, ASRock Polychrome Sync) to customize lighting effects, colors, and patterns.
If using a dedicated ARGB controller (often included with fan kits), refer to the controller's specific instructions for lighting adjustments.
Техникалык тейлөө
Үзгүлтүксүз техникалык тейлөө оптималдуу иштөөнү камсыз кылат жана күйөрмандарыңыздын иштөө мөөнөтүн узартат.
- Чаңды тазалоо: Periodically clean dust from the fan blades and housing using compressed air or a soft brush. Ensure the system is powered off before cleaning.
- Кабель текшерүү: Verify that all cables are securely connected and free from damage.
- Ызы-чуу мониторинги: Listen for unusual noises, which may indicate a fan bearing issue or obstruction.
Проблемаларды чечүү
If you encounter issues with your aigo AF12 ARGB fans, refer to the following common solutions:
Күйөрмандар айланбай жатышат
- кубат туташуу текшерүү: Ensure the fan's 3-pin power connector is securely plugged into the motherboard or controller.
- BIOS Орнотууларын текшерүү: Verify that fan headers are enabled in your motherboard's BIOS/UEFI settings.
- Test Another Header: Try connecting the fan to a different fan header to rule out a faulty header.
ARGB жарыктары иштебейт
- ARGB туташуусун текшериңиз: Ensure the 5V 3-pin ARGB connector is correctly and securely plugged into the motherboard or controller. Verify the pin orientation.
- Программаны текшерүү: Confirm that your motherboard's ARGB software is installed and configured correctly.
- Шайкештик: Ensure your motherboard has a compatible 5V 3-pin ARGB header. This product is not compatible with 12V 4-pin RGB headers.
Ашыкча ызы-чуу
- Тоскоолдуктарды текшерүү: Желдеткичтин калактарына кабелдердин же башка компоненттердин тийбегенин текшериңиз.
- Монтаждык бурамалар: Verify that all mounting screws are tightened to prevent vibrations.
- Чаңдын пайда болушу: Вентилятордун калактарынан чаңды тазалаңыз.
Техникалык мүнөздөмөлөр
| Өзгөчөлүк | Спецификация |
|---|---|
| Бренд | Айго |
| Модел | AF123IN1-BK |
| Күйөрмандардын саны | 3 x 120 мм |
| Fan Speed | 800 ± 2000 ± 10% RPM |
| Fan Noise | ≤ 30dBA |
| Аба агымы | 86.6 CFM |
| Статикалык басым | 1.27mm-H²O |
| Working Current (Motor) | ≤ 0.2A (12V) |
| Working Current (Light) | ≤ 0.48A (5V) |
| Өлчөмдөр | 120 x 120 x 25 мм |
| Кубат туташтыргычынын түрү | 3-Pin |
| Тtage | 12 вольт |
| Муздатуу ыкмасы | Аба |
| Шайкеш түзмөктөр | Иш такта |
| Элемент Салмагы | 10.6 унция |
Кепилдик жана колдоо
This aigo product comes with a 12 айлык кепилдик сатып алынган күндөн тартып өндүрүш кемчиликтерин жабуу.
For technical support, warranty claims, or further assistance, please visit the official aigo store or contact their customer service through the details provided on their webсайт.
Official aigo Store: Amazon'догу aigo дүкөнү