
1. Киришүү
The Tyenaza H8 2-Way Voice Intercom System provides reliable and convenient two-way communication for various environments such as homes, offices, and classrooms. This system allows for clear voice transmission over long distances and can also function as a doorbell unit. This manual provides detailed instructions for setting up, operating, and maintaining your intercom system.
2. Пакеттин мазмуну
Төмөндө тизмеленген нерселердин баары пакетиңизге камтылганын текшериңиз:
- 2 x Tyenaza H8 2-Way Voice Intercom Units
- 2 x заряддоо базасы
- 2 х USB кабелдери
- 1 х Колдонуучунун колдонмосу (бул документ)
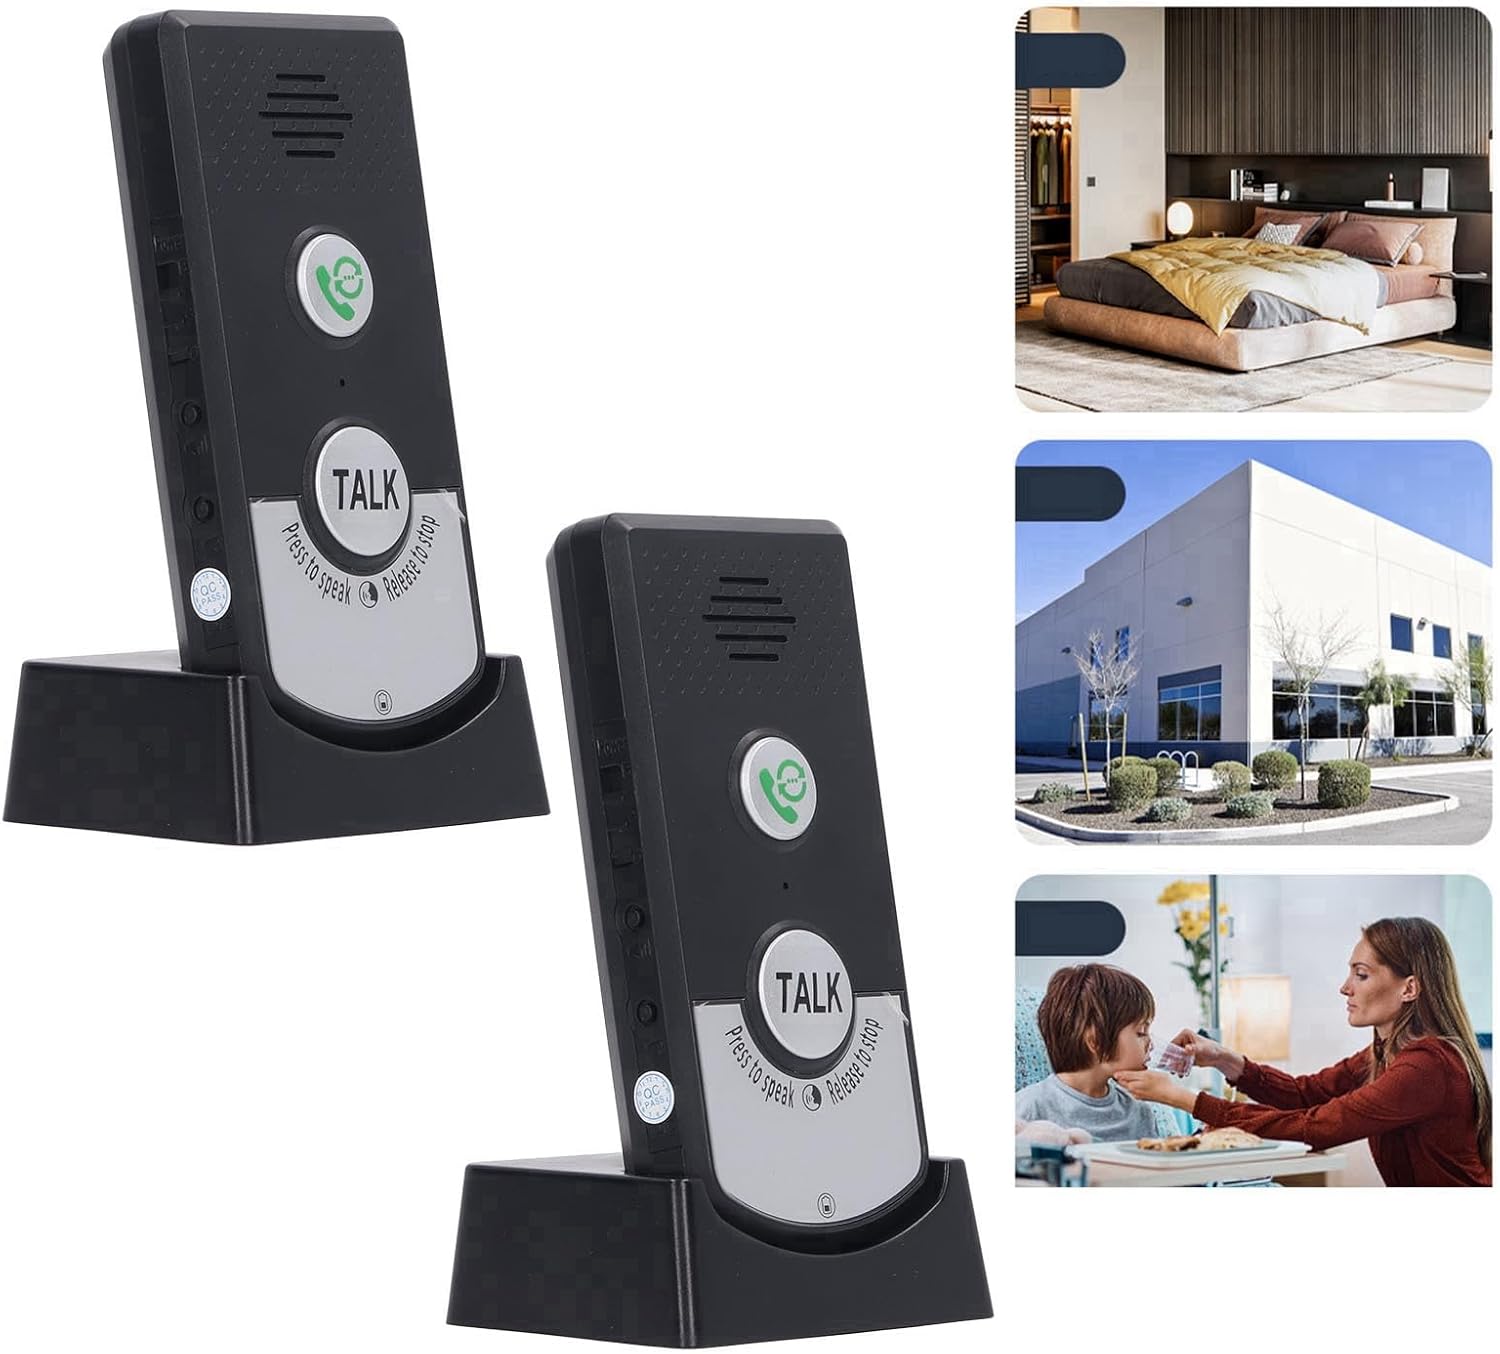
Image: Two Tyenaza H8 intercom units shown in their charging bases, illustrating the complete system. The image also includes small insets depicting potential usage scenarios in a home, office, and for caregiving.
3. Продукт бүтүп калдыview
Familiarize yourself with the components and controls of your Tyenaza H8 intercom unit.

Сүрөт: алдыңкы view of a single Tyenaza H8 intercom unit in its charging base, highlighting the main buttons and speaker. Dimensions are overlaid on the image: 12.5cm/4.9in height, 7cm/2.8in width, and 6cm/2.3in depth of the base.
- Баяндамачы: Located at the top of the unit for audio output.
- Чалуу баскычы: Green button with a phone icon, used to initiate a call or ring the other unit.
- Сүйлөшүү баскычы: Large silver button labeled "TALK", used for two-way communication. Press to speak, release to listen.
- Микрофон: Үн менен киргизүү үчүн интеграцияланган.
- Заряддоо байланыштары: Located at the bottom of the unit, connecting to the charging base.
- USB кубаттоо порту: Located on the charging base for power input.
- Индикатор жарыктары: For intercom status and power status.

Image: A detailed close-up of the "TALK" button on the intercom unit, clearly showing the instructions "Press to speak" and "Release to stop" around its perimeter.
4. Орнотуу
4.1 Түзмөктөрдү кубаттоо
- Connect one end of the provided USB cable to the USB charging port on the charging base.
- USB кабелинин экинчи учун туура келген USB кубат адаптерине (кошумча эмес) же компьютердин USB портуна туташтырыңыз.
- Place the intercom unit into the charging base, ensuring the charging contacts align.
- The power indicator light will illuminate to show that the unit is charging. Allow sufficient time for a full charge before first use.

Сүрөт: жакын план view of the charging base, highlighting the two metal charging contacts where the intercom unit sits.
4.2 Орнотуу
For optimal performance, consider the following when placing your intercom units:
- The system offers a transmission distance of up to 1000 meters (approximately 3280 feet) in open areas.
- Through walls, the effective range is typically 20 to 50 meters (approximately 65 to 164 feet).
- Avoid placing units near large metal objects or other electronic devices that may cause interference.
- Ensure units are within range of each other for reliable communication.

Image: An intercom unit placed in a modern living room, demonstrating its discreet integration into a home environment. Text on the image indicates "About 1000 meter far distance" and "No network required, no wiring required, turn on to use."
5. Иштөө нускамалары
5.1 Күйгүзүү/өчүрүү
The units are typically powered on when removed from the charging base after being charged, or by a dedicated power button if available (refer to unit for specific button location, usually a small switch on the side).
5.2 Эки тараптуу домофон функциясы
- To speak to the other unit, басып, кармап туруңуз the large "TALK" button.
- Микрофонго так сүйлө.
- бошотуу the "TALK" button to listen for a response from the other unit.
- The intercom light will indicate active communication.
5.3 Эшиктин коңгуроосунун функциясы
The units can switch between intercom mode and doorbell mode. To use as a doorbell:
- Press the green Call button (phone icon) on one unit.
- The other unit will ring, signaling an incoming call.
- To answer, the recipient can press the green Call button or the "TALK" button to initiate two-way communication.
5.4 Индикатор жарыктары
- Күч жарыгы: Indicates the power status and charging status of the unit.
- Intercom Light: Illuminates during active intercom communication.
6. Техникалык тейлөө
- Тазалоо: Агрегаттарды жумшак, кургак чүпүрөк менен сүртүңүз. Абразивдүү тазалагычтарды же эриткичтерди колдонбоңуз.
- Батареяга кам көрүү: The units contain built-in rechargeable lithium batteries. For optimal battery life, avoid fully discharging the units frequently. Charge them regularly.
- Сактагыч: If storing the units for an extended period, ensure they are partially charged and store them in a cool, dry place.
- Суу каршылык: The units are designed to be waterproof, but avoid submerging them in water.
7. Кыйынчылыктарды
| Көйгөй | Мүмкүн себеп | Чечим |
|---|---|---|
| Кубат жок / Бирдик күйбөйт | Батарея заряды түгөнгөн. | Place the unit on its charging base and ensure it is connected to a power source. Allow time for charging. |
| Домофон учурунда үн чыкпайт | Unit is out of range. "TALK" button not pressed or released correctly. Үн өтө төмөн. | Бөлүктөрдү бири-бирине жакыныраак жылдырыңыз. Ensure "TALK" button is pressed while speaking and released while listening. Check if there is a volume control and adjust it. |
| Poor communication range | Тоскоолдуктар (калың дубалдар, металл буюмдар). Бөлүмдөр бири-биринен өтө алыс жайгашкан. | Тоскоолдуктарды азайтуу үчүн бөлүмдөрдү башка жерге жылдырыңыз. Ensure units are within the specified operating range. |
| Doorbell function not working | Unit is out of range. Батарея аз. | Бөлүктөрдү бири-бирине жакыныраак жылдырыңыз. Charge the units. |
8. Техникалык шарттар
| Параметр | Нарк |
|---|---|
| Модел | H8 |
| Материал | ABS |
| Батарея түрү | Rechargeable Lithium Battery 3.7V 1800mAh (Built-in) |
| Иштөө температурасы | -20℃ден 55℃ге чейин (-4°F менен 131°F) |
| Transmission Distance (Open Area) | Up to 1000m (approx. 3280 ft) |
| Transmission Distance (Through Wall) | 20 to 50m (approx. 65 to 164 ft) |
| Иштөө жыштыгы | 410m үчүн 490M |
| Элемент Салмагы | 10.6 унция (бир бирдикке, болжолдуу) |
| Пакеттин өлчөмдөрү | 8.27 x 5.12 x 1.57 дюйм |
9. Кепилдик жана колдоо
For warranty information and technical support, please refer to the documentation provided with your purchase or contact Tyenaza customer service through their official channels. Keep your purchase receipt for warranty claims.