
1. Киришүү
This manual provides detailed instructions for the assembly, operation, and maintenance of your TRYX Luca L70 ATX Mid-Tower PC Case. Please read this manual thoroughly before beginning installation to ensure proper setup and to maximize the performance and longevity of your system.
2. Продукциянын өзгөчөлүктөрү
- Enhanced Cooling Support: Designed to accommodate up to two 420mm radiators, ensuring optimal thermal performance for high-end components.
- Премиум курулуш: Crafted from anodized 6000 series aluminum with 4mm tempered glass panels, offering durability, style, and component visibility.
- Spacious and Modular Design: Supports GPUs up to 460mm in length, E-ATX motherboards, and features flexible power supply unit (PSU) placement options (top or bottom) along with an adjustable motherboard tray for versatile configurations.
- Эң кыйынчылыксыз орнотуу: Features tool-free assembly with clip-on panels and hinged doors, simplifying the installation and maintenance process.
- Elegant эстетика: An X-shaped floating base elevates the chassis by 40mm, enhancing airflow and contributing to a sleek, modern appearance.
- Алдыңкы панелдин туташуусу: Includes 1x USB-C 3.2 Gen 2x2 (30W Power Delivery) and 4x USB-A 3.2 Gen 1 ports for extensive peripheral connectivity.

2.1-сүрөт: Ички view highlighting the sleek aesthetics, 19mm ultra-narrow bezel, 4mm tempered glass, and the X-shaped floating base design which elevates the case by 40mm for improved airflow.

Figure 2.2: Close-up of the case construction, illustrating the side panels and frame crafted from premium 6000 series anodized aluminum.
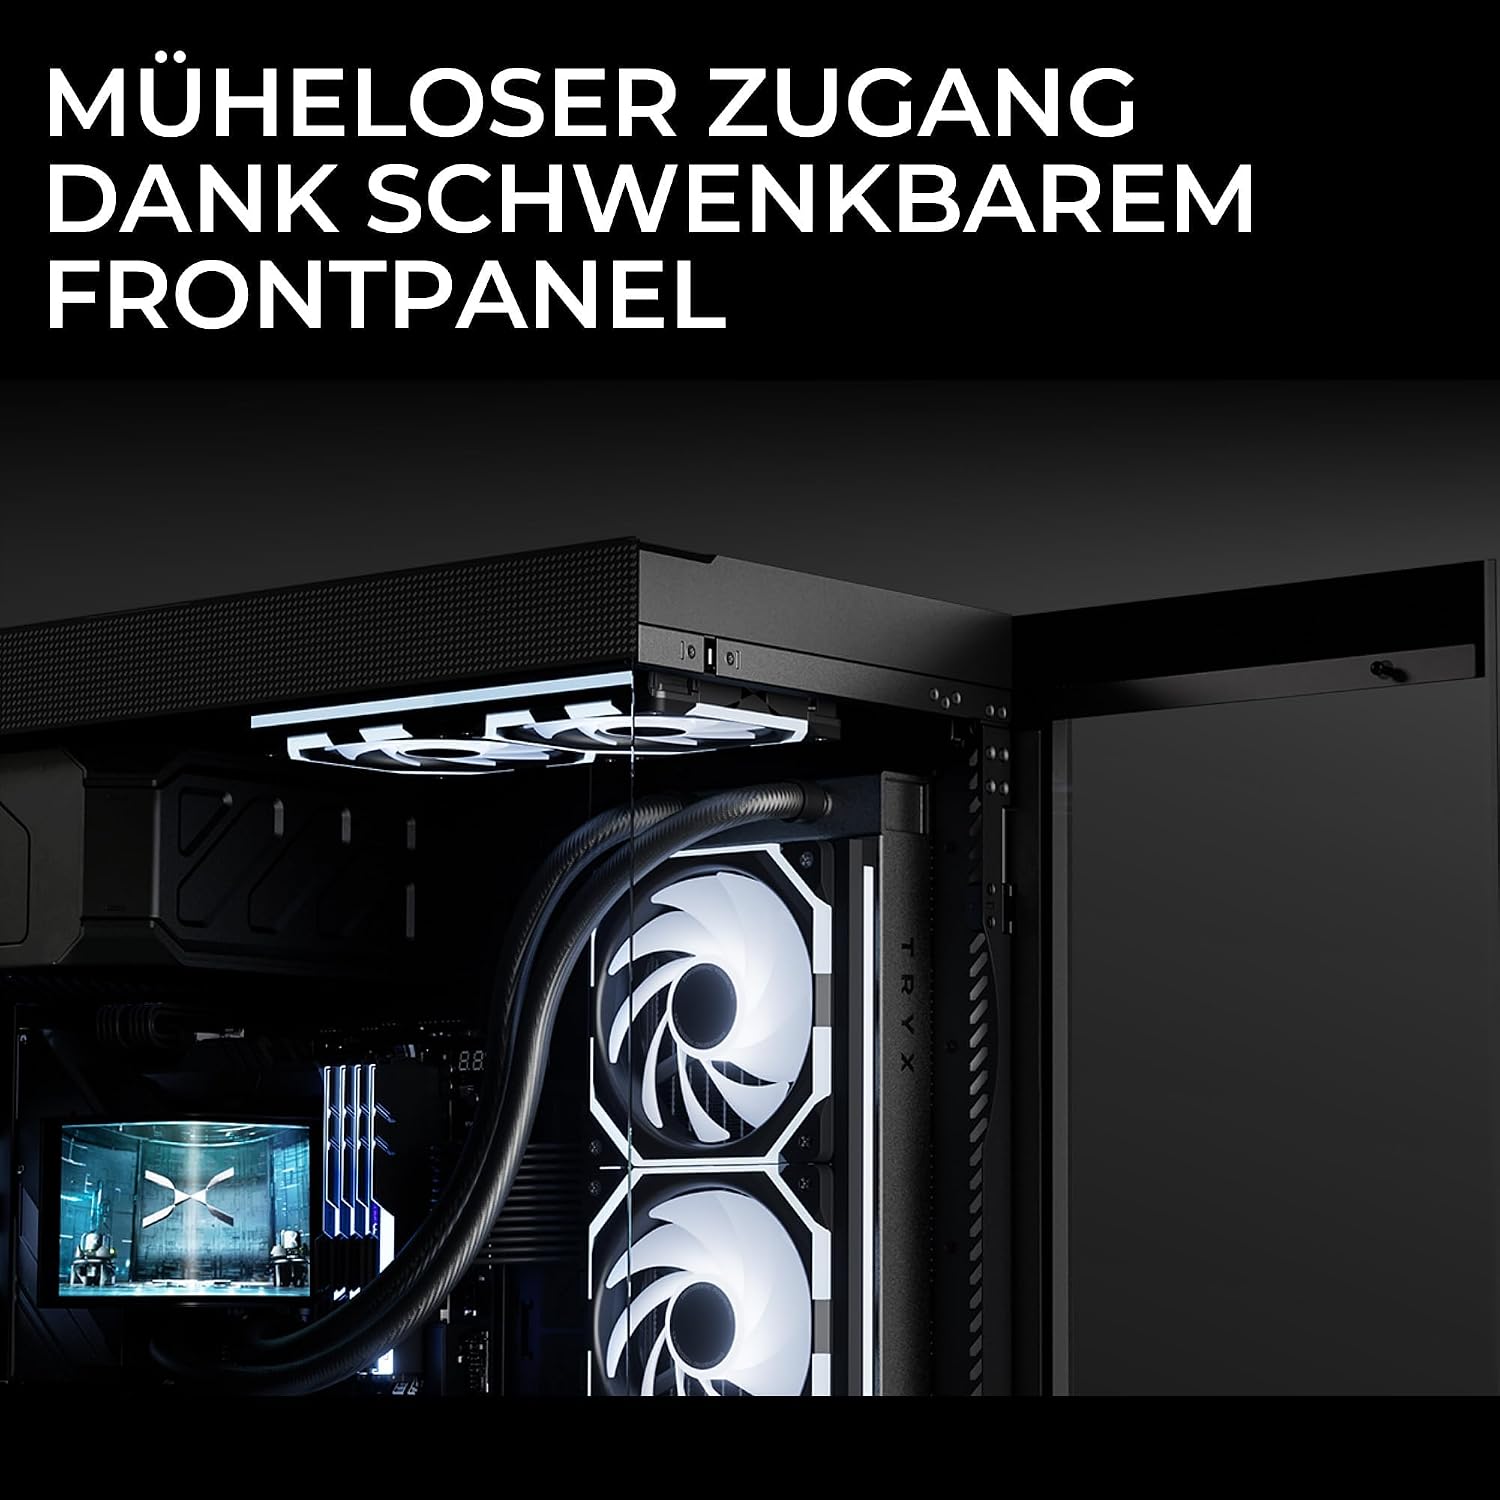
Figure 2.3: The hinged front panel in an open position, demonstrating the effortless access for installation and maintenance.

Figure 2.4: Diagram illustrating the modular design, including flexible PSU mounting options (top or bottom) and various radiator and fan compatibility configurations.

Figure 2.5: Front panel connectivity options, detailing the microphone and speaker jacks, 1x USB-C 3.2 Gen 2x2 (30W PD), and 4x USB-A 3.2 Gen 1 ports.
3. Техникалык шарттар
| Өзгөчөлүк | Деталь |
|---|---|
| Модель аты | Luca L70 |
| Модель номери | C-L700N-NN0H-G0K |
| Иштин түрү | Орто мунара |
| Түс | Кара |
| Материал | Anodized 6000 Series Aluminum, 4mm Tempered Glass |
| Өлчөмдөр (D x W x H) | 54P x 26l x 57H см |
| Motherboard шайкештиги | E-ATX, ATX, Micro-ATX, Mini-ITX |
| GPU тазалоо | 460 мм чейин |
| CPU муздаткычын тазалоо | 170 мм чейин |
| Кеңейтүү уячалары | 7 |
| Drive Bays | Up to 9x 2.5" SSDs, Up to 2x 3.5" HDDs (Total internal bays: 11) |
| PSU монтаждоо | Bottom, Top (Flexible) |
| Муздатуу ыкмасы | Water (Supports up to dual 420mm radiators), Air (Supports up to 9 fans) |
| Алдыңкы I / O порттору | 1x USB-C 3.2 Gen 2x2 (30W PD), 4x USB-A 3.2 Gen 1, Microphone, Speaker |
| UPC | 06977029650216 |
4. Орнотуу жана орнотуу
Follow these general steps for assembling your PC components within the TRYX Luca L70 case. Refer to your individual component manuals for specific installation details.
- Таңгактан чыгаруу жана текшерүү: Кутучаны таңгагынан этияттык менен чыгарыңыз. Ташуу учурунда кандайдыр бир бузулууларды текшериңиз.
- Панелди алып салуу: The side panels and front panel are designed for easy removal. Gently unclip or unhinge them as needed to access the interior. The front panel is hinged for convenient access.
- Motherboard орнотуу: Install the necessary standoffs for your motherboard form factor (E-ATX, ATX, Micro-ATX, Mini-ITX). Carefully place your motherboard onto the standoffs and secure it with screws. The motherboard tray is adjustable for optimal positioning.
- Электр менен камсыздоо блогун (PSU) орнотуу: Install your PSU in the designated area. The Luca L70 offers flexible mounting options for the PSU, either at the top or bottom of the chassis. Secure it with screws.
- Сактагыч дискти орнотуу: Mount your 2.5" SSDs and 3.5" HDDs into the available drive bays. The case supports up to 9x 2.5" SSDs and 2x 3.5" HDDs.
- Graphics Processing Unit (GPU) Installation: Insert your GPU into the appropriate PCIe slot on your motherboard and secure it. Ensure it is properly seated. The case supports GPUs up to 460mm.
- Муздатуу системасын орнотуу: Install your chosen cooling solution. The case supports up to two 420mm radiators for liquid cooling or up to 9 fans for air cooling. Position fans for optimal airflow.
- Кабелдик башкаруу: Utilize the cable routing channels and tie-down points behind the motherboard tray to manage cables. This improves airflow and aesthetics. The case provides 30mm of cable management space.
- Connecting Front Panel I/O: Connect the front panel cables (USB, audio, power, reset) to the corresponding headers on your motherboard. Refer to your motherboard manual for header locations.
- Closing Panels: Once all components are installed and cables are managed, reattach the side and front panels. Ensure they are securely fastened.
5. Иштетүү боюнча нускамалар
The TRYX Luca L70 is designed for optimal performance with proper airflow. Ensure that your cooling fans are configured to create an efficient air intake and exhaust path. The elevated X-shaped base contributes to improved bottom-up airflow, which is crucial for systems with bottom-mounted intake fans or radiators.
Regularly monitor your system's temperatures, especially during intensive tasks, to ensure all components are operating within safe thermal limits.
6. Техникалык тейлөө
To maintain optimal performance and longevity of your PC and case, regular maintenance is recommended:
- Чаң чыпкасын тазалоо: Periodically remove and clean any dust filters to prevent dust buildup, which can restrict airflow and lead to overheating. Use compressed air or a soft brush.
- Тышкы тазалоо: Корпустун сырткы беттерин жумшак менен сүртүңүз, гamp кездеме. Каптамага же чыңалган айнекке зыян келтириши мүмкүн болгон абразивдүү тазалоочу каражаттардан же эриткичтерден алыс болуңуз.
- Ички чаңды тазалоо: Every few months, open the case and use compressed air to gently remove dust from internal components, especially heatsinks and fan blades.
- Кабель текшерүү: Occasionally check all internal and external cable connections to ensure they are secure.
7. Кыйынчылыктарды
If you encounter issues with your PC build, consider the following general troubleshooting steps:
- Кубат жок: Ensure the PSU is switched on, the power cable is securely connected to both the PSU and the wall outlet, and the front panel power switch cable is correctly connected to the motherboard.
- Айланбаган күйөрмандар: Verify that all fan cables are properly connected to the motherboard or fan controller. Check BIOS/UEFI settings for fan speed control.
- Ашыкча ысып кетүү: Confirm that all cooling fans are operating correctly and oriented for proper airflow. Clean any dust filters and internal components. Ensure CPU cooler and GPU fans are functioning.
- Алдыңкы панелдин киргизүү/чыгаруу маселелери: If USB ports or audio jacks are not working, check that the corresponding cables from the front panel are securely connected to the correct headers on your motherboard.
- Компонент аныкталган жок: Re-seat the component (e.g., GPU, RAM, storage drive) and ensure all power and data cables are firmly connected.
For more specific issues, consult the manuals for your individual PC components (motherboard, GPU, PSU, etc.) or seek assistance from a qualified technician.
8. Кепилдик жана колдоо
For warranty information and customer support regarding your TRYX Luca L70 PC Case, please refer to your point of purchase or visit the official TRYX webсайт. Кепилдик дооматтар үчүн сатып алганыңыздын далилин сактаңыз.