1. Киришүү
Thank you for choosing the ROCAM Digital Alarm Clock. This manual provides detailed instructions to help you set up and operate your new alarm clock. Designed for clarity and ease of use, this clock features a large display, dual alarms, adjustable brightness, and convenient charging ports.

Image 1.1: The ROCAM Digital Alarm Clock with its power adapter, showcasing its sleek design and large digital display.
2. Продукциянын өзгөчөлүктөрү
- Чоң, ачык дисплей: 7.5-inch display with bold, easy-to-read numbers, visible from any angle.
- Колдонуучуга ыңгайлуу дизайн: Simple controls and large buttons for effortless setup and operation.
- Кош ойготкучтар: Set two independent alarms with options for everyday, weekday, or weekend modes.
- Жөнгө салынуучу жарыктык: Display brightness can be adjusted from 0% to 100% to suit your preference.
- Жумшак түнкү жарык: Integrated night light with three adjustable levels to create a comfortable ambiance.
- Батареянын камдык көчүрмөсү: Электр энергиясы өчүрүлгөн учурда убакытты жана ойготкуч жөндөөлөрүн сактайтtages (3 AAA батарейка талап кылынат, комплектке кирбейт).
- USB жана Type-C кубаттоо порттору: Түзмөктөрүңүздү сааттан түз заряддаңыз.
- Катуу ойготкуч: Five adjustable volume levels, from soft to 110 dB, suitable for all sleepers.

Image 2.1: The alarm clock's 7.5-inch display, highlighting its large and clear digital numbers for easy readability.
3. Пакеттин мазмуну
- ROCAM Digital Alarm Clock Unit
- Кубаттуу адаптер
- User Manual
4. Башкаруу жана дисплей
Familiarize yourself with the buttons and display elements of your alarm clock:

Image 4.1: A detailed diagram illustrating the location and function of each button on the top panel of the alarm clock.
Жогорку панелдеги баскычтар:
- TIME: Учурдагы убакытты коюу үчүн басыңыз.
- DIM: Дисплей жарыктыгын тууралоо.
- AL1 / AL2: Ойготкуч 1 же Ойготкуч 2 орнотуу үчүн басыңыз.
- + / -: Adjust values (time, volume, brightness).
- ТӨМ: Adjust alarm volume.
- 12/24H DST: Switch between 12-hour and 24-hour format; activate/deactivate Daylight Saving Time.
- SNOOZE OK / 💡: Snooze active alarm; confirm settings; long press to activate/deactivate night light.
Дисплей көрсөткүчтөрү:
- AM/PM: Indicates 12-hour time format.
- DST: Indicates Daylight Saving Time is active.
- MON/TUE/WED/THU/FRI/SAT/SUN: Аптанын учурдагы күнү.
- 🔔1 / 🔔2: Indicates Alarm 1 or Alarm 2 is active.
5. Орнотуу
5.1 Кубат туташтыруу
- Connect the provided power adapter to the DC IN port on the back of the alarm clock.
- Кубат адаптерин стандарттуу электр розеткасына сайыңыз. Дисплей күйөт.
5.2 Батареянын резервдик көчүрмөсүн орнотуу
The battery backup feature ensures your time and alarm settings are retained during a power outage. It does not power the display.
- Сааттын ылдый жагындагы батарея отсегин табыңыз.
- Батарея уясынын капкагын ачыңыз.
- Туура полярдуулукту (+/-) камсыз кылып, 3 AAA батарейкасын (кошулмага кирбейт) салыңыз.
- Батарея уясынын капкагын бекем жабыңыз.

Image 5.1: The back of the alarm clock, illustrating the USB and Type-C charging ports, and the battery backup compartment for AAA batteries.
5.3 Учурдагы убакытты орнотуу
- басып, кармап туруңуз TIME баскычын сааттын цифралары жарк этмейинче басыңыз.
- колдонуу + or - саатты тууралоо үчүн баскычтар. Басыңыз TIME ырастоо үчүн.
- Мүнөттөрдүн сандары күйүп-өчүп турат. Колдонуңуз + or - мүнөттөрдү жөндөө үчүн баскычтарды басыңыз. TIME ырастоо үчүн.
- Аптанын күнү жаркылдайт. колдонуу + or - buttons to select the correct day. Press TIME убакытты коюу режимин ырастоо жана чыгуу үчүн.
5.4 12/24 саат форматы
To switch between 12-hour and 24-hour time display:
- басыңыз 12/24 сааттык DST button once. The display will toggle between 12-hour (with AM/PM indicator) and 24-hour format.
5.5 Жайкы убакыт (DST)
To activate or deactivate Daylight Saving Time:
- басып, кармап туруңуз 12/24 сааттык DST button. The time will adjust by one hour forward or backward, and the 'DST' indicator will appear or disappear on the display.
6. Иштөө нускамалары
6.1 Ойготкучтарды орнотуу (AL1 / AL2)
The clock features two independent alarms, AL1 and AL2.
- басып, кармап туруңуз AL1 (же AL2) button until the alarm hour digits flash.
- колдонуу + or - ойготкуч саатын тууралоо үчүн баскычтарды басыңыз. AL1 (же AL2) ырастоо үчүн.
- Мүнөттөрдүн сандары күйүп-өчүп турат. Колдонуңуз + or - buttons to adjust the alarm minutes. Press AL1 (же AL2) ырастоо үчүн.
- The alarm volume will flash. Use the + or - buttons to set the desired alarm volume (5 levels). Press AL1 (же AL2) ырастоо үчүн.
- The alarm mode will flash (e.g., MON-SUN, MON-FRI, SAT-SUN). Use the + or - buttons to select the desired alarm frequency. Press AL1 (же AL2) to confirm and exit alarm setting mode.

Image 6.1: The alarm clock displaying two separate alarm times, illustrating the dual alarm functionality and customization options for different days.
6.2 Turning Alarms On/Off
To quickly enable or disable an alarm:
- басыңыз AL1 (же AL2) button once. The corresponding alarm icon (🔔1 or 🔔2) will appear on the display when the alarm is active, and disappear when it is off.
6.3 Тындыруу функциясы
Ойготкуч чырылдаганда:
- басыңыз SNOOZE OK / 💡 button to activate snooze. The alarm will pause for 9 minutes and then sound again.
- To turn off the alarm completely, press any other button (e.g., AL1, AL2, TIME, DIM, +, -, VOL, 12/24H DST).
6.4 Дисплейдин жарыктыгын жөндөө
To adjust the main display brightness:
- басыңыз DIM button repeatedly to cycle through different brightness levels (0% to 100%).
6.5 Түнкү жарык функциясы
To activate or adjust the integrated night light:
- көпкө басыңыз SNOOZE OK / 💡 Түнкү жарыкты күйгүзүү же өчүрүү үчүн баскычты басыңыз.
- When the night light is on, short press the SNOOZE OK / 💡 button to cycle through its three brightness levels.
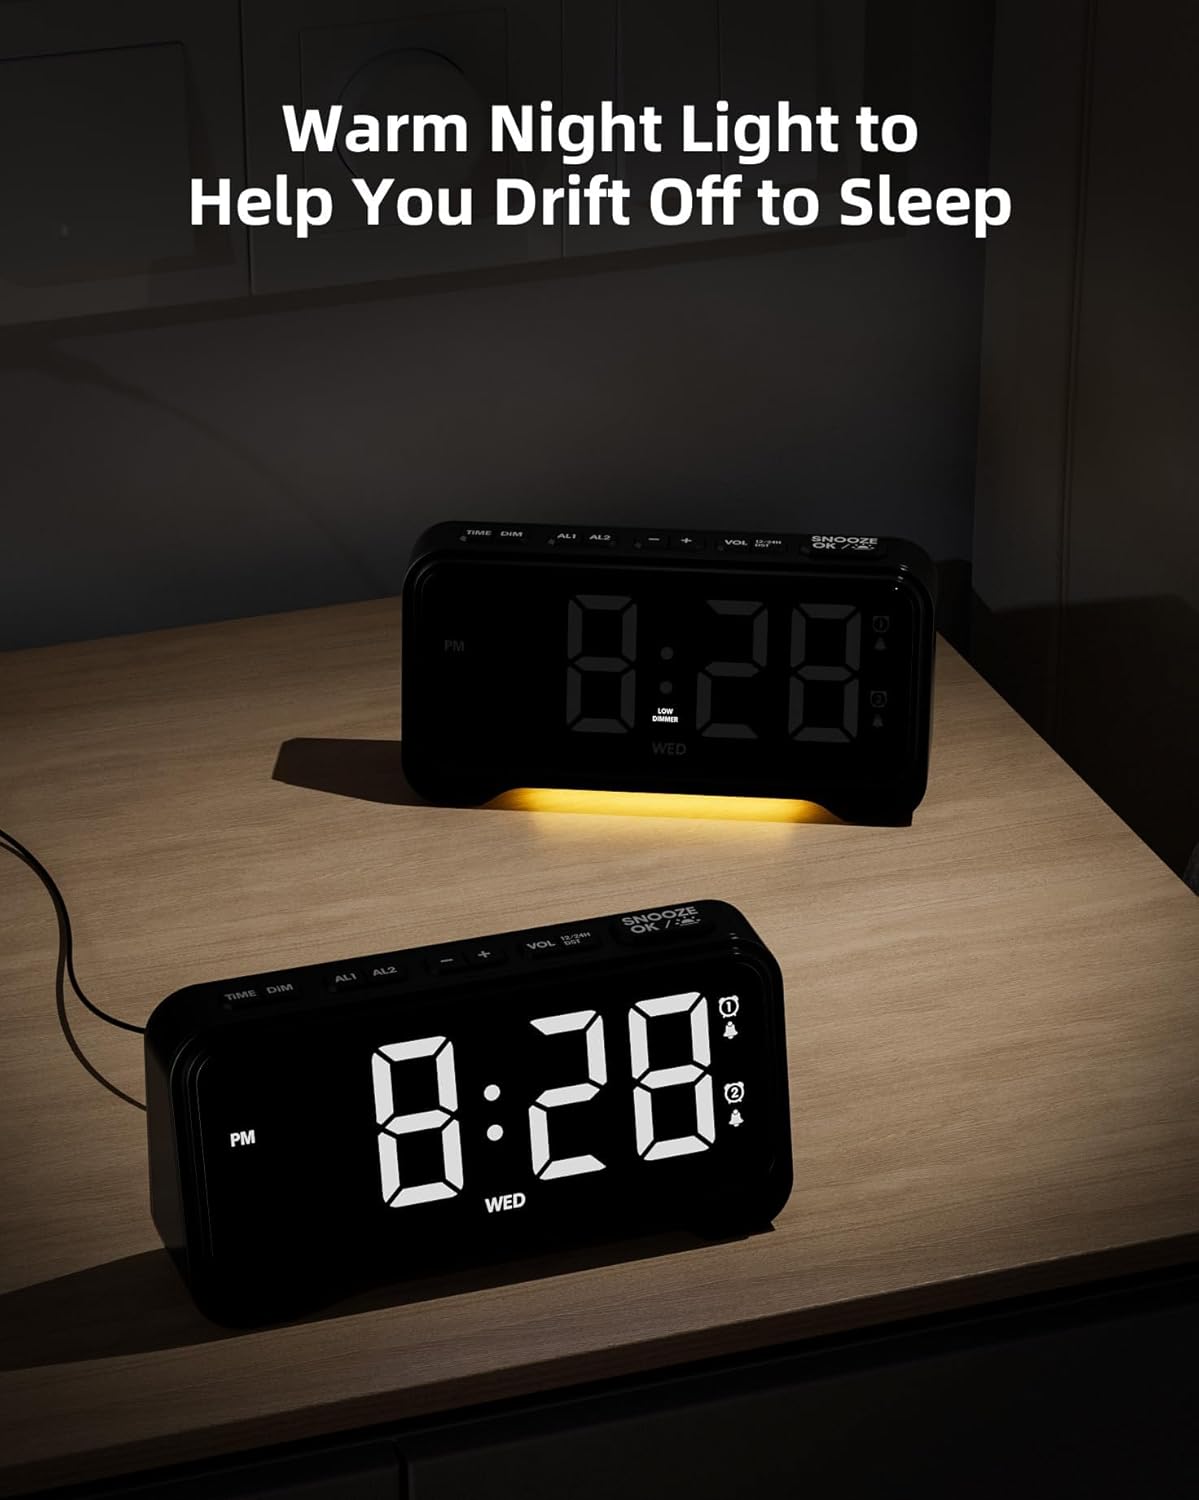
Image 6.2: The alarm clock with its warm night light feature activated, providing a soft glow suitable for a bedroom environment.
6.6 USB & Type-C Charging Ports
The clock is equipped with a USB-A port and a Type-C port on the back for charging external devices.
- Connect your device's charging cable to the appropriate port on the back of the alarm clock.
- Ensure the alarm clock is powered via its adapter for charging functionality.
7. Техникалык тейлөө
7.1 Тазалоо
- Тазалоодон мурун ойготкуч саатты электр розеткасынан сууруп алыңыз.
- Use a soft, dry cloth to wipe the display and exterior surfaces.
- Абразивдүү тазалагычтарды, момдорду же эриткичтерди колдонбоңуз, анткени алар финишке зыян келтириши мүмкүн.
7.2 Батареяны алмаштыруу
- If the battery backup function is not working, replace the 3 AAA batteries in the compartment on the bottom of the clock.
- Жаңы батарейкаларды салууда туура полярдуулукту камсыз кылыңыз.
8. Кыйынчылыктарды
If you encounter any issues with your ROCAM Digital Alarm Clock, please refer to the following common solutions:
| Көйгөй | Мүмкүн себеп | Чечим |
|---|---|---|
| Дисплей бош. | Электр байланышы жок. | Ensure the power adapter is securely plugged into the clock and a working electrical outlet. |
| Ойготкуч угулбайт. | Ойготкуч иштетилген эмес же туура эмес орнотулган. | Check if the alarm icon (🔔1 or 🔔2) is displayed. Re-set the alarm time and mode (everyday, weekday, weekend). Ensure alarm volume is not set to minimum. |
| Электр кубаты өчүрүлгөндөн кийин убакыт/жөндөөлөр баштапкы абалга келтирилетtage. | Батареянын камдык көчүрмөсү орнотулган эмес же батареялары түгөнгөн. | Install 3 fresh AAA batteries in the battery compartment. |
| USB/Type-C charging not working. | Clock not powered by adapter; faulty cable. | Сааттын негизги кубат булагына туташтырылганын текшериңиз. Башка кубаттоочу кабелди колдонуп көрүңүз. |
9. Техникалык шарттар
| Өзгөчөлүк | Деталь |
|---|---|
| Бренд | ROCAM |
| Модел | Санарип ойготкуч саат |
| Түс | Кара |
| Продукциянын өлчөмдөрү | 16.9 x 3.81 x 8.6 см |
| Элемент Салмагы | 200 г |
| Материал | Пластик |
| Дисплей түрү | Санарип |
| Өзгөчөлүктөр | Adjustable Brightness, Adjustable Volume, Charging Port, Daylight Saving, Night Mode |
| Батареянын камдык көчүрмөсү | 3 x AAA батарейкалар (киргизилген эмес) |
10. Кепилдик жана колдоо
ROCAM products are designed for reliability and performance. This product comes with a standard manufacturer's warranty. For specific warranty details, please refer to the warranty card included with your purchase or contact ROCAM customer support.
If you require further assistance or have questions not covered in this manual, please contact our customer support team:
- Электрондук почта: [Кардарларды колдоо кызматынын электрондук почтасын бул жерге киргизиңиз]
- Телефон: [Кардарларды колдоо кызматынын телефон номерин бул жерге киргизиңиз]
- Webсайт: Visit the ROCAM Store on Amazon