1. Киришүү
The S25HH0 303DH US KVM Switch allows you to control up to three computers using a single set of keyboard, mouse, and three monitors. This device supports high-resolution video output and USB 3.0 peripheral sharing, enhancing productivity in multi-computer environments.
Please read this manual thoroughly before installation and operation to ensure proper use and to maximize the performance of your KVM switch.
2. Коопсуздук маалыматы
- Ensure the KVM switch is placed on a stable, flat surface.
- Аппаратты сууга, нымдуулукка же экстремалдык температурага тийгизбеңиз.
- Берилген кубат адаптерин гана колдонуңуз. Туура эмес адаптерди колдонуу түзмөккө зыян келтирип, кепилдикти жокко чыгарышы мүмкүн.
- Ашыкча ысып кетүүнүн алдын алуу үчүн вентиляция тешиктерин жабуудан качыңыз.
- Аппаратты өзүңүз ачууга же оңдоого аракет кылбаңыз. Бардык тейлөөлөрдү квалификациялуу кызматкерлерге тапшырыңыз.
- Disconnect power before cleaning. Clean the device with a soft, dry cloth.
3. Пакеттин мазмуну
Сураныч, алгандан кийин пакеттин мазмунун текшериңиз. Эгерде кандайдыр бир буюмдар жок же бузулуп калса, сатуучуга кайрылыңыз.
- S25HH0 303DH US Triple Monitor KVM Switch
- Кубаттуу адаптер
- Зымдуу Remote Switch
- USB 3.0 Cables (Quantity may vary based on package)
- HDMI Cables (Quantity may vary based on package)
- Колдонуучунун колдонмосу (бул документ)
4. Продукт бүтүп калдыview
The KVM switch features multiple ports for connecting your computers, monitors, and USB peripherals. Familiarize yourself with the port layout before proceeding with installation.

Сүрөт: Алдыңкы жана арткы view of the S25HH0 303DH US KVM Switch. This image illustrates the various input and output ports, including HDMI, USB 3.0, and the power input, along with the physical switch buttons for PC selection.
Front Panel
- PC Selection Buttons: Used to manually switch between connected computers.
- USB 3.0 порттору: Баскычтопту, чычканды жана башка USB 3.0 перифериялык түзүлүштөрдү туташтыруу үчүн.
- LED көрсөткүчтөрү: Show which computer is currently selected.
Арткы панель
- HDMI Input Ports (PC1, PC2, PC3): Connect to the HDMI output of your computers.
- USB 3.0 Input Ports (PC1, PC2, PC3): Компьютерлериңиздин USB 3.0 портторуна туташтырыңыз.
- HDMI Output Ports (Monitor 1, Monitor 2, Monitor 3): Мониторлоруңузга туташыңыз.
- DC 12V кубат киргизүү: Берилген кубат адаптерин туташтырыңыз.
- Remote Switch Port: Connect the wired remote control for switching.
5. Орнотуу нускамалары
KVM которгучуңузду туташтыруу үчүн төмөнкү кадамдарды аткарыңыз:
- Өчүрүү түзмөктөрү: Бардык компьютерлер жана мониторлор эч кандай туташуудан мурун өчүрүлгөнүн текшериңиз.
- Мониторлорду туташтыруу: Connect your three monitors to the HDMI Output ports (Monitor 1, Monitor 2, Monitor 3) on the KVM switch using HDMI cables.
- Connect Computers (PC1):
- Connect the HDMI output from your first computer to the HDMI Input (PC1) on the KVM switch.
- Connect a USB 3.0 cable from your first computer's USB 3.0 port to the USB 3.0 Input (PC1) on the KVM switch.
- Connect Computers (PC2 & PC3): Repeat step 3 for your second and third computers, connecting them to the respective HDMI Input (PC2/PC3) and USB 3.0 Input (PC2/PC3) ports.
- Перифериялык түзүлүштөрдү туташтыруу: Connect your keyboard, mouse, and any other USB 3.0 peripherals to the USB 3.0 ports on the front panel of the KVM switch.
- Connect Wired Remote (Optional): If desired, connect the wired remote switch to the dedicated port on the KVM switch.
- Күйгүзүү: Connect the provided 12V power adapter to the DC 12V input on the KVM switch, then plug it into a power outlet.
- Түзмөктөрдү күйгүзүү: Power on your monitors, then power on your computers.

Сүрөт: Connection diagram illustrating how two PCs share four USB 3.0 devices and multiple monitors through the KVM switch. This highlights the USB 3.0 ports for peripherals like keyboards, mice, and printers.
6. Иштөө нускамалары
6.1 Компьютерлердин ортосунда которулуу
You can switch between connected computers using two methods:
- Physical Button Switch: Press the corresponding PC selection button (PC1, PC2, or PC3) on the front panel of the KVM switch. The LED indicator will light up for the selected computer.
- Wired Remote Switch: Use the wired remote control to switch between computers. Press the button on the remote to cycle through the connected PCs.
Сүрөт: Two switching methods for the KVM switch: the physical buttons on the device and the external wired remote control. This illustrates the flexibility in controlling which computer is active.
6.2 Display Modes (Extend Mode / Copy Mode)
After connecting correctly, you can choose your desired display mode:
- Басыңыз "Windows + P" клавиатураңызда.
- A pop-up window will appear, allowing you to select between display modes such as Узартуу or Duplicate (Copy).

Сүрөт: Comparison of Extend Mode and Copy Mode. In Extend Mode, each monitor displays unique content, expanding the desktop. In Copy Mode, all three monitors display the same content, duplicating the desktop.
6.3 USB 3.0 Device Sharing
The KVM switch allows up to four USB 3.0 devices to be shared between the connected computers. When you switch to a different computer, the connected USB peripherals (keyboard, mouse, USB drives, etc.) will automatically switch to that computer.
USB 3.0 offers a faster transfer rate of 5Gbps compared to USB 2.0's 480Mbps, ensuring efficient data transfer for your peripherals.
7. Display Resolution and Refresh Rate
The KVM switch supports high-resolution video outputs, ensuring a clear and smooth visual experience.
- DisplayPort (DP1.4) Support: Up to 8K@30Hz, 4K@144Hz, 4K@120Hz. Backward compatible with lower resolutions and refresh rates.
- HDMI (HDMI2.1) Support: Up to 8K@60Hz, 4K@120Hz. Backward compatible with lower resolutions and refresh rates.
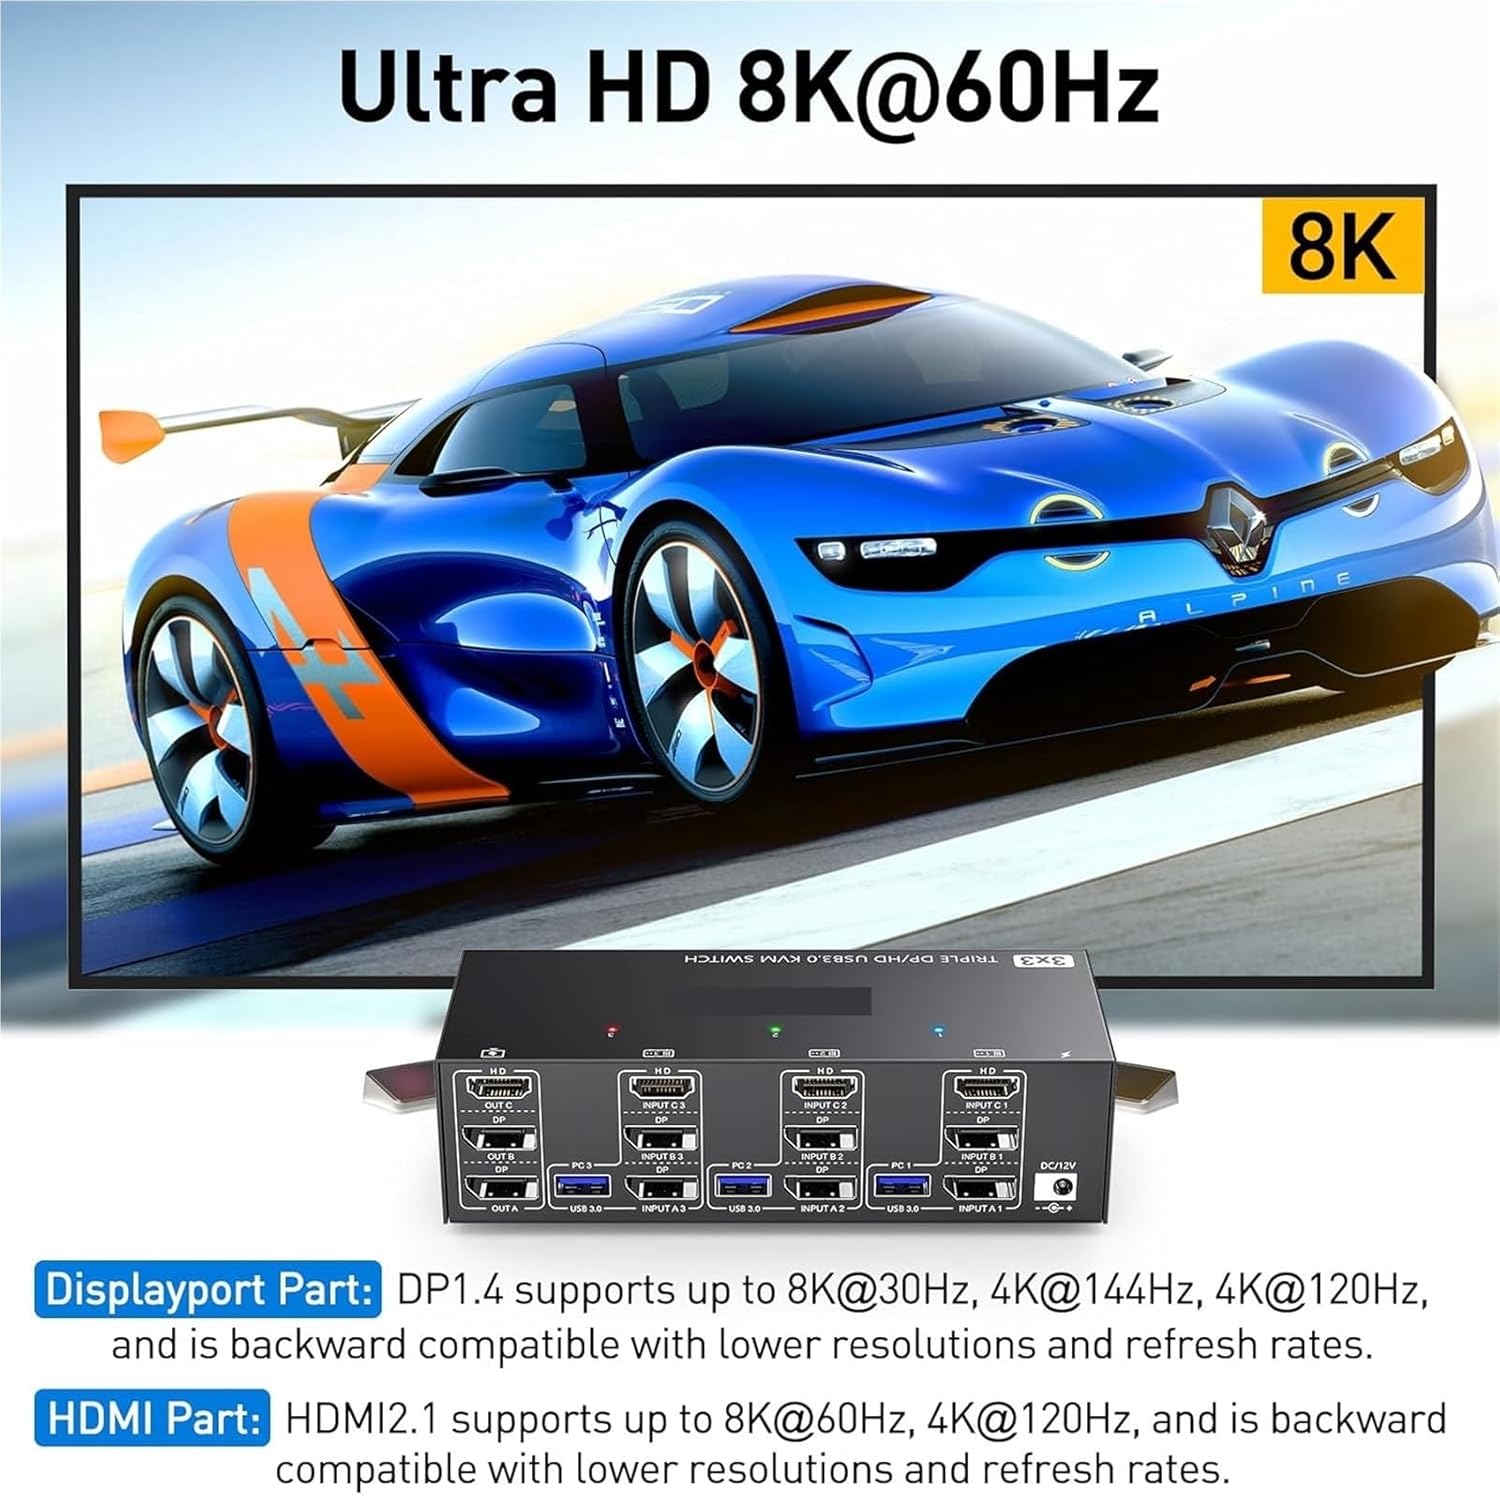
Сүрөт: Visual representation of Ultra HD 8K@60Hz capability. This image details the supported resolutions and refresh rates for both DisplayPort 1.4 and HDMI 2.1 connections, emphasizing high-quality video output.
8. Техникалык тейлөө
- Keep the KVM switch in a cool, dry place away from direct sunlight.
- Regularly clean the exterior of the device with a soft, dry, lint-free cloth.
- Do not use liquid or aerosol cleaners, as they may contain flammable substances or chemicals that can damage the device.
- Бардык кабелдер бекем туташтырылып, ийилип же бузулбагандыгын текшериңиз.
9. Кыйынчылыктарды
If you encounter issues with your KVM switch, please refer to the following common problems and solutions:
| Көйгөй | Мүмкүн болгон себеп / Чечим |
|---|---|
| No display on monitors. |
|
| Keyboard or mouse not working. |
|
| Cannot switch between computers. |
|
| Видеонун сапаты начар же бүлбүлдөп. |
|
10. Техникалык шарттар
| Өзгөчөлүк | Спецификация |
|---|---|
| Бренд | S25HH0 |
| Модел | 303DH US |
| Киргизүү порттору | 3 x HDMI, 3 x USB 3.0 |
| Output Ports | 3 x HDMI, 4 x USB 3.0 |
| Видео стандарт | HDMI 2.1, DisplayPort 1.4 (backward compatible) |
| Max Resolution (HDMI) | 8K@60Hz, 4K@120Hz |
| Max Resolution (DisplayPort) | 8K@30Hz, 4K@144Hz, 4K@120Hz |
| USB стандарты | USB 3.0 (5Gbps) |
| Башкаруу ыкмасы | Physical Button, Wired Remote |
| Operating Voltage | 12 вольт |
| Элемент Салмагы | 50 грамм |
| Сертификаттар | CE, RoHS |
11. Кепилдик жана колдоо
This product comes with a standard manufacturer's warranty. Please refer to the warranty card included in your package or contact your retailer for specific warranty terms and conditions.
For technical support or further assistance, please contact your vendor or the manufacturer's customer service. Contact information can typically be found on the product packaging or the manufacturer's official webсайт.
