
1. Киришүү
Thank you for choosing the MOUNTUP Dual Monitor Arm MU8012-W-07. This instruction manual provides essential information for the safe and correct installation, operation, and maintenance of your new monitor arm. Please read this manual thoroughly before installation and keep it for future reference.
Коопсуздук чаралары
- Монтаждоодон мурун бардык компоненттер бар экенин жана бузулбаганын текшериңиз. Эгерде кандайдыр бир бөлүктөрү жок же туура эмес болсо, колдонбоңуз.
- Verify that your desk surface is strong enough to support the combined weight of the monitor arm and your monitors.
- Ар бир кол үчүн 10 кг (22 фунт) салмактан ашпаңыз.
- Always follow the installation steps carefully. Improper installation may result in product damage or personal injury.
- Keep children away from the product during assembly. Small parts may be a choking hazard.
2. Пакеттин мазмуну
Сураныч, пакетиңизде төмөнкү компоненттердин бардыгы бар экенин текшериңиз:
- Monitor Arm Assembly (x1)
- VESA Плитасы (x2)
- Desk Clamp Негиз (x1)
- Grommet Base (x1)
- Орнотуу жабдууларынын комплекти (бурамалар, шайбалар, аралыктар)
- Алты бурчтуу ачкычтар (ар кандай өлчөмдөрдө)
- Instruction Manual (x1)
3. Техникалык шарттар
| Өзгөчөлүк | Спецификация |
|---|---|
| Модел | MU8012-W-07 |
| Материал | Эритме болот |
| Түс | Ак |
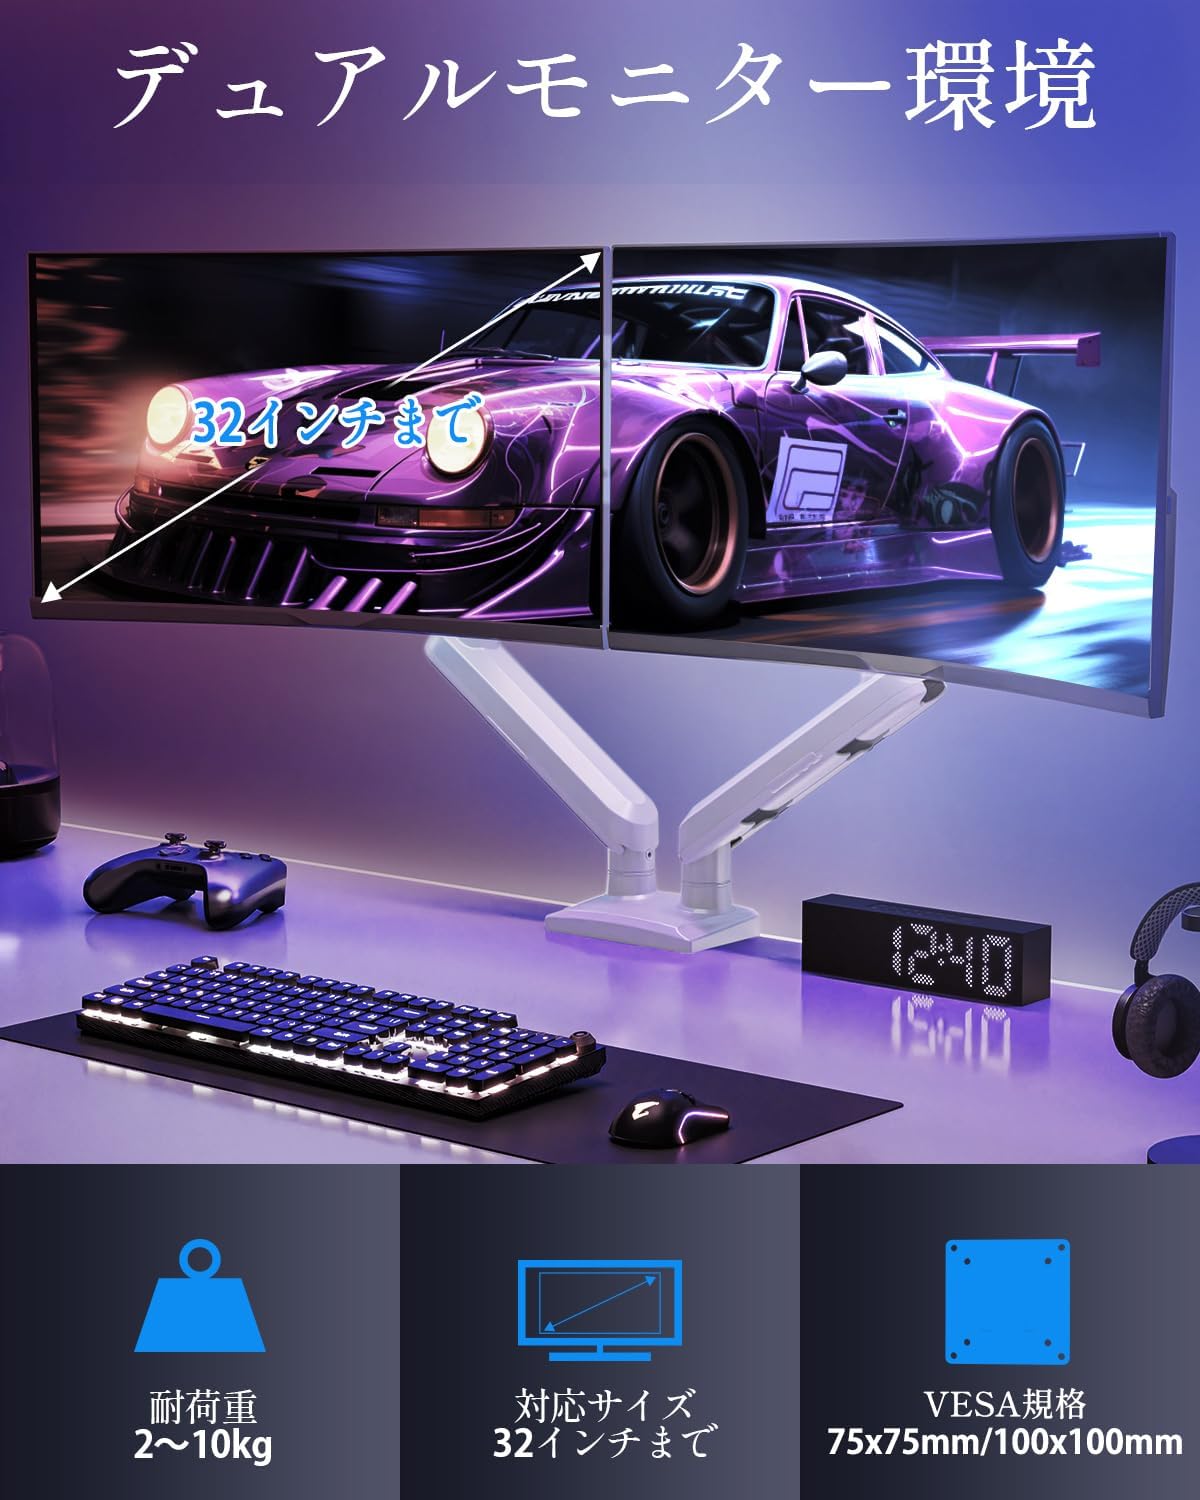
| Экрандын өлчөмүнүн шайкештиги | 13 - 32 дюйм |
| Салмак сыйымдуулугу (бир кол үчүн) | 2 - 10 кг (4.4 - 22 фунт) |
| VESA шайкештиги | 75x75мм, 100x100мм |
| Монтаждоо параметрлери | Clamp, Grommet |
| Тилтүү диапазону | +85°тан -45°ка чейин |
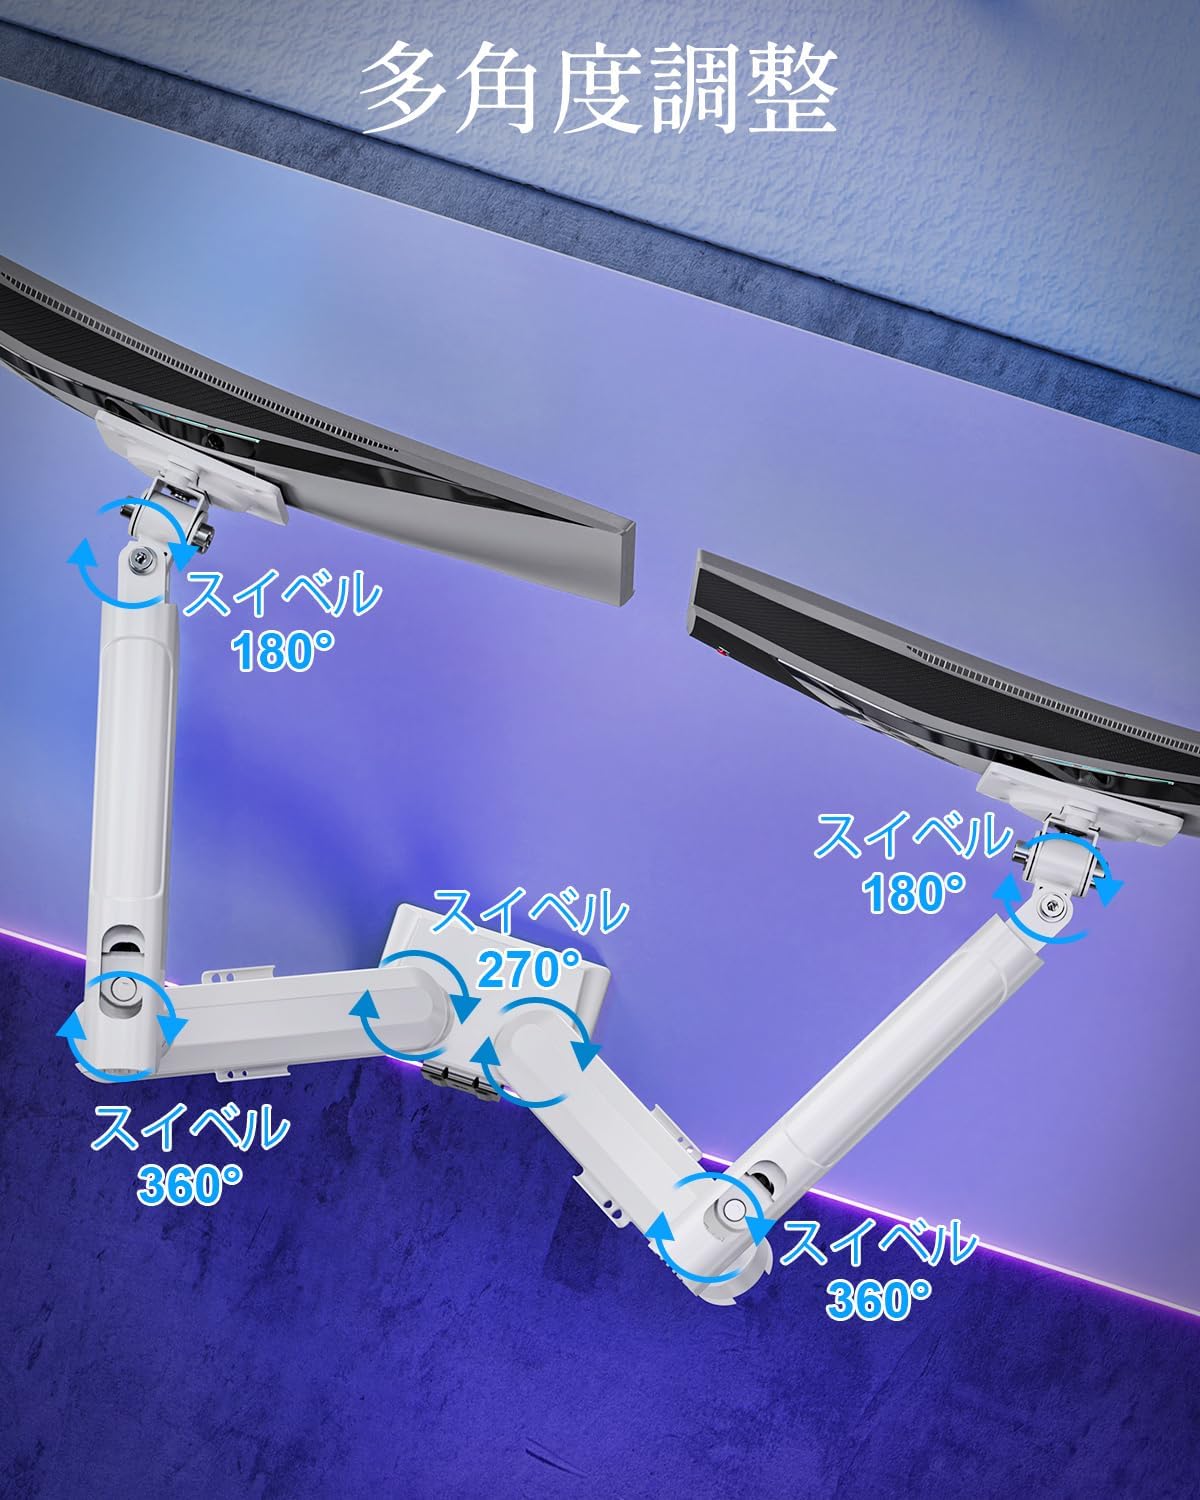
| Айналма тоо | 180° (monitor plate), 270° (middle joint), 360° (base) |
| Rotation (Pivot) | 360° |
| Максималдуу бийиктикти тууралоо | 44 см (17.3 дюйм) |
| Max Arm Extension | 50 см (19.7 дюйм) |
| Продукт Салмагы | 3.1 кг (6.8 фунт) |

4. Орнотуу жана орнотуу
1-кадам: Монтаждоо ыкмасын тандаңыз
The MOUNTUP Dual Monitor Arm supports two installation methods: Clamp Mount and Grommet Mount. Choose the method that best suits your desk.

Clamp Монтаждоо
- cl тиркеңизamp base to the main pole of the monitor arm.
- cl койamp onto the edge of your desk. Ensure the desk thickness is between 10-70mm (0.4-2.7 inches).
- Клamp колун столго бекем бекиткенге чейин бураңыз. Анын туруктуу жана солкулдабагандыгын текшериңиз.

Grommet Mount орнотуу
- If your desk has a grommet hole, ensure its diameter is between 10-60mm (0.4-2.4 inches) and the desk thickness is between 10-70mm (0.4-2.7 inches).
- Громметтин негизин негизги мамыга бекитиңиз.
- Үстөлдүн тешиги аркылуу тромб болтту киргизип, аны астынан берилген табак жана гайка менен бекитиңиз.
- Tighten the nut until the arm is firmly attached to the desk.
2-кадам: VESA плиталарын мониторлорго бекитиңиз
- Мониторуңузду жумшак, таза бетке кылдаттык менен караңыз.
- Align the VESA plate with the mounting holes on the back of your monitor.
- Use the appropriate screws (M4 or M5) and washers from the hardware kit to secure the VESA plate to the monitor. Do not overtighten.
3-кадам: Мониторлорду куралдарга орнотуңуз
- Slide the monitor (with the attached VESA plate) onto the VESA head of the monitor arm.
- Ensure the monitor clicks into place or is securely fastened by the quick-release mechanism.
- Экинчи монитор үчүн кайталаңыз.

4-кадам: Кабель башкаруу
Route your monitor cables through the integrated cable management clips on the underside of the arms. This helps maintain a tidy workspace.

5. Иштөө жана тууралоо
The MOUNTUP Dual Monitor Arm offers flexible adjustments to optimize your viewтажрыйбасы.

Adjusting Arm Tension (Gas Spring)
The gas spring mechanism allows for smooth height adjustments. If your monitor sags or is difficult to move, you may need to adjust the tension.

- To increase tension (if monitor sags): Use the provided hex wrench to turn the adjustment screw clockwise.
- To decrease tension (if arm is too stiff): Turn the adjustment screw counter-clockwise.
- Always adjust tension with the arm held horizontally. Test the movement after each small adjustment until the monitor holds its position freely.
Монитор жөндөөлөрү
- Бийиктигин тууралоо: Gently push or pull the monitor up or down to your desired height. The gas spring will assist in holding the position. Max height is 44cm (17.3 inches).
- Эңкейүүнү тууралоо: Tilt the monitor screen up to +85° or down to -45° to reduce glare and optimize viewing angles. Loosen the tilt bolt, adjust, then re-tighten.
- Айланууну жөндөө: The arm allows for 180° swivel at the monitor plate, 270° at the middle joint, and 360° at the base, providing wide range of motion.
- Айландыруу (айлануу): Rotate your monitor 360° to switch between landscape and portrait orientations.

6. Техникалык тейлөө
- Тазалоо: Монитордун колун жумшак менен сүртүңүз, damp кездеме. Финишке зыян келтирүүчү абразивдүү тазалагычтардан же эриткичтерден качыңыз.
- Мезгилдүү текшерүүлөр: Мезгил-мезгили менен бардык бурамалар менен байланыштарды текшерип туруңуз, алар бекем жана бекем бойдон калууда. Керек болсо кайра тартыңыз.
- Gas Spring Longevity: The high-quality gas spring is tested for over 20,000 cycles. Proper tension adjustment will help maintain its performance over time.

7. Кыйынчылыктарды
- Monitor Sags or Won't Stay Up: The gas spring tension is too low. Refer to the "Adjusting Arm Tension" section and turn the adjustment screw clockwise to increase tension.
- Arm is Too Stiff or Difficult to Move: The gas spring tension is too high. Refer to the "Adjusting Arm Tension" section and turn the adjustment screw counter-clockwise to decrease tension.
- Монитор термелүүлөр: Ensure all mounting screws (VESA plate to monitor, arm to desk) are securely tightened. Check that the desk clamp or grommet mount is firm.
- Monitor Tilt Angle Won't Hold: The tilt bolt may be loose. Tighten the tilt bolt on the VESA head.
8. Кепилдик жана колдоо
MOUNTUP камсыз кылат 2 жылдык сапат кепилдиги бул продукт сатып алынган күндөн тартып. Бул кепилдик өндүрүштүк кемчиликтерди жана кадимки колдонуудан келип чыккан көйгөйлөрдү камтыйт.
If you encounter any problems with your MOUNTUP Dual Monitor Arm, or if you have questions regarding installation or operation, please contact our customer support. You can typically find seller contact information through your purchase history on the platform where you bought the product (e.g., Amazon order details).
Please have your model number (MU8012-W-07) and purchase date ready when contacting support to ensure a swift resolution.