
MELONARE MWU-20-2H
MELONARE MWU-20-2H Dual Channel Wireless Microphone System User Manual
Professional Cordless Dynamic Mic Set
1. Бүттүview
The MELONARE MWU-20-2H is a dual-channel wireless microphone system designed for clear and reliable audio transmission. It features an auto-scan function for optimal frequency selection, a long operating range, and user-friendly controls including one-tap mute and a lock function. The system is suitable for various applications such as singing, karaoke, church events, weddings, and DJ performances.

Figure 1: The MELONARE MWU-20-2H Dual Channel Wireless Microphone System, showing the receiver unit with two antennas and two handheld microphones.
2. Кутуда эмне бар
The MELONARE MWU-20-2H system includes the following components:
- 1 x зымсыз кабыл алгыч
- 2 x Handheld Transmitters (Microphones)
- 4 x AA батарейкалары (микрофондор үчүн)
- 1 x Power Adapter (for receiver)
- 1 x 1/4" аудио кабель
- 1 x User Manual
- 1 x 6.35mm to 3.5mm Cable Adapter
- 2 х Антенналар
- 2 x Anti-rolling Rings
- 4 х Резина бут

Figure 2: All items included in the MELONARE MWU-20-2H package.
3. Орнотуу
- Туташуу кубаты: Plug the power adapter into the wireless receiver's DC IN port and then into a power outlet. The receiver's display should illuminate.
- Антенналарды тиркөө: Screw the two included antennas firmly into the antenna ports on the back of the receiver. Ensure they are positioned vertically for optimal signal reception.
- Микрофондорго батарейкаларды орнотуу: Unscrew the bottom part of each handheld transmitter (microphone). Insert two AA batteries into each microphone, observing the correct polarity (+/-). Screw the bottom part back on securely.
- Аудио тутумга туташуу:
- For mixers or audio interfaces with XLR inputs, connect the receiver's XLR audio outputs to your device using XLR cables (not included).
- үчүн amplifiers, karaoke machines, or portable speakers, use the included 1/4" audio cable to connect the receiver's 1/4" Mixed Output to your device's input. If your device has a 3.5mm input, use the provided 6.35mm to 3.5mm cable adapter.
- Күйгүзүү: Press the power button on the receiver to turn it on. Press the power button on each handheld microphone to turn them on.
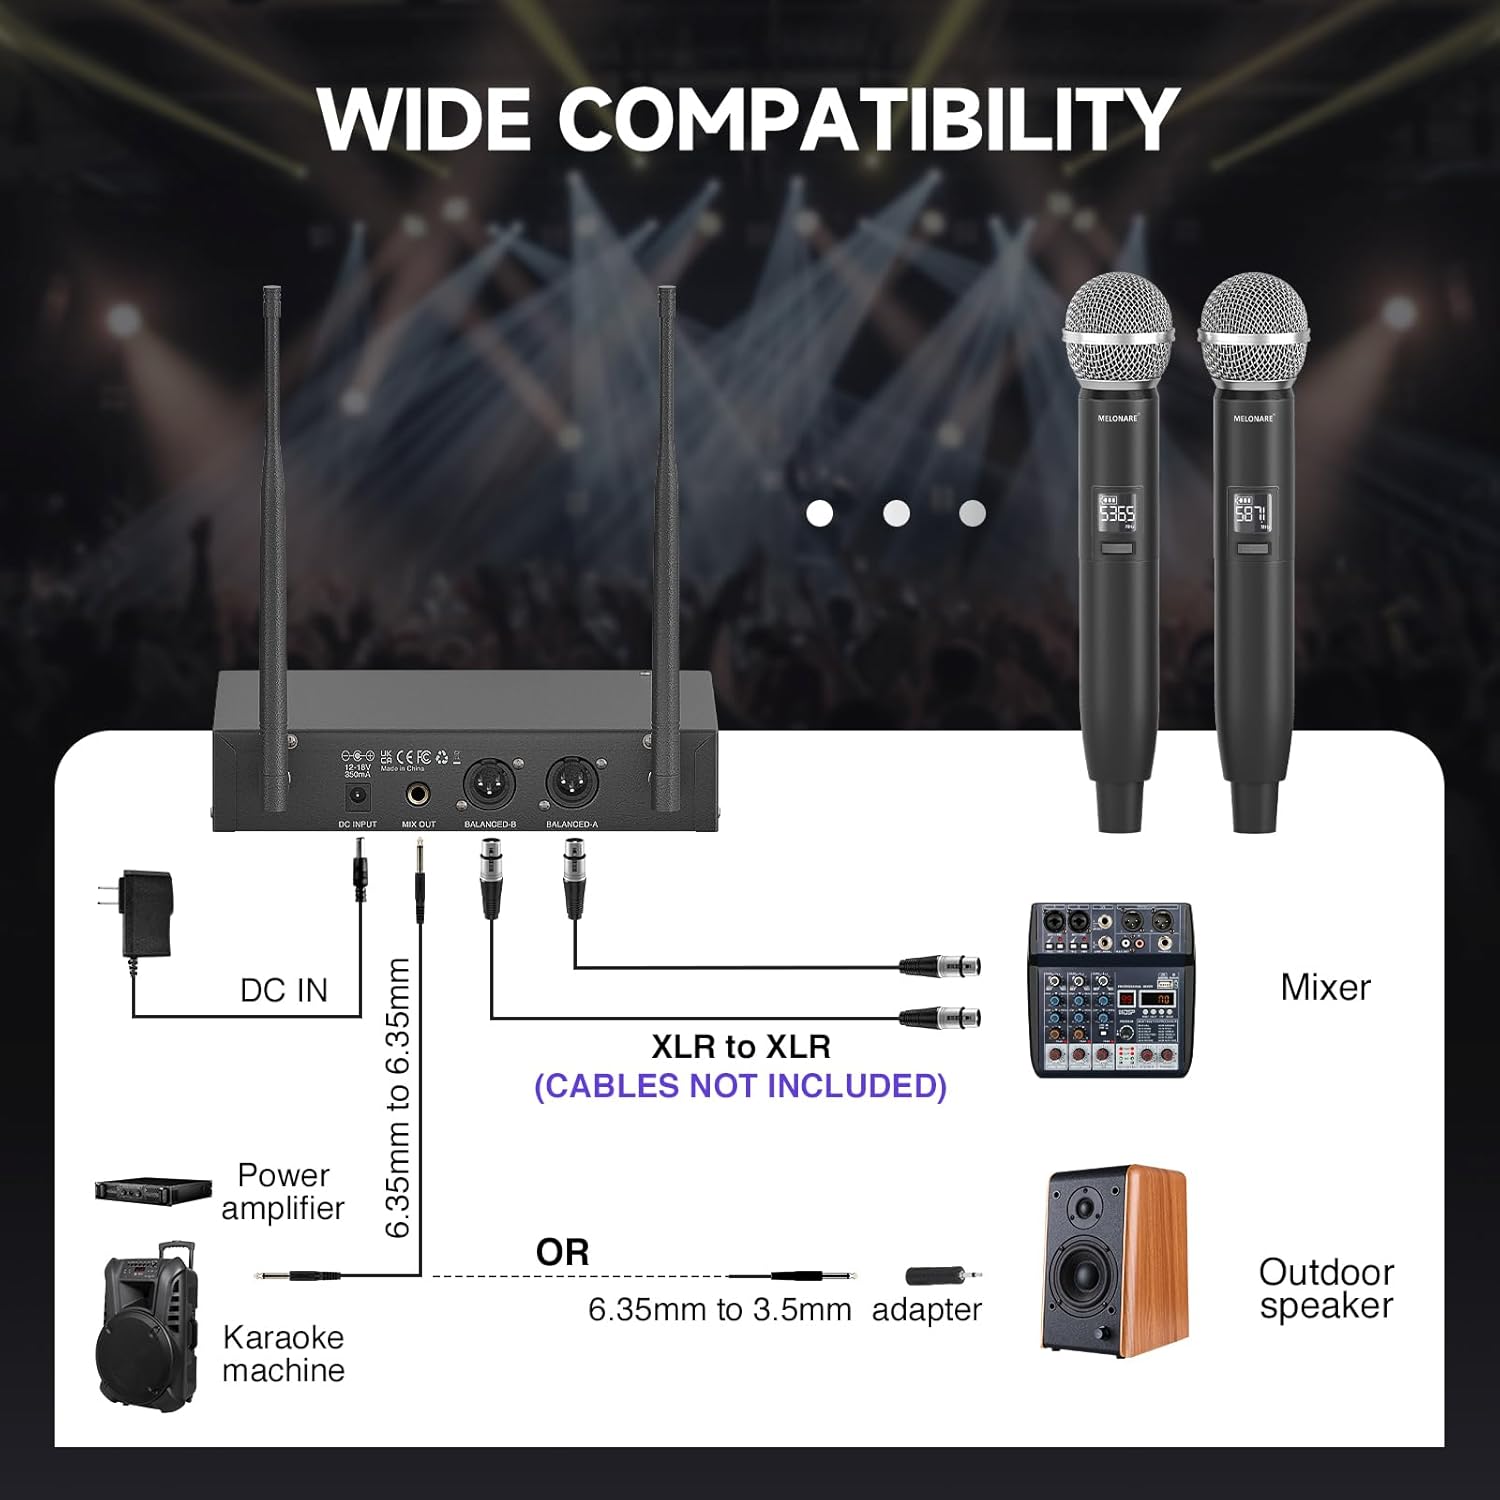
Figure 3: Connection options for the wireless microphone system with different audio equipment.
4. Иштөө нускамалары
4.1. Күйгүзүү / Өчүрүү
- Алуучу: басыңыз КҮЧ button on the front panel to turn the receiver on or off.
- Колдук өткөргүчтөр: басып, кармап туруңуз КҮЧ button on each microphone for a few seconds to turn it on or off. A short tap will mute/unmute the microphone.
4.2. Frequency Pairing (Auto-Scan & IR Sync)
The system features an Auto-Scan function to find the most stable frequency and IR Sync for quick pairing.
- Initiate Auto-Scan: On the receiver, long press the SET button to initiate the Auto-Scan function. The receiver will automatically scan for the clearest available frequency.
- Ырастоо жыштыгы: Wait until the selected frequency appears on the receiver's LCD display.
- IR Sync Microphones:
- Ensure the handheld microphone is powered on.
- Align the IR window on the microphone (usually near the power button) vertically with the IR window on the receiver.
- басыңыз SET button on the receiver to initiate IR sync. The microphone's frequency will automatically match the receiver's.
- Repeat for the second microphone.

Figure 4: The receiver's display showing the auto-scan feature for quick frequency matching.
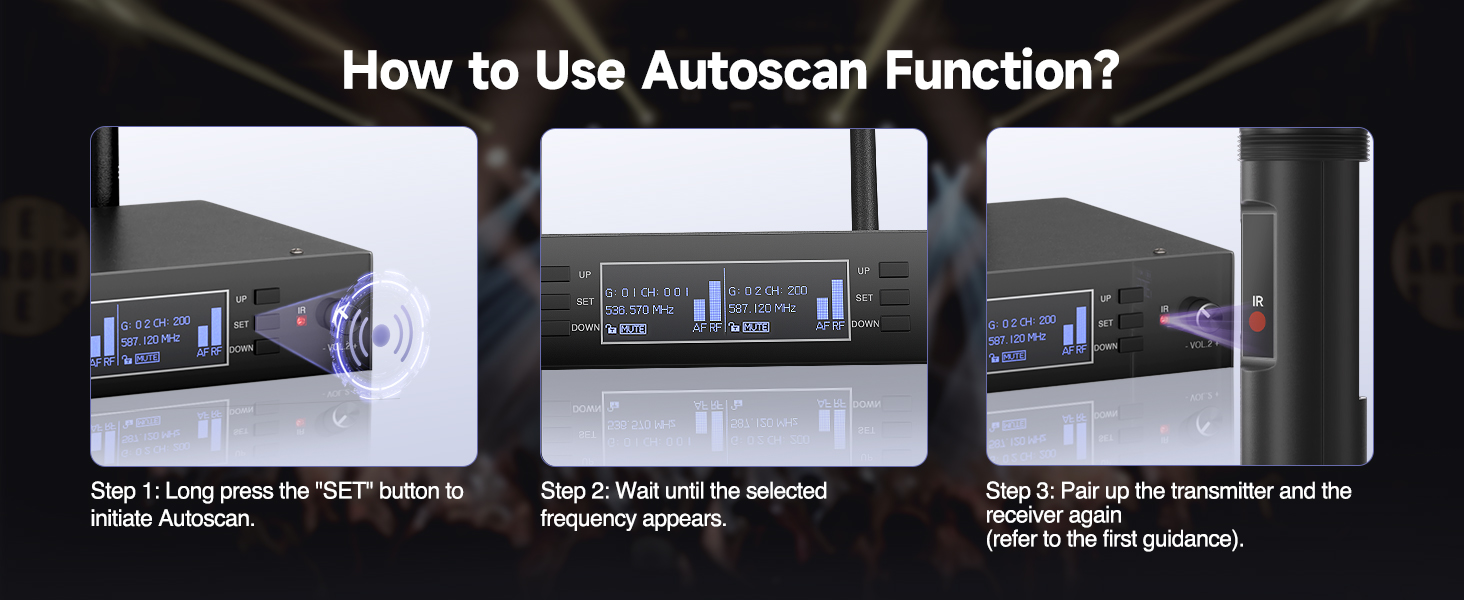
Figure 5: Step-by-step guide for IR synchronization between the microphone and receiver.
4.3. Mute and Lock Functions
- One-Tap Mute (Microphone): Кыскача таптаңыз КҮЧ button on the handheld microphone to mute or unmute the audio output. The microphone's display will indicate "MUTE" when active.
- Lock Function (Receiver): To prevent accidental changes to settings, long press the UP button on the receiver. This will activate the lock function, indicated on the display. Long press again to unlock.

Figure 6: Details of the handheld microphone, including the mute function and color-coded base for easy identification.
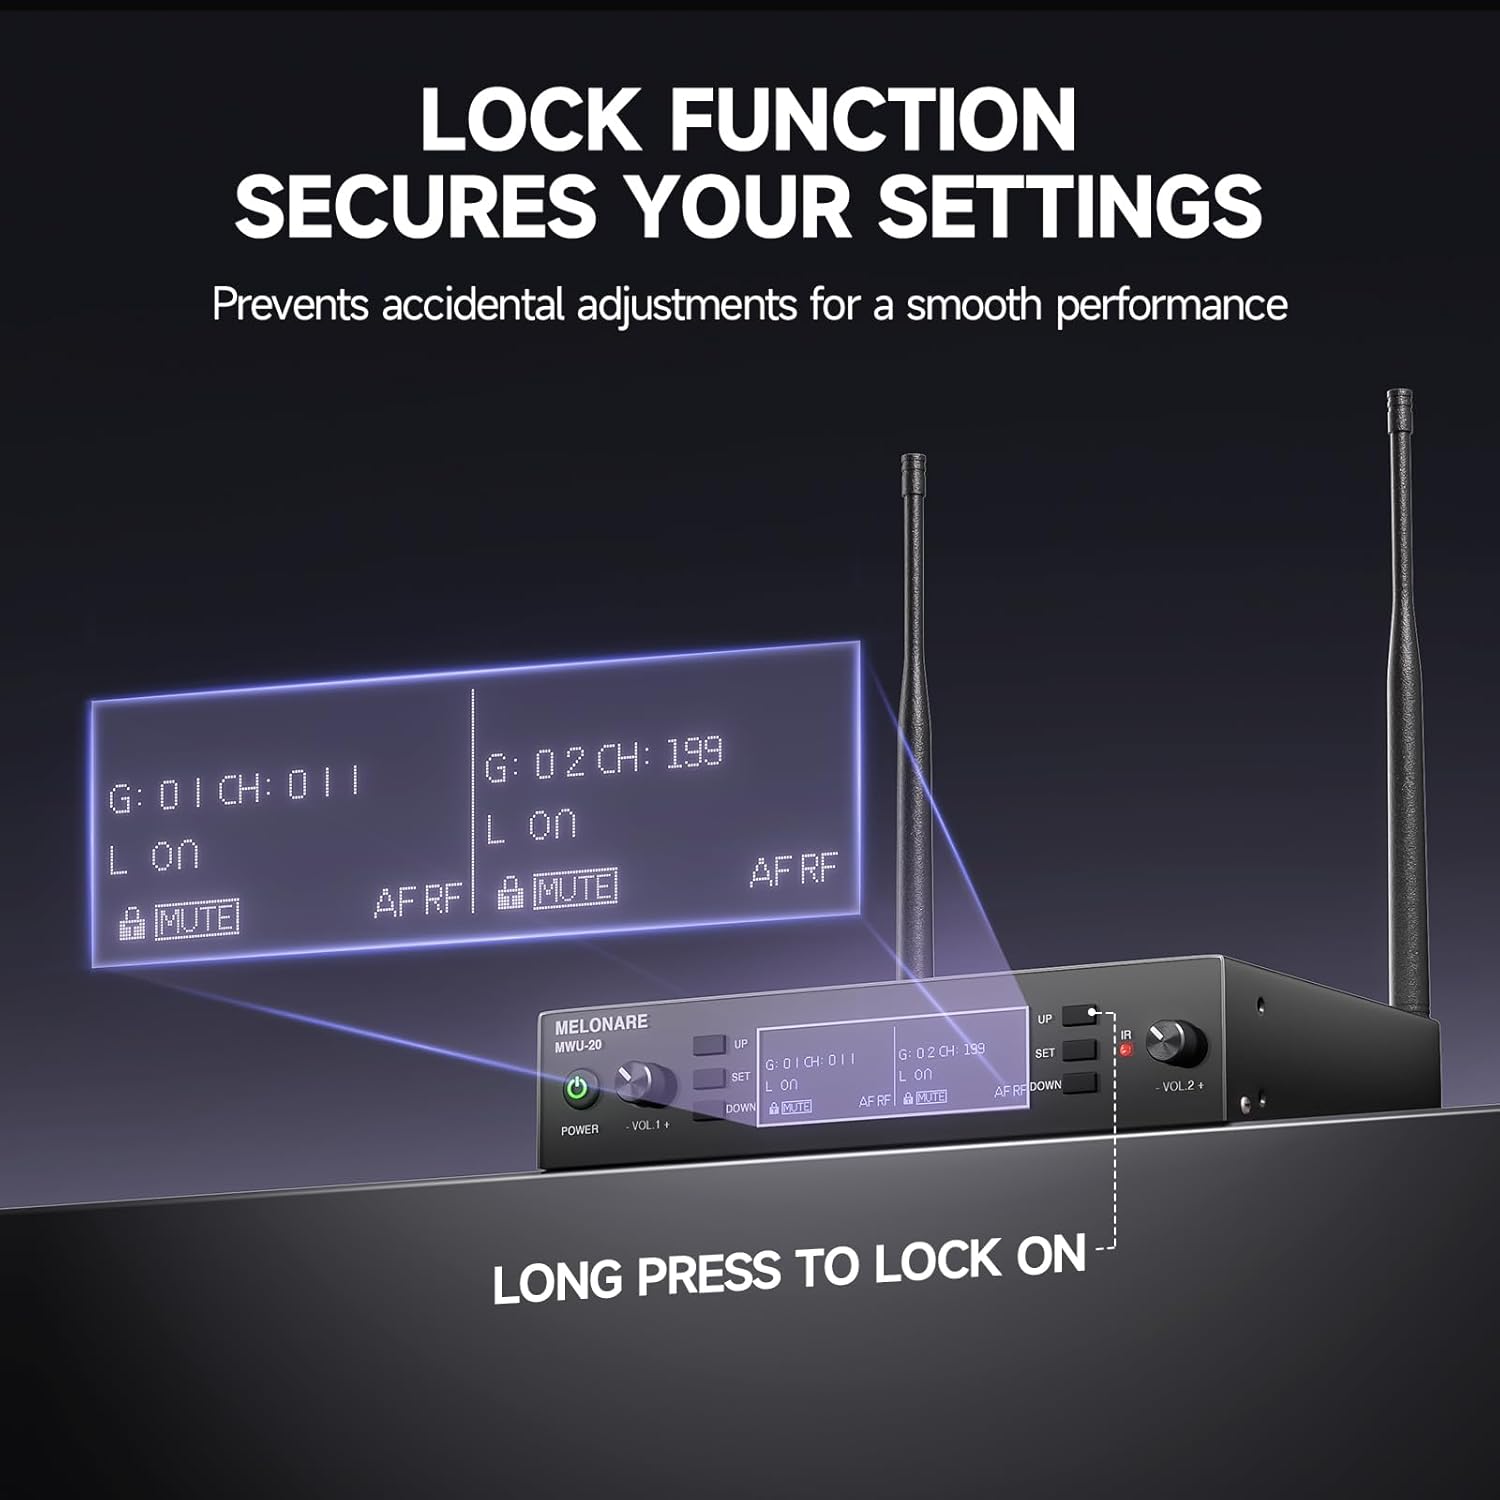
Figure 7: The receiver's display indicating the active lock function to secure settings.
4.4. Үндү башкаруу
The receiver has individual volume control knobs for each microphone channel (VOL 1 and VOL 2). Rotate the respective knob clockwise to increase volume and counter-clockwise to decrease volume.
5. Техникалык тейлөө
- Батареяны алмаштыруу: The handheld microphones are powered by AA batteries. Replace them when the battery indicator on the microphone's display shows low power. Always use fresh AA batteries for optimal performance.
- Тазалоо: Кабыл алгычты жана микрофондорду тазалоо үчүн жумшак, кургак чүпүрөктү колдонуңуз. Суюк тазалоочу каражаттарды же абразивдүү материалдарды колдонбоңуз, анткени алар капталына же ички компоненттерине зыян келтириши мүмкүн.
- Сактагыч: When not in use for extended periods, store the system in a cool, dry place away from direct sunlight and extreme temperatures. Remove batteries from the microphones before long-term storage to prevent leakage.
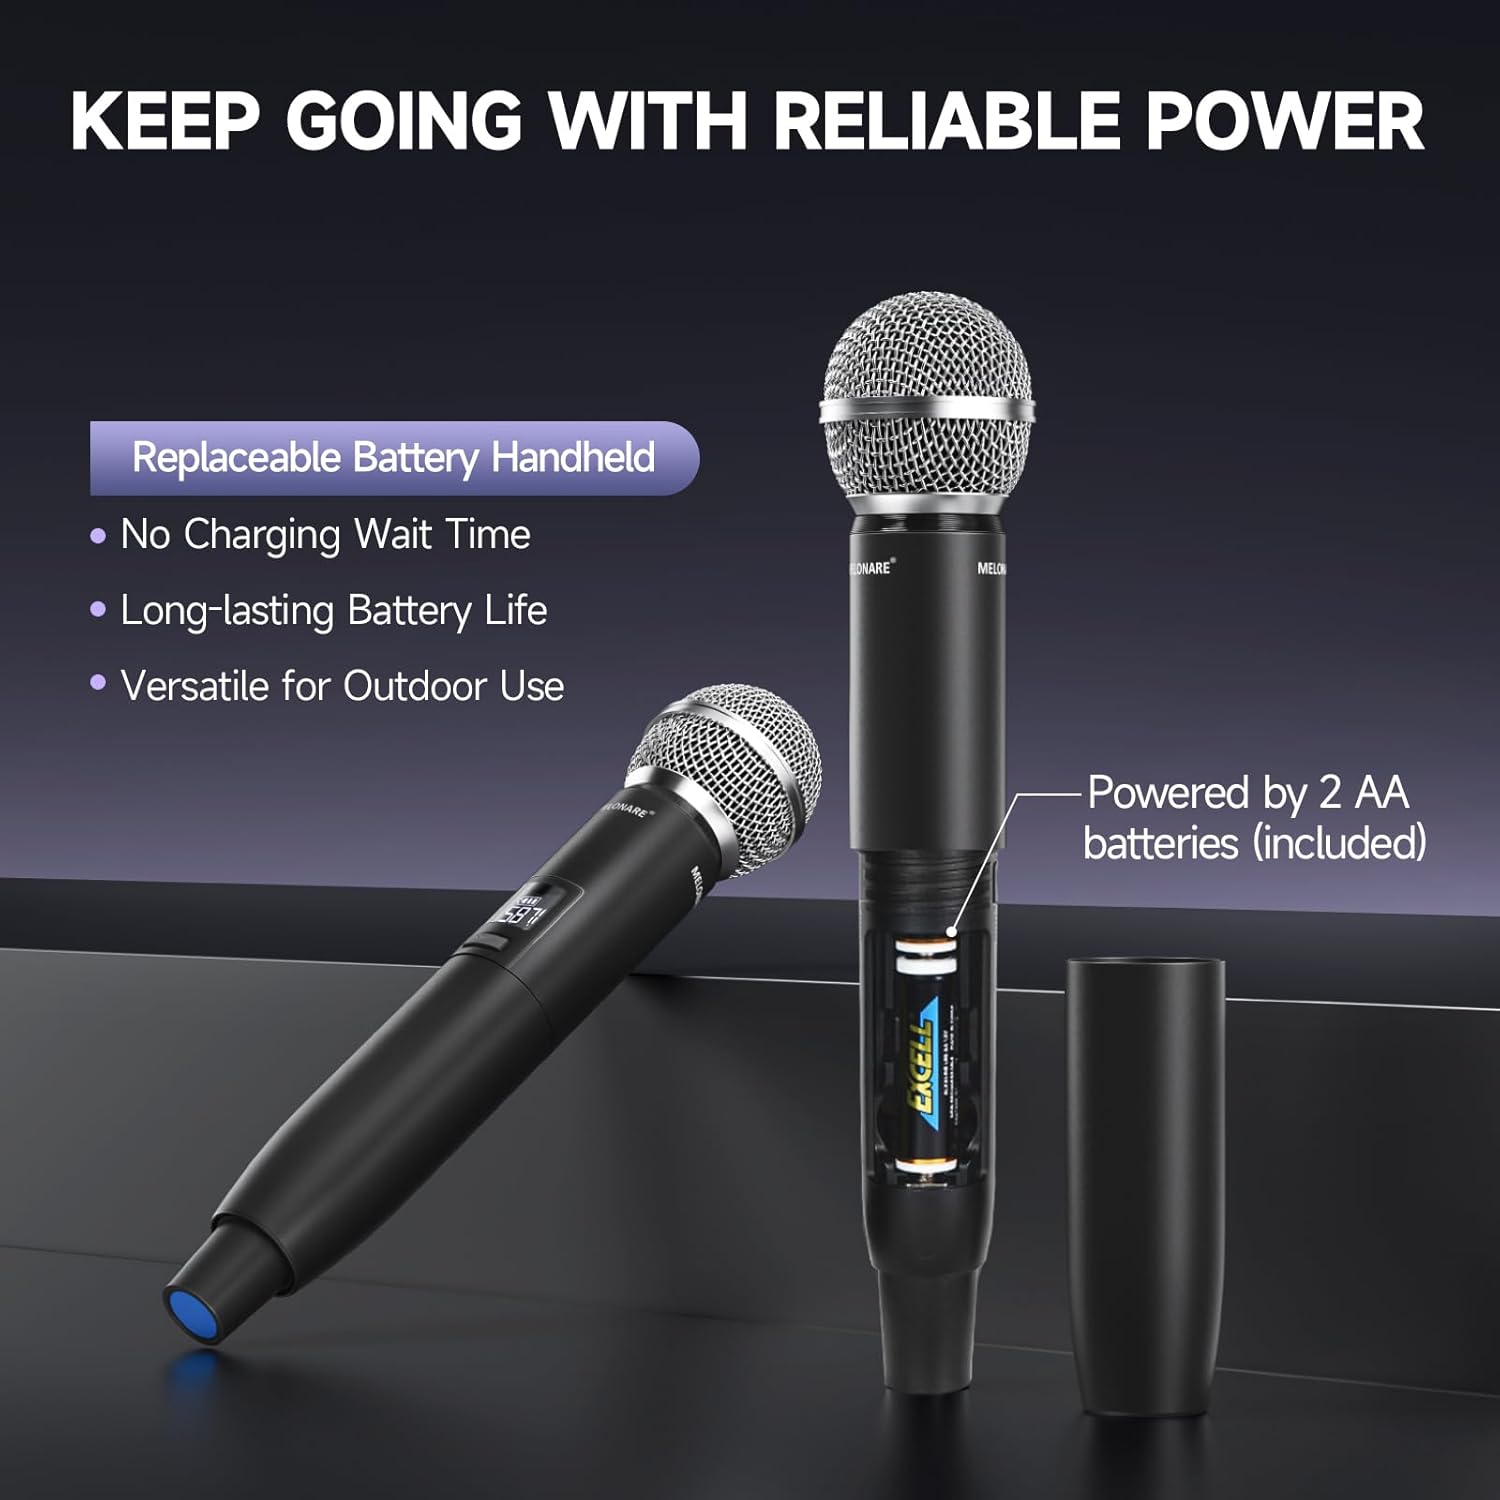
Figure 8: The handheld microphone's battery compartment, illustrating the use of replaceable AA batteries.
6. Кыйынчылыктарды
| Көйгөй | Мүмкүн себеп | Чечим |
|---|---|---|
| Микрофондон үн чыкпайт | Microphone or receiver not powered on; Low microphone battery; Incorrect frequency pairing; Microphone muted; Audio cable disconnected. | Ensure both units are powered on. Replace AA batteries. Perform IR Sync to pair frequencies. Tap power button to unmute. Check all audio cable connections. |
| Интерференция же начар үн сапаты | Nearby electronic devices causing interference; Frequency conflict; Obstacles blocking signal. | Move receiver away from other electronic devices. Use the Auto-Scan function to find a clear frequency. Ensure clear line-of-sight between microphone and receiver. |
| Кыска иштөө диапазону | Antennas not properly positioned; Environmental obstacles (walls, metal structures); Low microphone battery. | Ensure antennas are fully extended and positioned vertically. Minimize obstacles between microphone and receiver. Replace AA batteries. |
| Ресивердин дисплейи иштебей жатат | Receiver not powered on; Power adapter issue. | Check power connection and ensure receiver is turned on. Try a different power outlet or adapter if available. |
7. Техникалык шарттар
| Өзгөчөлүк | Деталь |
|---|---|
| Модель номери | MWU-20-2H |
| Жыштык диапазону | 2x100 UHF Frequencies (530-580 MHz) |
| Иштөө диапазону | 260 фут (100 м) чейин |
| Микрофон түрү | Dynamic, Cardioid Polar Pattern |
| Микрофондун электр булагы | 2 x AA батарейкалары (ар бир микрофон үчүн) |
| Кабылдагычтын кубат булагы | Кубат адаптери (кошулган) |
| Receiver Outputs | XLR Audio Outputs, 1/4" Mixed Output |
| Элемент Салмагы | 4.29 фунт |
| Пакеттин өлчөмдөрү | 17.56 x 12.2 x 3.43 дюйм |
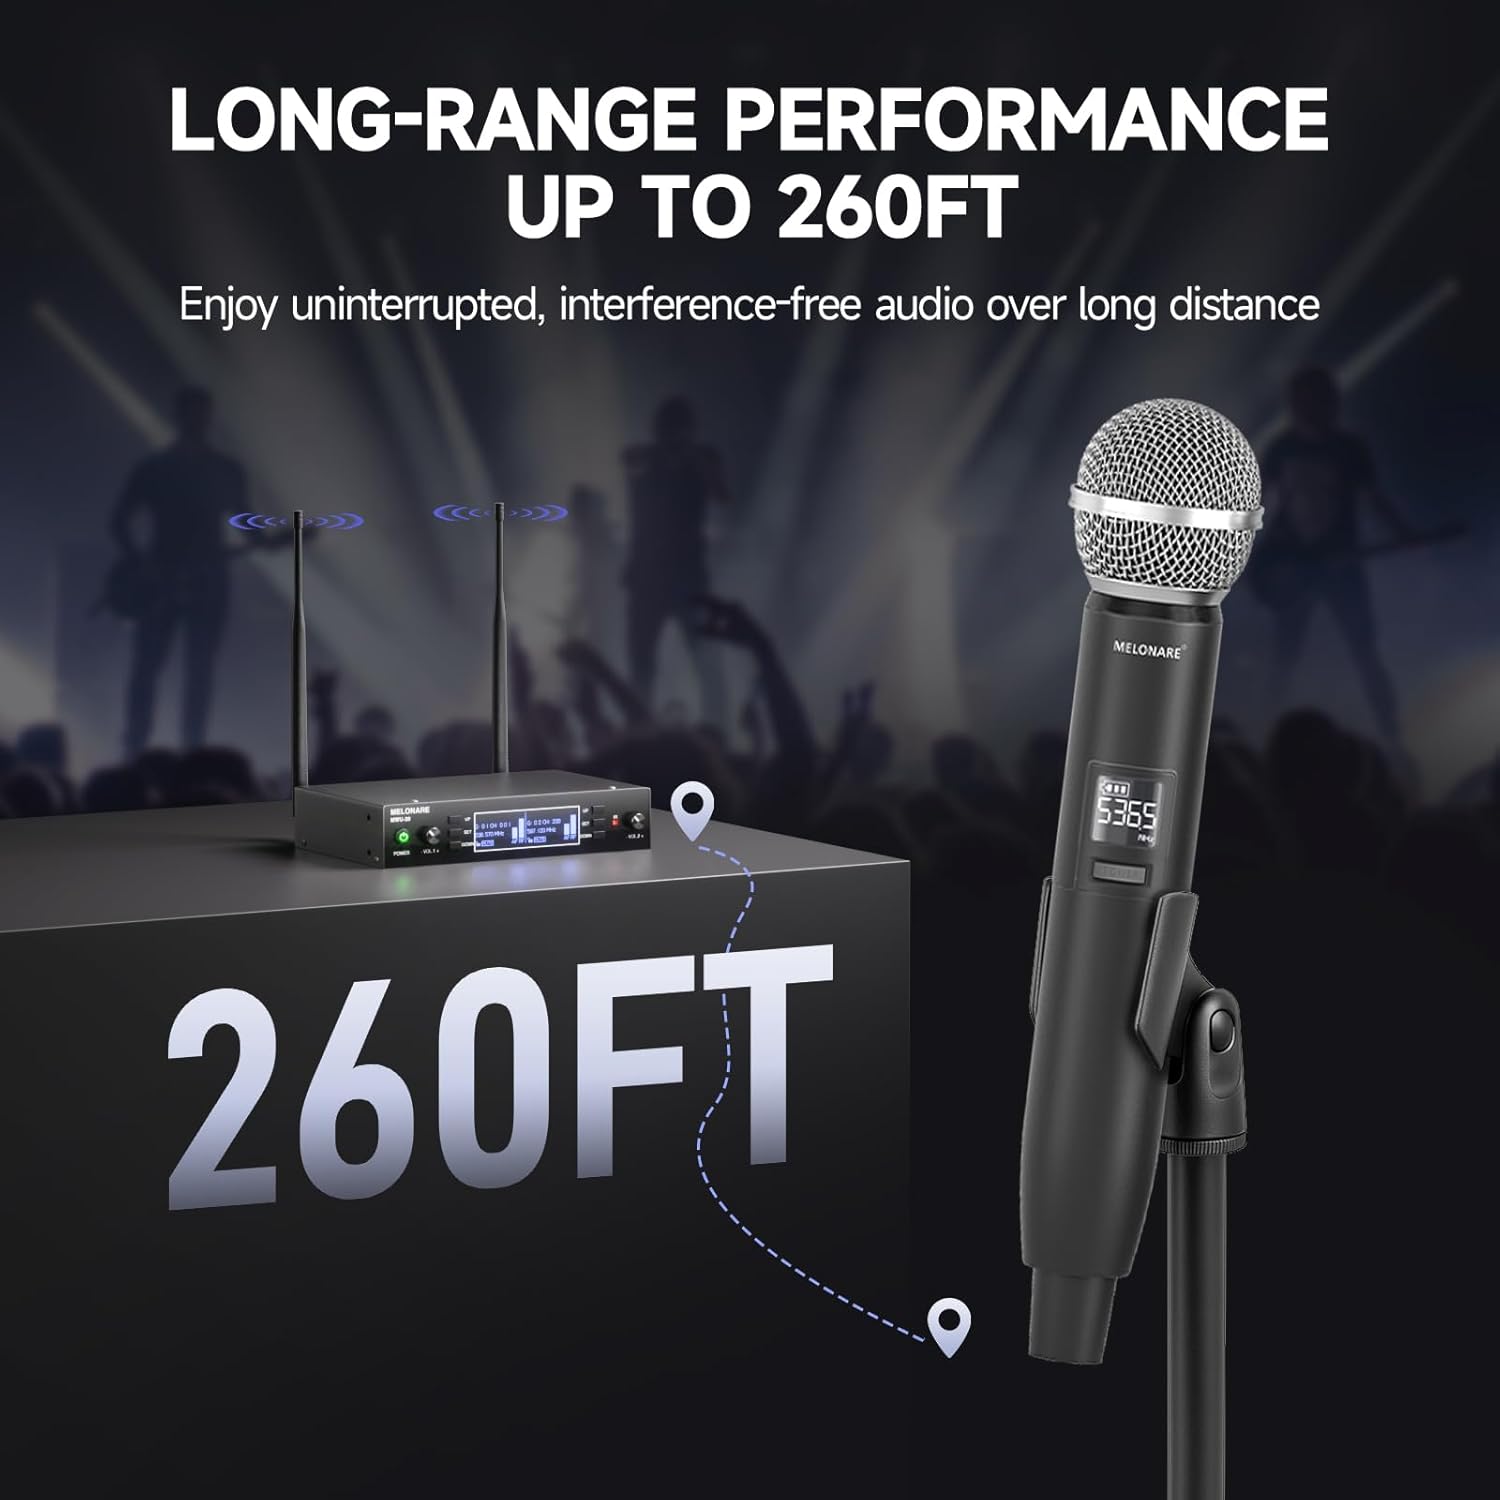
Figure 9: The system's long-range performance, capable of up to 260 feet of uninterrupted audio.
8. Кепилдик жана колдоо
For warranty information, technical support, or any inquiries regarding your MELONARE MWU-20-2H Dual Channel Wireless Microphone System, please refer to the contact details provided in the included user manual or visit the official MELONARE webсайт.
MELONARE is committed to providing affordable, user-friendly audio products and aims to bring joy and convenience through sound.
Ask a question about this manual
Ask about setup, troubleshooting, compatibility, parts, safety, or missing instructions. Manuals+ will review the question and use this page’s manual context to help answer it.