1. Киришүү
This manual provides comprehensive instructions for the safe and effective use of your Artfone Smart_500 Smartphone. Please read this manual thoroughly before operating the device and retain it for future reference. The Artfone Smart_500 is designed with ease of use in mind, featuring large icons, a clear display, and essential functions for communication.
2. Түзмөк бүттүview
Familiarize yourself with the components of your Artfone Smart_500 smartphone.

Сүрөт 2.1: Алдыңкы жана арткы view of the Artfone Smart_500 smartphone placed in its charging dock. The front displays a simplified interface with large icons for Phone, Contacts, Camera, and Photos. The back shows the camera module and the SOS button.

Сүрөт 2.2: Бир нече views of the Artfone Smart_500 smartphone, illustrating its front, back, and side profiles. This provides a comprehensive look at the device's physical design and button placement.
Негизги компоненттер:
- Алдыңкы дисплей: 5-inch IPS screen for clear viewжана өз ара аракеттенүү.
- Физикалык баскычтар: Dedicated buttons for call answer/end, volume control, and power.
- SOS баскычы: Located on the rear for emergency alerts.
- Камералар: Rear 13MP camera with LED flash, Front 5MP camera.
- Заряддоо порту: Төмөндө USB-C порту.
- Заряддоо станциясы: Included for convenient desktop charging.
3. Орнотуу
3.1 SIM картаны жана микро SD картаны орнотуу
- Түзмөктү толугу менен өчүрүңүз.
- Locate the SIM/Micro SD card tray on the side of the phone.
- Салгычты ачуу үчүн берилген SIM чыгаруучу куралды колдонуңуз.
- Carefully place your Nano-SIM card(s) and/or Micro SD card into the designated slots. Ensure correct orientation.
- Табаны телефондун ичине акырын түртүңүз, ал чыкылдагыча.
3.2 Баштапкы күйгүзүү
- Экран күйгөнгө чейин Кубат баскычын (адатта оң жагында) басып туруңуз.
- Тил тандоо, Wi-Fi туташуусу жана Google каттоо эсебин орнотуу сыяктуу баштапкы орнотууну аяктоо үчүн экрандагы көрсөтмөлөрдү аткарыңыз.
3.3 Аппаратты заряддоо
The Artfone Smart_500 can be charged using the included USB-C cable or the charging station.
- Заряддоо станциясын колдонуу: Place the phone into the charging station, ensuring the charging contacts align. The phone will indicate that it is charging.
- USB-C кабелин колдонуу: Connect the USB-C cable to the phone's charging port and the other end to a compatible power adapter.
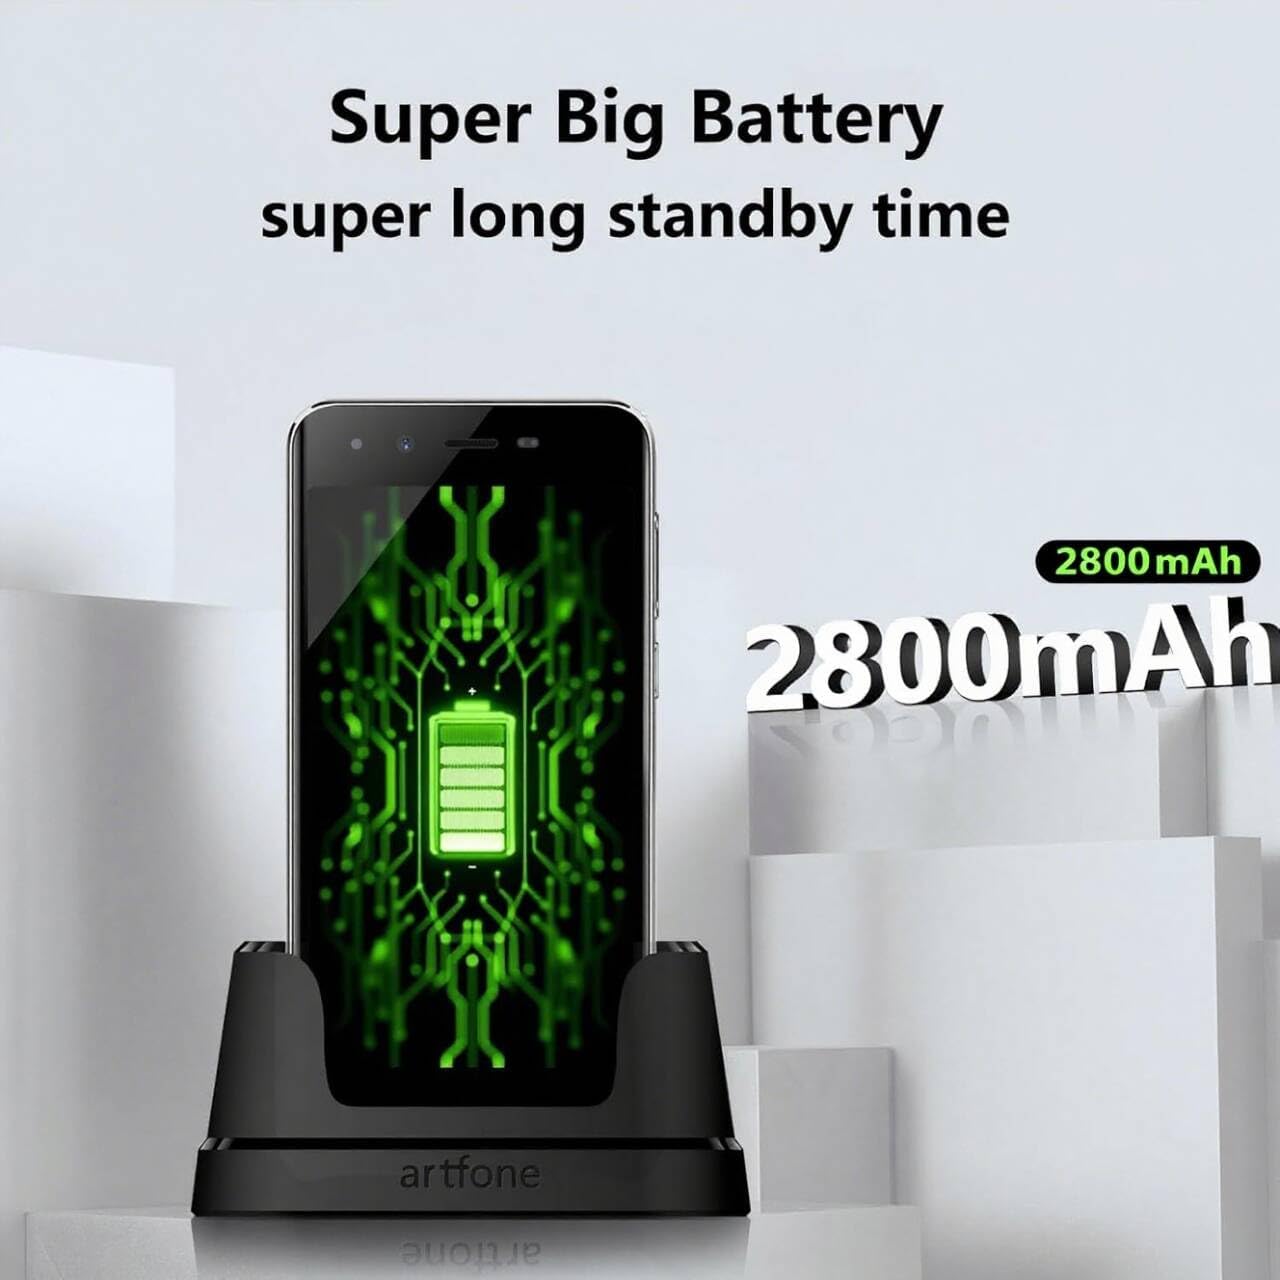
Image 3.1: The Artfone Smart_500 smartphone in its charging dock, displaying a battery icon on the screen. Text indicates 'Super Big Battery' and 'super long standby time', highlighting the device's 2550mAh battery capacity.
4. Негизги операция
4.1 Навигация
- Сенсордук экран: Tap icons to open applications, swipe to navigate between screens.
- Башкы экран: Features large, easy-to-identify icons for common functions like Phone, Contacts, Camera, and Photos.
- Артка баскычы: Мурунку экранга кайтат.
- Акыркы колдонмолор баскычы: Жакында колдонулган тиркемелерди көрсөтөт.
4.2 Чалууларды кабыл алуу жана кабыл алуу
- Чакыруу: Tap the 'Phone' icon, enter the number using the large keypad, then tap the green call button.
- Чалуу кабыл алуу: When a call comes in, tap the green 'Answer' button on the screen or press the dedicated answer button.
- Чалууну аяктоо: Tap the red 'End Call' button on the screen or press the dedicated end call button.
4.3 Байланыштар
- Байланыш кошуу: Tap the 'Contacts' icon, then tap the '+' or 'Add New Contact' button. Enter the contact's name and phone number, then save.
- Байланышка чалуу: Tap the 'Contacts' icon, select the desired contact, then tap the phone icon next to their name.
4.4 Кабарлашуу
- Tap the 'Messages' icon (if available on home screen, otherwise find in app drawer).
- Tap 'Start new chat' or the '+' icon.
- Enter the recipient's number or select from contacts, then type your message and tap 'Send'.
4.5 Камера
The Artfone Smart_500 features a 13MP rear camera and a 5MP front camera.

Image 4.1: A hand holding the Artfone Smart_500 smartphone, with text emphasizing its 13-megapixel camera for high-definition photography.
- Tap the 'Camera' icon on the home screen.
- Камераны объектиңизге багыттаңыз.
- Сүрөткө тартуу үчүн экрандагы жапкыч баскычын басыңыз.
- Use the LED flash in low-light conditions.
4.6 SOS өзгөчө кырдаал функциясы
The SOS button is a critical safety feature for emergencies.

Image 4.2: A visual representation of the SOS button located on the back of the Artfone Smart_500 smartphone. The diagram illustrates how pressing this button can alert pre-set emergency contacts such as family members (daughter, son, spouse), a doctor, or first responders.
- SOS байланыштарын орнотуу: Navigate to the SOS settings in the phone's menu to add up to 5 emergency contact numbers.
- SOSту иштетүү: In an emergency, press and hold the SOS button on the back of the phone.
- The phone will automatically call the pre-set emergency numbers one by one until a connection is made.
- Simultaneously, an emergency SMS message, including your location, will be sent to these contacts.
5. Өркүндөтүлгөн функциялар
5.1 Android 12 операциялык системасы
Your Artfone Smart_500 runs on Android 12, providing access to a wide range of applications and features.
- Google Play дүкөнү: Access the Play Store to download additional applications such as WhatsApp, social media, and utility tools.
- Интернетте серептөө: Use the pre-installed browser to access the internet.
- Мультимедиа: View videos, photos, and listen to music.
5.2 Байланыш

Image 5.1: A prominent 4G logo positioned above the Artfone Smart_500 smartphone, which displays a strong 4G signal indicator. This highlights the device's 4G connectivity for high-definition voice calls and faster internet.
- 4G/3G/2G: Supports various cellular networks for reliable communication.
- 4G VoLTE: Ensures high-quality voice calls with reduced background noise.
- Wi-Fi: Интернетке кирүү үчүн зымсыз тармактарга туташыңыз.
- Bluetooth: Pair with wireless headphones or other Bluetooth devices.
6. Техникалык тейлөө
6.1 Батареяга кам көрүү
- Батареянын иштөө мөөнөтүн узартуу үчүн, телефонду өтө жогорку температурага дуушар кылбаңыз.
- Charge the battery regularly, but avoid leaving it fully charged or fully depleted for extended periods.
- Use only the original charger and charging station provided with the device.
6.2 Тазалоо
- Экранды жана денени жумшак, түксүз чүпүрөк менен сүртүңүз.
- Катуу химиялык заттарды же абразивдүү материалдарды колдонуудан алыс болуңуз.
7. Кыйынчылыктарды
Жалпы маселелер жана чечимдер:
- Телефон күйбөй жатат: Батарея заряддалганын текшериңиз. Заряддоочуга туташып, кайра аракет кылыңыз.
- Чалуу сапаты начар: Check network signal strength. Ensure VoLTE is enabled in settings if available.
- Тиркемелерди тоңдуруу: Close background applications. Restart the phone.
- Батареянын бат түгөнүп калышы: Reduce screen brightness. Close unused apps. Check battery usage in settings to identify power-hungry apps.
- SOS button not working: Verify that emergency contacts are correctly set up in the SOS settings.
Эгер көйгөйлөр чечилбесе, кардарларды колдоо кызматына кайрылыңыз.
8. Техникалык шарттар
| Өзгөчөлүк | Спецификация |
|---|---|
| Модель аты | SMART_500 |
| Операция системасы | Android 12.0 |
| Дисплей | 5 дюймдук IPS сенсордук экраны |
| Процессор | 1.5 GHz Quad-Core (MTK 6739WW) |
| RAM | 3 ГБ |
| Ички сактагыч | 32 GB (Expandable via Micro SD) |
| Арткы камера | LED жарыгы менен 13 МП |
| Алдыңкы камера | 5 депутат |
| Батарея сыйымдуулугу | 2550 мАч литий-ион |
| Күтүү убактысы | 50-80 hours (average) |
| Talk Time | 5-6 hours (average) |
| Байланыш | 4G, 3G, 2G (4G VoLTE) |
| Заряддоо порту | USB Type-C |
| Өзгөчөлүктөр | SOS Button, Charging Station, Large Icons, High Volume |

Image 8.1: A visual representation of the phone's internal platform, highlighting the MTK 6739WW processor, 32GB of ROM (internal storage), and 3GB of RAM.
9. Кепилдик жана колдоо
For warranty information and customer support, please refer to the documentation included in your product packaging or visit the official Artfone webсайт. Запастык бөлүктөрдүн бар экендиги жана программалык камсыздоо жаңыртуулары тууралуу маалымат азыр жеткиликтүү эмес.
Өндүрүүчү: artfone