
1. Продукт бүтүп калдыview
This manual provides instructions for the installation and use of the SDYYDS 68064995AA Coolant Temperature Sensor Connector. This connector is designed as a replacement wiring harness for various Chrysler and Dodge vehicles, ensuring proper connection to the coolant temperature sensor.
1.1. Эмнелер камтылган
- 1 Pc Connector - Coolant Temp Sensor wiring harness
- 2 Pcs Terminals

Image 1.1: The SDYYDS 68064995AA Coolant Temperature Sensor Connector, including the wiring harness and two terminals.
2. Техникалык шарттар
| Бөлүмдүн номери | 68064995AA, PT2427, 1P2227, S2442 |
| Модель номери | SD55-505 |
| Жабуунун узундугу | 7.87 inches (approximately 20 cm) |
| Туташтыргычтын өлчөмү | Болжол менен 3.6 x 2.0 x 2.0 см |
| Материал | Silicon, Copper, Plastic (Tinned Copper Wires) |
| Жогорку температура рейтинги | 125 градус |
| Өлчөө тактыгы | ±1.5°C (for sensor, not connector itself) |

Image 2.1: Visual representation of the connector's wire length and overall dimensions.

Image 2.2: Detail of the tinned copper wiring, highlighting resistance to humidity and high temperatures.
3. Шайкештик
This connector is compatible with the following vehicle models. Please verify your vehicle's specific requirements and existing part numbers before installation.
3.1. Chrysler Models
- Chrysler 200 (2011-2017)
- Chrysler 300 (2008-2023)
- Chrysler Aspen
- Chrysler Grand Caravan
- Chrysler Pacifica
- Chrysler Sebring
- Chrysler Town & Country
3.2. Dodge Models
- Dodge Avenger
- Dodge Challenger (2008-2023)
- Dodge Charger (2008-2023)
- Додж Дакота
- Dodge Dart
- Dodge Durango
- Dodge Grand Caravan
- Dodge Journey (2009-2019)
- Dodge Nitro
- Dodge Ram 1500, 2500, 3500
3.3. Jeep and Ram Models
- Jeep Cherokee
- Jeep Commander
- Jeep Compass
- Jeep Grand Cherokee L
- Jeep Grand Wagoneer
- Jeep Liberty
- Jeep Renegade
- Jeep Wagoneer
- Jeep Wrangler
- Ram 1500, 1500 Classic, 2500, 3500, 4500, 5500
- Ram C/V
- Ram Dakota
- Ram ProMaster 1500, 2500, 3500
4. Орнотуу жана орнотуу
Коопсуздук эскертүүсү:
Always disconnect the vehicle's battery before performing any electrical work. Ensure the engine is cool to avoid burns from hot coolant or engine components. If you are unsure about any step, consult a qualified automotive technician.
4.1. Керектүү куралдар
- Зым кыргычтар/кримперлер
- Heat gun (for heat shrink terminals, if used)
- Мультиметр (текшерүү үчүн, кошумча, бирок сунушталат)
- Basic hand tools (e.g., screwdriver, wrench, depending on sensor access)
4.2. Орнотуу кадамдары
- Сенсорду табыңыз: Identify the coolant temperature sensor on your vehicle. Its location can vary by make and model, often found near the thermostat housing or on the engine block.
- Батареяны ажыратыңыз: Электр шорт-тыгыз туташууларынын алдын алуу үчүн унааңыздын аккумуляторунун терс терминалын сууруп алыңыз.
- Access Old Connector: Carefully disconnect the old coolant temperature sensor connector. Inspect the existing wiring for any damage.
- Зымдарды даярдоо: If replacing the connector, cut the old connector off, leaving enough wire length to work with. Strip approximately 1/4 to 1/2 inch of insulation from the ends of the vehicle's wires and the new connector's wires.
- Connect New Harness:
- Match the wire colors of the new connector to the vehicle's existing wiring. While standard colors exist, always verify with a wiring diagram for your specific vehicle if available.
- Use the provided terminals (or appropriate connectors) to securely join the wires. Crimp the terminals firmly onto the stripped wire ends.
- For a robust connection, consider soldering the wires and then using heat-shrink tubing over the connections to protect them from moisture and corrosion.
- Коопсуз байланыштар: Ensure all connections are tight and insulated. Avoid any exposed wire.
- Connect to Sensor: Plug the new connector securely onto the coolant temperature sensor.
- Батареяны кайра туташтыруу: Унаанын аккумуляторунун терс терминалын кайра туташтырыңыз.
- Сыноо системасы: Start the vehicle and monitor the coolant temperature gauge or diagnostic system to ensure the sensor is functioning correctly and no warning lights appear.

Сүрөт 4.1: Арткы view of the connector, illustrating the secure entry points for the blue and yellow wires.
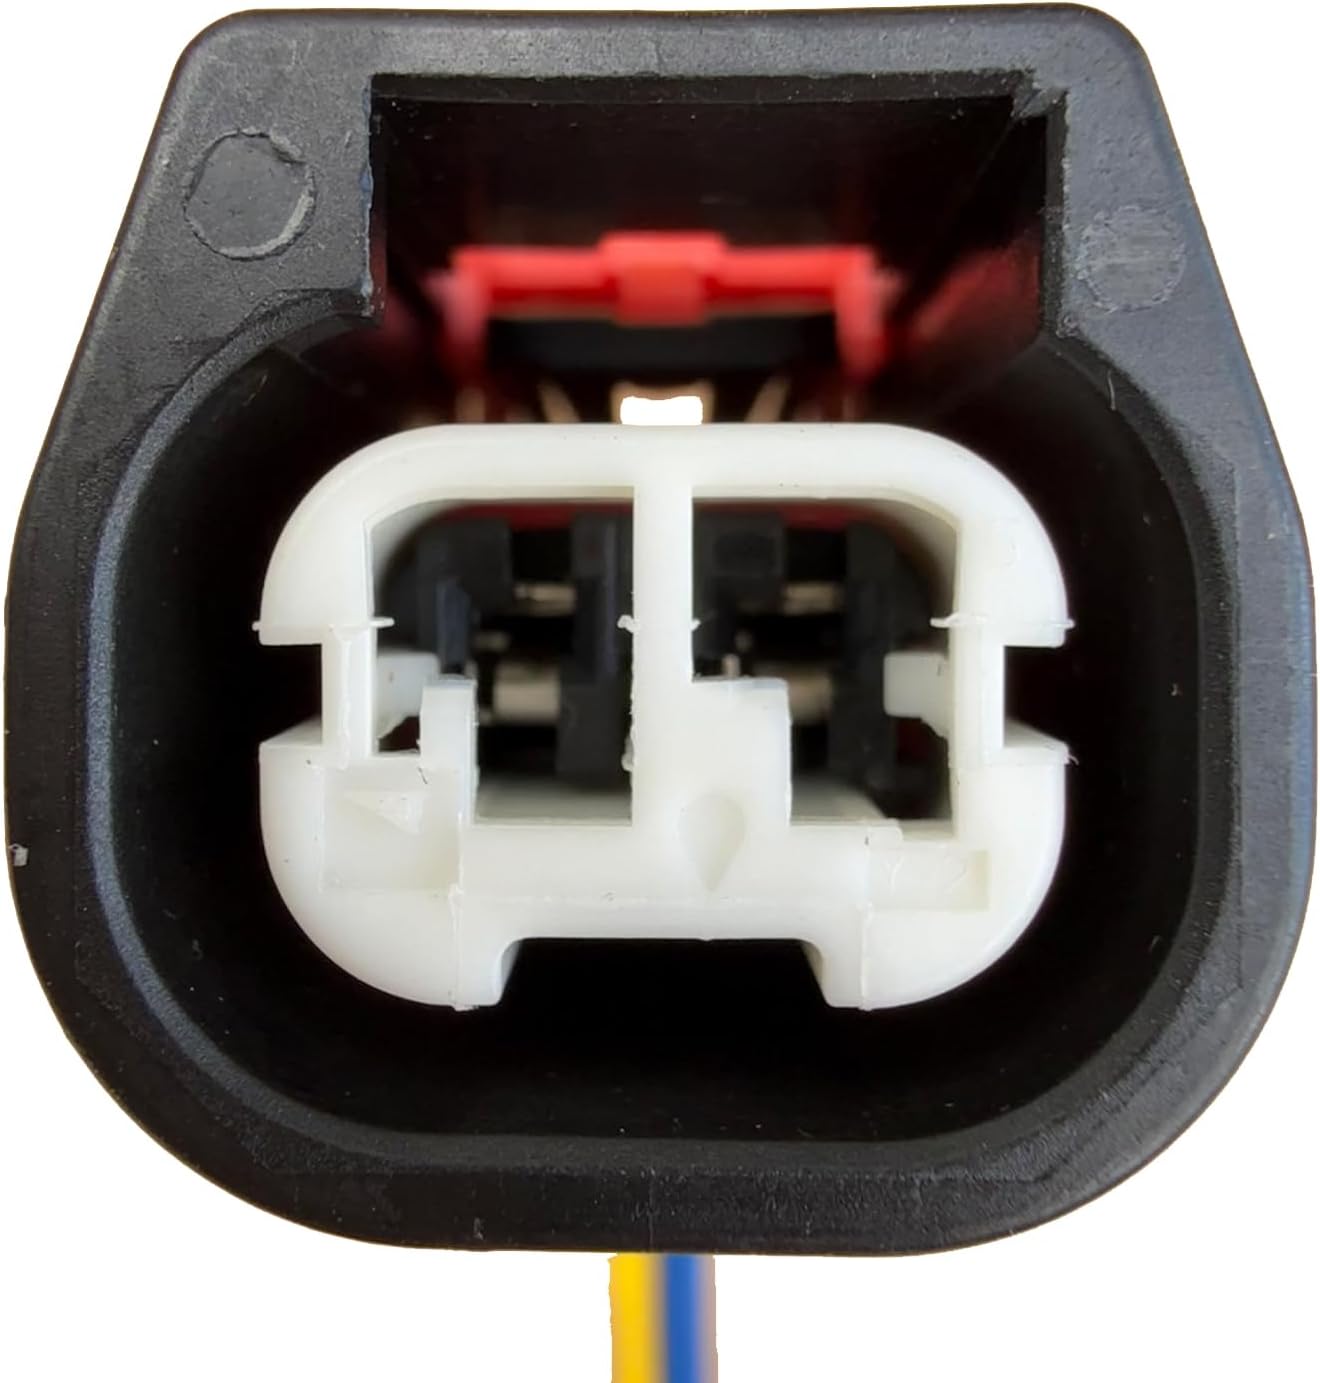
Сүрөт 4.2: Алдыңкы view of the connector, showing the internal terminal slots designed for a secure fit with the sensor.
5. Operating (Post-Installation Check)
Once the connector is installed, its "operation" is passive, facilitating the electrical signal from the coolant temperature sensor to the vehicle's engine control unit (ECU). Proper function is indicated by accurate temperature readings and the absence of diagnostic trouble codes (DTCs) related to the coolant temperature sensor.
5.1. Verification Steps
- Кыймылдаткычты баштоо: After installation, start the vehicle's engine.
- Температура өлчөгүч: Observe the vehicle's coolant temperature gauge on the dashboard. It should rise steadily as the engine warms up.
- Diagnostic Scan (Recommended): Use an OBD-II scanner to check for any pending or active DTCs. A properly functioning sensor and connector will not trigger codes like P0117 (Engine Coolant Temperature Sensor Circuit Low Input) or P0118 (Engine Coolant Temperature Sensor Circuit High Input).
- Агып кетүүнү текшерүү: Visually inspect the area around the coolant temperature sensor for any coolant leaks, especially if the sensor itself was removed or disturbed during the process.
6. Техникалык тейлөө
The SDYYDS coolant temperature sensor connector is designed for durability and requires minimal maintenance once properly installed. However, periodic inspection can help ensure its longevity and reliable performance.
6.1. Текшерүү боюнча көрсөтмөлөр
- Визуалдык текшерүү: During routine vehicle maintenance (e.g., oil changes), visually inspect the connector and its wiring for any signs of wear, fraying, cracks, or corrosion.
- Туташуу коопсуздугу: Gently check if the connector is still firmly seated on the sensor.
- Курчап турган чөйрөнүн таасири: Ensure the wiring and connector are not exposed to excessive heat, sharp edges, or areas where they could be damaged by moving engine components.
- Тазалык: Keep the connector free from excessive dirt, oil, or coolant residue. A clean, dry cloth can be used for cleaning.
7. Кыйынчылыктарды
If you experience issues after installing the coolant temperature sensor connector, consider the following troubleshooting steps:
7.1. Жалпы маселелер жана чечүү жолдору
- Incorrect Temperature Readings or No Reading:
- Байланыштарды текшерүү: Ensure the connector is fully seated on the sensor and all wire connections are secure and properly crimped/soldered.
- Зым полярдуулугу: Verify that the wires are connected with the correct polarity (if applicable, consult vehicle wiring diagram).
- Сенсордун катасы: The issue might be with the coolant temperature sensor itself, not the connector. Test the sensor if possible.
- ECU/Wiring Harness Issue: Inspect the vehicle's main wiring harness for damage further upstream.
- Check Engine Light (CEL) or Diagnostic Trouble Codes (DTCs):
- Коддорду издөө: Use an OBD-II scanner to retrieve specific DTCs. Common codes related to the coolant temperature sensor include P0117, P0118, P0116 (Engine Coolant Temperature Circuit Range/Performance).
- Зымдарды текшерүү: Ensure there are no shorts or open circuits in the new connector's wiring or its connection to the vehicle's harness.
- Таза коддор: After addressing any issues, clear the DTCs and re-test the vehicle.
- Loose or Intermittent Connection:
- Re-crimp/Re-solder: If connections feel loose, re-crimp or re-solder them to ensure a solid electrical contact.
- Inspect Terminals: Check the terminals inside the connector for bending or corrosion.
Always refer to your vehicle's service manual for specific diagnostic procedures and wiring diagrams.
8. Кепилдик жана колдоо
For warranty information or technical support regarding your SDYYDS 68064995AA Coolant Temperature Sensor Connector, please contact the manufacturer directly. Details can typically be found on the product packaging or the official SDYYDS webсайт.
When contacting support, please have your product model number (SD55-505) and purchase information readily available.