1. Киришүү
This user manual provides detailed instructions for the operation and maintenance of the 5.8GHZ 48Channel RD40 Raceband Dual Diversity Receiver. Please read this manual thoroughly before using the device to ensure proper function and safety.
2. Пакеттин мазмуну
Пакетти ачкандан кийин, төмөндө көрсөтүлгөн нерселердин бардыгы бар экенин жана жакшы абалда экендигин текшериңиз:
- 1 x RD40 Receiver
- 1 х AV Cable
- 1 x Кубат кабели
- 2 Антеннаны х
2.1-сүрөт: The RD40 Receiver with its two antennas, AV cable, and power cable.
3. Өзгөчөлүктөрү
The RD40 Diversity Receiver offers a range of advanced features for reliable performance:
- 40 channels across 5 frequency bands for versatile wireless receiving.
- Individual buttons for channel (CH) and band (FR) selection.
- Dual number display to clearly indicate the current receiving frequency and band.
- Memory function to recall the last used channel and frequency upon power-on.
- Two-way video and audio signal output (Video: PAL, NTSC, CECAM; Audio: 6.5MHz).
- Wide dynamic power supply compatibility (7-24V).
- Two high-sensitivity receivers, making signals more stable.
- Specific indicator lights to show the current working state.

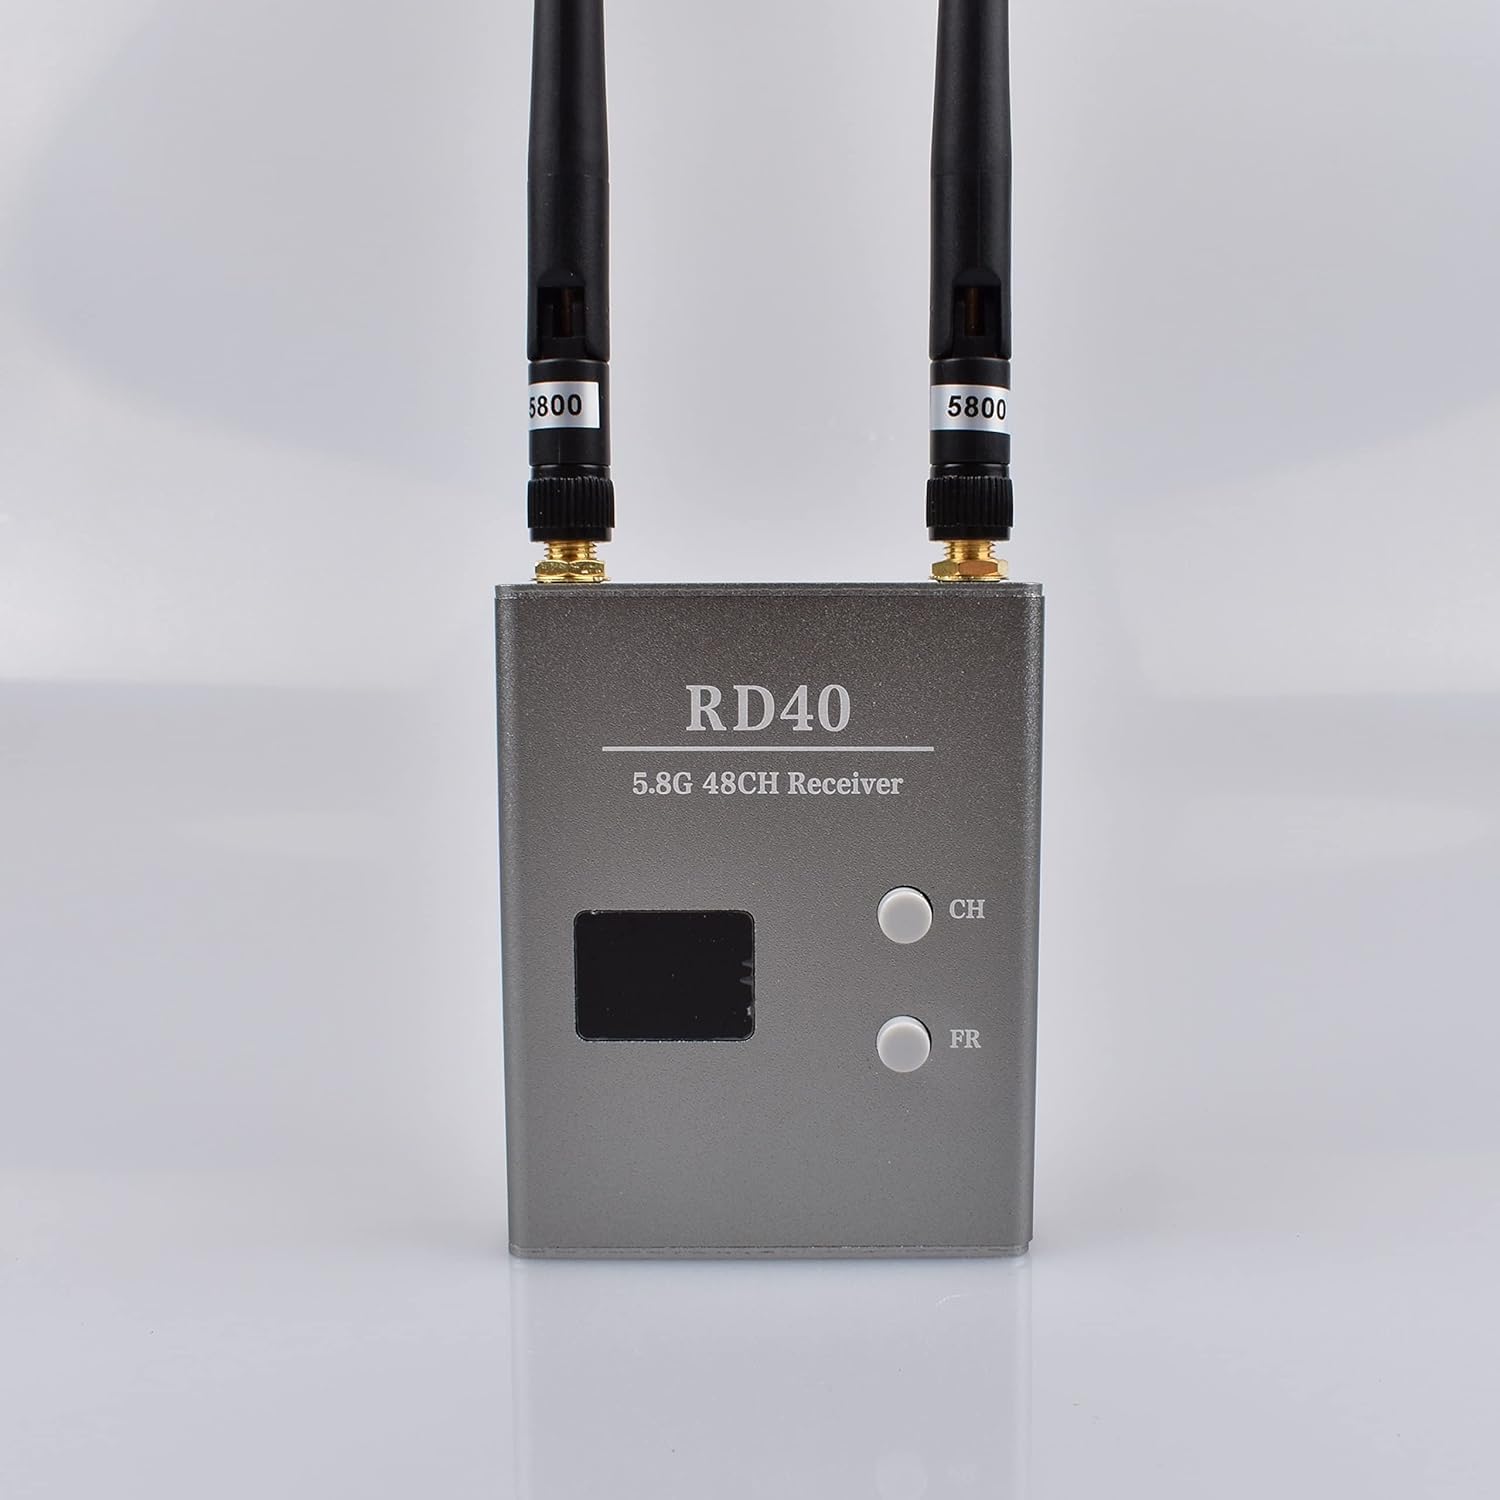
3.1-сүрөт: The top panel of the RD40 receiver, highlighting the display and CH/FR control buttons.
4. Техникалык шарттар
| Параметр | Нарк |
|---|---|
| Элементтин аты | RD40 Diversity Receiver |
| Жыштык | ISM 5.8GHz 40CH |
| Туташтыргыч түрү | RP-SMA |
| Сезимталдуулук | -90дБм |
| Power Supply Voltage | DC 7-24V |
| Учурдагы | 280мА |
| RF Input Matching | 50 Ом |
| Видео чыгаруу деңгээли | 1.0Vp_p 75Ω |
| Аудио чыгаруу деңгээли | 1.0Vp_p 10KΩ |
| Өлчөм | 80 x 65 x 15 мм |
| Салмагы | 100г |
Жыштык тилкелери:
| Band | Жыштыктар (МГц) |
|---|---|
| FR1 (or "A") | 5865, 5845, 5825, 5805, 5785, 5765, 5745, 5725 |
| FR2 (or "B") | 5733, 5752, 5771, 5790, 5809, 5828, 5847, 5866 |
| FR3 (or "E") | 5705, 5685, 5665, 5645, 5885, 5905, 5925, 5945 |
| FR4 (or "F") | 5740, 5760, 5780, 5800, 5820, 5840, 5860, 5880 |
| FR5 (or "R") | 5658, 5695, 5732, 5769, 5806, 5843, 5880, 5917 |
5. Орнотуу
Follow these steps to set up your RD40 Diversity Receiver:
- Антенналарды тиркөө: Carefully screw the two included antennas onto the RP-SMA connectors on the top of the receiver. Ensure they are finger-tight.
- Туташуу кубаты: Connect the power cable to the "DC 7-24V" input port on the side of the receiver. Connect the other end to a compatible power source (e.g., a 7-24V DC battery or power adapter).
- Connect A/V Output: Use the provided AV cable to connect the receiver's "AV OUT1" or "AV OUT2" port to your display device (e.g., FPV goggles, monitor, or DVR). Ensure the yellow connector goes to video input, and white/red to audio inputs if applicable.

5.1-сүрөт: The side panel of the RD40 receiver, showing the AV output ports and the DC power input.

5.2-сүрөт: A connection diagram illustrating how to connect the RD40 receiver to a monitoring display and a battery power source.
6. Иштөө нускамалары
Once the receiver is powered on, the display will show the last used channel and frequency. Use the CH and FR buttons to adjust settings.
6.1. Channel Control (CH Button)
басыңыз CH button to cycle through the 8 available channels (1-8) within the currently selected frequency band. The channel number will be displayed on the CH-LED display. Both RX1 and RX2 receivers will switch channels simultaneously.
6.2. Frequency Band Control (FR Button)
басыңыз FR button to cycle through the 5 available frequency bands (1-5). The selected band number will be displayed on the FR-LED display. Both RX1 and RX2 receivers will switch frequency bands simultaneously.
Refer to the "Frequency Bands" table in the Specifications section for the exact frequencies corresponding to each band.
7. Техникалык тейлөө
To ensure the longevity and optimal performance of your RD40 Diversity Receiver, follow these maintenance guidelines:
- Тазалоо: Use a soft, dry cloth to wipe the exterior of the receiver. Do not use liquid cleaners or solvents, as they may damage the casing же ички компоненттер.
- Сактагыч: Store the receiver in a cool, dry place away from direct sunlight and extreme temperatures. When not in use for extended periods, disconnect it from the power source.
- Антеннага кам көрүү: Handle the antennas carefully. Avoid bending or stressing them excessively, as this can damage the connectors or internal wiring.
- Туташтыргыч текшерүү: Periodically inspect all cable connectors (power, AV, antenna) for signs of wear, corrosion, or damage. Ensure they are securely connected during use.
8. Кыйынчылыктарды
This section addresses common issues you might encounter with the RD40 Diversity Receiver.
| Көйгөй | Мүмкүн себеп | Чечим |
|---|---|---|
| No power/Receiver not turning on |
|
|
| Дисплейде видео сигнал жок |
|
|
| Poor video quality/Static |
|
|
9. Кепилдик жана колдоо
Кепилдик маалыматы же техникалык колдоо алуу үчүн өндүрүүчүгө же сатып алган жериңизге кайрылыңыз. Сатып алганыңыздын далили катары сатып алуу дүмүрчөгүңүздү сактаңыз.
Өндүрүүчү: Жалпы
Модель номери: ABLFY_DUD_20501