
Introduction
This manual provides detailed instructions for the installation, operation, and maintenance of your Alphacool Core Distro Plate 280 Right with VPP/D5 Apex PWM Pump. This product is designed to simplify custom water cooling loops in PC systems, offering both aesthetic and functional benefits. Please read this manual thoroughly before installation and operation to ensure proper function and safety.
Коопсуздук маалыматы
- Always disconnect power from your PC system before installing or performing maintenance on any components.
- Use only approved coolants for water cooling systems. Mixing incompatible coolants can lead to system damage.
- Ensure all fittings are securely tightened to prevent leaks. Perform a leak test before powering on the system.
- Avoid bending or kinking tubing excessively, as this can restrict flow and potentially cause leaks.
- Keep the product away from direct sunlight and high temperatures.
- Do not attempt to disassemble the pump or distro plate beyond what is described in this manual.
Пакеттин мазмуну
Төмөндө тизмеленген нерселердин баары пакетиңизде бар экенин текшериңиз:
- Alphacool Core Distro Plate 280 Right
- VPP/D5 Apex PWM Pump (pre-installed or separate, depending on model variant)
- Alphacool Core Push Mounting Kit
- G1/4" chrome-plated brass fittings (quantity as specified)
- Монтаждоо бурамалар жана аксессуарлар
Орнотуу жана орнотуу
1. Таңгактан чыгаруу жана текшерүү
Carefully remove all components from the packaging. Inspect the distro plate and pump for any visible damage. If any damage is found, do not proceed with installation and contact your retailer.
2. Mounting the Distro Plate
The Alphacool Core Distro Plate 280 is designed for flexible mounting using the included Alphacool Core Push Mounting Kit. Identify suitable mounting points within your PC case, typically radiator mounts or dedicated pump/reservoir mounts. Secure the distro plate using the provided screws and the push mounting kit, ensuring it is firmly attached and level.

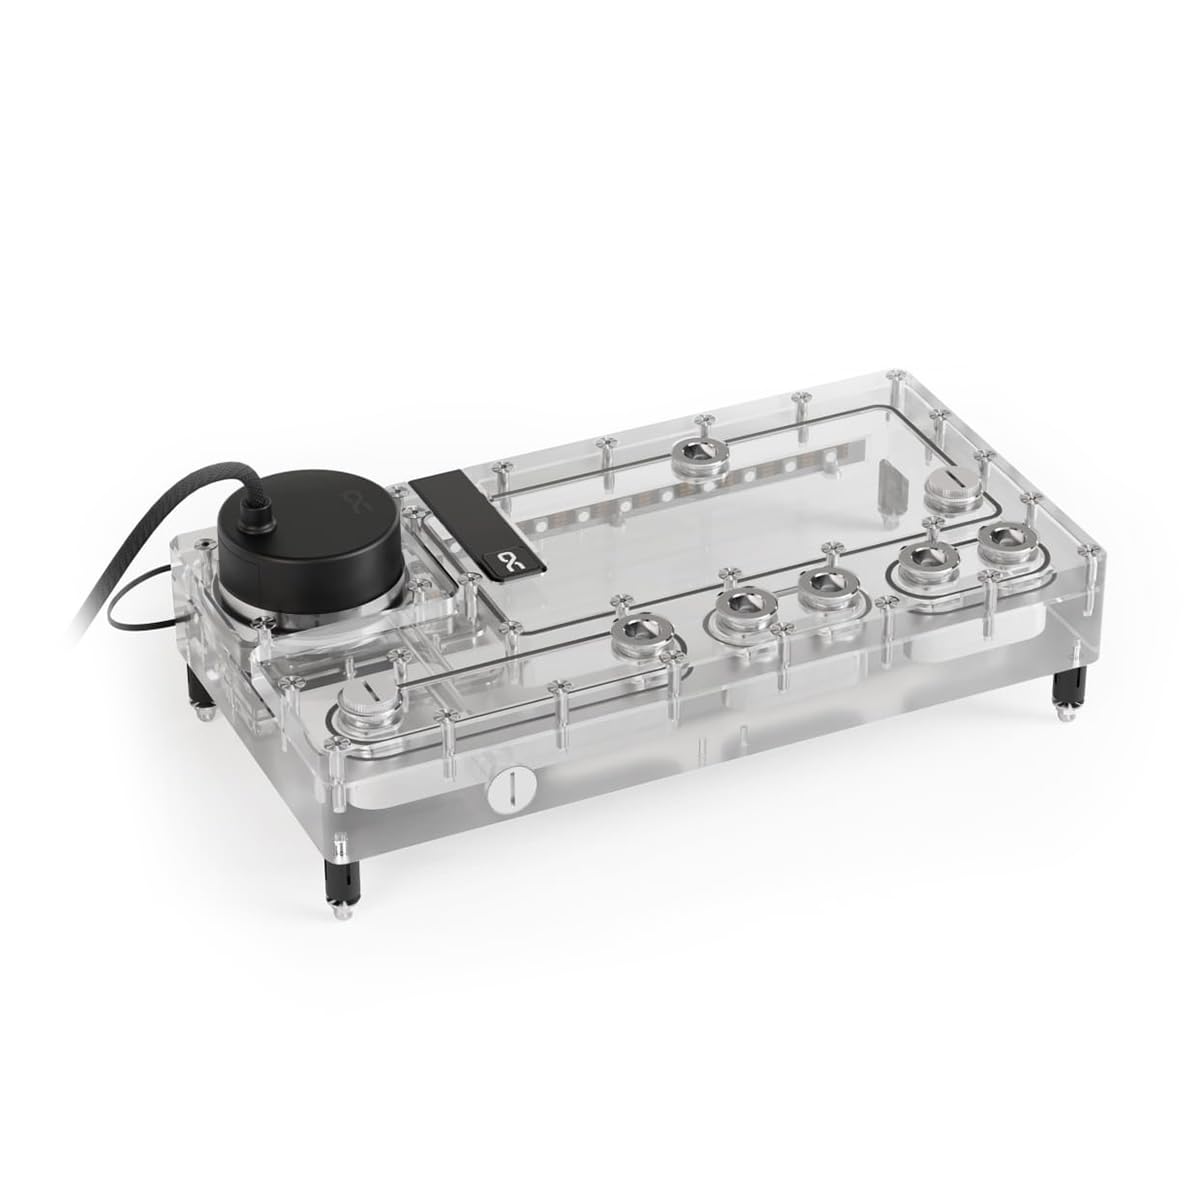
This image displays the underside and rear of the Alphacool Core Distro Plate 280, highlighting the transparent acrylic construction and the various mounting points for secure installation within a PC case. The internal fluid channels are also visible.
3. Насос орнотуу
If the VPP/D5 Apex PWM Pump is not pre-installed, carefully insert it into the designated pump housing on the distro plate. Ensure the O-ring is correctly seated to create a watertight seal. Secure the pump with the retaining ring or screws as per the pump's specific instructions.
4. Connecting Fittings
Install the G1/4" brass fittings into the desired ports on the distro plate. Ensure that each fitting has its O-ring properly seated before tightening. Hand-tighten fittings initially, then use a fitting wrench to gently snug them, being careful not to overtighten and damage the acrylic. Plan your tubing runs to ensure optimal flow and aesthetics.
5. aRGB Lighting Connection
The distro plate features integrated aRGB lighting. Connect the 3-pin JST + 3-pin 5V power connection to a compatible digital aRGB header on your motherboard or an external aRGB controller (e.g., Alphacool Aurora Eiscontrol). Ensure correct pin orientation to prevent damage.
This image illustrates the Alphacool Core Distro Plate 280 with its integrated aRGB lighting system activated. The lighting transitions from purple to blue, showcasing the aesthetic capabilities of the distro plate when illuminated.
6. Filling the Water Cooling Loop
After all components are installed and tubing is connected, fill the loop with your chosen coolant through the designated fill port. Use a funnel to minimize spills. Once filled, perform a leak test for at least 24 hours with the pump running but the rest of the system powered off. Monitor for any drips or moisture before powering on your PC.
Иштөө нускамалары
1. Баштапкы ишке киргизүү
After a successful leak test, power on your PC. The VPP/D5 Apex PWM pump will start circulating coolant. Monitor the system for any unusual noises or signs of air bubbles. Allow the system to run for a period to ensure all air is purged from the loop. You may need to tilt your PC gently to help release trapped air.
2. aRGB Lighting Control
Control the integrated aRGB lighting using your motherboard's software (if connected to a motherboard header) or your external aRGB controller's interface. Refer to your motherboard or controller manual for specific instructions on customizing lighting effects and colors.
Техникалык тейлөө
1. Тазалоо
Periodically inspect the distro plate and tubing for any signs of coolant discoloration or particle buildup. External surfaces can be cleaned with a soft, damp кездеме. Абразивдүү тазалагычтардан алыс болуңуз.
2. Coolant Replacement
It is recommended to replace the coolant every 6-12 months, depending on the coolant type and system usage. To replace, drain the old coolant from the designated drain port, flush the system with distilled water if necessary, and then refill with fresh coolant as described in the 'Filling the Water Cooling Loop' section.
Проблемаларды чечүү
- No Power to Pump: Check all power connections to the pump and ensure the PWM cable is correctly connected to the motherboard or controller. Verify power supply functionality.
- Leaks Detected: Immediately power off the system. Identify the source of the leak. Tighten fittings, inspect O-rings, and replace any damaged components or tubing. Re-perform a leak test.
- Poor Flow/High Temperatures: Check for kinks in tubing, blockages in components, or insufficient coolant level. Ensure the pump is running at an adequate speed.
- aRGB Lighting Not Working: Verify the 3-pin JST + 3-pin 5V connection is secure and correctly oriented. Check your motherboard or controller software settings. Ensure the aRGB header on your motherboard is enabled in BIOS/UEFI.
- Насостун адаттан тыш үндөрү: This may indicate air trapped in the pump or a foreign object. Gently tilt the system to help dislodge air. If the noise persists, consider draining and refilling the loop.
Техникалык мүнөздөмөлөр
| Өзгөчөлүк | Спецификация |
|---|---|
| Өлчөмдөрү (L x W x Y) | 280.00 x 145.00 x 42.00 мм |
| Dimensions (L x W x H) with pump | 280.00 x 145.00 x 61.00 мм |
| Материал | Акрил |
| Көлөм | 360мл |
| Насостун шайкештиги | D5/VPP |
| Байланыштар | 8x G1/4" internal thread / 1x drain port |
| Maximum жумушчу Температура | 60°C |
| Pressure Tested | 0.8 бар |
| Number of Digital aRGB LEDs | 12 |
| Тtage Digital aRGB LEDs | 5V |
| Power Connection Digital aRGB LEDs | 3-pin JST + 3-pin 5V |
| Элемент моделинин номери | 14574 |
Кепилдик жана колдоо
Alphacool products are manufactured to high-quality standards. For warranty information and technical support, please refer to the official Alphacool webсайтка же сатуучуга кайрылыңыз. Кепилдик дооматтар үчүн сатып алганыңыздын далилин сактаңыз.