
1. Киришүү
Welcome to your new Geevon Small Travel Alarm Clock. This compact and versatile digital alarm clock is designed to provide accurate timekeeping, dual alarms, indoor temperature display, and a convenient backlight function. Its portable design makes it ideal for various settings, including bedrooms, home offices, and travel.

Сүрөт 1.1: Бүттүview of the Geevon Small Travel Alarm Clock, highlighting its compact size and key features such as dual alarm, locking function, snooze, backlight, battery power, 12/24 hour display, temperature, and calendar.
2. Орнотуу
2.1 Батареяны орнотуу
The Geevon Small Travel Alarm Clock requires two (2) AAA batteries for operation. Batteries are not included with the product.
- Сааттын артындагы батарея отсегин табыңыз.
- Open the battery cover by sliding it down or lifting the latch.
- Эки (2) AAA батарейкасын салыңыз, полярдуулуктун тууралыгын (+ жана - терминалдары бөлүмдүн ичиндеги белгилер менен дал келгенин текшериңиз).
- Батареянын капкагын бекем жабыңыз.

Image 2.1: The back of the alarm clock with the battery compartment open, illustrating where to insert the two AAA batteries.
2.2 Алгачкы убакытты жана датаны орнотуу
After installing batteries, set the current time and date.
- басып, кармап туруңуз SET button (located on the top of the clock) for approximately 3 seconds to enter time setting mode. The hour digit will begin to flash.
- колдонуу UP (^) or ылдый (v) buttons (on the back) to adjust the hour.
- Кыскача басыңыз SET again to confirm the hour and move to minute setting. Adjust minutes using UP (^) or ылдый (v).
- Continue briefly pressing SET to cycle through and set the year, month, and day, adjusting each value with the UP (^) or ылдый (v) buttons.
- Басыңыз SET one last time to exit the setting mode and save your changes.
Video 2.1: Demonstration of setting the time and alarm on the Geevon Small Travel Alarm Clock. This video shows the button locations and the step-by-step process for adjusting time, minutes, and alarm settings.
3. Иштөө нускамалары
3.1 12/24 саат форматы
12 сааттык (AM/PM) жана 24 сааттык форматтардын ортосунда которулуу үчүн:
- In normal time display mode, briefly press the UP (^) button. The display will toggle between the two formats.

Image 3.1: The clock display showing both 12-hour (AM/PM) and 24-hour time formats, illustrating the clear digital readout.
3.2 Температура дисплейи
The clock displays the indoor temperature. To switch between Celsius (°C) and Fahrenheit (°F):
- In normal time display mode, briefly press the ° C / ° F button (located on the back of the clock).

Image 3.2: The clock display showing the indoor temperature in both Fahrenheit and Celsius, demonstrating the temperature conversion feature.
3.3 Ойготкучтарды орнотуу (ойготкуч 1 & Ойготкуч 2)
The clock features two independent alarms (Alarm 1 and Alarm 2) that can be set for different times or days.
- To set Alarm 1: Press and hold the Ойготкуч 1 button (bell icon) on the back for approximately 3 seconds. The hour digit for Alarm 1 will flash.
- колдонуу UP (^) or ылдый (v) buttons to adjust the desired alarm hour.
- Кыскача басыңыз Ойготкуч 1 again to confirm the hour and move to minute setting. Adjust minutes using UP (^) or ылдый (v).
- Кыскача басыңыз Ойготкуч 1 again to select the alarm repetition mode:
- 1-5: Alarm sounds Monday to Friday.
- 6-7: Alarm sounds Saturday and Sunday.
- 1-7: Ойготкуч күн сайын чырылдайт.
- Кыскача басыңыз Ойготкуч 1 one last time to confirm your settings and exit.
- Repeat the entire process for Alarm 2 using the Ойготкуч 2 баскычы.
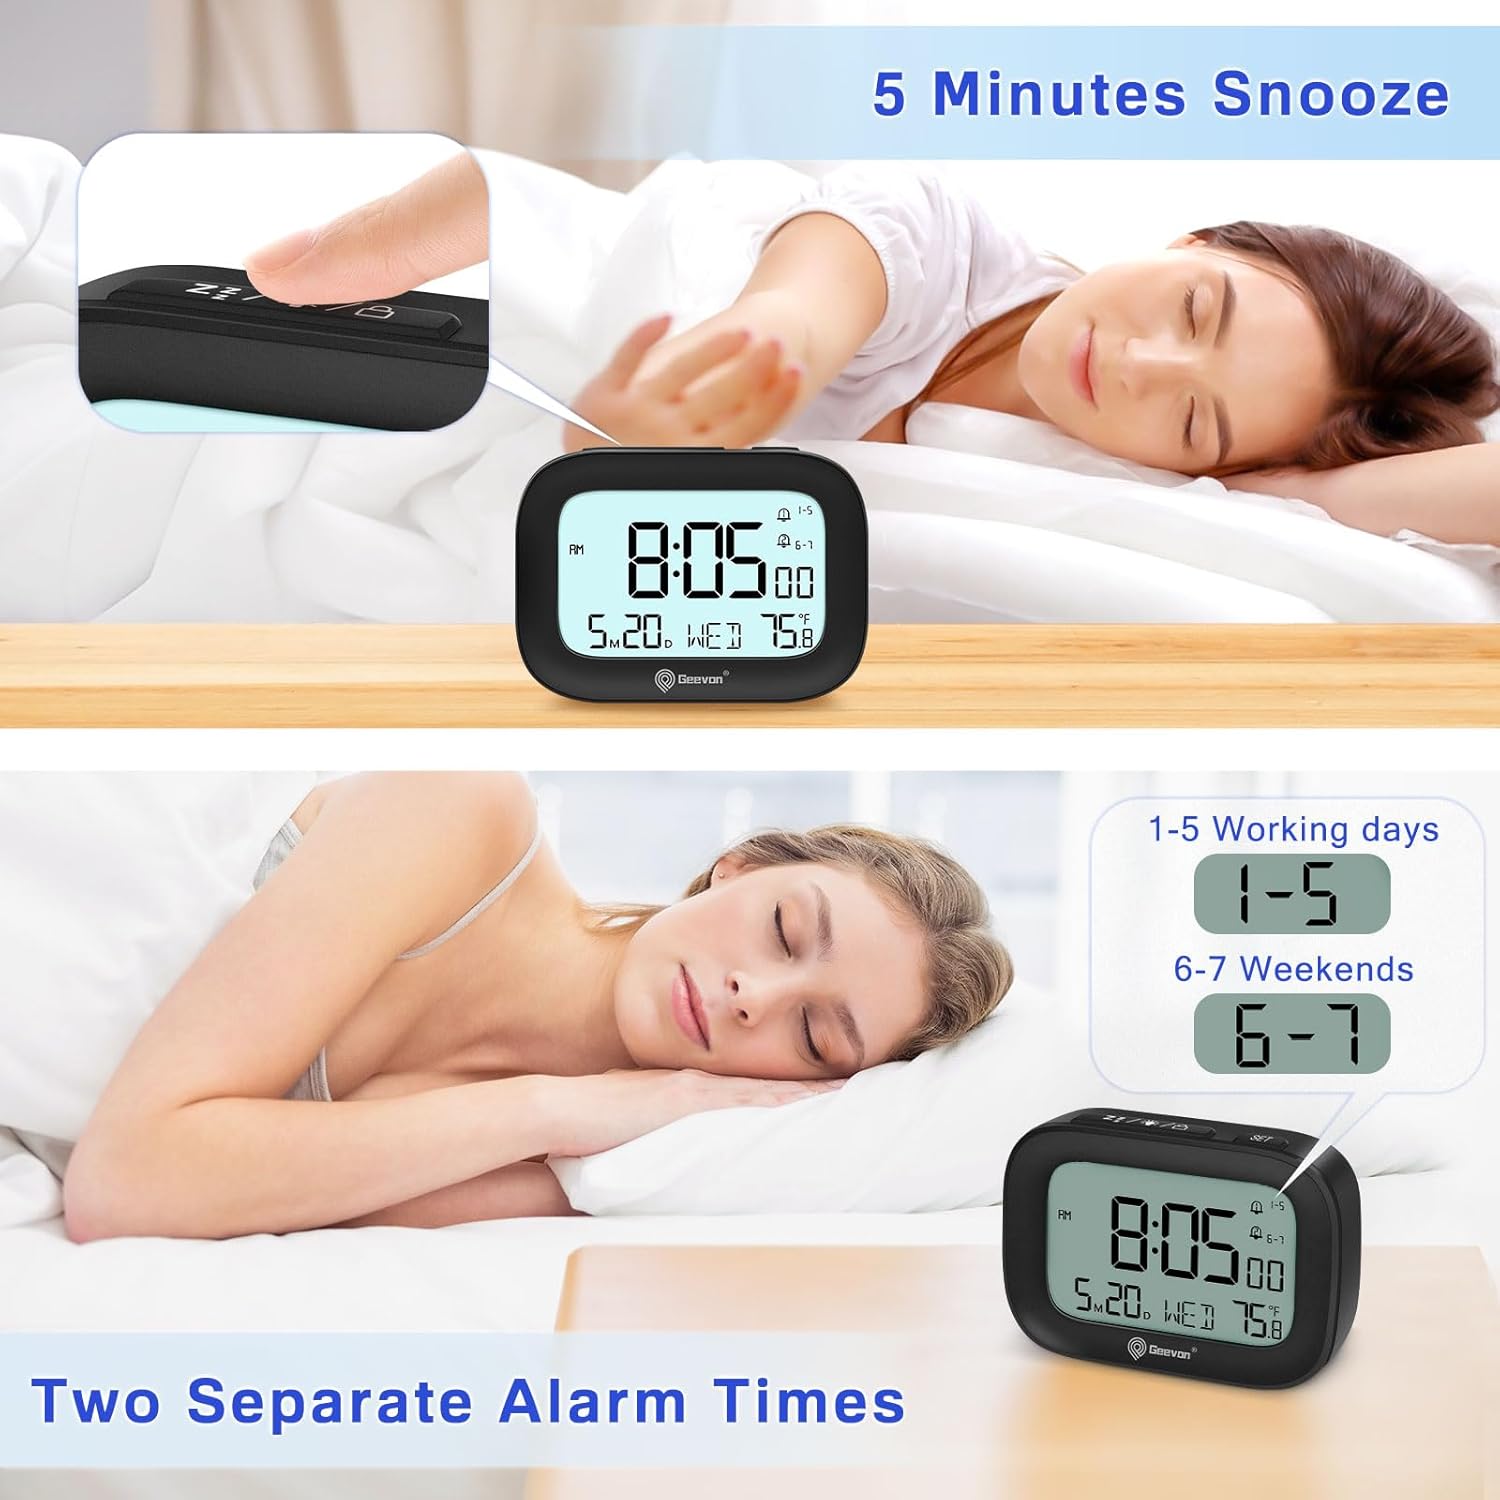
Image 3.3: The clock display illustrating the setup for two separate alarm times, indicating the flexibility for weekday and weekend alarms.
3.4 Сигнализацияларды иштетүү/өчүрүү
Ойготкучту күйгүзүү же өчүрүү үчүн:
- In normal time display mode, briefly press the Ойготкуч 1 or Ойготкуч 2 баскычы.
- An alarm icon will appear on the display when the respective alarm is active. The icon will disappear when the alarm is deactivated.
3.5 Тындыруу функциясы
Ойготкуч кагылганда:
- басыңыз LIGHT / SNOOZE button (top of the clock) to activate the snooze function. The alarm will pause for 5 minutes and then sound again.
- The alarm sound is designed to gradually increase in volume over 2 minutes to ensure a gentle waking experience.
3.6 Жарыктын иштеши
To illuminate the display:
- басыңыз LIGHT / SNOOZE button. The backlight will illuminate for 5 seconds.
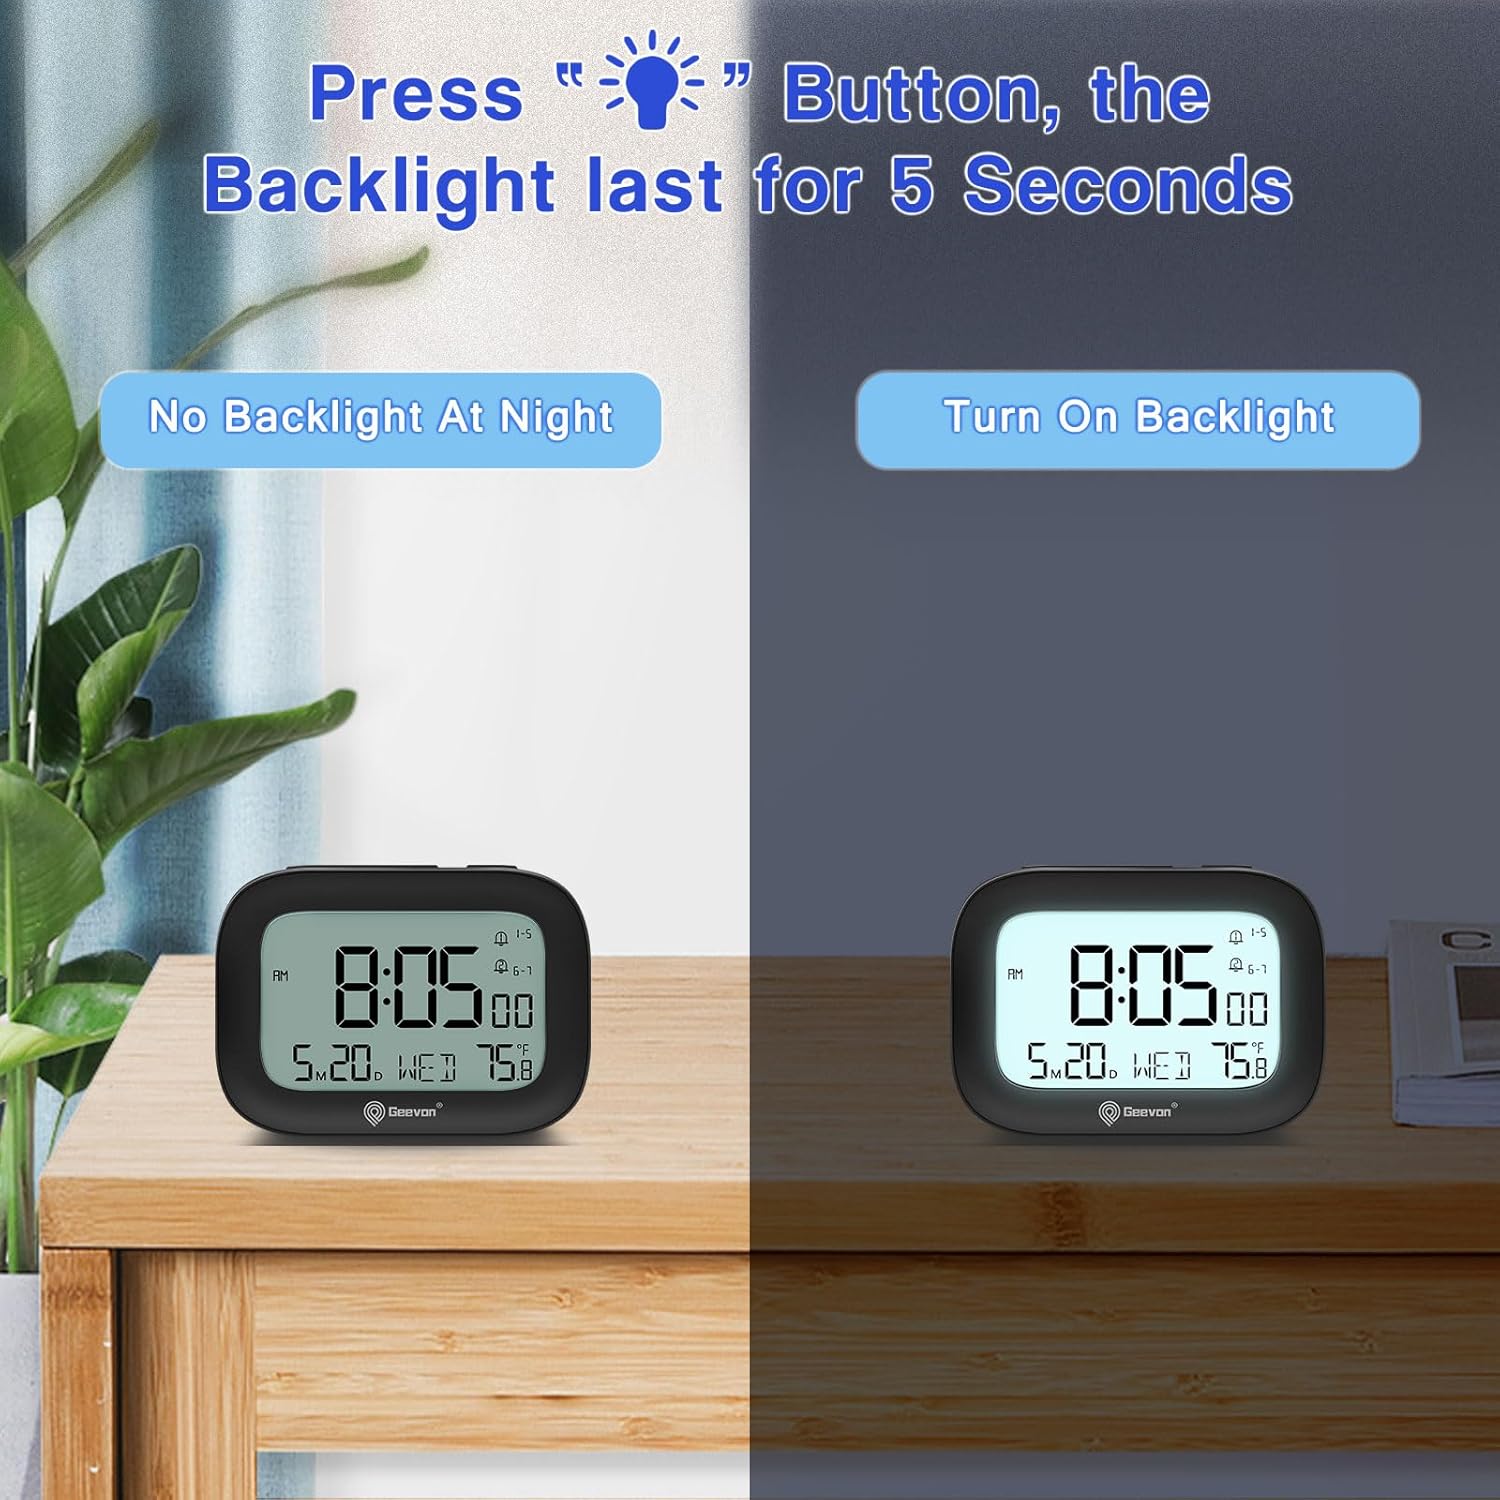
Image 3.4: The clock display with and without the 5-second backlight activated, demonstrating its visibility in low-light conditions.
3.7 Кулпу функциясы
To prevent accidental changes to settings or alarms, use the lock function:
- Кулпулоо үчүн: баскычын басып кармап туруңуз LIGHT/SNOOZE/LOCK button for approximately 3 seconds until a lock icon appears on the display.
- To unlock: Press and hold the same button for approximately 3 seconds until the lock icon disappears.

Image 3.5: The clock being placed into a bag, illustrating the convenience of the lock function to prevent accidental button presses during travel.
4. Техникалык тейлөө
4.1 Тазалоо
To clean your Geevon Small Travel Alarm Clock:
- Саатты жумшак, кургак чүпүрөк менен сүртүңүз.
- Do not use abrasive cleaners, chemical solvents, or spray directly onto the clock, as these may damage the surface or internal components.
4.2 Батареяны алмаштыруу
Replace batteries when the display dims, becomes erratic, or functions become unreliable.
- Follow the steps in Section 2.1 Battery Installation.
- Always replace both AAA batteries simultaneously to ensure optimal performance.
5. Кыйынчылыктарды
| Көйгөй | Мүмкүн себеп | Чечим |
|---|---|---|
| Display is blank or very dim. | Батареялар өлүп калган же туура эмес орнотулган. | Батарея орнотулгандыгын текшериңиз жана жаңы AAA батарейкалары менен алмаштырыңыз. |
| Ойготкуч угулбайт. | Alarm is not set or activated; low battery. | Verify the alarm is set correctly and activated (alarm icon visible on display). Replace batteries if low. |
| Убакыт туура эмес. | Time was not set properly or batteries were removed. | 2.2-бөлүмдөгү көрсөтмөлөргө ылайык убакытты жана күндү кайра коюңуз. |
| Баскычтар жооп бербейт. | Кулпу функциясы иштеп жатат. | Deactivate the lock function by pressing and holding the LIGHT/SNOOZE/LOCK button for 3 seconds. |
6. Техникалык шарттар
- Модел: 250509-Б
- Өлчөмдөрү: 3.5" (W) x 2.36" (H)
- Салмагы: 0.26 фунт
- Кубат булагы: 2 x AAA Батареялар (киргизилген эмес)
- Дисплей: 3-inch LCD Digital Display
- Өзгөчөлүктөрү: Dual Alarms, Snooze, 5-second Backlight, Indoor Temperature Display, 12/24 Hour Format, Date, Day of Week, Lock Function, Silent Operation
- Материалдар: Acrylonitrile Butadiene Styrene (ABS), LCD, Plastic

Сүрөт 6.1: Ар кандай views of the Geevon Small Travel Alarm Clock, including front, top, side, and back, showcasing анын компакттуу дизайны жана баскычтардын жайгашуусу.
7. Кепилдик жана колдоо
7.1 Кепилдик
This Geevon Small Travel Alarm Clock comes with a 12-month warranty from the date of purchase, covering manufacturing defects and malfunctions under normal use.
7.2 Колдоо
For technical assistance, troubleshooting, or warranty claims, please contact Geevon customer support through the retailer's platform where you purchased the product or visit the official Geevon webбайланыш маалыматы үчүн сайт.