Introduction
Welcome to the instruction manual for your new Generic Refrigerator Icemaker Replacement. This manual provides essential information for the safe and efficient installation, operation, and maintenance of your icemaker. Please read these instructions carefully before proceeding with installation or use.
This icemaker replacement is compatible with a wide range of refrigerator models, including various Amana, Crosley, Ikea, KitchenAid, Roper, and Inglis units. Specific compatible models include, but are not limited to: Amana ASD2522WES01, ASD2522WEW00, ASD2522WEW01, ASD2522WRD01, ASD2522WRD02, ASD2522WRD03, ASD2522WRD04, ASD2522WRS02, ASD2522WRS03, ASD2522WRS07, ASD2522WRW01, ASD2522WRW02; Crosley CS22CFXTQ00, CS22CFXTQ01, CS22CFXTQ02; KitchenAid KSRD22FKST17, KSRD22FKST18, KSRD22FKST19; Roper RS22AGXTQ00; and Ikea ID5HHEXTQ00. Always verify compatibility with your specific refrigerator model before installation.
Маанилүү коопсуздук нускамалары
To reduce the risk of fire, electric shock, or injury, follow these basic precautions:
- Always disconnect power to the refrigerator before attempting any installation, repair, or maintenance.
- Травмалардын алдын алуу үчүн кол кап сыяктуу тиешелүү жеке коргоочу шаймандарды кийиңиз.
- Ensure the water supply valve to the refrigerator is turned off before beginning work.
- Эгер кандайдыр бир кадамды так билбесеңиз, квалификациялуу техника боюнча адиске кайрылыңыз.
- Keep all parts and tools away from children.
Орнотуу: Орнотуу колдонмосу
This section outlines the general steps for replacing your refrigerator's icemaker. Specific procedures may vary slightly depending on your refrigerator model.
- Орнотууга даярданыңыз: Disconnect the refrigerator from its power source and turn off the water supply valve. Remove any existing ice from the ice bucket.
- Locate and Remove Old Icemaker: Open the freezer door and locate the existing icemaker. It is typically mounted on the side wall of the freezer compartment. Carefully remove any screws securing the icemaker. Disconnect the electrical wiring harness by gently squeezing the tab and pulling it apart.
- Inspect and Transfer Components (if necessary): Compare your new icemaker with the old one. Some models may require transferring a mounting bracket or other small components from the old unit to the new one.
- Install New Icemaker: Position the new icemaker in the freezer compartment. Align it with the mounting holes.
- Secure the Icemaker: Use the appropriate screws to firmly attach the new icemaker to the freezer wall. Ensure it is level and securely in place.
- Зымдарды туташтыруу: Reconnect the electrical wiring harness to the new icemaker. Ensure the connection is secure and fully seated.
- Электр энергиясын жана сууну калыбына келтирүү: Turn the water supply valve back on. Plug the refrigerator back into the power outlet.
- Сыноо операциясы: The icemaker will typically begin its first cycle within a few hours. Discard the first few batches of ice to ensure the water lines are clear and the ice is fresh.
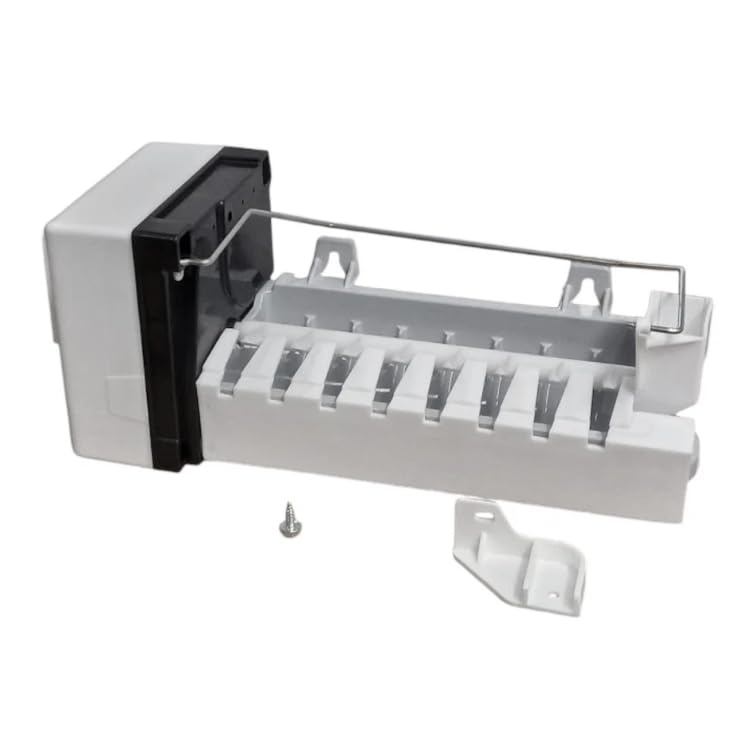
Image: The complete icemaker replacement unit, ready for installation.
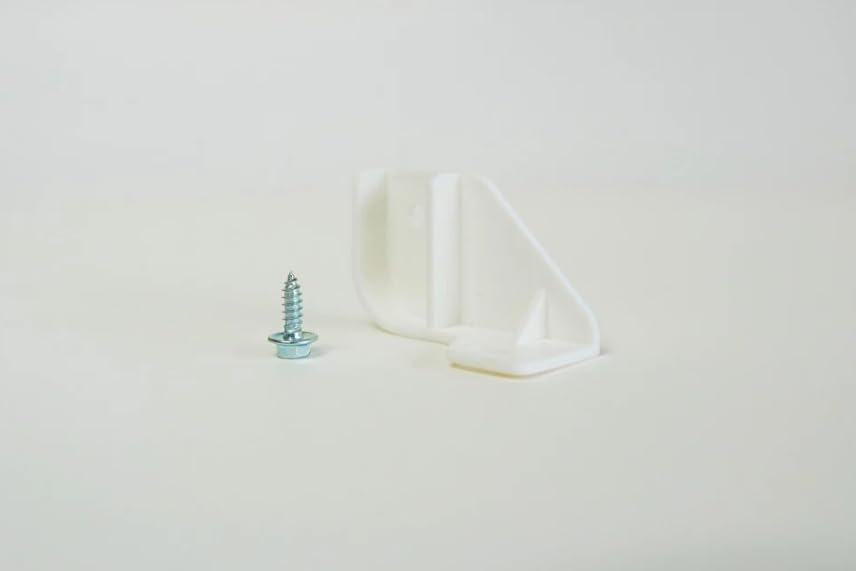
Сүрөт: Мисample of a mounting screw and bracket used to secure the icemaker.
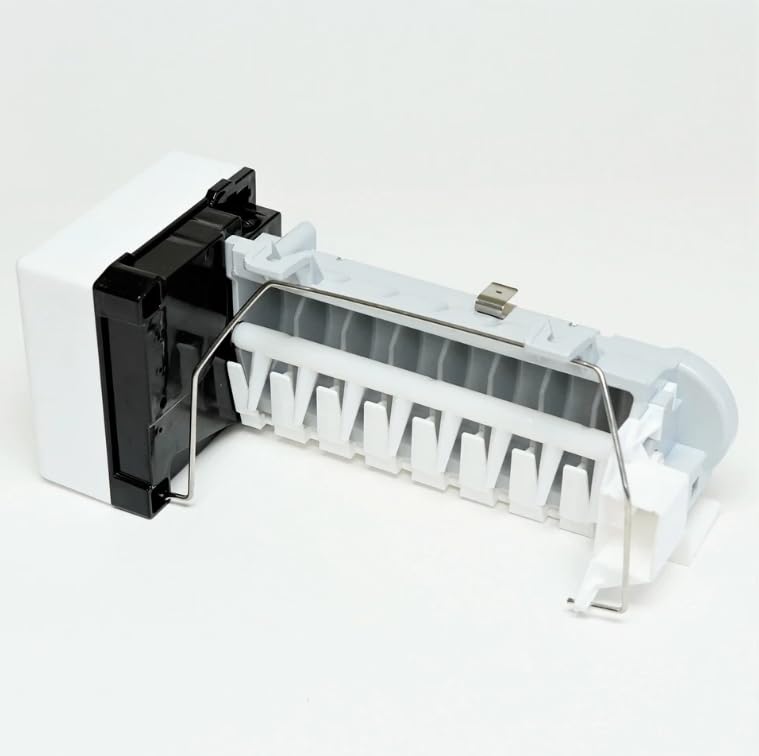
Сүрөт: бурчтуу view of the icemaker, highlighting the ice mold and the wire shut-off arm.
Operating Your New Icemaker
Once installed and connected, your icemaker will automatically begin producing ice. The icemaker features a wire shut-off arm that controls ice production:
- When the ice bucket is full, the wire arm will be pushed up by the ice, stopping ice production.
- As ice is used and the level drops, the arm will lower, signaling the icemaker to resume production.
- To manually stop ice production, lift the wire arm to its highest position.
Кароо жана тейлөө
Regular maintenance helps ensure optimal performance and longevity of your icemaker:
- Тазалоо: Periodically remove the ice bucket and wash it with mild soap and warm water. Rinse thoroughly and dry completely before returning it to the freezer.
- Суу чыпкасы: If your refrigerator has a water filter, ensure it is replaced according to the manufacturer's recommendations to maintain water quality and prevent mineral buildup in the icemaker.
- Water Line Inspection: Суу түтүгүнүн ийилген жерлерин, агып кетүүлөрүн же бузулууларын мезгил-мезгили менен текшерип туруңуз.
- Icemaker Mechanism: Avoid using sharp objects to break up ice in the bucket, as this can damage the icemaker or bucket.
Жалпы көйгөйлөрдү чечүү
Refer to the table below for solutions to common icemaker problems:
| Көйгөй | Мүмкүн себеп | Чечим |
|---|---|---|
| муз өндүрүү жок | Refrigerator not plugged in; water supply off; icemaker arm in 'off' position; clogged water filter; faulty water inlet valve. | Check power connection; turn on water supply; lower icemaker arm; replace water filter; inspect water inlet valve for clogs or damage. |
| Чакан же көңдөй муз кубиктери | Low water pressure; partially clogged water filter; kinked water line. | Check household water pressure; replace water filter; straighten water line. |
| Icemaker is noisy | Normal operation sounds; loose mounting; foreign object in ice bucket. | Some operational sounds are normal. Ensure icemaker is securely mounted. Remove any foreign objects from the ice bucket. |
| Муздун даамы жаман | Old ice; dirty ice bucket; old water filter; food odors in freezer. | Discard old ice; clean ice bucket; replace water filter; store odorous foods in airtight containers. |
Продукт спецификациялары
| Өзгөчөлүк | Деталь |
|---|---|
| Бренд | Жалпы |
| Модель аты | Ice Maker |
| Элемент моделинин номери | ASD2522WRD03 |
| Продукциянын өлчөмдөрү | 1"D x 1"W x 1"H (болжолдуу) |
| Кубаттуулугу | 1 Cubic Feet (Approximate) |
| Тtage | 1V (Please refer to your refrigerator's specifications for actual operating voltage) |
Кепилдик жана Кардарларды колдоо
Information regarding specific warranty coverage for this Generic Refrigerator Icemaker Replacement is not provided within this manual. For details on warranty terms or to obtain customer support, please refer to the product listing where you purchased this item or contact the retailer directly. Ensure you have your purchase receipt and product model number available when seeking support.


