1. Киришүү
This manual provides detailed instructions for the installation, operation, and maintenance of the GEPRC GEP-F722-35A AIO (All-In-One) Flight Controller. This advanced flight controller integrates an F722 MCU with a 35A 4-in-1 BLHeli_S ESC, making it an ideal solution for compact FPV freestyle and cinewhoop drone builds. Please read this manual thoroughly before use to ensure proper setup and safe operation.
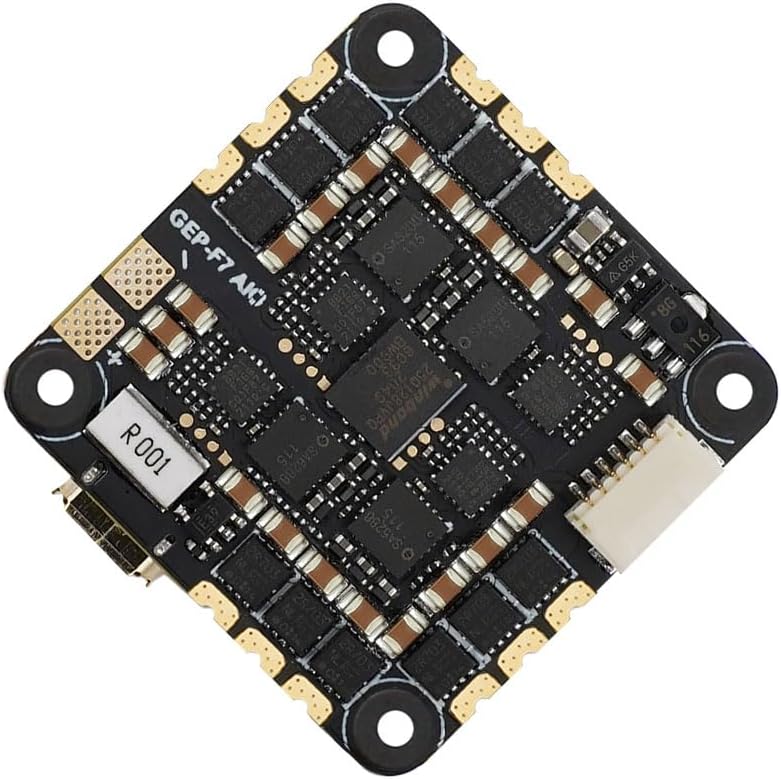
1.1-сүрөт: Жогорку view of the GEPRC GEP-F722-35A AIO Flight Controller, showcasing its compact design and component layout.
2. Негизги өзгөчөлүктөрү
- High-Performance MCU: Equipped with an STM32F722 microcontroller for robust performance and high computing speed.
- Multiple UART Ports: Features 5 full UART ports, allowing connection of various external devices such as GPS, VTX, and receivers.
- DJI Air Unit Compatibility: Includes a dedicated 6-pin connector for direct plug-and-play integration with DJI Air Unit modules.
- Integrated 35A ESC: The BLHeli_S 35A 4-in-1 ESC supports 35A continuous current (40A burst) and 2-6S LiPo batteries, providing strong flight performance.
- OSD колдоо: Supports OSD (On-Screen Display) parameter adjustment for real-time flight data.
- Кошумча функциялар: Includes support for buzzer and LED functions.
- Компакт дизайн: Designed with a 25.5x25.5mm mounting pattern, suitable for various drone frames.
3. Орнотуу жана орнотуу
3.1 Пакеттин мазмуну
Орнотууну баштоодон мурун, пакетте бардык компоненттер бар экенин текшериңиз:

Figure 3.1: The flight controller and its accompanying accessories, including wires, capacitor, and vibration dampэнергетиктер.
3.2 Өлчөмдөрү жана монтаждоо
The GEP-F722-35A AIO Flight Controller features a 25.5x25.5mm mounting pattern. Ensure your drone frame is compatible with these dimensions.

Figure 3.2: Detailed dimensions of the flight controller, showing its compact size and mounting hole spacing.
3.3 Электр кошуу схемасы (жалпы)
Connect the flight controller to your drone's components according to the following general guidelines. Refer to the specific pinout diagram provided by GEPRC for precise connections.
- Моторлор: Solder motor wires to the designated motor pads (M1-M4) on the ESC section of the board.
- Кубат киргизүү: Connect the main battery lead (2-6S LiPo) to the VBAT and GND pads. It is recommended to solder the included low ESR capacitor across the main battery pads for cleaner power.
- Алуучу: Connect your receiver (e.g., SBUS, Crossfire, ELRS) to one of the available UARTs (e.g., RX1/TX1).
- VTX/Camera: Connect your video transmitter (VTX) and FPV camera to the appropriate video in/out and power pads. For DJI Air Unit, use the dedicated 6-pin connector.
- GPS/Other Peripherals: Utilize remaining UARTs for GPS, external compass, or other accessories.

3.3-сүрөт: Мисample setup showing the flight controller connected to an FPV camera and a DJI Air Unit, demonstrating the plug-and-play compatibility.
3.4 Firmware Flashing
The flight controller comes pre-flashed with Betaflight firmware. For updates or configuration, connect the board to your computer via the USB-C port and use the Betaflight Configurator software. Ensure you select the correct target for the F722 MCU (e.g., GEPRCF722_AIO).
4. Иштөө нускамалары
4.1 Betaflight конфигурациясы
After physical installation, configure the flight controller using Betaflight Configurator:
- Порттор өтмөгү: Enable Serial RX on the UART connected to your receiver. Configure other UARTs for VTX (SmartAudio/TrampHV), GPS, etc.
- Конфигурация өтмөгү: Select your receiver protocol (e.g., SBUS, CRSF), enable DSHOT for ESC protocol, and set up other features like OSD, Air Mode, etc.
- Motors Tab: Test motor direction and ensure they spin correctly. If not, reverse motor direction in BLHeliSuite32 or Betaflight.
- PIDди жөндөө: Adjust PID values as needed for optimal flight performance.
- OSD: Customize the On-Screen Display to show desired flight information (voltage, current, flight time, etc.).
4.2 Куралдануу жана куралсыздандыруу
Ensure your radio transmitter is properly bound and calibrated. Set up an arming switch in Betaflight Modes tab. Always arm your drone in a safe, open area, clear of people and obstacles.
5. Техникалык тейлөө
Regular maintenance ensures the longevity and reliability of your flight controller:
- Визуалдык текшерүү: Periodically inspect the board for any signs of damage, loose solder joints, or burnt components.
- Тазалоо: Gently clean the board with isopropyl alcohol and a soft brush to remove dust, dirt, or flux residue. Ensure the board is completely dry before powering on.
- Программалык камсыздоонун жаңыртуулары: Keep the flight controller firmware updated to the latest stable version of Betaflight for performance improvements and bug fixes.
- Вибрацияны башкаруу: Ensure the flight controller is properly soft-mounted to minimize vibrations, which can affect flight performance and component lifespan.
6. Кыйынчылыктарды
Көйгөйгө туш болсоңуз, төмөнкү жалпы көйгөйлөрдү чечүү кадамдарын караңыз:
- Кубат жок/Светодиоддор өчүк:
- Батареянын туташуусун жана полярдуулугун текшериңиз.
- Inspect for short circuits on the board or connected components.
- Моторлор айланбай жатат:
- Verify motor connections to the ESC pads.
- Check ESC calibration and firmware.
- Ensure the flight controller is armed and throttle is above minimum.
- Check motor direction in Betaflight Configurator.
- No Receiver Input:
- Confirm receiver is properly bound to the transmitter.
- Verify receiver wiring to the correct UART RX pad.
- Check UART configuration in Betaflight Ports tab.
- Ensure correct receiver protocol is selected in Betaflight Configuration tab.
- Учуунун туруксуздугу:
- Check for excessive vibrations; ensure soft-mounting is effective.
- Review PID tuning settings.
- Ensure propellers are undamaged and balanced.
7. Техникалык шарттар
| Компонент | Спецификация |
|---|---|
| MCU | STM32F722 |
| ӨИК | BMI270 |
| ESC микропрограммасы | BLHeli_S |
| Үзгүлтүксүз ток | 35A |
| Жарылуу агымы | 40A |
| Киргизүү көлөмүtage | 2-6S LiPo |
| UARTs | 5 Full UARTs |
| Монтаж үлгүсү | 25.5мм x 25.5мм |
| Connector for DJI Air Unit | 6-pin (Plug and Play) |
| Салмагы | Болжол менен 8.8 г |

Figure 7.1: The flight controller being weighed on a digital scale, indicating its light weight of approximately 8.8 grams.
8. Кепилдик жана колдоо
This product is covered by the standard warranty provided by the manufacturer, Generic. Please retain your proof of purchase for warranty claims. For technical support, troubleshooting assistance, or warranty inquiries, please contact the seller or the manufacturer directly through their official support channels.
For the latest firmware, documentation, and community support, refer to the official GEPRC website or relevant FPV forums.


