
1. Продукт бүтүп калдыview
The GEPRC Cinelog30 V3 O4 Air Unit Pro is a high-performance FPV drone designed for professional-grade aerial videography and dynamic flight. It features an O4 Pro Air Unit for ultra-sharp 4K/120fps footage, an aluminum-reinforced frame for durability, and a TAKER F722 45A AIO flight system for responsive handling.
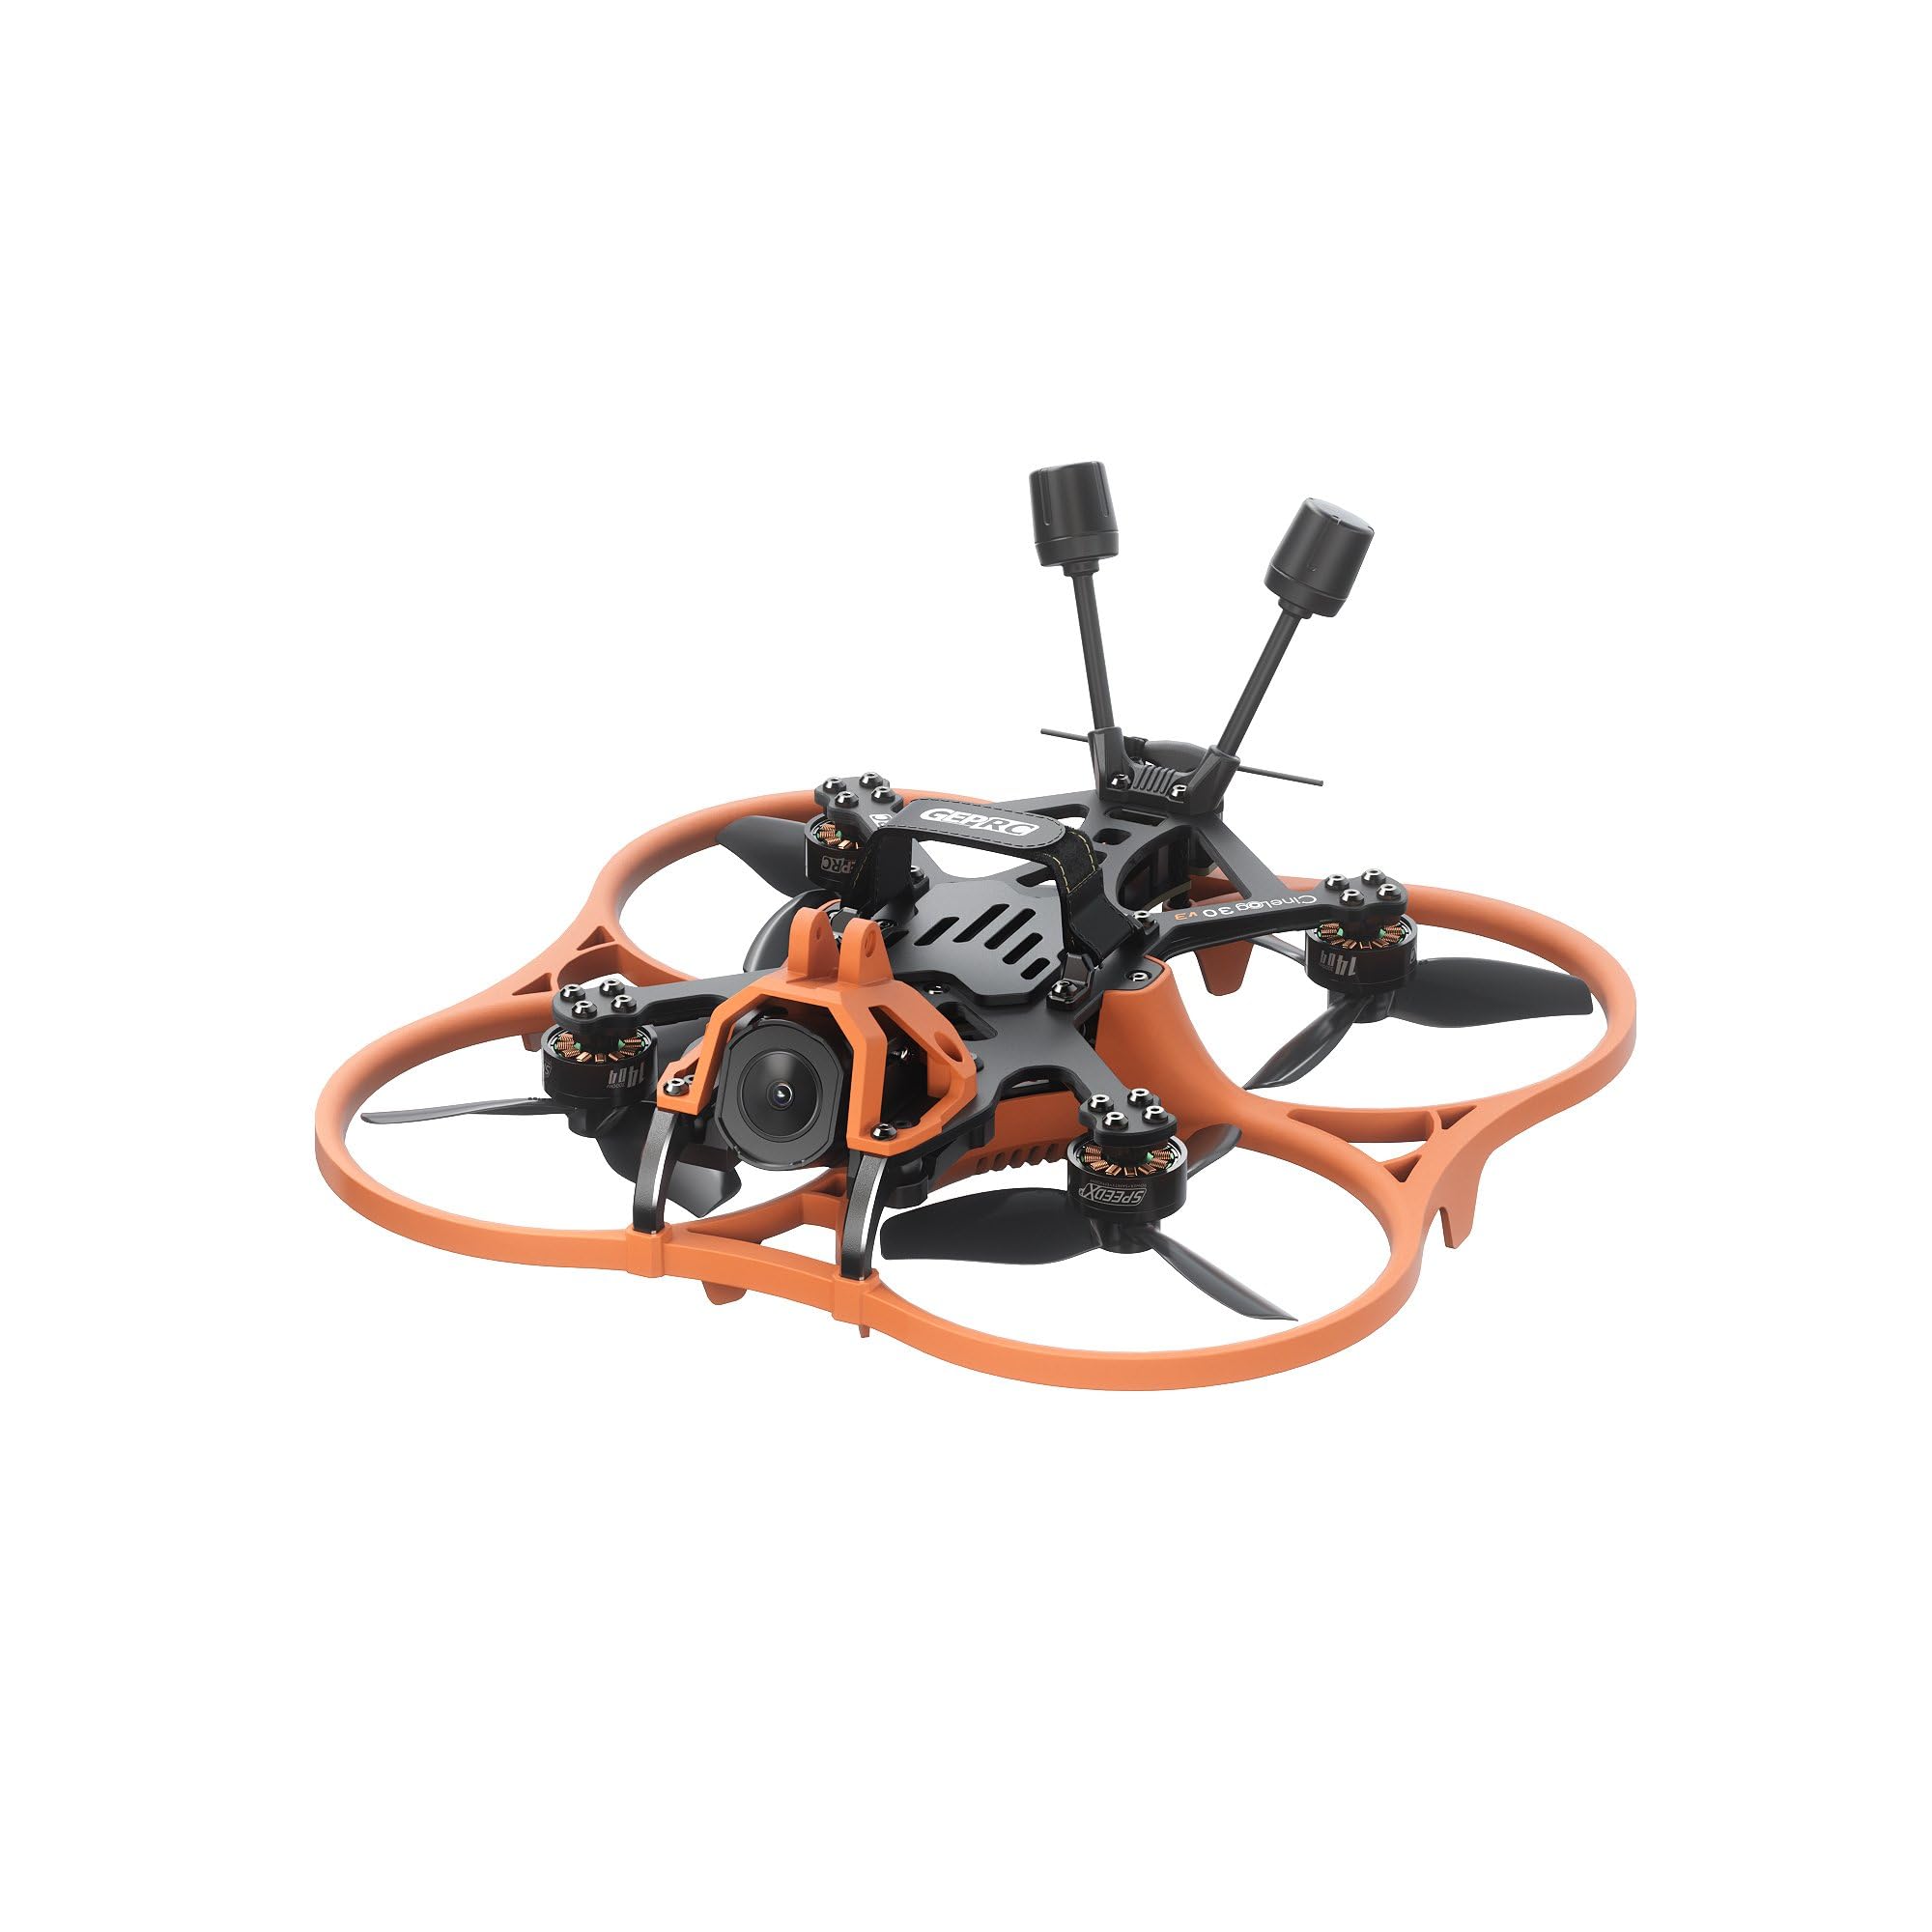
Сүрөт 1: жогорудан ылдыйга view of the GEPRC Cinelog30 V3 O4 Air Unit Pro FPV Drone, showcasing its orange protective frame and black carbon fiber components.
2. Камтылган компоненттер
Сиздин пакетте төмөнкү компоненттердин бардыгы камтылганын текшериңиз:
- 1 x Cinelog30 V3 FPV Drone
- 1 x Protective Frame (transparent black)
- 2 x HQprop DT76mmx3 V2 (pair) - Запастык пропеллер
- 1 x 15*150mm Battery Strap
- 1 x L формасындагы 1.5 мм отвертка
- 1 x Grey Canopy
- 1 x Black Canopy
- 1 x Spare Screw Pack (includes M2 rivet nut, M2*4.5, M2*6, M2*4 button-head hex socket screws, M2*12 button-head screw, 2 x Damping Ball)
- 1 x Battery Anti-slip Pad
- 1 x Damping Ball Puncher
- 1 x Frequency Pairing Ejector pin
3. Баштапкы орнотуу
3.1 Дронду ачуу
Carefully unfold the drone arms. Always unfold the front arms first, then the rear arms. Ensure they click securely into place.

Сүрөт 2: Бурчтуу view of the GEPRC Cinelog30 V3 FPV Drone with its arms unfolded, ready for flight.
3.2 Propeller Installation (If Required)
The drone comes with propellers pre-installed. If replacement is needed, ensure correct orientation. Match the propeller rotation direction to the motor direction. Use the provided L-shaped screwdriver for secure attachment.
3.3 Батареяны туташтыруу
Connect a fully charged LiHV 4S 660mAh-720mAh battery (not included) to the XT30 connector on the drone. Secure the battery using the provided battery strap and anti-slip pad.
3.4 Canopy Installation
Choose between the grey or black canopy and securely attach it to the drone frame. Ensure it does not obstruct any sensors or the camera.
4. FPV System Setup (O4 Air Unit Pro & Goggles)
The Cinelog30 V3 is equipped with the O4 Air Unit Pro for high-quality digital FPV transmission. For optimal experience, it is recommended to use compatible FPV goggles, such as the DJI Goggles 3.
4.1 Liveview Sharing with DJI Goggles 3
The DJI Goggles 3 allow for live view sharing to a mobile device or other goggles. This feature is useful for co-pilots or spectators to view the drone's feed.
Video 1: This video demonstrates how to set up live view sharing from DJI Goggles 3 to a mobile device or other compatible goggles, allowing multiple users to see the drone's real-time camera feed.
For detailed instructions on connecting and sharing live view with DJI Goggles 3, please refer to the video above. Ensure your mobile device has the DJI Fly app installed and that Wi-Fi and Bluetooth are enabled for wireless connections.
5. Иштетүү боюнча көрсөтмөлөр
5.1 Учуу алдындагы текшерүүлөр
- Бардык колдор толугу менен сунулуп, бекитилгенин текшериңиз.
- Check propellers for any damage and ensure they are securely fastened.
- Verify battery is fully charged and securely attached.
- Confirm FPV goggles and remote controller are powered on and connected.
- Perform a visual inspection of the drone for any loose parts or damage.
5.2 Учуп-конуу
Place the drone on a flat, open surface, clear of obstacles. Follow your remote controller's specific instructions for arming motors and initiating take-off. For landing, gently descend the drone to a clear area.
5.3 Учууну башкаруу
Familiarize yourself with your remote controller's stick configurations for throttle, yaw, pitch, and roll. Practice in a safe, open environment before attempting complex maneuvers.
5.4 Камеранын иштеши
The O4 camera captures ultra-sharp 4K/120fps footage. Use your FPV goggles or connected mobile device to view the live feed and control camera settings. The advanced structural design isolates camera vibration for smooth footage.
5.5 Active Tracking
The drone supports active tracking features, allowing it to follow moving subjects. Refer to your remote controller and FPV system manual for specific active tracking mode activation and usage.
6. Техникалык тейлөө жана кам көрүү
6.1 Тазалоо
Regularly clean the drone, especially after flights in dusty or dirty environments. Use a soft, dry cloth to wipe down the frame and propellers. Ensure the camera lens is clean for clear footage.
6.2 Пропеллерди алмаштыруу
Inspect propellers before each flight for cracks, bends, or chips. Replace damaged propellers immediately using the spare HQprop DT76mmx3 V2 pairs and the provided screwdriver. Incorrectly installed or damaged propellers can affect flight stability and safety.
6.3 Микропрограмма жаңыртуулары
Periodically check the GEPRC official website for firmware updates for the TAKER F722 45A 32Bit AIO flight system (FC Firmware: GEPRC_F722_AIO). Follow the provided instructions carefully to ensure proper update installation.
6.4 Батареяга кам көрүү
Store LiHV batteries in a cool, dry place away from direct sunlight. Do not overcharge or over-discharge batteries. Always use a compatible charger. Discontinue use of any damaged or swollen batteries.
7. Кыйынчылыктарды
- Дрон күйбөй жатат: Ensure the battery is fully charged and correctly connected to the XT30 connector.
- FPV түрмөгү жок: Check the connection between the O4 Air Unit Pro and your FPV goggles. Ensure both devices are powered on and correctly paired.
- Туруксуз учуу: Inspect propellers for damage or incorrect installation. Calibrate the gyroscope and accelerometer if necessary (refer to the flight controller manual).
- Алыстан башкаруучу туташпай жатат: Ensure the remote controller is powered on and correctly bound to the drone's receiver (PNP digital built-in VTS receiver). Use the frequency pairing ejector pin if re-binding is required.
For further assistance, please contact GEPRC customer support.
8. Техникалык шарттар
| Өзгөчөлүк | Спецификация |
|---|---|
| Модел | Cinelog30 V3 O4 Pro Quadcopter |
| Frame Model | GEP-CL30 V3 |
| Carbon Fiber Plate Thickness | 2.5мм |
| Wheelbase | 128мм |
| Учуу системасы | TAKER F722 45A 32Bit AIO |
| MCU | STM32F722RET6 |
| Гиро | ICM 42688-P |
| FC микропрограммасы | GEPRC_F722_AIO |
| Flash | 16MB |
| ESC | 32 бит 45A |
| Мотор | SPEEDX2 1404 3850KV |
| Пропеллер | HQprop DT76mmx3 V2 |
| Батарея туташтыргычы | XT30 |
| VTX | O4 AIR Unit Pro |
| Камера | O4 |
| Антенна | O4 original |
| Алуучу | PNP (digital built-in VTS receiver) |
| Сунушталган батарея | LiHV 4S 660mAh-720mAh |
| Approximate Flight Time | 8’10″ (Tested at slow cruising speeds; actual times may vary with flying method) |
| Видео тартуунун резолюциясы | 4K |
| Элемент Салмагы | 190 грамм (болжол менен 6.7 унция) |
| Продукциянын өлчөмдөрү | 7.99"L x 7.99"W x 3.54"H |
9. Кепилдик жана колдоо
For warranty information, technical support, or to purchase replacement parts, please visit the official GEPRC webсайтка же түздөн-түз кардарларды тейлөөгө кайрылыңыз. Кепилдик дооматтар үчүн сатып алуу дүмүрчөгүңүздү сактаңыз.
Сиз да зыярат кылсаңыз болот GEPRC Store on Amazon кошумча продукт маалымат жана колдоо ресурстар үчүн.