
Introduction
Thank you for choosing the jindaaudio Professional 7-Channel Audio Mixer. This manual provides detailed instructions for the proper setup, operation, and maintenance of your mixer. Please read this manual thoroughly before using the product to ensure optimal performance and to prevent damage.
This professional audio mixer is designed for a variety of applications including recording, podcasting, live streaming, and DJ performances. It features 7 input channels, Bluetooth connectivity, and USB audio interface capabilities.
Продукт бүттүview
Негизги өзгөчөлүктөрү:
- 7-channel input for versatile audio mixing.
- Integrated Bluetooth for wireless audio streaming.
- USB interface for direct connection to computers for recording and playback.
- Конденсатордук микрофондор үчүн +48V Phantom Power.
- Individual channel controls for Gain, High, Mid, Low, and Pan.
- Built-in Delay and Repeat effects.
- Multiple power supply options for flexibility.
Компоненттин идентификациясы:
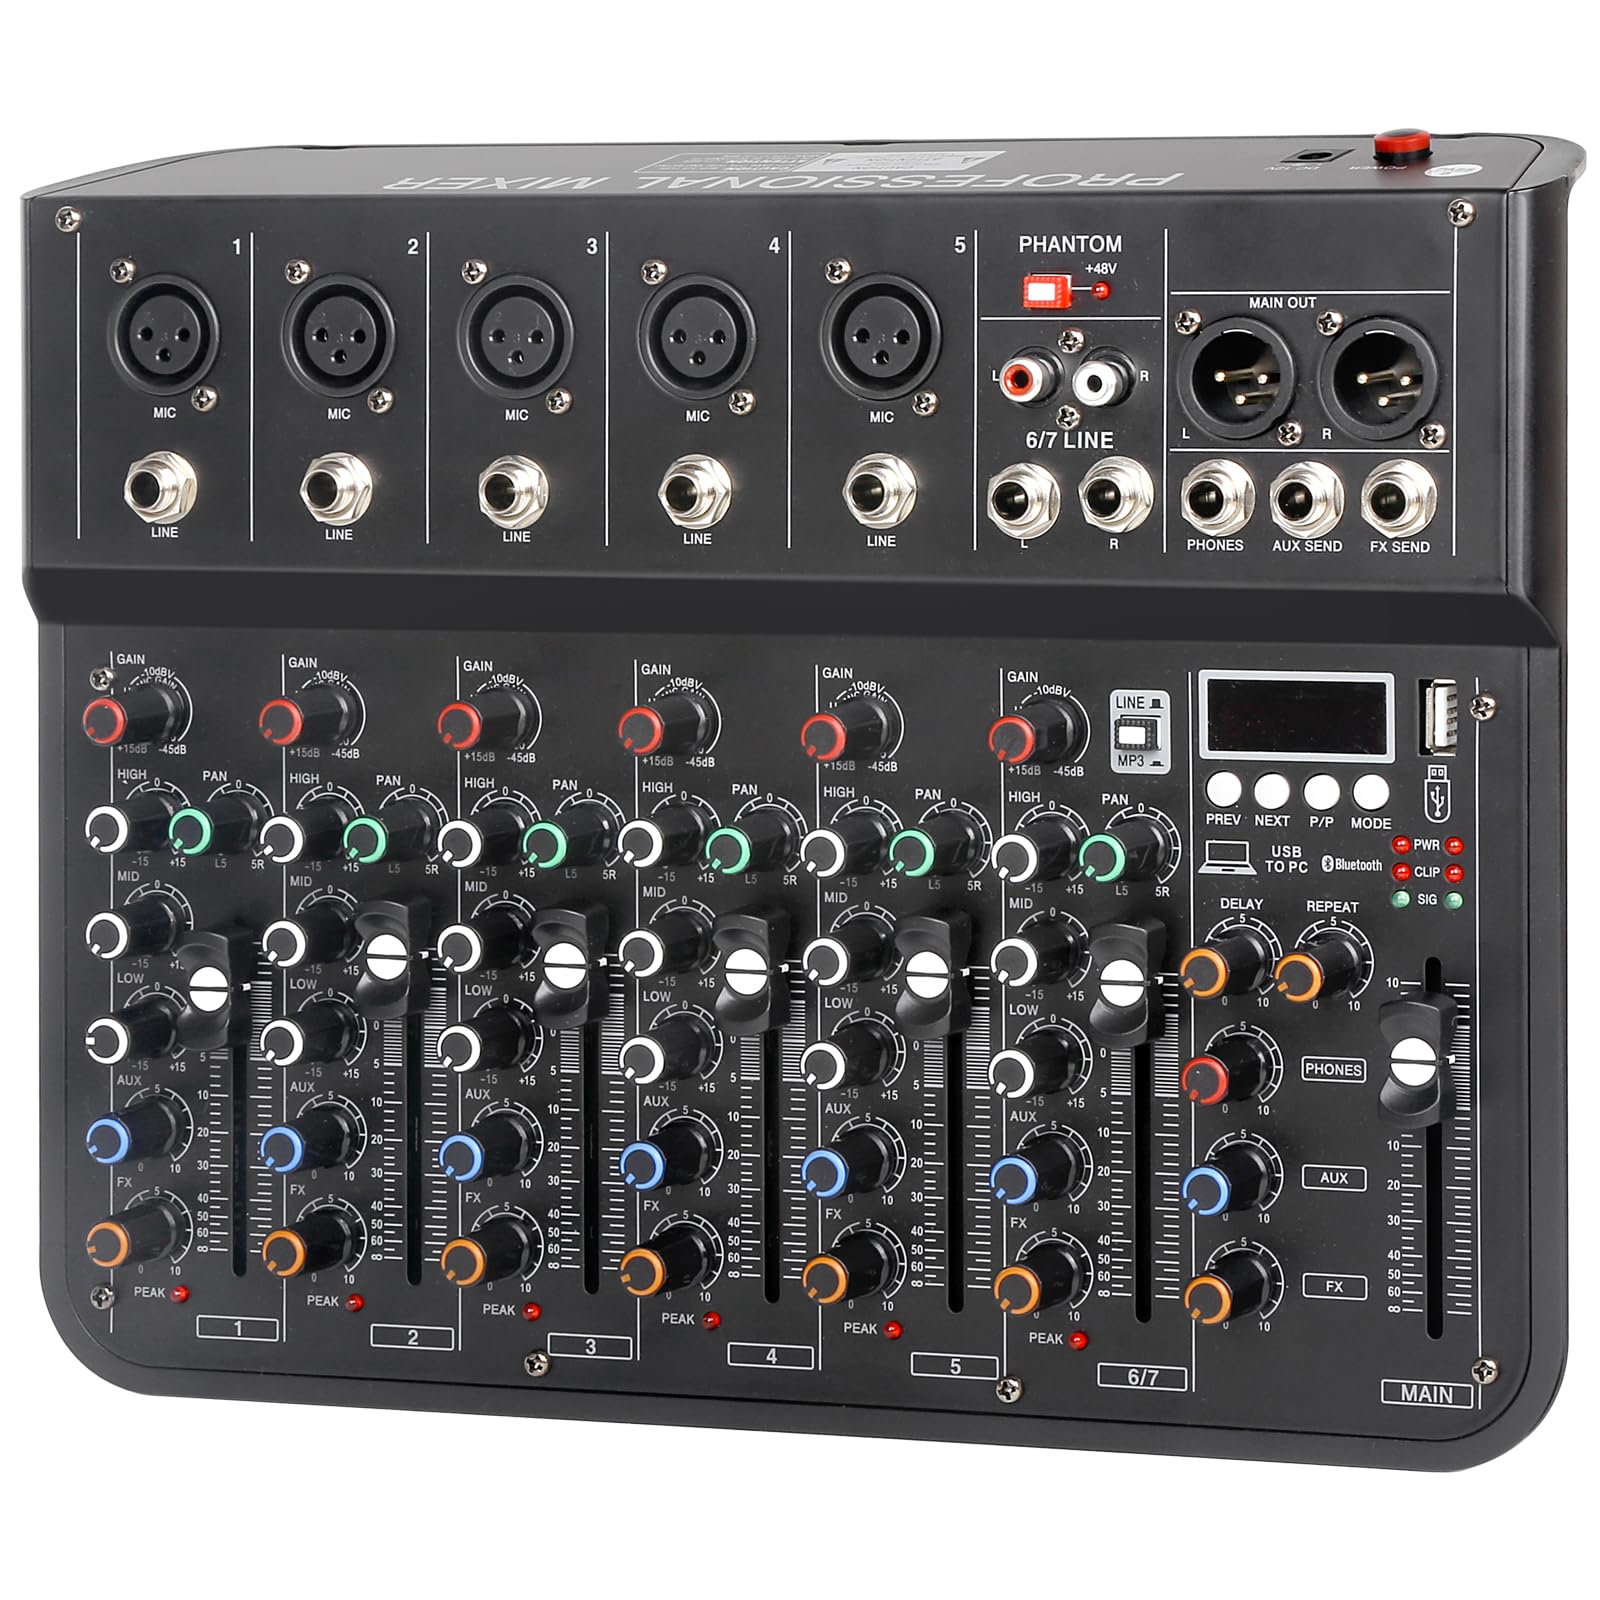
Refer to the image below for a visual guide to the mixer's components and controls.

1-сүрөт: Жогорку view of the jindaaudio 7-Channel Audio Mixer. This image displays the microphone/line inputs, main output, headphone jack, USB port, Bluetooth indicator, and various control knobs for gain, equalization (high, mid, low), pan, effects (delay, repeat), and main volume faders.
Жайгашуу
Кубат менен камсыздоо параметрлери:
The mixer supports three power supply modes, offering flexibility for various environments.
2-сүрөт: Three power supply modes. The mixer can be powered via a laptop's USB port, a standard DC 12V power adapter (included), or a portable power bank for mobile use.
- DC 12V адаптер: Connect the provided power adapter to the DC 12V input on the mixer and plug it into a standard wall outlet.
- USB Power: Connect the mixer to a computer's USB port using a USB cable. This mode is suitable for recording and streaming setups.
- Power Bank: For portable use, connect a compatible power bank to the mixer's USB power input.
Ensure the power switch is in the OFF position before connecting or disconnecting any power source.
Аудио түзмөктөрдү туташтыруу:
The mixer is compatible with a wide range of audio equipment.
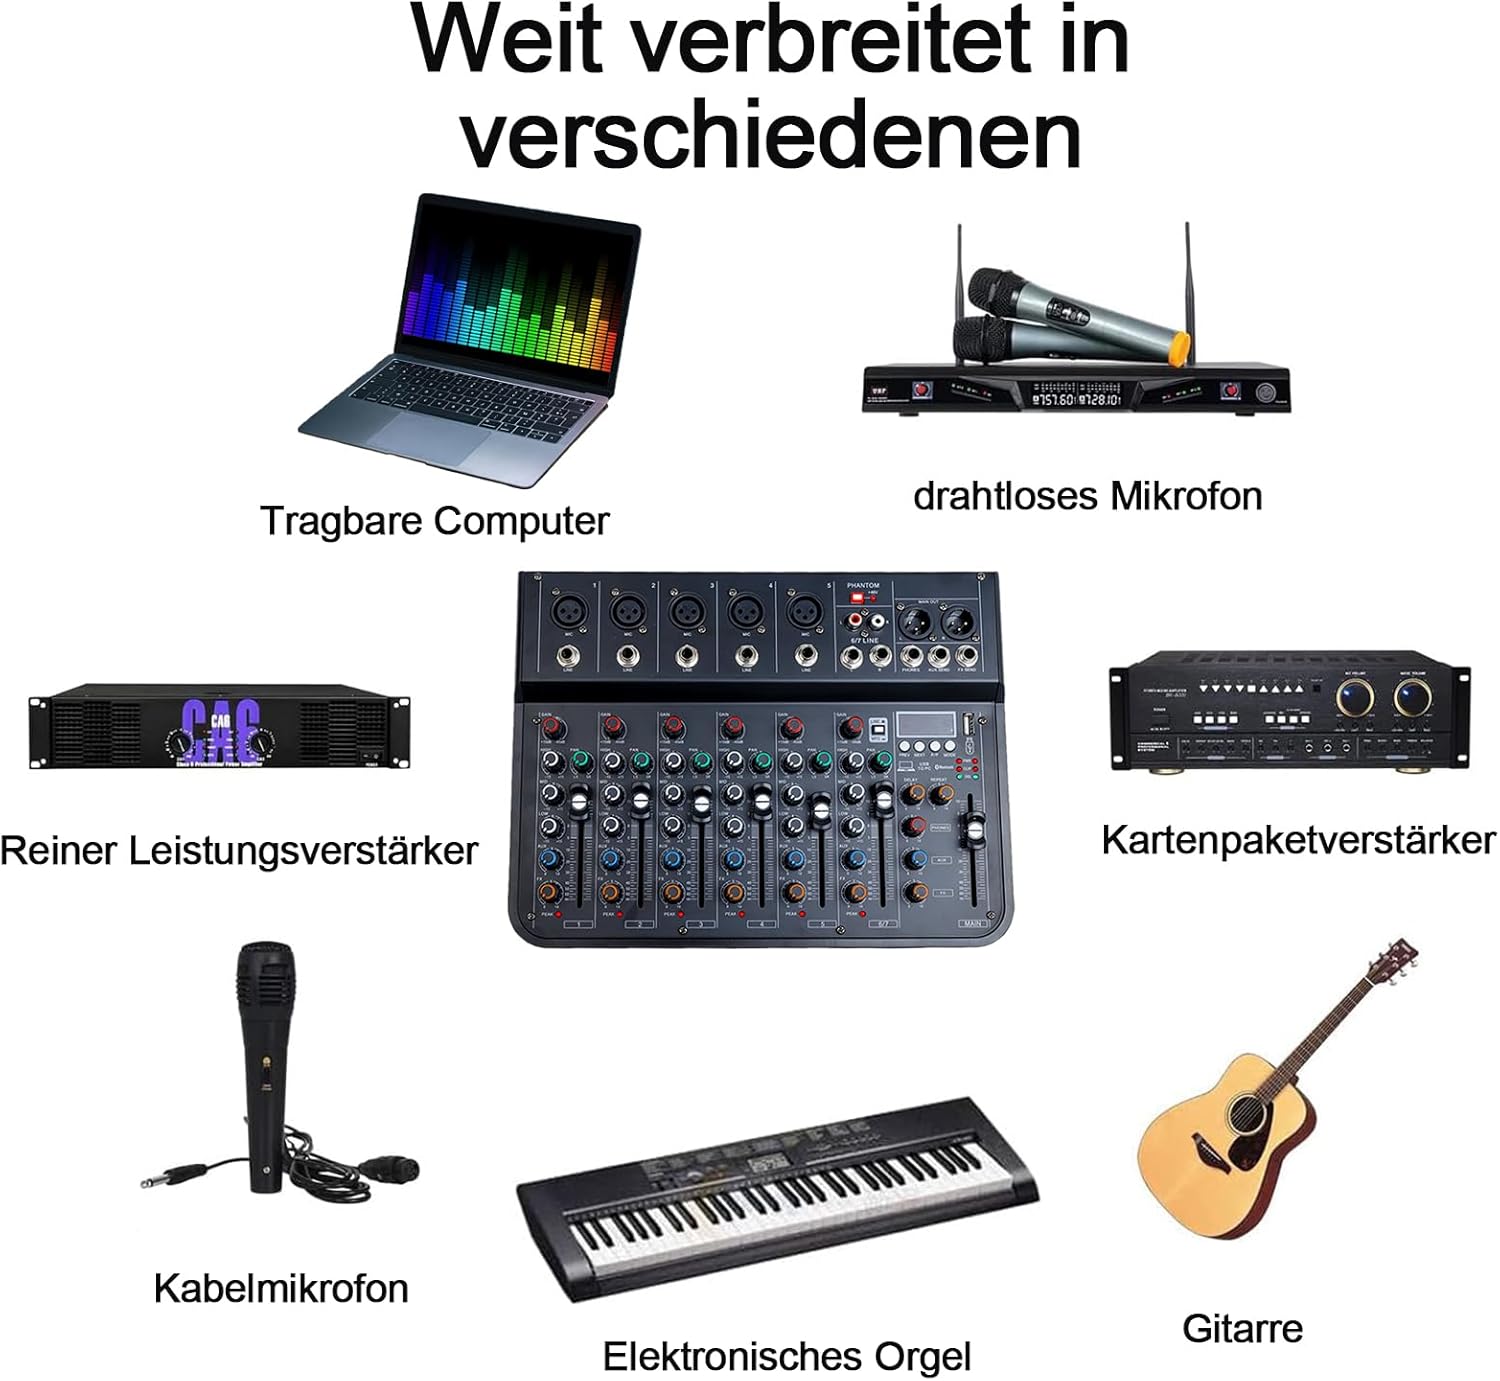
3-сүрөт: Wide range of connectivity options. The mixer can connect to laptops, wireless microphones, power amplifiers, wired microphones, electronic organs, and guitars.
- Микрофондор: Connect XLR microphones to the MIC inputs (channels 1-5). For condenser microphones, activate the +48V Phantom Power switch.
- Линиялык деңгээлдеги түзмөктөр: Connect instruments (e.g., electronic organ, guitar) or other line-level audio sources to the LINE inputs (channels 1-5) or the stereo 6/7 LINE input.
- Чыгаруу түзмөктөрү: Негизги динамиктерди туташтыруу же amplifier to the MAIN OUT (XLR or 1/4" TRS) ports. Connect headphones to the PHONES output.
- External Effects: Use the AUX SEND and FX SEND for connecting external effects processors.
Иштөө нускамалары
Негизги операция:
- Күйгүзүү: After connecting all devices and power, switch the mixer ON.
- Пайданы тууралоо: For each input channel, adjust the GAIN knob to achieve an optimal input level. Avoid clipping (indicated by the PEAK LED).
- Теңдөө: Ар бир канал үчүн жогорку, орто жана төмөнкү жыштыктарды жөндөө үчүн HIGH, MID жана LOW баскычтарын колдонуңуз.
- Пан Control: The PAN knob adjusts the stereo position of the channel's signal.
- Үндү өчүргүчтөр: Use the channel faders and the MAIN fader to control the overall volume levels.
Bluetooth байланышы:
The mixer features integrated Bluetooth for wireless audio input.

4-сүрөт: Integrated Bluetooth for stable wireless transmission. The image highlights the Bluetooth indicator light and a smartphone wirelessly connected to the mixer.
- Bluetooth иштетүү: Press the MODE button on the MP3/USB section until "Bluetooth" is selected. The Bluetooth indicator light will flash.
- Жупташтыруу: On your smartphone or other Bluetooth device, search for available devices and select "jindaaudio Mixer" (or similar name).
- Байланыш: Once paired, the Bluetooth indicator light will become solid. You can now stream audio wirelessly to the mixer.
USB Audio Interface (PC Connection):
Connect the mixer to your computer for recording and playback.

5-сүрөт: Mixer connected to a computer. This setup allows for digital audio recording and playback through the mixer's USB interface.
- USB туташтыруу: Use a USB cable to connect the mixer's USB port to your computer.
- Драйверди орнотуу: The mixer is typically plug-and-play and may not require specific drivers. If prompted, follow your operating system's instructions for driver installation.
- Программалык камсыздоону орнотуу: Open your preferred Digital Audio Workstation (DAW) or recording software. Select the mixer as your audio input and output device in the software's audio settings.
- Жаздыруу/ойнотуу: You can now record audio from the mixer's inputs to your computer or play back audio from your computer through the mixer.
Effects (Delay/Repeat):
The mixer includes built-in delay and repeat effects.
- КЕЧИКТИРҮҮ баскычы: Adjusts the delay time of the effect.
- REPEAT Knob: Controls the number of repetitions for the delay effect.
- FX Fader: Негизги миксте жөнөтүлгөн эффекттердин жалпы деңгээлин көзөмөлдөйт.
Техникалык тейлөө
- Тазалоо: Use a soft, dry cloth to clean the mixer's surface. Avoid liquid cleaners or abrasive materials.
- Сактагыч: Миксерди күн нурунан жана экстремалдык температурадан алыс салкын, кургак жерде сактаңыз.
- Колдонуу: Handle the mixer with care. Avoid dropping or subjecting it to strong impacts.
- Вентиляция: Ашыкча ысып кетүүнүн алдын алуу үчүн аралаштыргычтын айланасында туура желдетүүнү камсыз кылыңыз.
Проблемаларды чечүү
| Көйгөй | Мүмкүн себеп | Чечим |
|---|---|---|
| Күч жок | Power cable not connected; power source failure; power switch off. | Check power connections; try a different outlet/USB port; ensure power switch is ON. |
| Үн чыгышы жок | Volume faders down; incorrect cable connections; output device issues. | Increase main and channel faders; verify all audio cables are correctly connected; check connected speakers/headphones. |
| Bluetooth жупташкан жок | Bluetooth mode not active; device too far; interference. | Ensure mixer is in Bluetooth mode; bring devices closer; restart both devices. |
| Үн сапаты начар / Ызы-чуу | Туура эмес күчөтүү staging; faulty cables; ground loop; external interference. | Adjust GAIN knobs to avoid clipping; use high-quality cables; check for ground loops; move away from electronic interference. |
| USB жаздыруу көйгөйлөрү | Mixer not selected as audio device in software; incorrect software settings. | Verify mixer is selected as input/output in DAW settings; check sampылдамдыгы жана буфер өлчөмү. |
Техникалык шарттар
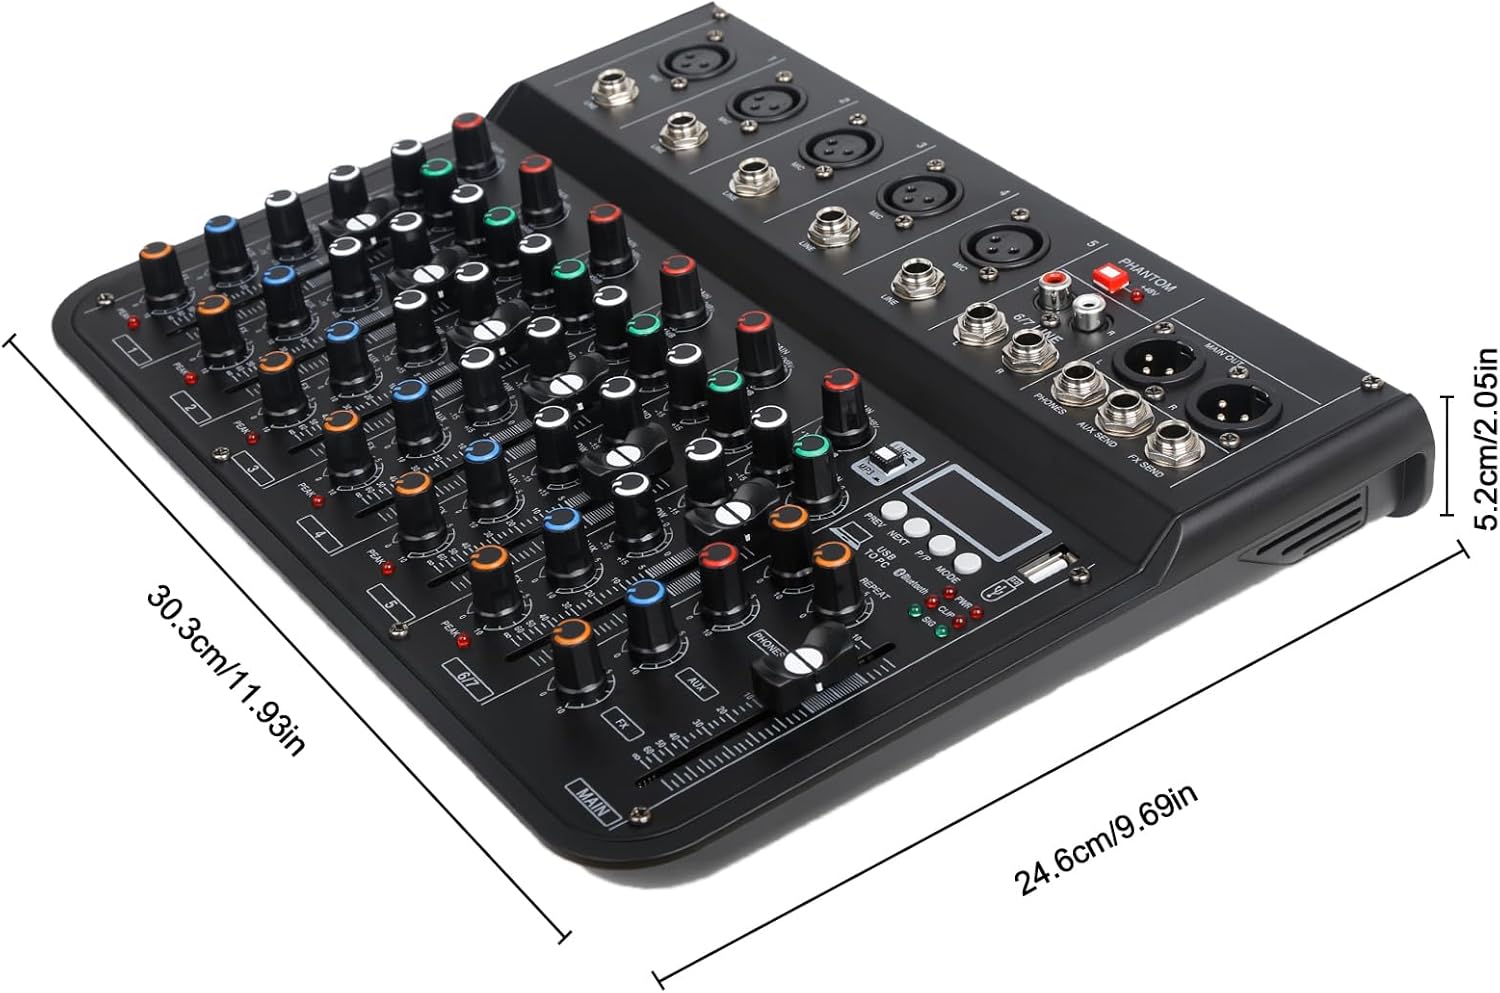
6-сүрөт: Mixer dimensions. The product measures approximately 30.3 cm in length, 24.6 cm in width, and 5.2 cm in height.
- Модел: 7CH F-7
- Бренд: jindaaudio
- Каналдардын саны: 7
- Байланыш технологиясы: Bluetooth, USB
- Кубат булагы: USB, DC 12V Adapter
- Чыгуу түрү: USB, Bluetooth
- Аудио киргизүү: 8 channels (including stereo 6/7 line input)
- Элемент Салмагы: Болжол менен 1 килограмм
- Пакеттин өлчөмдөрү: Болжол менен 35 x 25 x 8 см
- Продукциянын өлчөмдөрү: Болжол менен 30.3 см х 24.6 см х 5.2 см
Кепилдик жана колдоо
For warranty information and technical support, please refer to the documentation provided with your purchase or contact jindaaudio customer service. Keep your purchase receipt as proof of purchase for warranty claims.
For further assistance, visit the official jindaaudio webсайтка кайрылыңыз же жергиликтүү дистрибьютериңиз менен байланышыңыз.