GMKtec G10-16+1TB
GMKtec G10 Mini PC Instruction Manual
Model: G10-16+1TB
1. Киришүү
This manual provides detailed instructions for the setup, operation, maintenance, and troubleshooting of your GMKtec G10 Mini PC. Please read this manual thoroughly before using the device to ensure proper functionality and longevity.
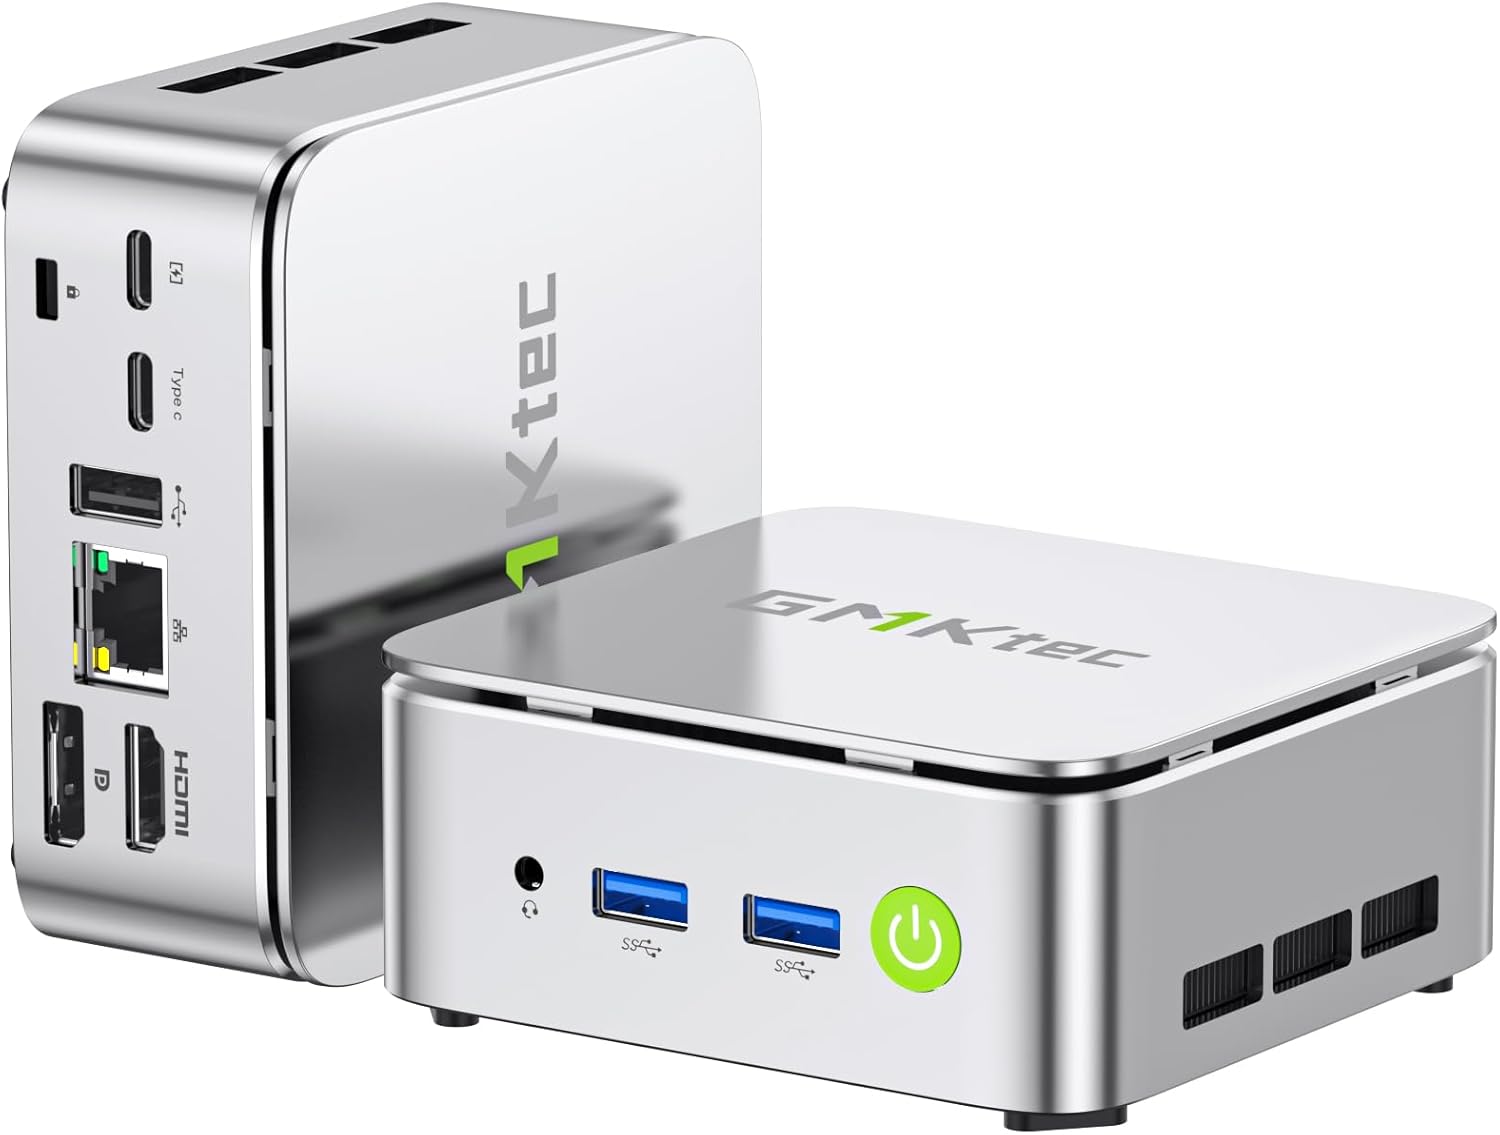
Figure 1: GMKtec G10 Mini PC, showcasing анын компакттуу конструкциясы жана ар турдуу порттору.
2. Кутуда эмне бар
Төмөндө тизмеленген нерселердин баары пакетиңизге камтылганын текшериңиз:
- GMKtec Nucbox G10 Mini PC Ryzen 5 3500U Mini PC Computer
- HDMI кабели
- Type-C Power Supply
- VESA тоосу
- Колдонуучунун Колдонмосу (бул документ)
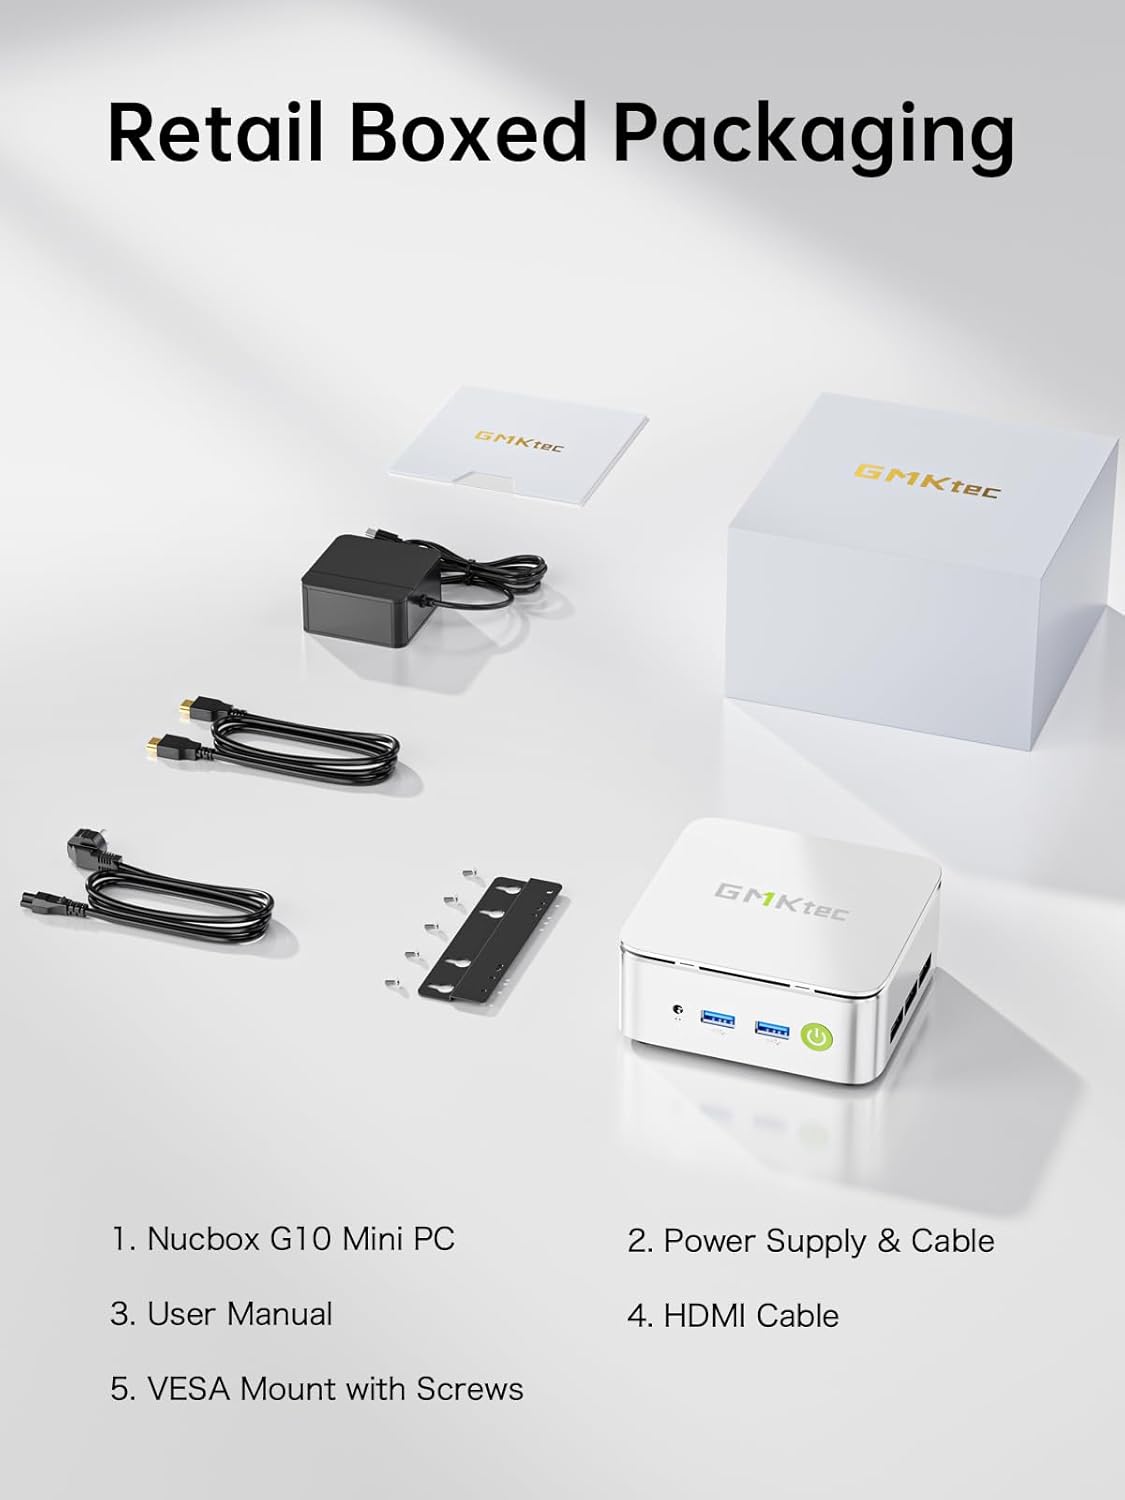
Figure 2: Package contents including the Mini PC, power supply, HDMI cable, VESA mount, and user manual.
3. Продукттун спецификациялары
The GMKtec G10 Mini PC is equipped with the following technical specifications:
| Өзгөчөлүк | Спецификация |
|---|---|
| Процессор | AMD Ryzen 5 3500U (4C/8T, up to 3.7GHz) |
| Графика | AMD Radeon Vega 8 Graphics (up to 1200MHz) |
| RAM | 16GB Dual-channel DDR4 (2x8GB), expandable up to 32GB |
| Сактагыч | 1TB M.2 PCIe 3.0 SSD, expandable up to 2x8TB SSDs with dual M.2 2280 PCIe 3.0 slots |
| Display Output | Triple 4K@60Hz via HDMI 2.1 TMDS, DisplayPort 1.4, and USB-C |
| Networking | 2.5GbE RJ45 LAN port, WiFi 5, Bluetooth 5.2 |
| Порттар | 2x USB 3.2 Gen1, 1x USB 2.0, 1x USB-C (Full-Function: PD/DP/Data), 1x DisplayPort, 1x HDMI, 1x 3.5mm audio jack |
| Операция системасы | Windows 11 Pro (preinstalled) |
| Өлчөмдөрү (LxWxH) | 3.86 x 1.65 x 4.06 дюйм |
| Салмагы | 2.35 фунт |
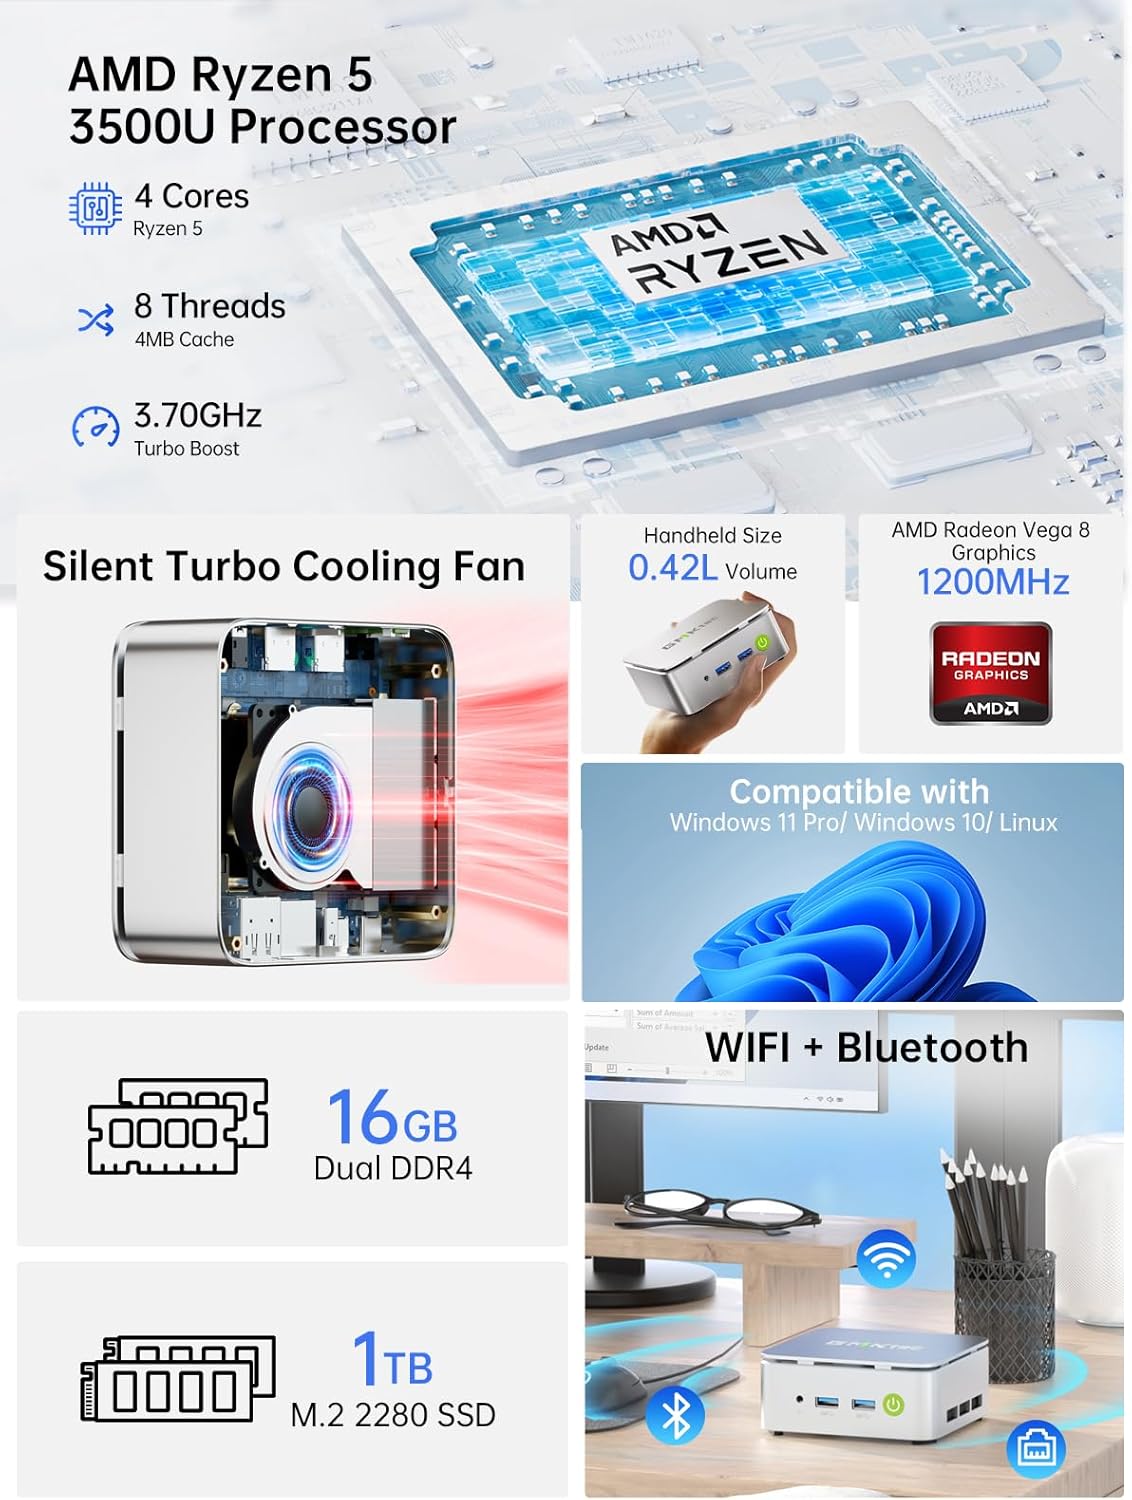
Figure 3: ашыкview of the GMKtec G10's core components and features.

Figure 4: Memory and storage expansion capabilities of the G10 Mini PC.
4. Орнотуу колдонмосу
4.1 Перифериялык түзүлүштөрдү туташтыруу
Before powering on your Mini PC, connect all necessary peripherals:
- Дисплей: Connect your monitor(s) using the HDMI, DisplayPort, or USB-C port. The G10 supports up to three 4K@60Hz displays simultaneously.
- Баскычтоп жана чычкан: Connect your USB keyboard and mouse to the available USB 3.2 Gen1 or USB 2.0 ports. Wireless peripherals can be connected via Bluetooth 5.2.
- Тармак: For a wired connection, connect an Ethernet cable to the 2.5GbE RJ45 LAN port. For wireless, ensure your WiFi network is available.
- Аудио: Зарыл болсо, динамиктерди же гарнитураны 3.5 мм аудио уячасына туташтырыңыз.

5-сүрөт: Детальдуу view of the G10 Mini PC's rich interface ports.
4.2 Күйгүзүү
- Connect the Type-C power supply to the USB-C (PD Only) port on the Mini PC and then to a power outlet.
- Mini PCтин алдыңкы бетинде жайгашкан кубат баскычын басыңыз. Кубат индикатору күйөт.
- The system will boot into Windows 11 Pro. Follow the on-screen instructions for initial setup if it's your first time using the device.
4.3 VESA орнотуу (милдеттүү эмес)
The GMKtec G10 Mini PC can be mounted to the back of a compatible monitor using the included VESA mount:
- Attach the VESA mount bracket to the back of your monitor using the provided screws. Ensure the mount is securely fastened to the VESA holes on your monitor.
- Slide the Mini PC onto the VESA mount bracket until it clicks into place.
- Ensure all cables are connected securely after mounting.
5. Иштөө нускамалары
5.1 Негизги операция
- Күйгүзүү/өчүрүү: Press the power button once to turn on. To turn off, use the Windows shutdown option or press and hold the power button for 5 seconds.
- Кайра баштоо: Use the restart option within the Windows operating system.
- Уйку режими: Press the power button briefly while the PC is on to enter sleep mode. Press it again to wake the PC.
5.2 Дисплейдин конфигурациясы
To configure multiple displays or adjust resolution:
- Right-click on the desktop and select "Display settings" (Windows 11).
- From here, you can detect, arrange, and set the resolution for your connected monitors.

6-сүрөт: Мисample of a triple screen HD display setup with the G10 Mini PC.
5.3 Тармакка туташуу
- Зымдуу (Ethernet): Once the Ethernet cable is connected, the system should automatically establish a network connection.
- Зымсыз (WiFi): Click the network icon in the system tray, select your desired WiFi network, enter the password, and connect.
- Bluetooth: To pair Bluetooth devices, go to "Settings" > "Bluetooth & devices" and follow the on-screen instructions.

Figure 7: Wireless connectivity options: WiFi 5 and Bluetooth 5.2.
6. Техникалык тейлөө
6.1 Тазалоо
- Мини-компьютердин сыртын жумшак, кургак чүпүрөк менен үзгүлтүксүз тазалап туруңуз.
- Суюк тазалагычтарды же аэрозолдорду түз эле аппаратта колдонбоңуз.
- Ensure ventilation openings are clear of dust and debris to maintain optimal airflow.
6.2 Программалык камсыздоо жаңыртуулары
Keep your operating system and drivers updated to ensure optimal performance and security. Windows Update will typically handle OS updates automatically.
6.3 Сактагычты кеңейтүү
The GMKtec G10 Mini PC supports storage expansion. You can add or upgrade M.2 2280 PCIe 3.0 SSDs. Refer to the internal structure diagram for component location.

Figure 8: Internal structure of the G10 Mini PC, highlighting key components.
6.4 Муздатуу системасы
The G10 Mini PC features an efficient cooling system designed for quiet operation. While the fan noise is minimal during normal use, it may increase under heavy load. Ensure proper ventilation around the device.

Figure 9: Noise level comparison for the G10 Mini PC's silent cooling system.
7. Кыйынчылыктарды
| Көйгөй | Мүмкүн себеп | Чечим |
|---|---|---|
| No power/PC won't turn on | Power cable not connected; faulty power adapter; power outlet issue. | Ensure power cable is securely connected to the PC and outlet. Try a different power outlet. Contact support if issue persists. |
| Монитордо дисплей жок | Monitor not connected; incorrect input source selected on monitor; faulty cable. | Check display cable connections. Ensure monitor is set to the correct input (HDMI, DP, USB-C). Try a different cable or monitor. |
| Интернет байланышы жок (зымдуу) | Ethernet cable loose; router/modem issue; network driver issue. | Check Ethernet cable connection. Restart router/modem. Check network adapter status in Device Manager. |
| Интернет байланышы жок (зымсыз) | WiFi disabled; incorrect password; router too far; WiFi driver issue. | Ensure WiFi is enabled. Re-enter WiFi password. Move closer to router. Update WiFi drivers. |
| System slow or unresponsive | Too many applications running; insufficient RAM/storage; overheating. | Close unnecessary applications. Check disk space. Ensure proper ventilation. Consider RAM/SSD upgrade if frequently slow. |
8. Кепилдик жана колдоо
GMKtec provides a full 1 жылдык кепилдик from the purchase date, covering all hardware faults due to workmanship. For technical assistance or warranty claims, please contact our professional after-sales team.
- Электрондук почта колдоо: support@gmktec.com
- Онлайн колдоо: зыярат кылыңыз GMKtec Store on Amazon and navigate to the "Ask a Product Question" section.
- Өмүр бою техникалык колдоо: GMKtec offers lifetime technical support for its products.
Ask a question about this manual
Ask about setup, troubleshooting, compatibility, parts, safety, or missing instructions. Manuals+ will review the question and use this page’s manual context to help answer it.