
1. Киришүү
Thank you for choosing the BLACK+DECKER GL350L 350W Corded String Trimmer. This manual provides essential information for the safe and efficient operation, assembly, maintenance, and troubleshooting of your new string trimmer. Please read these instructions carefully before use and retain them for future reference.
The GL350L is designed for light trimming and maintenance of weeds and grass in small gardens. It features a powerful 350W motor, a 23 cm (9") cutting width, and a no-load speed of 12000 RPM, ensuring efficient performance.
2. Коопсуздук нускамалары
Always follow basic safety precautions to reduce the risk of fire, electric shock, and personal injury when using power tools. Familiarize yourself with all controls and proper usage.
2.1 Жалпы коопсуздук
- Бардык нускамаларды окуңуз: Before operating the tool, read and understand all safety warnings and instructions.
- Жумуш ордун таза кармаңыз: Ensure the area is free from debris, children, and bystanders.
- Тийиштүү кийинүү: Wear long trousers, sturdy footwear, and eye protection. Avoid loose clothing or jewelry that could get caught in moving parts.
- Кооптуу чөйрөлөрдөн качыңыз: Do not use the trimmer in wet or damp шарттар.
- Куралды текшерүү: Before each use, check for damaged parts, loose fasteners, or any other condition that may affect its safe operation.
2.2 Электр коопсуздугу
- Кубат булагы: Кубат булагы томго дал келишин текшериңизtage specified on the tool's rating plate (220-240V).
- Узартуу шнурлары: Use only outdoor-rated extension cords that are in good condition and suitable for the tool's power rating.
- Avoid damage to cord: Do not carry the tool by the cord or yank it to disconnect from the outlet. Keep the cord away from heat, oil, sharp edges, or moving parts.
- Жерге тийүү чынжырын үзгүч (GFCI): Always use a GFCI when operating the trimmer outdoors.
3. Продукт бүтүп калдыview жана Бөлүктөрдү идентификациялоо
Familiarize yourself with the components of your BLACK+DECKER GL350L string trimmer before operation.

Сүрөт: Бүттүview of the GL350L String Trimmer with key components labeled.
- Негизги туткасы: Designed for comfortable grip during extended use.
- Trigger Switch: Activates and deactivates the trimmer.
- Cord Retainer: Secures the power cord in place to prevent accidental disconnection.
- Pivoting Button: Allows adjustment of the trimmer head angle for various cutting tasks.
- Көмөкчү тутка: Provides additional control and comfort, especially during two-handed operation.
- Upper Shaft: The upper section of the trimmer's main body.
- Lower Shaft: The lower section of the trimmer's main body, connecting to the trimmer head.
- Коопсуздук күзөтчүсү: Protects the user from flying debris during operation.
- Кесүү линиясы: The nylon line used for cutting grass and weeds.
- Cut-Off Blade: Automatically trims the cutting line to the correct length.
- Катушканын капкагы: Protects the trimmer line spool.
- Spool Cover Lock Button: Prevents the line from becoming tangled.
- Bump Head: Mechanism to advance the cutting line.
- Катушка: Holds the cutting line for smooth and continuous trimming.
4. Орнотуу
Although the GL350L requires minimal assembly, ensure all components are correctly attached before first use.
4.1 Коопсуздук коргоочусун бекитүү
- Align the safety guard with the slots on the trimmer head.
- Push the guard firmly until it clicks into place. Ensure it is securely fastened and does not wobble.

Сүрөт: Components of the GL350L String Trimmer before assembly, showing the safety guard.
4.2 Көмөкчү тутканы бекитүү
- Slide the auxiliary handle onto the upper shaft.
- Adjust the handle to a comfortable position for your height and working posture.
- Tighten the handle securely using the pivoting button or locking mechanism provided.

Сүрөт: Detail of the auxiliary handle attachment point.
4.3 Кубатка туташуу
- Insert the power cord into the cord retainer on the main handle. This prevents accidental unplugging.
- Триммердин кубат шнурун сыртта колдонууга ылайыктуу узарткыч шнурга туташтырыңыз.
- Plug the extension cord into a grounded 220-240V outlet protected by a GFCI.
5. Иштөө нускамалары
Follow these guidelines for effective and safe trimming.
5.1 Баштоо жана токтотуу
- Баштоо: Hold the trimmer firmly with both hands. Press the trigger switch on the main handle.
- Токтотуу: Ишти ачкычты бошотуңуз.
5.2 Кыркуунун ыкмалары
For optimal results and to prevent damage to your lawn and the trimmer, use the following techniques:
- Бир нече өтүүлөр: It is ideal to cut grass in multiple passes, especially for longer grass. This prevents discoloration of the lawn (brown grass) and reduces the load on the 350W motor, preventing overheating and damage.
- 1/3rd Rule: In each pass, cut no more than 1/3rd of the total grass length.
- Кесүү бийиктиги: For grass less than 5 cm, a single pass is sufficient. For grass between 5 cm and 10 cm, trim in one pass. For grass between 10 cm and 15 cm, trim in one pass. Refer to the manual for specific height adjustment instructions if applicable.

Сүрөт: Visual guide for effective grass trimming, emphasizing multiple passes and cutting height.
5.3 Advancing the Cutting Line (Bump Feed)
The GL350L features a bump feed system to advance the cutting line.
- While the trimmer is running, gently tap the bump head on a firm, flat surface (e.g., the ground).
- The cutting line will automatically extend. The cut-off blade on the safety guard will trim the line to the correct length.
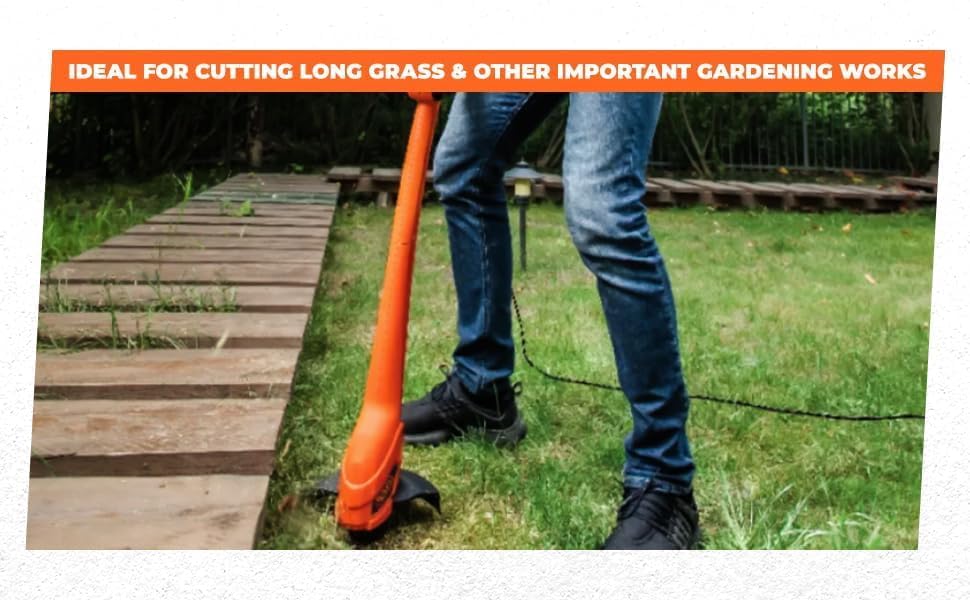
Сүрөт: A user demonstrating the use of the string trimmer for garden maintenance.
6. Техникалык тейлөө
Үзгүлтүксүз техникалык тейлөө триммериңиздин узак иштөөсүн жана оптималдуу иштешин камсыз кылат.
6.1 Тазалоо
- Кубатты өчүрүү: Always unplug the trimmer from the power source before cleaning.
- Таза турак-жай: Триммердин сыртын жарнама менен сүртүңүзamp кездеме. Катуу химиялык заттарды же абразивдүү тазалагычтарды колдонбоңуз.
- Таштандыларды тазалоо: Remove any grass clippings or debris from the safety guard, trimmer head, and ventilation openings. Use a small brush or compressed air if necessary.
6.2 Кесүүчү жипти алмаштыруу
When the cutting line runs out or becomes too short, it needs to be replaced.
- Кубатты өчүрүү: Ensure the trimmer is unplugged.
- Remove Spool Cap: Press the spool cover lock button and remove the spool cap.
- Эски катушканы алып салуу: Take out the empty or damaged spool.
- Жаңы катушканы орнотуу: Place a new BLACK+DECKER replacement spool (or correctly wound line of the specified diameter) into the trimmer head. Ensure the line is threaded through the eyelets.
- Reattach Spool Cap: Securely reattach the spool cap.

Сүрөт: Деталдаштырылган view of the trimmer head components, including the spool and cap.
6.3 Сактоо
- Триммерди кургак, коопсуз, балдар жетпеген жерде сактаңыз.
- Сактоо учурунда электр шнурунун бузулушунан сактаңыз.
7. Кыйынчылыктарды
Before attempting any repairs, always disconnect the trimmer from the power supply.
| Көйгөй | Мүмкүн себеп | Чечим |
|---|---|---|
| Триммер башталбайт | Электр энергиясы жок Бузулган которгуч | кубат туташуу жана розетка текшерүү Которуштурууну алмаштыруу үчүн кардарларды колдоо кызматына кайрылыңыз |
| Кесүү сызыгы алдыга жылбайт | Жип чаташып калган же тыгылып калган Спуль бош Bump head mechanism faulty | Disconnect power, clear tangles, or re-spool line Катушканы жаңы сызык менен алмаштырыңыз Кардарларды колдоо кызматына кайрылыңыз |
| Мотор иштейт, бирок линия айланбайт | Spool not correctly installed Drive shaft issue | Disconnect power, re-install spool correctly Кардарларды колдоо кызматына кайрылыңыз |
| Ашыкча термелүү | Damaged cutting line or spool Бош компоненттер | Replace cutting line/spool Check all fasteners and tighten if necessary |
8. Техникалык шарттар
Technical details for the BLACK+DECKER GL350L Corded String Trimmer.

Сүрөт: Visual summary of the GL350L's main technical specifications.
| Өзгөчөлүк | Спецификация |
|---|---|
| Модель номери | GL350L |
| Power Source | Электр зымдары |
| Мотор күчү | 350 Вт |
| Киргизүү көлөмүtage | 220-240 В |
| Жүк жок ылдамдык | 12000 RPM |
| Кесүү туурасы | 23 см (9") |
| Кабелдин узундугу | 2.87 м |
| Элемент Салмагы | 1.6 кг (1.62 килограмм) |
| Продукциянын өлчөмдөрү (L x W) | 80L x 20W Centimeters |
| Ассамблея талап кылынат | No (minimal assembly of guard/handle) |
| Сунушталган Колдонуулар | Brush Cutting, Edging, Trimming |
9. Кепилдик жана колдоо
BLACK+DECKER is committed to providing quality products and support.
9.1 Кепилдик маалыматы
This product comes with a standard manufacturer's warranty. An optional 1-year extended warranty by Onsitego may also be available. For detailed warranty terms and conditions, please refer to the warranty card included with your product or contact customer support.
9.2 Кардарларды колдоо
For sales, after-sales support, original parts, or any information regarding your BLACK+DECKER GL350L string trimmer, please contact us through the following channels:

Сүрөт: BLACK+DECKER Total Care contact details for support.
- Телефон: 1800-203-0644 (Дүйшөмбү - Ишемби, 09:00 - 06:00 IST, өкмөттүк майрамдардан тышкары)
- Электрондук почта: SBD-CUSTOMERCOMMUNICATIONS@SBDINC.COM
- WhatsApp: +91 96060 55835 (Scan the QR code in the image or click the link to contact us)
- Ыйгарым укуктуу тейлөө борборлору: Over 500+ service centers available.
Manufacturer Contact Information: Stanley Black & Decker India Pvt Limited, GAT NO. 135, 137 & 157, PO Mahalunge Talukha - Khed Pune 410501, India.