
1. Киришүү
This manual provides detailed instructions for the installation, operation, and maintenance of your PGST QEK-A105F-F Home Alarm System. This system offers comprehensive security for your home or business, featuring WiFi and 4G GSM connectivity, a 2.4-inch display, and compatibility with the Tuya Smart Life app, Alexa, and Google Assistant. Please read this manual thoroughly before using the product to ensure proper function and safety.
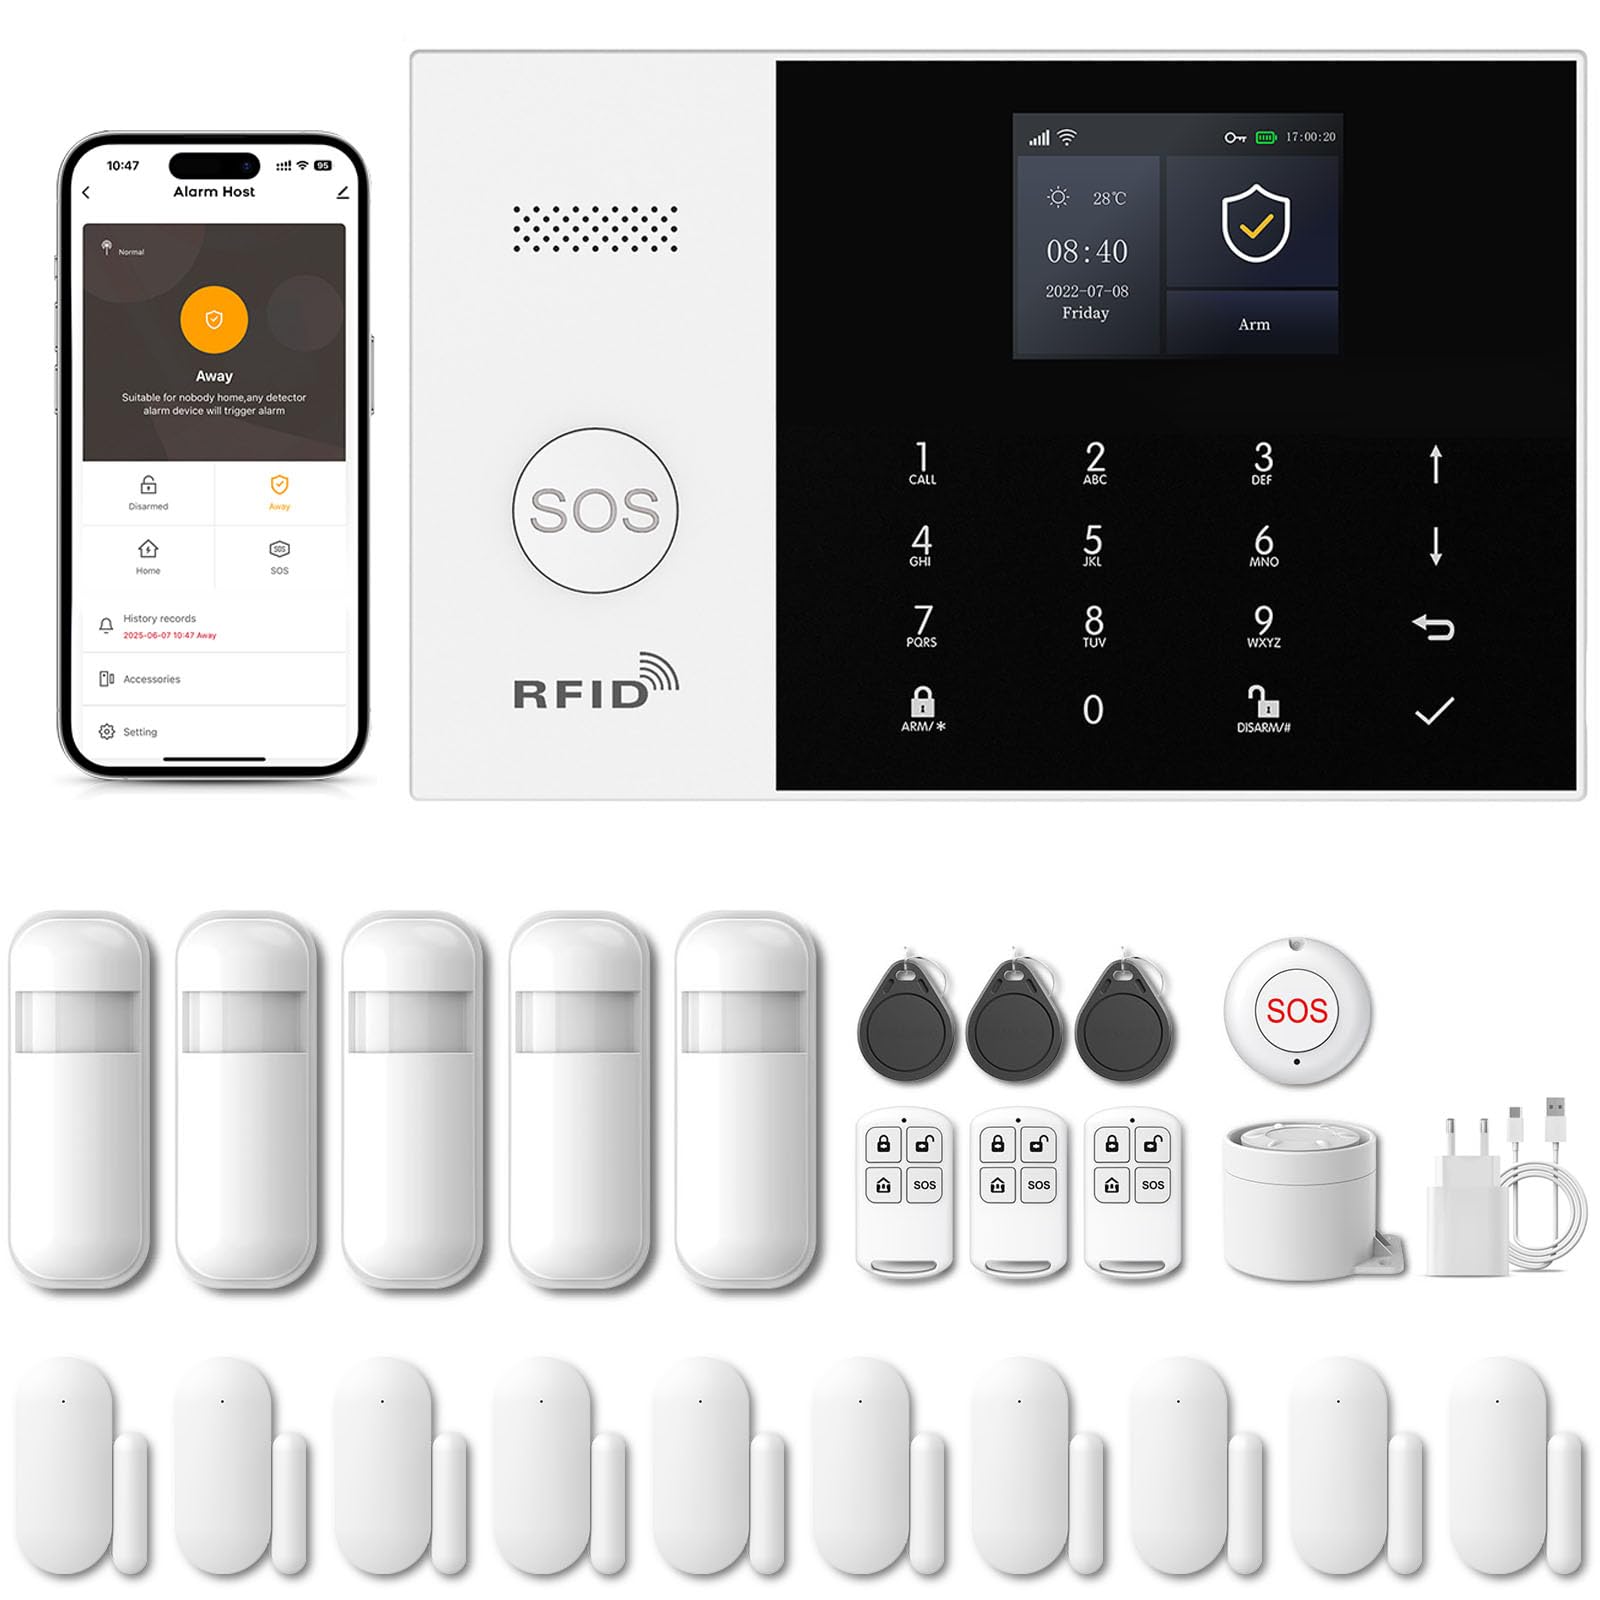
Image 1.1: PGST Home Alarm System main unit and included accessories.
2. Коопсуздук маалыматы
- Аппаратты экстремалдык температурага, нымдуулукка же түз күн нуруна калтырбаңыз.
- Кубат адаптери жергиликтүү фонуңузга шайкеш келишин текшериңизtage жана ток.
- Аппаратты суудан жана башка суюктуктардан алыс кармаңыз.
- Аппаратты өз алдынча бөлүүгө же оңдоого аракет кылбаңыз. Жардам алуу үчүн кардарларды колдоо бөлүмүнө кайрылыңыз.
- Уруксат берилген аксессуарларды жана алмаштыруу бөлүктөрүн гана колдонуңуз.
3. Пакеттин мазмуну
Пакетиңизде бардык буюмдар бар экенин текшериңиз:
- PGST Alarm Host Panel (QEK-A105F-F)
- Кубаттуу адаптер
- Remote Controls
- Эшик/терезе сенсорлору
- PIR кыймыл детектору
- RFID Tags
- Mounting Screws and Adhesives
- User Manual

Сүрөт 3.1: Мисample of included components in the alarm kit.
4. Продукт бүтүп калдыview
4.1. Alarm Host Panel Layout

Сүрөт 4.1: Алдыңкы жана арткы view of the alarm host panel with labeled components.
- Баяндамачы: For alarm sounds and voice prompts.
- SOS баскычы: Press for emergency alarm.
- RFID Card Sensing Area: For disarming with RFID tags.
- TFT дисплей экраны: 2.4-inch screen for status and settings.
- Up/Down Function Buttons: Навигация үчүн.
- Артка/Жокко чыгаруу баскычы: To go back or cancel an action.
- Ырастоо баскычы: Тандоолорду ырастоо үчүн.
- Dialing Buttons (0-9): For entering numbers or codes.
- Away Arming Key: Activates full arming mode.
- Home Arming Key: Activates home arming mode.
- Disarming Button: Сигнализация системасын өчүрөт.
- Anti-prying switch: Triggers alarm if panel is tampменен жасалган.
- 3.5mm Siren Interface: For connecting an external wired siren.
- Wired Arming Area Interface: For connecting wired sensors.
- SIM карта слоту: For 2G/3G/4G GSM SIM card.
- ON/OFF которуу: Негизги электр өчүргүч.
- Micro USB 110/220V AC to 5V: Кубат киргизүү порту.
4.2. Өлчөмдөр
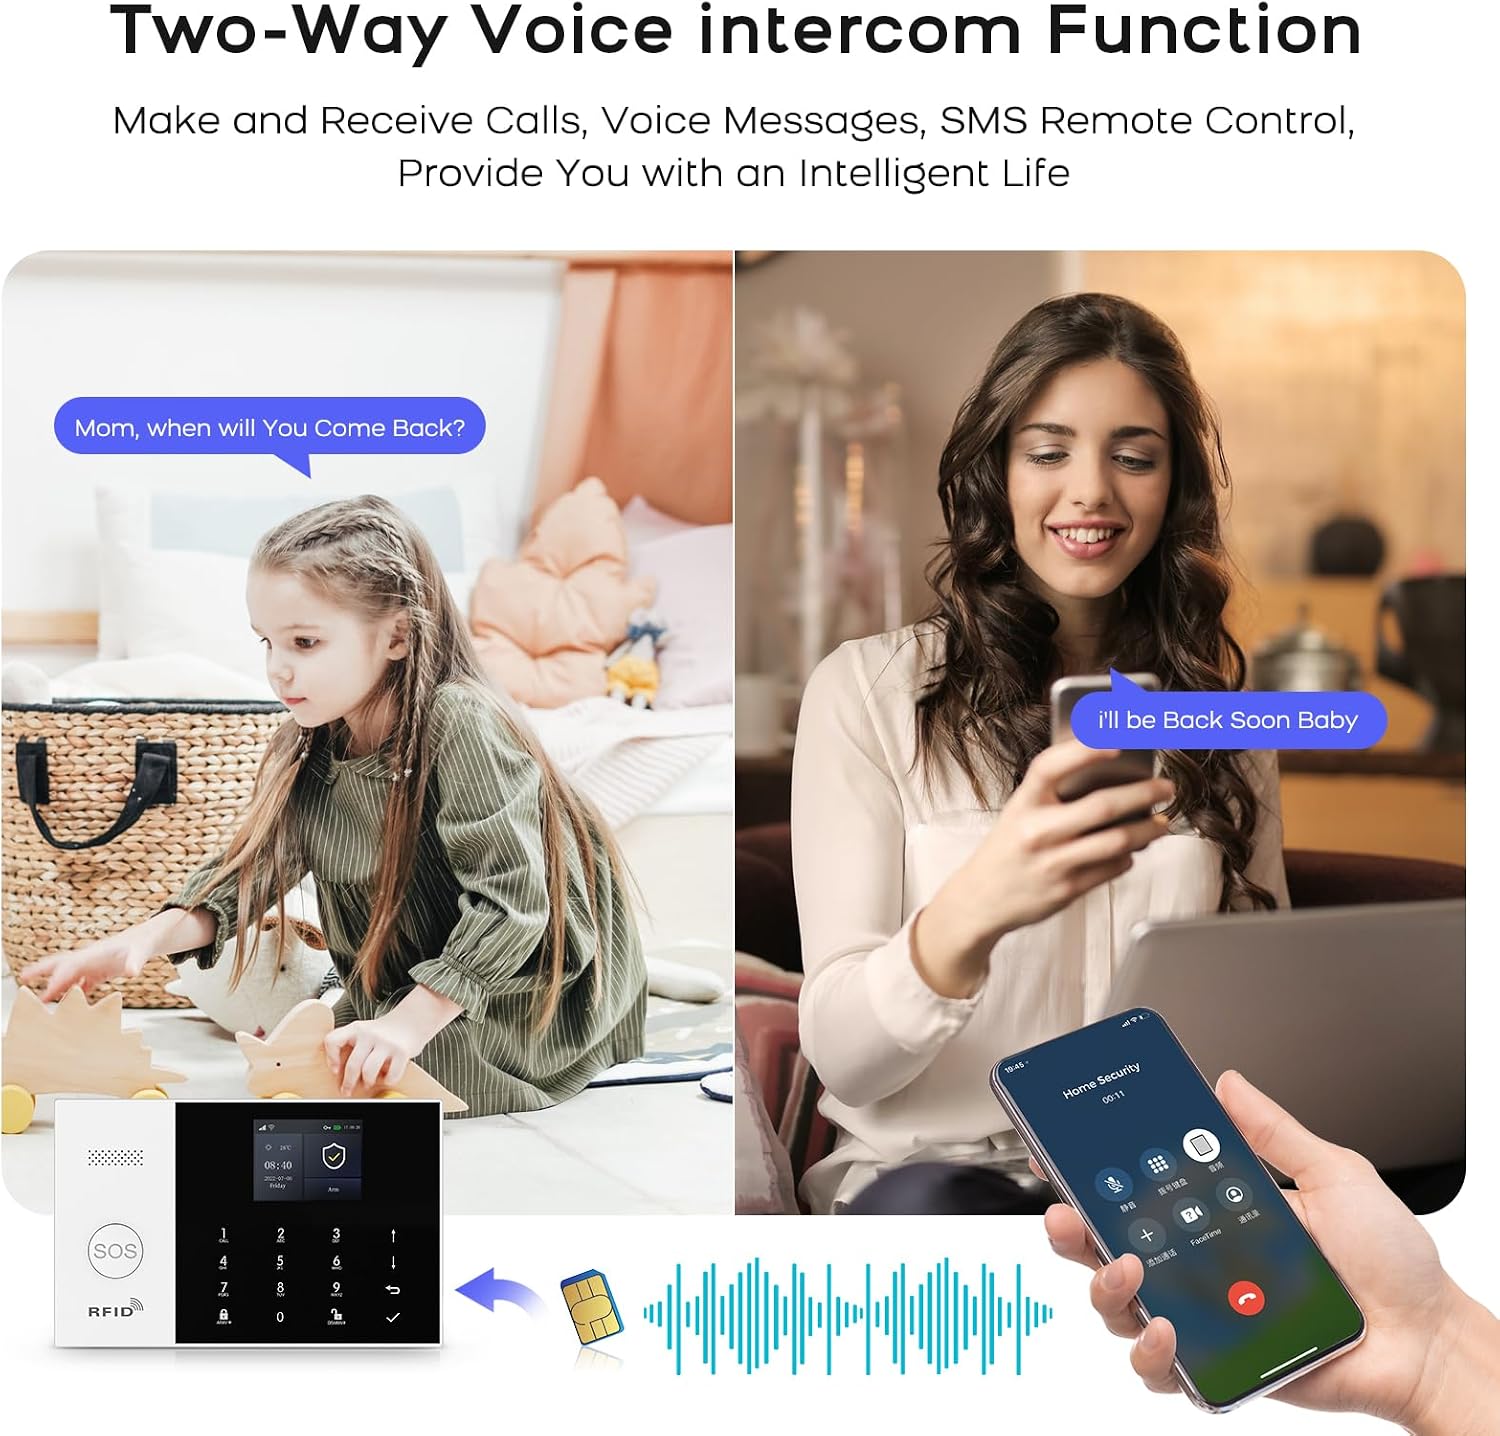
Image 4.2: Physical dimensions of the alarm host panel.
5. Орнотуу жана орнотуу
5.1. Powering the Host Panel
- Connect the power adapter to the Micro USB port on the host panel.
- Адаптерди кадимки эле розеткага сайыңыз.
- Flip the ON/OFF switch to the 'ON' position. The panel will power on.
5.2. SIM Card Installation (Optional for 4G GSM Functionality)
- Ensure the host panel is powered off.
- Locate the SIM card slot on the rear of the panel.
- Insert a 2G/3G/4G GSM SIM card into the slot, ensuring correct orientation.
- Power on the host panel. The system will attempt to register with the cellular network.
5.3. Колдонмону орнотуу жана Wi-Fi туташуусу
The system uses the 'Smart Life' or 'Tuya Smart' app for remote control and configuration.
- Download the 'Smart Life' or 'Tuya Smart' app from your smartphone's app store (Google Play for Android, App Store for iOS).
- Каттоо же өз эсебиңизге кирүү.
- On the alarm host panel, navigate to Menu > Wi-Fi > Soft AP Configuration.
- In the app, tap '+' to add a device. Select 'Sensors' > 'Alarm' > 'Wi-Fi Flashing'.
- Follow the on-screen instructions in the app to connect the alarm host to your 2.4GHz Wi-Fi network. (5GHz Wi-Fi is not supported).

Image 5.1: Steps for Wi-Fi configuration via the Smart Life app.
5.4. Adding Wireless Accessories (Sensors, Remotes)
The system supports up to 100 wireless storage locations for accessories.
- On the host panel, enter the pairing mode (refer to the panel's menu for 'Add Sensor' or 'Add Remote').
- Activate the accessory (e.g., trigger a motion sensor, separate a door sensor, press a button on the remote).
- The host panel will confirm successful pairing.
- Repeat for all desired accessories.

Сүрөт 5.2: Мисample of sensor placement within a home environment.
6. Системаны иштетүү
6.1. Куралдануу жана куралсыздандыруу
- Колдон алыс: басыңыз Away Arming Key on the panel, use the remote control, or arm via the Smart Life app. All sensors will be active.
- Кол үйү: басыңыз Home Arming Key on the panel, use the remote control, or arm via the Smart Life app. Typically, perimeter sensors (doors/windows) are active, while internal motion sensors are inactive.
- Куралсыздандыруу: Enter your PIN on the panel, use the disarm button on the remote, use an RFID tag, or disarm via the Smart Life app.
6.2. SOS өзгөчө кырдаал функциясы
Шашылыш учурда, баскычын басыңыз SOS баскычы on the host panel or the remote control. The system will immediately trigger the alarm and send notifications to pre-set emergency contacts.

Image 6.1: Remote control with SOS button for emergency alerts.
6.3. Two-Way Voice Intercom
The alarm host supports two-way voice communication through the integrated speaker and microphone, allowing you to communicate with someone at the alarm panel via the app or a phone call.

Image 6.2: Two-way voice intercom function in use.
6.4. Timer Function (Scheduled Arm/Disarm)
You can set schedules for automatic arming and disarming of the system through the Smart Life app.

Сүрөт 6.3: Мисample of scheduled arming and disarming times.
6.5. Entry/Exit Delay
Configure custom entry and exit delays to allow time to leave or enter your property without triggering the alarm immediately. This can be set in the app.

Image 6.4: Customizing entry and exit delays via the app.
6.6. Үн менен башкаруу (Alexa жана Google Жардамчысы)
Integrate your alarm system with Amazon Alexa or Google Assistant for convenient voice control commands such as arming or disarming the system.

Image 6.5: Using Alexa for voice control of the alarm system.
6.7. Ойготкуч эскертмелери
Upon alarm trigger, the system will:
- Sound the internal siren (up to 120dB) and any connected external sirens.
- Send instant push notifications to your smartphone via the Smart Life app.
- Send SMS messages to up to 5 pre-set phone numbers (if a SIM card is installed).
- Make phone calls to up to 5 pre-set phone numbers (if a SIM card is installed).

Image 6.6: Five preset alarm call numbers for notifications.
7. Техникалык тейлөө
7.1. Батареяны башкаруу
The host panel has a built-in 1000 mAh backup battery, providing approximately 5.5 hours of operation during a power outage. Wireless sensors are battery-powered and will send low battery alerts to the host panel and your app when replacement is needed.
Image 7.1: Low battery alerts for wireless sensors.
7.2. Тазалоо
Wipe the host panel and sensors with a soft, dry cloth. Do not use liquid cleaners or abrasive materials.
7.3. Анти-Тampкоргоо
The alarm host is equipped with an anti-tampering switch. If the main unit is forcibly removed from its mounting, an alarm will be triggered immediately, regardless of its armed status.

Image 7.2: Anti-tampering protection feature.
8. Кыйынчылыктарды
| Көйгөй | Мүмкүн себеп | Чечим |
|---|---|---|
| Host panel not powering on. | Power adapter disconnected; ON/OFF switch off; faulty adapter. | Check power connection; ensure switch is ON; try a different adapter. |
| Wi-Fi'га туташпай жатат. | Incorrect Wi-Fi password; 5GHz network used; host too far from router. | Verify password; ensure 2.4GHz network; move host closer to router. |
| Сенсорлор коңгуроо какпайт. | Sensor battery low; sensor not paired; system disarmed. | Replace sensor battery; re-pair sensor; ensure system is armed. |
| No SMS/Call notifications. | No SIM card; SIM card not active; poor cellular signal; incorrect emergency numbers. | Install/activate SIM card; check signal strength; verify emergency numbers in settings. |
9. Техникалык шарттар
- Бренд: PGST
- Модель номери: QEK-A105F-F
- Байланыш технологиясы: Зымсыз (Wi-Fi 2.4 ГГц, GSM/3G/4G)
- Кубат булагы: Battery (1000 mAh Lithium Polymer) / AC Adapter
- Продукциянын өлчөмдөрү (L x W x Y): 18 x 12 x 3 см (7.09 x 4.72 x 1.18 дюйм)
- Дисплей: 2.4 дюймдук TFT экран
- Башкаруу ыкмасы: Application (Tuya Smart Life), Keypad, Remote Control, Voice Control (Alexa, Google Assistant)
- Макс зымсыз диапазон: 100 метр (ачык аянт)
- Ойготкучтун түрү: Аудио жана кыймыл
- Орнотуу түрү: Өзү жабышчаак / Дубалга орнотулган
10. Кепилдик жана колдоо
Your PGST Home Alarm System comes with a standard manufacturer's warranty. Please refer to the warranty card included in your package for specific terms and conditions. For technical support, troubleshooting assistance, or warranty claims, please contact PGST customer service through the contact information provided on the official PGST webсайт же сатып алуу платформаңыз.