
1. Продукт бүтүп калдыview
The FNIRSI 2C53T is a versatile 3-in-1 handheld device combining the functionalities of a dual-channel digital oscilloscope, a 4.5-digit 19999-count multimeter, and a DDS signal generator. This compact instrument is designed for professionals, students, and hobbyists requiring a portable solution for electronic testing and waveform analysis.
Негизги өзгөчөлүктөрү:
- Кош каналдуу осциллограф: 50 MHz analog bandwidth, 250 MSa/s real-time sampling rate, 1 Kpts record depth, automatic measurement functions, maximum input voltage of 400V, vertical sensitivity from 10 mV/div to 10 V/div. Supports waveform image storage and export.
- 4.5-Digit, 19999-Count Multimeter: Measures AC Voltage (0-750 V), DC Voltage (0-999.9 V), DC/AC Current (0-9.999 A), Resistance (0-19.99 MΩ), and Capacitance (0-99.99 mF). Includes continuity measurement.
- DDS сигнал генератору: Generates 13 types of waveforms with a maximum output frequency of 50 kHz and a 1 Hz interval.
- Data Saving Function: One-click saving and screening of data. Connects to PC via Type-C for saved image upload. Allows comparison of reference and measured waveforms on the same screen.
- Күчтүү дизайн: Features an FPGA+MCU+ADC hardware architecture, integrated high-voltage protection module, 2.8-inch LCD display, and a built-in 3000 mAh lithium-ion battery providing up to 6 hours of standby time. Type-C interface supports 5V/1A charging.

Image 1.1: The FNIRSI 2C53T device showcasing its 3-in-1 capabilities as an oscilloscope, multimeter, and signal generator.
2. Коопсуздук маалыматы
Please read all safety information carefully before using the device to prevent electric shock, injury, or damage to the instrument. Keep this manual for future reference.
- Always use the correct input terminals, function, and range for measurements.
- Колдонбоңуз томtage or current that exceeds the maximum rated values specified for the device.
- Ар бир колдонуудан мурун сыноо өткөргүчтөрүн текшериңиз. Эгерде изоляция бузулса же жылаңач металл ачык болсо, колдонбоңуз.
- Түзмөктү нымдуу чөйрөдө же нымдуу колдор менен иштетпеңиз.
- Ensure the device is turned off and disconnected from any circuits before changing functions or connecting/disconnecting test leads.
- Refer to the specifications section for maximum input ratings for each function.
- Түзмөктү оңдоого же өзгөртүүгө аракет кылбаңыз. Тейлөөнү квалификациялуу адистерге тапшырыңыз.
3. Продукциянын компоненттери
The FNIRSI 2C53T package typically includes the following items:
- FNIRSI 2C53T 3-in-1 Device
- Осциллограф зонддору (x2)
- Multimeter Test Leads (Red and Black)
- Type-C USB кабели
- Колдонуучунун Колдонмосу (бул документ)
- Сатуу сумкасы (таңгакка жараша өзгөрүшү мүмкүн)
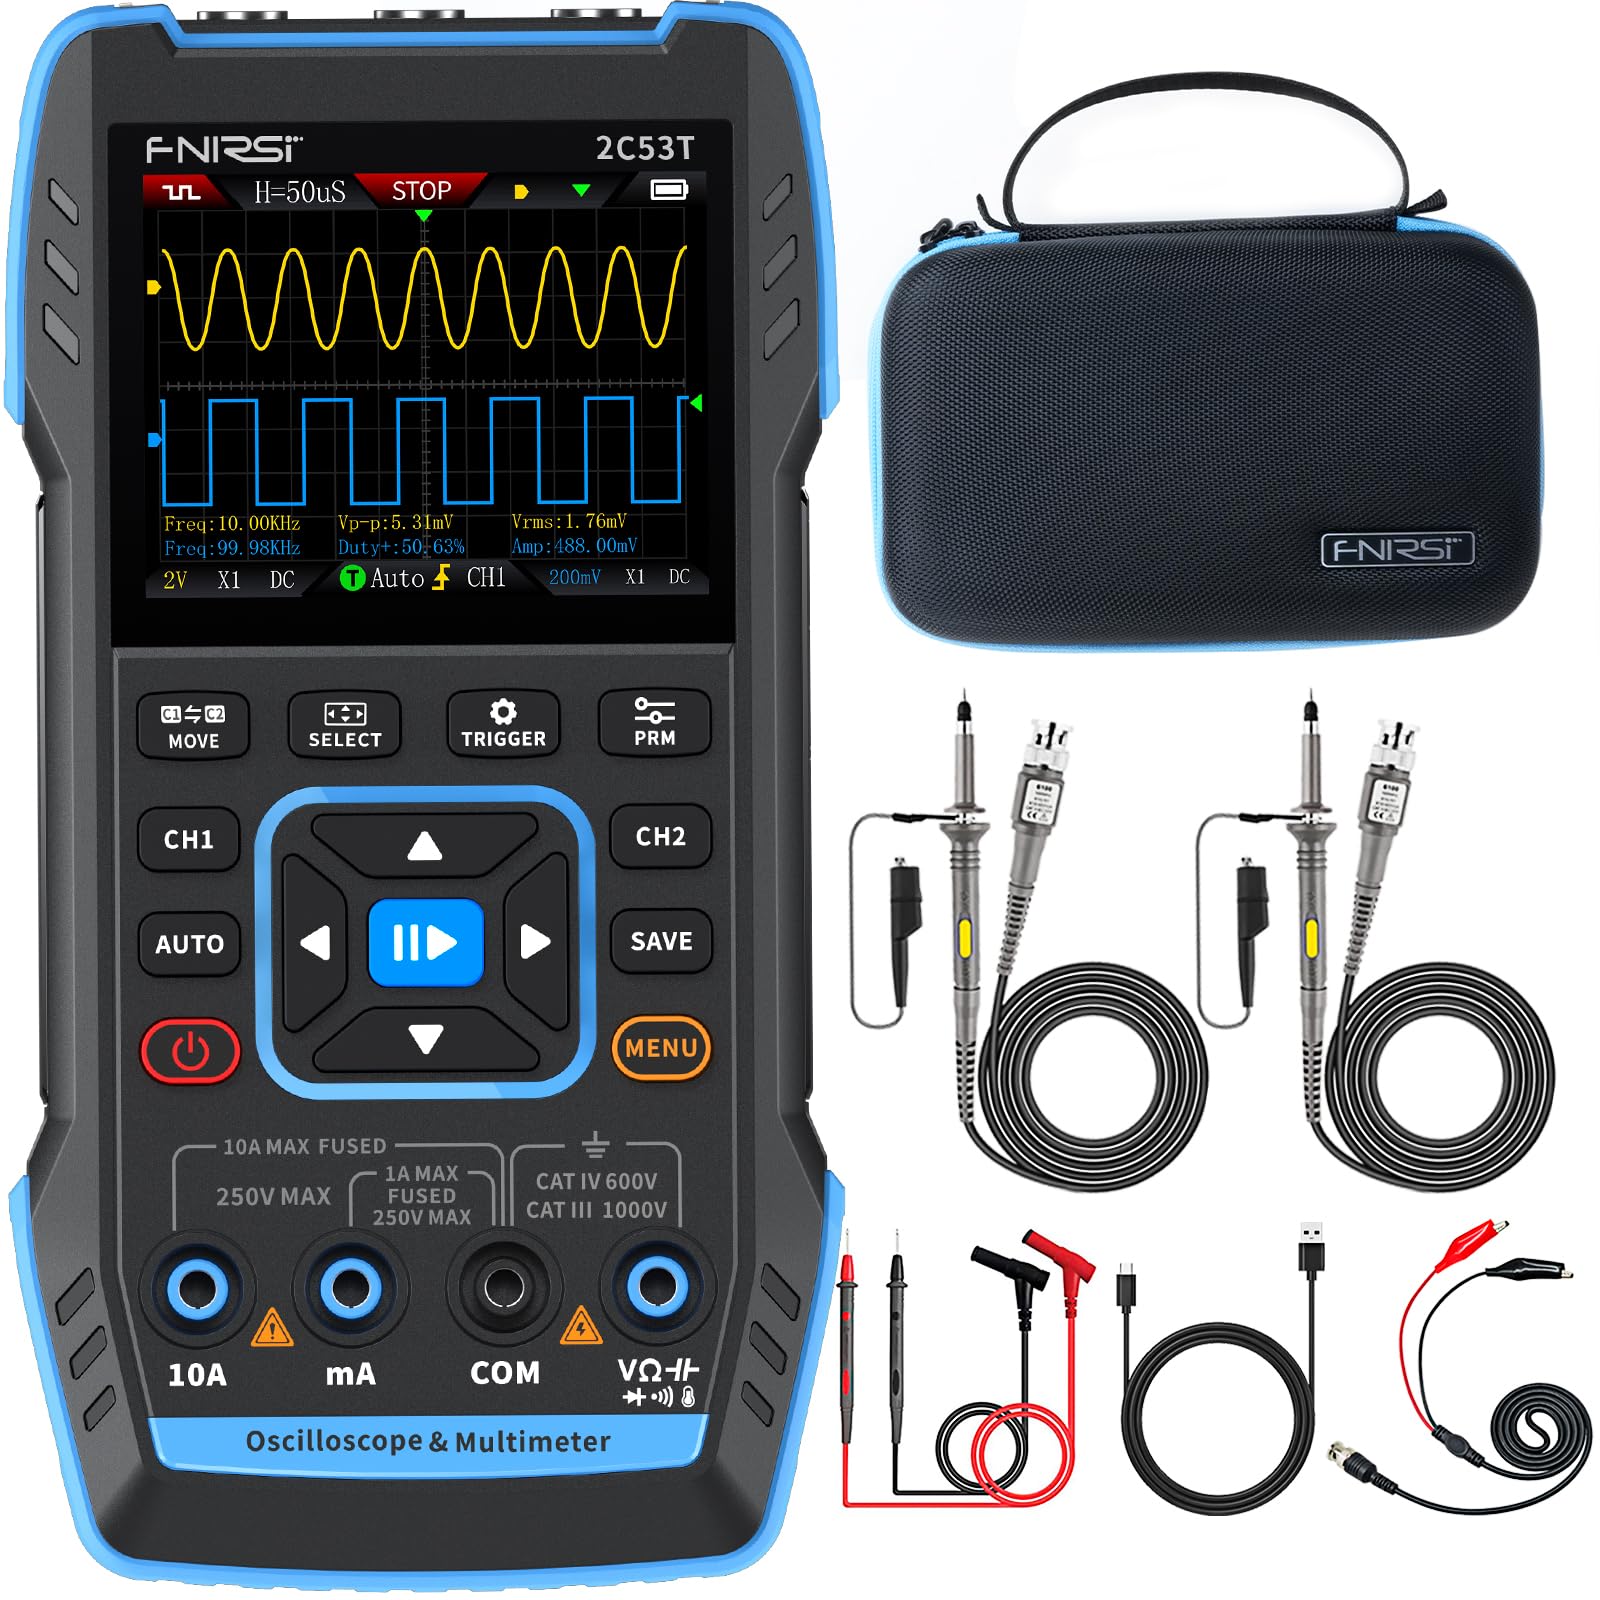
Image 3.1: The FNIRSI 2C53T device along with its standard accessories, including oscilloscope probes and multimeter test leads.
4. Орнотуу жана алгачкы колдонуу
4.1 Аппаратты заряддоо
Before first use, fully charge the internal lithium-ion battery. Connect the supplied Type-C USB cable to the device's Type-C port and to a 5V/1A USB power adapter (not included). The charging indicator on the screen will show the charging status.
4.2 Күйгүзүү/өчүрүү
Press and hold the power button (usually marked with a power symbol) for a few seconds to turn the device ON or OFF.
4.3 Connecting Probes and Test Leads
The device features dedicated input ports for oscilloscope channels (CH1, CH2) and the signal generator (DDS), as well as multimeter input jacks (10A, mA, COM, VΩ+). Ensure correct connections for the desired function.

Сүрөт 4.1: Жакын пландан view of the FNIRSI 2C53T's input ports, including CH1, CH2 for oscilloscope, and DDS for signal generator output.
5. Иштөө нускамалары
The FNIRSI 2C53T features a user-friendly interface with a central navigation pad and dedicated function buttons (MOVE, SELECT, TRIGGER, PRM, AUTO, SAVE, MENU, CH1, CH2).
5.1 Осциллограф режими
To enter Oscilloscope mode, ensure the device is powered on. The default screen often displays the oscilloscope interface. Use the CH1 and CH2 buttons to enable or disable channels.
- Параметрлерди тууралоо: Use the navigation pad (up/down/left/right) to select and adjust parameters like vertical sensitivity (V/div), horizontal time base (s/div), and trigger level. The 'SELECT' button confirms selections.
- Trigger орнотуулары: Press the 'TRIGGER' button to access trigger settings, including trigger mode (Auto, Normal, Single), trigger type (Edge, Pulse, Video), and source.
- Автоматтык өлчөө: Press 'AUTO' for automatic waveform scaling and measurement display.
- Толкун формасын талдоо: The device supports various analysis functions. Access these through the 'MENU' button or dedicated options. These include Math Operations, Cursor Functions for precise measurements, Infinite Afterglow for observing signal changes over time, X-Y Mode for phase relationship analysis, and FFT Spectrum for frequency domain analysis.
- Толкун формаларын сактоо: Press the 'SAVE' button to store the current waveform display. Saved images can be transferred to a PC via the Type-C connection.

Image 5.1: The FNIRSI 2C53T displaying various waveform analysis features, including Math Operations, Cursor Functions, Infinite Afterglow, and X-Y Mode.
5.2 Мультиметрдик режим
To switch to Multimeter mode, press the 'MENU' button and navigate to the Multimeter option, or use a dedicated button if available. Connect the test leads to the appropriate input jacks (COM and VΩ+ for voltage/resistance/capacitance, 10A or mA for current).
- Тtage Өлчөө (AC/DC): Select ACV or DCV. Connect test leads in parallel with the circuit or component.
- Токту өлчөө (AC/DC): Select ACA or DCA. Connect test leads in series with the circuit. Ensure the correct current input jack (10A or mA) is used.
- Каршылык өлчөө: Select Ω. Connect test leads across the component when the circuit is de-energized.
- Capacitance өлчөө: Select F. Connect test leads across the capacitor when the circuit is de-energized.
- Үзгүлтүксүздүк тести: Select the continuity symbol. The device will emit an audible beep if continuity is detected.

Image 5.2: The FNIRSI 2C53T displaying its multimeter interface, showing voltage measurement and input jack labels.
5.3 Сигнал генераторунун режими
To access the Signal Generator, press the 'MENU' button and select the Signal Generator option. Connect the DDS output to the circuit where the signal is needed.
- Толкун формасын тандоо: Use the navigation pad to choose from 13 available waveforms (e.g., Sine Wave, Square Wave, Sawtooth Wave).
- Параметрди тууралоо: Жыштыкты тууралоо, amplitude, and duty cycle (for certain waveforms) using the navigation pad and 'SELECT' button.

Image 5.3: The FNIRSI 2C53T displaying the various waveforms available from its DDS signal generator function.
6. Техникалык тейлөө
6.1 Тазалоо
Аппаратты жумшак менен сүртүңүз, гamp кездеме. Абразивдүү тазалоочу каражаттарды же эриткичтерди колдонбоңуз. Тазалоодон мурун түзмөктүн өчүрүлгөнүн жана бардык чынжырлардан ажыратылганын текшериңиз.
6.2 Батареяга кам көрүү
Батареянын иштөө мөөнөтүн узартуу үчүн, бат-баттан батарейканы толук зарядсыздандырбаңыз. Аппаратты узак мөөнөткө сактасаңыз, аны болжол менен 50% кубаттап, бир нече ай сайын кайра заряддаңыз.
6.3 Сактоо
Store the device in a cool, dry place, away from direct sunlight and extreme temperatures. Use the provided carrying case for protection during transport and storage.
7. Кыйынчылыктарды
- Түзмөк күйбөйт: Ensure the battery is charged. Connect the Type-C cable to a power source and try again.
- Осциллограф режиминде толкун формасы көрсөтүлбөйт: Check probe connections. Ensure the trigger settings are appropriate for the signal being measured. Adjust vertical and horizontal scales.
- Мультиметрдин туура эмес көрсөткүчтөрү: Verify test lead connections to the correct input jacks and ensure the correct measurement function is selected. Check if the circuit is de-energized for resistance and capacitance measurements.
- Сигнал генератору чыгарбай жатат: Confirm the DDS output is connected correctly and the signal generator function is active with appropriate parameters set.
- Экран катып калган же жооп бербей жатат: Кубат баскычын кармап туруп, түзмөктү өчүрүп-күйгүзүп көрүңүз. Эгер көйгөй чечилбесе, кардарларды колдоо кызматына кайрылыңыз.
8. Техникалык шарттар
| Өзгөчөлүк | Спецификация |
|---|---|
| Модел | FNIRSI 2C53T |
| Осциллограф каналдары | 2 |
| Аналогдук өткөрүү жөндөмдүүлүгү | 50 МГц |
| Sampling Rate | 250 МСа/с |
| Record Depth | 1 Kpt |
| Max Input Voltage | 400 V |
| Vertical Sensitivity | 10 мВ/бөлүү - 10 В/бөлүү |
| Multimeter Digits | 4.5 |
| Мультиметрдин эсептөөлөрү | 19999 |
| AC Voltage Диапазон | 0-750 В |
| DC Voltage Диапазон | 0-999.9 В |
| DC/AC ток диапазону | 0-9.999 А. |
| Каршылык диапазону | 0-19.99 МΩ |
| Кубаттуулук диапазону | 0-99.99 mF |
| Signal Generator Max Freq. | 50 кГц |
| Сигнал генераторунун толкун формалары | 13 түрү |
| Дисплей | 2.8 дюймдук LCD |
| Батарея | 3000 мАч Li-ion |
| Күтүү убактысы | 6 саатка чейин |
| Заряддоо интерфейси | Type-C (5V/1A) |
| Өлчөмдөр | 21.3 x 14.1 x 9.9 см |
| Салмагы | 890 г |
9. Кепилдик жана колдоо
The FNIRSI 2C53T comes with a standard manufacturer's warranty. For warranty claims, technical support, or service inquiries, please contact your point of purchase or the official FNIRSI customer support channels. Keep your purchase receipt as proof of purchase.