
1. Киришүү
This manual provides detailed instructions for the installation, operation, and maintenance of the Real HD DS-9664NI-M8 4K 64 Channel Enterprise Network Video Recorder (NVR). This NVR is designed for professional surveillance systems, supporting up to 64 IP camera inputs and advanced recording capabilities up to 32MP resolution.

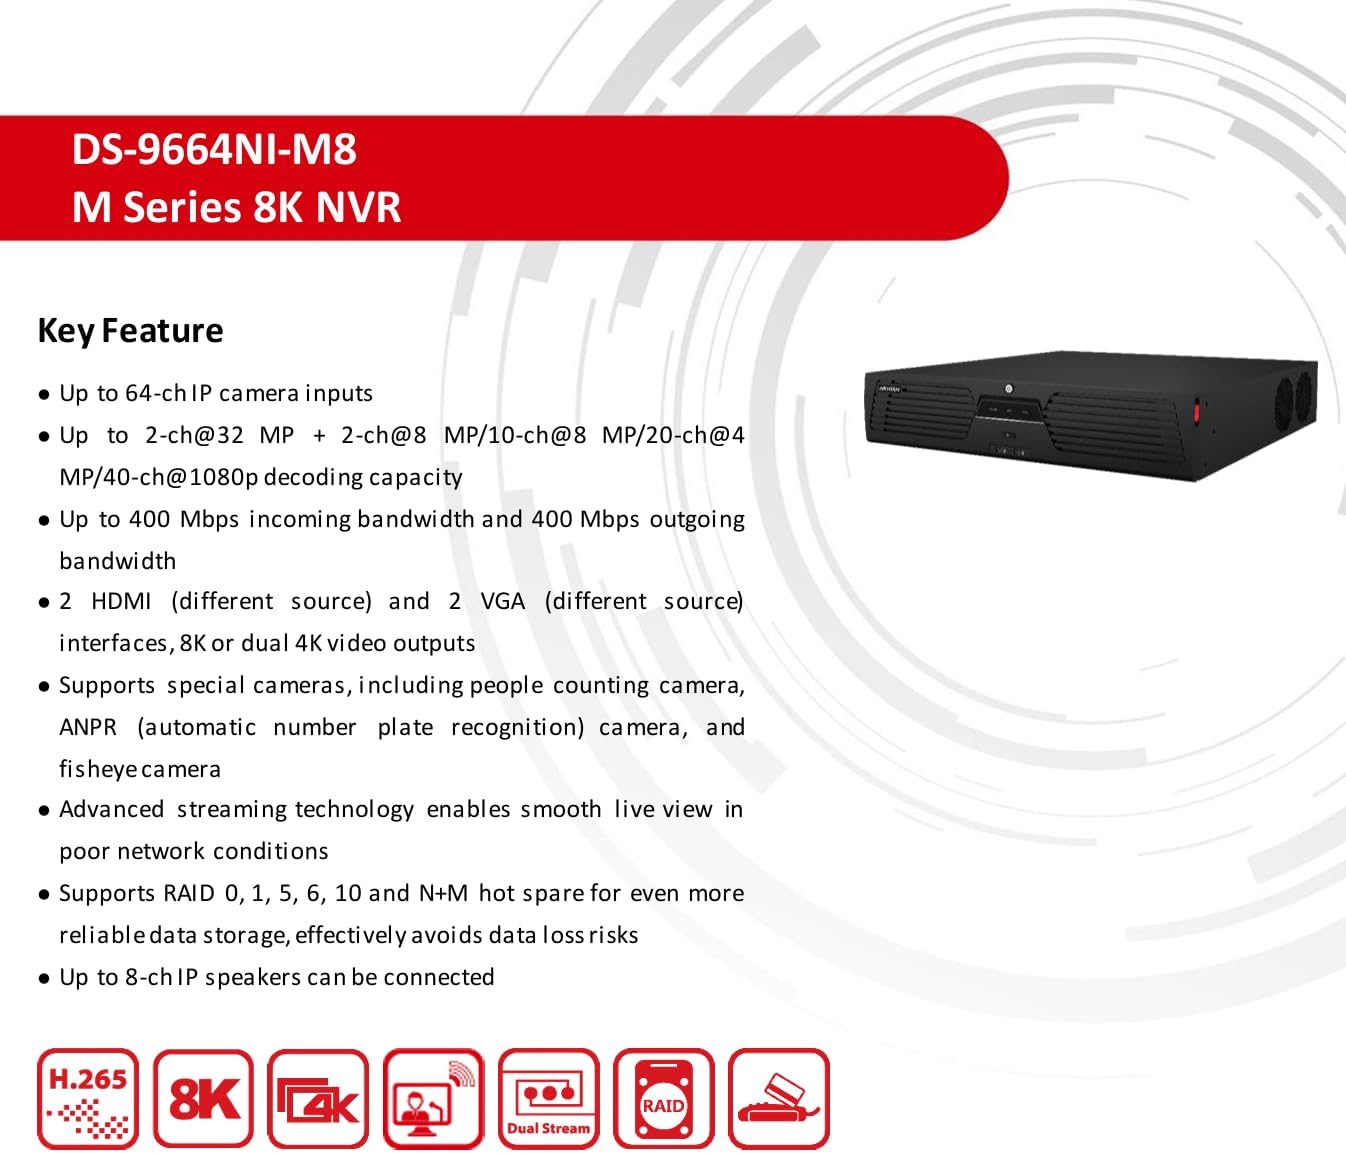
Figure 1: Key features of the DS-9664NI-M8 NVR, highlighting its capabilities such as 64 IP camera inputs, 32MP recording, 400 Mbps bandwidth, dual HDMI/VGA outputs, special camera support, advanced streaming, RAID, and IP speaker connectivity.
Негизги өзгөчөлүктөрү бүттүview:
- Up to 64-channel IP camera inputs.
- Decoding capacity: 2-ch@32 MP, 2-ch@24 MP, 4-ch@12 MP, 8-ch@8 MP, 16-ch@4 MP, or 32-ch@1080p.
- Up to 400 Mbps incoming and 400 Mbps outgoing bandwidth.
- Dual HDMI (different source) and dual VGA (different source) interfaces, supporting 8K or dual 4K video outputs.
- Supports special cameras including people counting, ANPR (automatic number plate recognition), and fisheye cameras.
- Advanced streaming technology for smooth live view начар тармактык шарттарда.
- Supports RAID 0, 1, 5, 6, 10 and N+M hot spare for reliable data storage.
- Up to 8-channel IP speakers can be connected.
2. Продукт бүтүп калдыview
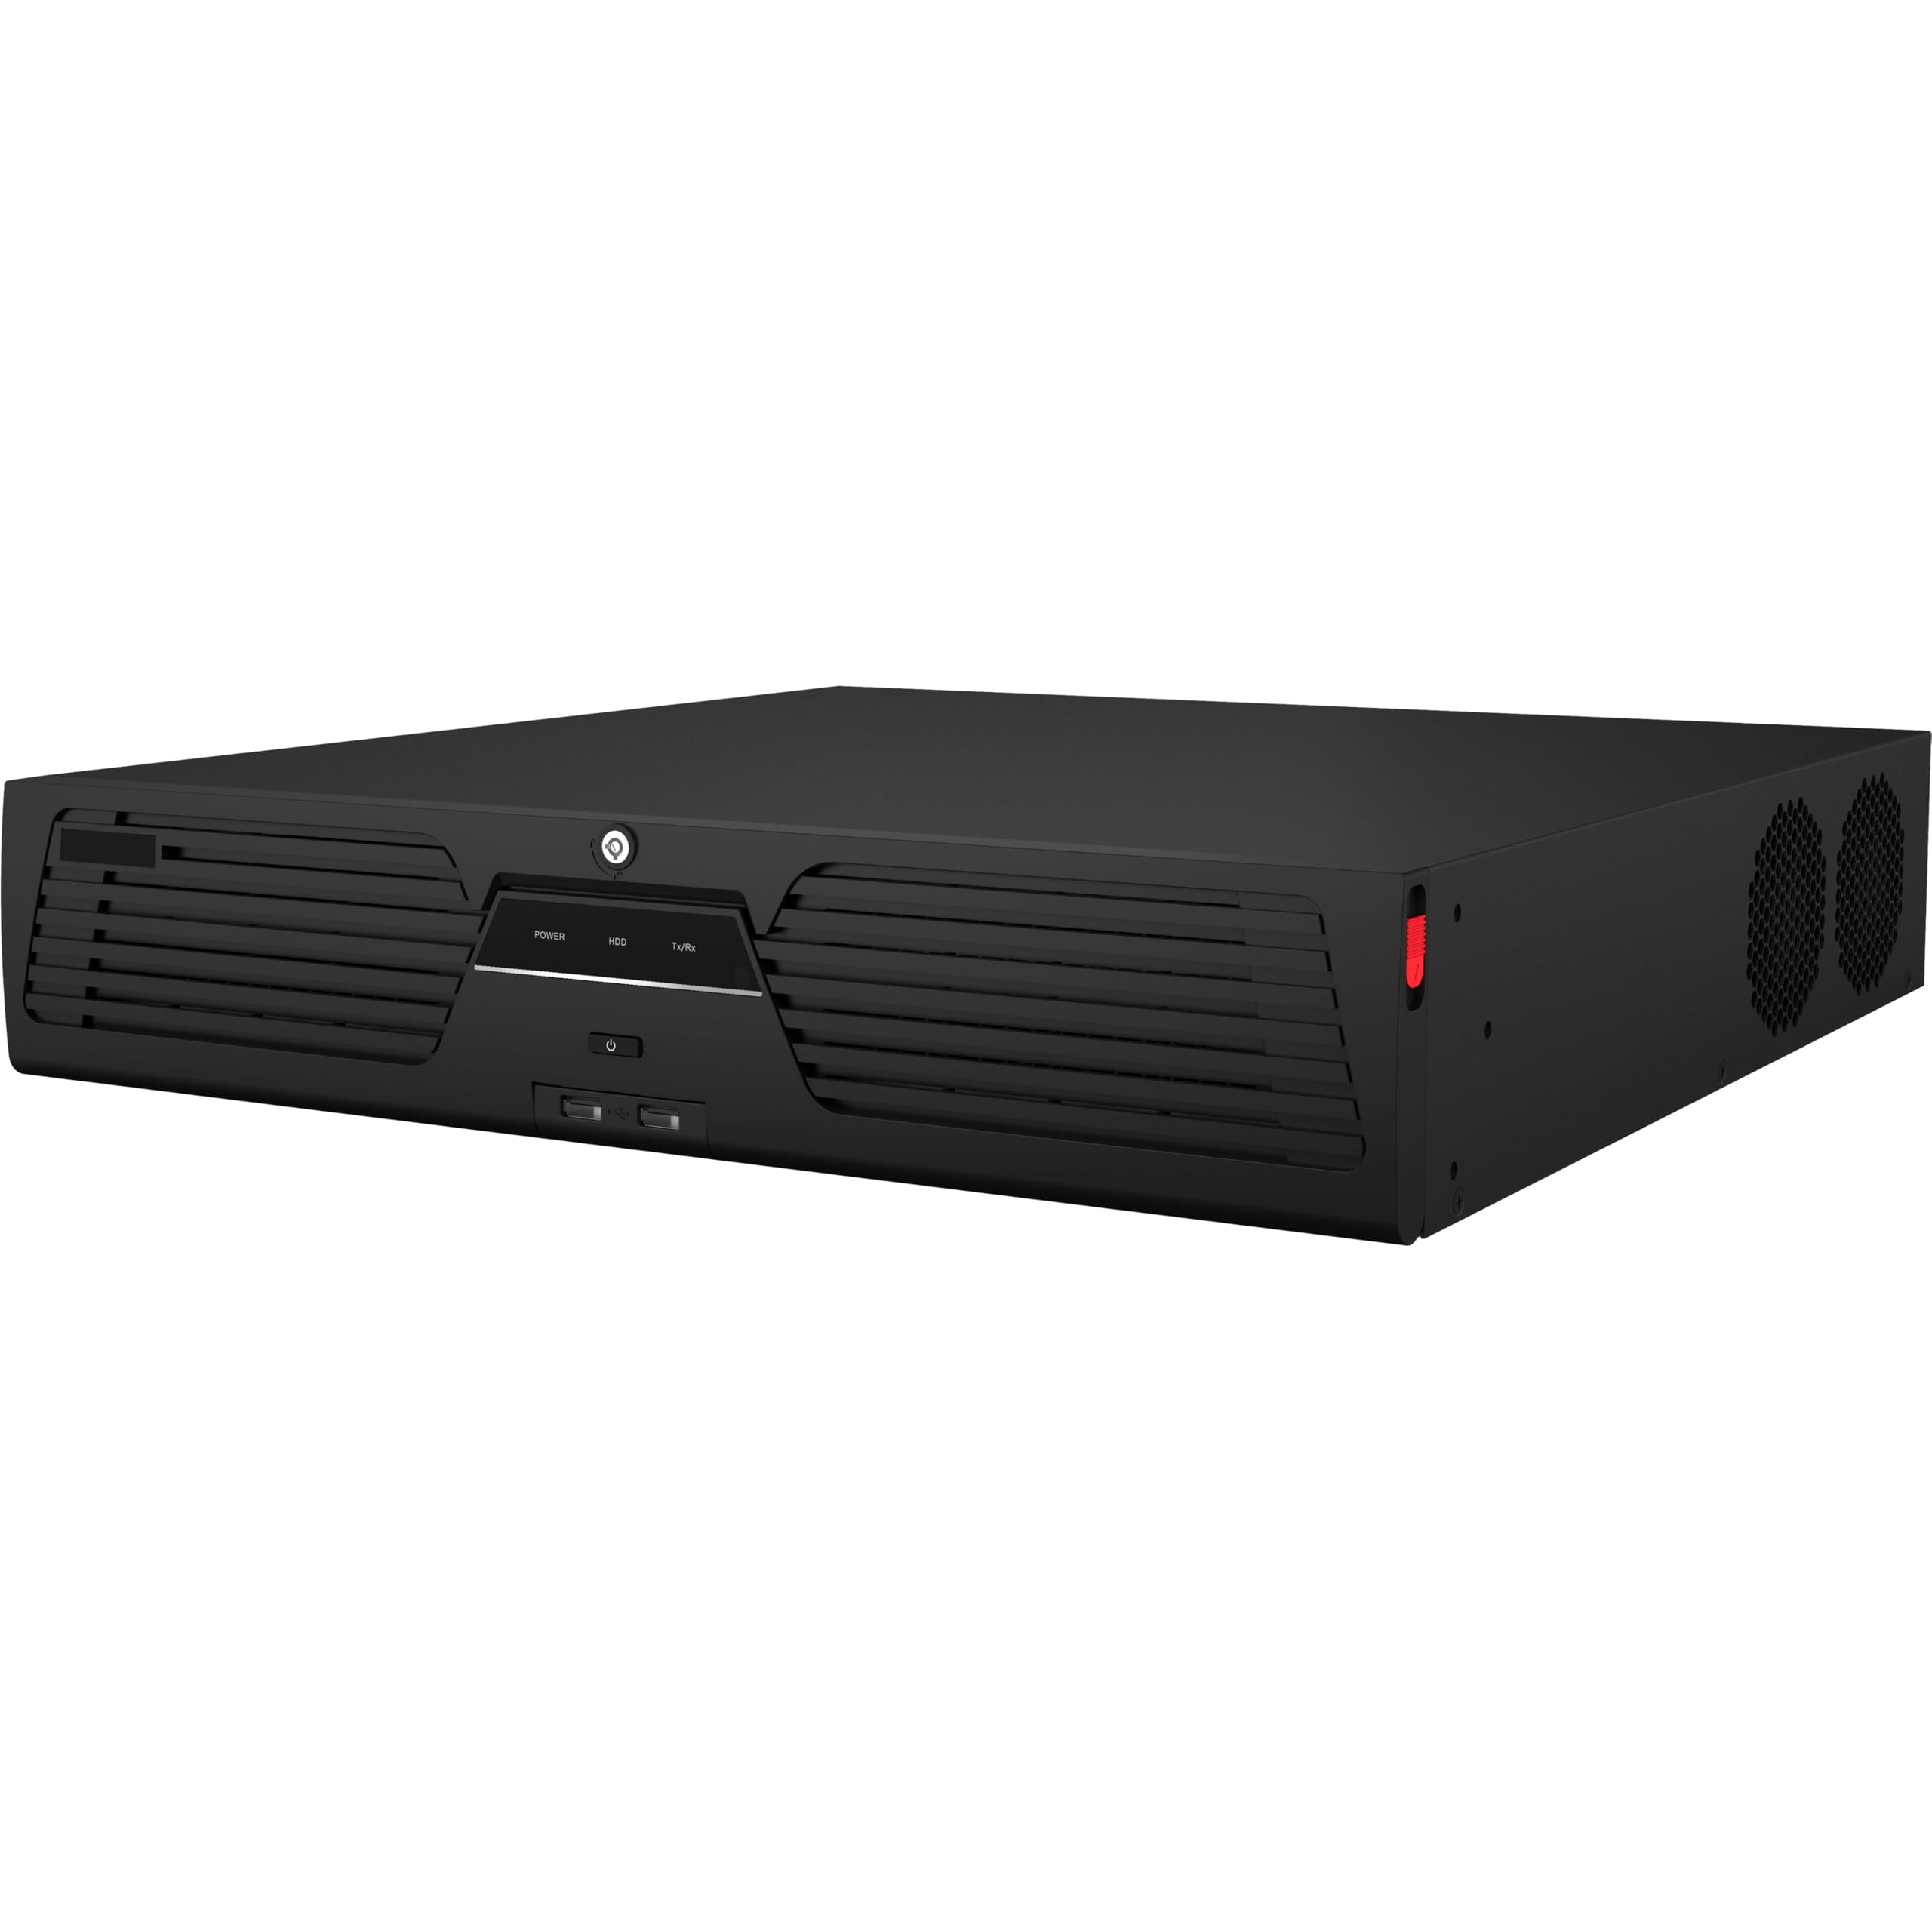
Сүрөт 2: Алдыңкы view of the Real HD DS-9664NI-M8 NVR unit, showing its rack-mountable design and front panel indicators.
The DS-9664NI-M8 is a robust network video recorder designed for enterprise-level surveillance. It features a standard rack-mountable chassis, providing efficient space utilization in server rooms or dedicated surveillance cabinets. The front panel typically includes status indicators and USB ports for easy access.
3-сүрөт: Каптал view of the Real HD DS-9664NI-M8 NVR, illustrating its ventilation design for optimal heat dissipation.
Физикалык интерфейс
The rear panel of the NVR provides various ports for connecting cameras, monitors, network, and other peripherals. Refer to the diagram below for a detailed layout of the interfaces.

Figure 4: Rear panel interface diagram of the DS-9664NI-M8 NVR, showing all connection ports.
| Жок. | Description | Жок. | Description |
|---|---|---|---|
| 1 | eSATA интерфейси | 7 | RS-232 Сериялык интерфейс |
| 2 | LAN интерфейстери | 8 | USB 3.0 интерфейстери |
| 3 | Аудио кирүү жана чыгуу | 9 | Alarm in, alarm out, RS-485 serial interface, Ctrl 12V and DC 12V |
| 4 | Audio out and video out | 10 | GND |
| 5 | HDMI 1 and HDMI 2 interfaces | 11 | 100 to 240 VAC power supply |
| 6 | VGA 1 and VGA 2 interfaces | 12 | Кубат өчүргүч |
3. Орнотуу
3.1 Катуу дискти орнотуу
The DS-9664NI-M8 NVR supports up to 8 SATA HDDs and 1 eSATA interface. Hard drives are not included with the NVR and must be purchased separately. Follow these general steps for installation:
- Power off the NVR and disconnect all cables.
- Open the NVR chassis by removing the screws on the rear panel and sliding the cover off.
- Mount the SATA hard drives into the designated bays using the provided screws.
- Connect the SATA data and power cables from the NVR motherboard to each hard drive.
- Securely close the NVR chassis.
3.2 Перифериялык түзүлүштөрдү туташтыруу
Before powering on the NVR, connect all necessary peripherals:
- IP камералар: Connect IP cameras to the LAN interfaces (No. 2) using Ethernet cables. Ensure cameras are powered and configured correctly.
- Мониторлор: Connect a monitor to either the HDMI (No. 5) or VGA (No. 6) output ports. For 8K resolution, use HDMI 1.
- Тармак: Connect the NVR to your local network using one of the LAN interfaces (No. 2).
- USB түзмөктөрү: Connect a mouse, keyboard, or USB storage devices to the USB 2.0 (front panel) or USB 3.0 (No. 8) ports.
- Аудио: Connect audio input/output devices to the Audio in/out ports (No. 3, No. 4).
- Alarm/Serial: Connect alarm devices or serial communication devices to the respective ports (No. 7, No. 9).
3.3 Күйгүзүү
After all connections are made, connect the power cable to the 100 to 240 VAC power supply port (No. 11) and then to a power outlet. Press the power switch (No. 12) to turn on the NVR. The system will boot up, and you should see the initial setup wizard on the connected monitor.
4. Операция
4.1 Баштапкы конфигурация
Upon first boot, the NVR will guide you through an initial setup wizard. This typically includes setting up an administrator password, network settings (DHCP or static IP), date and time, and hard drive initialization. It is crucial to format the installed hard drives before recording can begin.
4.2 Video Input and Recording
The NVR supports various recording resolutions and decoding capabilities. You can configure recording schedules, motion detection, and other event-triggered recordings through the NVR's graphical user interface (GUI). The system supports H.265+/H.265/H.264+/H.264 video compression formats for efficient storage.
4.3 Тармактын конфигурациясы
Access the network settings in the NVR's menu to configure IP addresses, subnet masks, gateways, and DNS servers. The NVR supports various network protocols including TCP/IP, DHCP, IPv4, IPv6, DNS, DDNS, NTP, RTSP, SMTP, SNMP, and ONVIF (Version 2.2) for broad compatibility with IP cameras.
4.4 RAID конфигурациясы
For enhanced data reliability and performance, the NVR supports RAID 0, 1, 5, 6, 10, and N+M hot spare configurations. Access the RAID management section in the NVR's system settings to create and manage RAID arrays. This helps protect against data loss in case of a hard drive failure.
4.5 Mobile Access (HIK-CONNECT)
To access your NVR and view live camera feeds remotely, download and install the HIK-CONNECT application on your mobile device. The app is available on the App Store, Google Play, and Android Market.

Figure 5: HIK-CONNECT mobile application download options and interface preview for remote NVR access.
Follow the in-app instructions to register an account, add your NVR using its serial number or QR code, and configure remote viewорнотуулар.
5. Техникалык шарттар
5.1 Техникалык мүнөздөмөлөр
The following table details the technical specifications of the Real HD DS-9664NI-M8 NVR:

Figure 6: Detailed technical specifications for the DS-9664NI-M8 NVR, including video, audio, network, RAID, and general parameters.
| Категория | Параметр | |
|---|---|---|
| Видео жана аудио | IP видео киргизүү | 64-ч |
| Кирүүчү өткөрүү жөндөмдүүлүгү | 400 Мбит/сек | |
| Чыгуучу өткөрүү жөндөмдүүлүгү | 400 Мбит/сек | |
| HDMI 1 чыгышы | 8K (7680 × 4320)/30 Hz, 4K (3840 × 2160)/60 Hz, 4K (3840 × 2160)/30 Hz, 2K (2560 × 1440)/60 Hz, 1920 × 1080/60 Hz | |
| HDMI 2 чыгышы | 4K (3840 × 2160)/60 Hz, 4K (3840 × 2160)/30 Hz, 2K (2560 × 1440)/60 Hz, 1920 × 1080/60 Hz (Max 1080p when HDMI 1 is 8K) | |
| VGA 1 Output | 1920 × 1080/60 Гц | |
| VGA 2 Output | 1920 × 1080/60 Гц | |
| Декоддоо | Декоддоо форматы | H.265 + / H.265 / H.264 + / H.264 |
| Resolution Recording | 32 MP/24 MP/12 MP/8 MP/7 MP/6 MP/5 MP/4 MP/3 MP/1080p/UXGA/720p/VGA/4CIF/DCIF/2CIF/CIF/QCIF | |
| Синхрондуу ойнотуу | 16-ч | |
| Декоддоо мүмкүнчүлүгү | 2-ch@32 MP (30 fps) + 2-ch@8 MP (30 fps)/10-ch@8 MP (30 fps)/20-ch@4 MP (30 fps)/40-ch@1080p (30 fps) | |
| Аудио кысуу | G.711ulaw/G.711alaw/G.722/G.726/AAC/MP2L2/PCM | |
| Network | Network протоколу | TCP/IP, DHCP, IPv4, IPv6, DNS, DDNS, NTP, RTSP, SADP, SMTP, SNMP, NFS, iSCSI, UPnP, HTTP, HTTPS, ONVIF (Version 2.2), OTAP |
| Тармак интерфейси | 2, RJ-45 10/100/1000 Mbps self-adaptive Ethernet interface | |
| Camera Access Protocol | ONVIF (Version 2.5), RTSP | |
| RAID | RAID түрү | RAID0, RAID1, RAID5, RAID6, RAID10 |
| Көмөкчү интерфейс | Сериялык интерфейс | 1 RS-485 (full-duplex), 1 RS-232 |
| SATA | 8 SATA interfaces supporting hot-plug | |
| eSATA | 1 eSATA interface | |
| Кубаттуулугу | Ар бир диск үчүн 16 ТБга чейин сыйымдуулук | |
| USB интерфейси | Front panel: 2 × USB 2.0; Rear panel: 2 × USB 3.0 | |
| Генерал | Электр камсыздоо | 100 - 240 VAC, 50 - 60 Гц |
| Керектөө | ≤ 50 Вт (HDDсиз) | |
| Иштөө температурасы | -10 °Cден 55 °Cге чейин (14 °F менен 131 °F) | |
| Иштөө нымдуулугу | 10% - 90% | |
| Шасси | 2U шасси | |
| Салмагы | ≤ 10 кг (22 фунт) | |
| Сертификация | Сертификат алган | CE, FCC |
| FCC | 15-бөлүк B кичи бөлүгү, ANSI C63.4-2014 | |
5.2 Өлчөмдөр
The physical dimensions of the NVR are provided below:

Figure 7: Dimensional drawing of the DS-9664NI-M8 NVR, showing measurements in millimeters and inches.
- Өлчөмдөрү (Г × Д × Ж): 442 × 462 × 88 мм (17.4" × 18.2" × 3.5")
6. Техникалык тейлөө
Туура техникалык тейлөө NVR системаңыздын узак мөөнөттүү иштешин жана оптималдуу иштешин камсыз кылат.
- Тазалоо: Regularly clean the exterior of the NVR with a soft, dry cloth. Ensure ventilation openings are free from dust and obstructions to prevent overheating. Do not use liquid cleaners directly on the unit.
- Экологиялык шарттар: Operate the NVR within the specified temperature (-10 °C to 55 °C) and humidity (10% to 90%) ranges. Avoid direct sunlight, excessive heat, and high moisture environments.
- Программалык камсыздоонун жаңыртуулары: Мезгил-мезгили менен өндүрүүчүнүн текшерүү website for firmware updates. Keeping the firmware updated can improve performance, add new features, and enhance security.
- Маалыматтын камдык көчүрмөсү: Regularly back up critical recordings to external storage to prevent data loss, especially if not utilizing RAID.
7. Кыйынчылыктарды
This section addresses common issues you might encounter with your NVR. For more complex problems, refer to the online support resources or contact technical support.
- Кубат жок: Ensure the power cable is securely connected to both the NVR and a working power outlet. Check the power switch and any associated circuit breakers.
- Видео чыгаруу жок: Verify that the monitor is correctly connected to the HDMI or VGA port and is set to the correct input source. Check the resolution settings on the NVR if possible.
- Cameras Not Recording: Confirm that hard drives are installed, initialized, and healthy. Check recording schedules and ensure cameras are properly connected and configured within the NVR interface.
- Тармакка туташуу маселелери: Ensure Ethernet cables are securely connected. Verify NVR IP address, subnet mask, gateway, and DNS settings are correct and match your network configuration. Test network cables.
- Сырсөздү унуттум: Refer to the NVR's specific password reset procedure, which may involve a physical reset button or a software utility.
8. Кепилдик жана колдоо
8.1 Кепилдик маалыматы
The Real HD DS-9664NI-M8 NVR comes with a 1 жылдык өндүрүүчүнүн кепилдиги from the date of purchase. This warranty covers defects in materials and workmanship under normal use. Please retain your proof of purchase for warranty claims. The warranty does not cover damage caused by misuse, accidents, unauthorized modifications, or improper installation.
8.2 Техникалык колдоо
For technical assistance, troubleshooting, or warranty inquiries, please contact Real HD customer support. Refer to the official Real HD website for the most current contact information, support resources, and FAQs.
Онлайн ресурстар: Visit the Real HD official website for product documentation, firmware updates, and support forums.