Introduction
This manual provides detailed instructions for the installation, operation, and maintenance of your be quiet! Pure Loop 3 280mm Black CPU Liquid Cooler. This all-in-one (AIO) liquid cooling system is designed to deliver high cooling performance for all consumer CPUs, including heavily overclocked systems, while maintaining quiet operation.
The Pure Loop 3 features a state-of-the-art PWM pump with a 6-pole motor to minimize vibrations, two Pure Wings 3 140mm PWM high-speed fans for high static pressure and quiet operation, and flexible sleeved tubes for easy handling. Please read these instructions carefully before proceeding with installation.

Image: The be quiet! Pure Loop 3 280mm Black CPU Liquid Cooler, showcasing the radiator, fans, pump, and product packaging.
Кутуда эмне бар
Орнотууну баштоодон мурун, пакетиңизде төмөндө келтирилген бардык компоненттер бар экенин текшериңиз:
- Pure Loop 3 280mm AIO Liquid Cooler (Radiator, Pump, and Tubes pre-assembled)
- 2x Pure Wings 3 140mm PWM High-Speed Fans
- Жылуулук пастасы
- Mounting kit for Intel sockets (LGA 1954/1851/1700/1200/1151/1150/1155)
- Mounting kit for AMD sockets (AM5/AM4)
- Адаптер кабелдери
- Колдонуучунун колдонмосу (бул документ)

Image: All included components of the Pure Loop 3 280mm cooler, including the radiator, fans, pump, mounting hardware, thermal paste, and cables.
Орнотуу жана орнотуу
Proper installation is crucial for optimal cooling performance. Follow these general steps. Refer to the detailed diagrams in the included printed manual for specific socket instructions.
1. Радиатор менен желдеткичтерди даярдаңыз
- Attach the two Pure Wings 3 140mm PWM fans to the radiator using the provided screws. Ensure the fan airflow direction is appropriate for your case's ventilation.
- Connect the daisy-chained PWM fan cables to a single PWM header on your motherboard or to the included adapter cable.
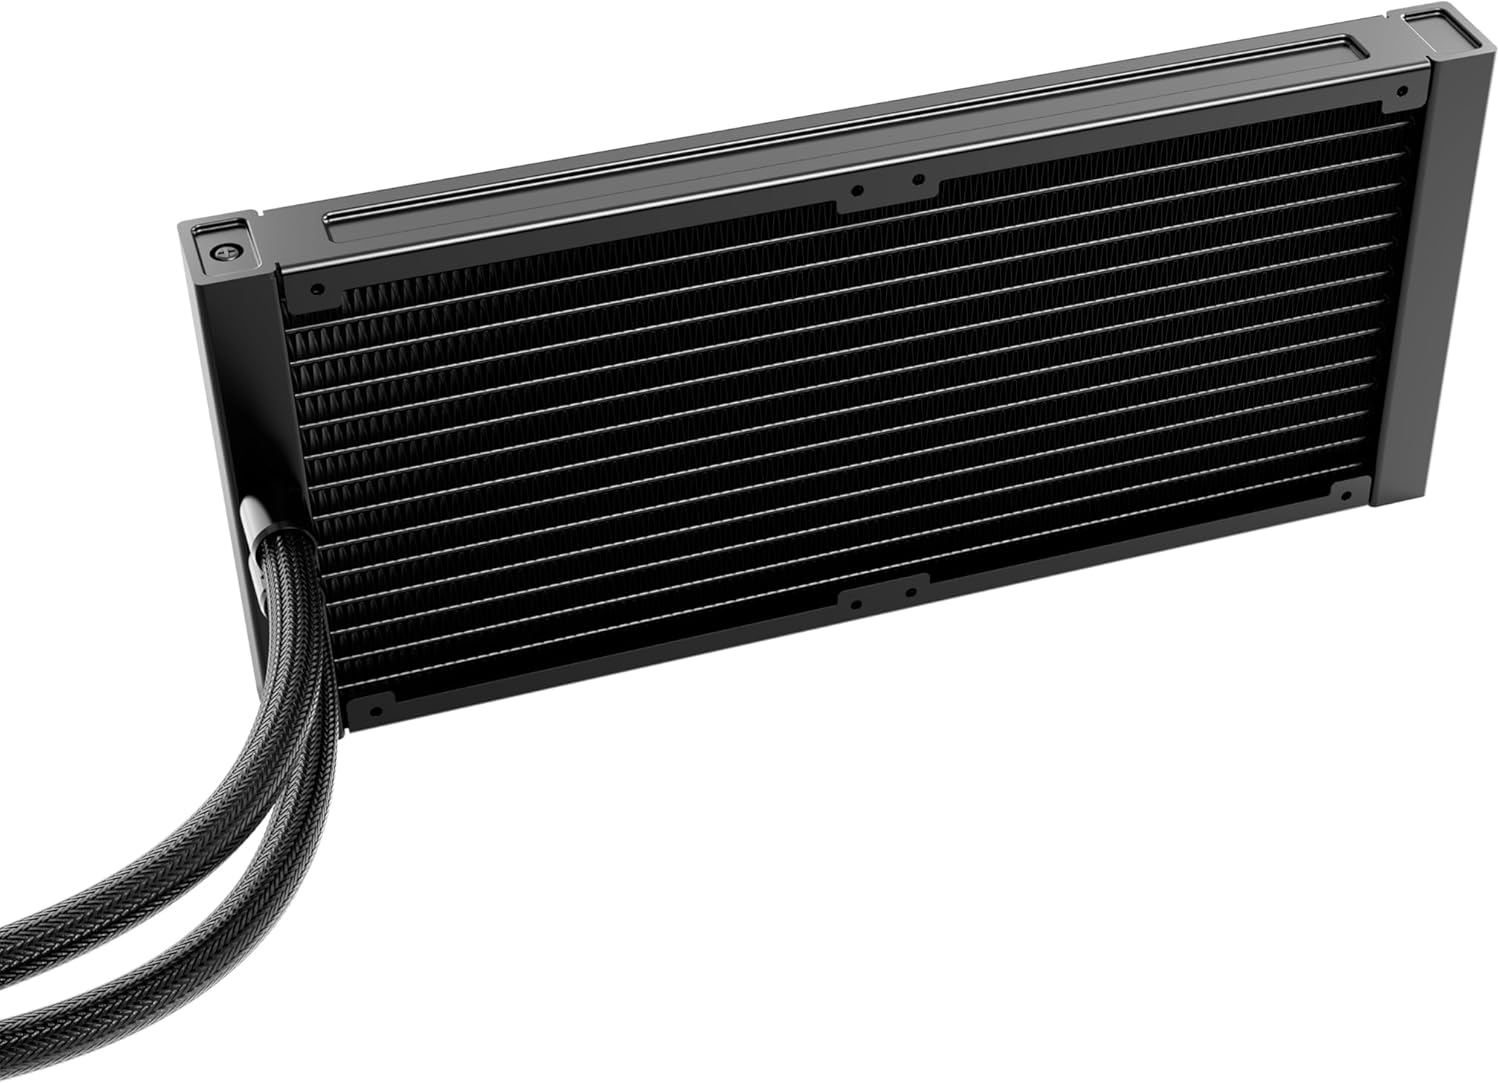
Сүрөт: деталдуу view of the radiator, showing its fin structure and connection points for the tubes.
2. Install the Radiator in Your PC Case
Mount the radiator assembly to an available fan mounting location in your PC case (e.g., top, front, or rear). Use the appropriate screws for your case. Ensure there is sufficient clearance for the radiator and fans.
3. CPU розеткасын даярдаңыз
- CPU розеткасынын түрүн аныктаңыз (Intel LGA же AMD AM).
- Install the correct backplate (if required) and mounting brackets for your socket type onto the motherboard.
- Чаңды же эски термикалык пастаны кетирүү үчүн CPU бетин изопропил спирти менен тазалаңыз.
- Apply a small amount of the provided thermal paste to the center of the CPU's integrated heat spreader (IHS).
4. Насосту/Муздак плитаны орнотуңуз
- Carefully place the pump/cold plate assembly onto the CPU, aligning it with the mounting holes on the brackets.
- Secure the pump/cold plate with the appropriate screws, tightening them in a diagonal pattern until snug. Do not overtighten.
- Connect the pump's 4-pin power cable to the designated CPU_FAN or AIO_PUMP header on your motherboard.
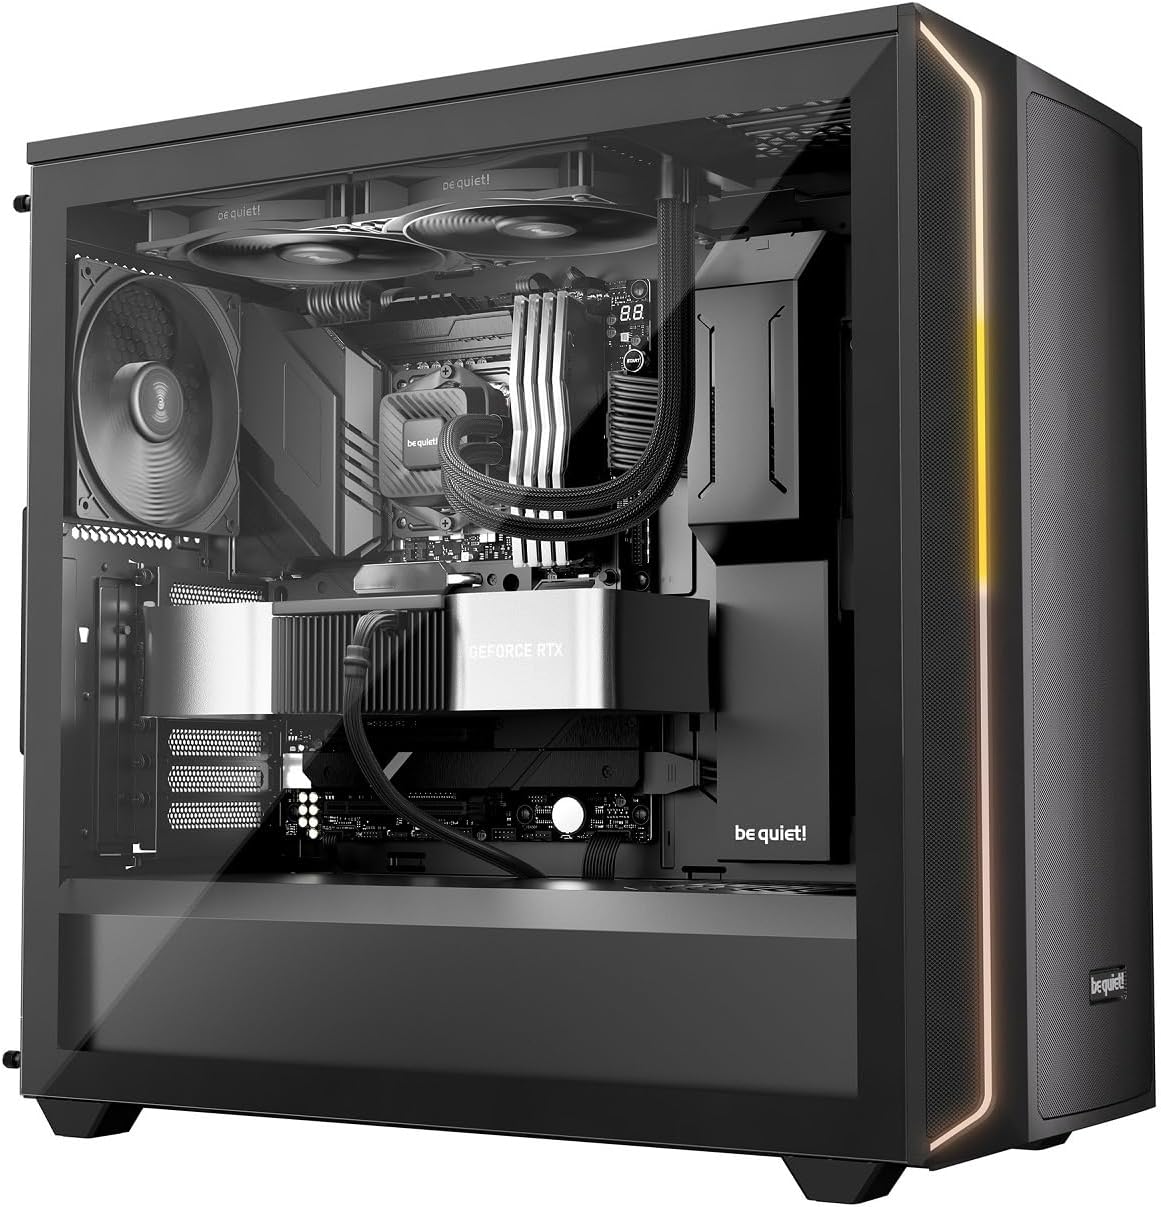
Image: The Pure Loop 3 liquid cooler installed within a computer case, demonstrating its placement and integration with other components.
Иштөө нускамалары
Once installed, the Pure Loop 3 liquid cooler operates automatically based on your motherboard's fan and pump control settings. For optimal performance and acoustics, it is recommended to configure these settings in your motherboard's BIOS/UEFI.
- Насостун иштеши: The PWM pump features a 6-pole motor designed for quiet and efficient operation. Ensure the pump is connected to a dedicated AIO_PUMP or CPU_FAN header that provides continuous power or is configured for PWM control based on CPU temperature.
- Күйөрман операциясы: The two Pure Wings 3 140mm PWM high-speed fans are daisy-chained for simplified cable management. Connect them to a single PWM fan header. Configure a fan curve in your BIOS/UEFI to balance cooling performance and noise levels according to your preferences.
- Алгачкы ишке киргизүү: After installation, power on your system and monitor CPU temperatures using monitoring software. Ensure the pump is running and fans are spinning. A slight gurgling sound may be heard initially as air bubbles are purged from the loop; this should subside quickly.
Техникалык тейлөө
The be quiet! Pure Loop 3 is designed for low maintenance. However, periodic checks can help ensure long-term performance.
- Чаңды тазалоо: Кысылган аба же жумшак щетка менен радиатордун сүзгүчтөрүнүн жана желдеткичтеринин чаңын мезгил-мезгили менен тазалап туруңуз. Тазалоо учурунда желдеткичтер айланбагандыгын текшериңиз.
- Толтуруу порту: The Pure Loop 3 features an easy-to-access refill port on the pump unit. Over time, a small amount of coolant may evaporate. If you notice a significant increase in CPU temperatures or hear unusual pump noises, you may need to top up the coolant. Use only high-quality, non-conductive liquid cooling fluid specifically designed for AIO systems. Refer to the be quiet! website for recommended coolant types and detailed refill instructions.
- Түтүктөрдү текшерүү: Occasionally inspect the flexible sleeved tubes for any signs of kinks, leaks, or damage.
Проблемаларды чечүү
If you encounter issues with your Pure Loop 3 liquid cooler, consider the following common troubleshooting steps:
- Жогорку CPU температурасы:
- Ensure the pump is running and connected correctly to a motherboard header.
- Verify that the fans are spinning and installed with the correct airflow direction.
- Check if the cold plate is making proper contact with the CPU. Re-seat if necessary, ensuring thermal paste is applied correctly.
- Inspect the radiator for dust buildup and clean if necessary.
- Check coolant levels via the refill port if temperatures remain high after other checks.
- Unusual Noises (Gurgling, Whining):
- A slight gurgling sound during initial startup is normal as air purges. If it persists, gently tilt your PC case to help trapped air move to the radiator.
- Ensure the pump is not running at excessively high RPMs if controllable.
- Check fan blades for obstructions or damage.
- Айланбаган күйөрмандар:
- Verify fan cables are securely connected to the motherboard header or adapter.
- Check BIOS/UEFI settings to ensure fan control is enabled and not set to a very low RPM curve at idle temperatures.
- Насос иштебейт:
- Ensure the pump's 4-pin cable is securely connected to the correct motherboard header (AIO_PUMP or CPU_FAN).
- Check BIOS/UEFI settings to ensure the pump header is enabled and receiving power.
If these steps do not resolve your issue, please contact be quiet! customer support for further assistance.
Техникалык шарттар
| Өзгөчөлүк | Деталь |
|---|---|
| Модель номери | BW028EU |
| Радиатордун өлчөмү | 280 мм |
| Fan Size | 2x 140 mm Pure Wings 3 PWM High-Speed |
| Шайкеш Intel розеткалары | LGA 1954, 1851, 1700, 1200, 1151, 1150, 1155 |
| Шайкеш AMD розеткалары | AM5, AM4 |
| Муздатуу ыкмасы | Суюктук (Баары бир жерде) |
| Насос мотору | 6-pole PWM motor |
| Ызы-чуу деңгээли | Up to 36.6 Decibels (dB) |
| Кубат туташтыргычынын түрү | 4-Pin (for pump and fans) |
| Продукциянын өлчөмдөрү | 11.02"L x 11.02"W x 11.02"H (Overall, approximate) |
| Refill Port | Yes, easy-to-access |
Кепилдик жана колдоо
be quiet! products are manufactured to the highest quality standards. This product comes with a manufacturer's warranty. For specific warranty terms and conditions, please refer to the warranty card included in your product packaging or visit the official be quiet! webсайт.
For technical support, troubleshooting assistance, or to inquire about replacement parts, please contact be quiet! customer service. You can find contact information and frequently asked questions on the official be quiet! webсайт: www.bequiet.com.


