
1. Продукт бүтүп калдыview
The MOUNTUP Ultrawide Monitor Wall Mount (MU-WM49) is designed to securely hold ultrawide and standard monitors ranging from 22 to 49 inches. This heavy-duty mount supports monitors weighing between 4.4 lbs (2 kg) and 44 lbs (20 kg) for flat screens, and 4.4 lbs (2 kg) and 33 lbs (15 kg) for curved screens. It features full motion capabilities, allowing for optimal viewing angle adjustments and space-saving benefits.

Image 1.1: The MOUNTUP Ultrawide Monitor Wall Mount with a curved monitor, showcasing анын дизайны жана функционалдуулугу.
2. Коопсуздук маалыматы
Please read and understand all instructions before installation and use. Failure to do so may result in personal injury or property damage.
- Салмак сыйымдуулугу: Do not exceed the maximum weight capacity of 44 lbs (20 kg) for flat monitors or 33 lbs (15 kg) for curved monitors.
- Дубал түрү: This mount is designed for installation on wood studs, brick walls, or concrete walls. Гипсокартонго гана орнотпоңуз.
- VESA шайкештиги: Ensure your monitor has VESA mounting patterns of 75x75mm or 100x100mm. If your monitor does not have VESA holes, a VESA adapter (not included) may be required.
- Ассамблея: Эки адам коопсуз орнотуу үчүн сунушталат.
- Куралдар: Орнотуу үчүн тиешелүү куралдарды колдонуңуз.
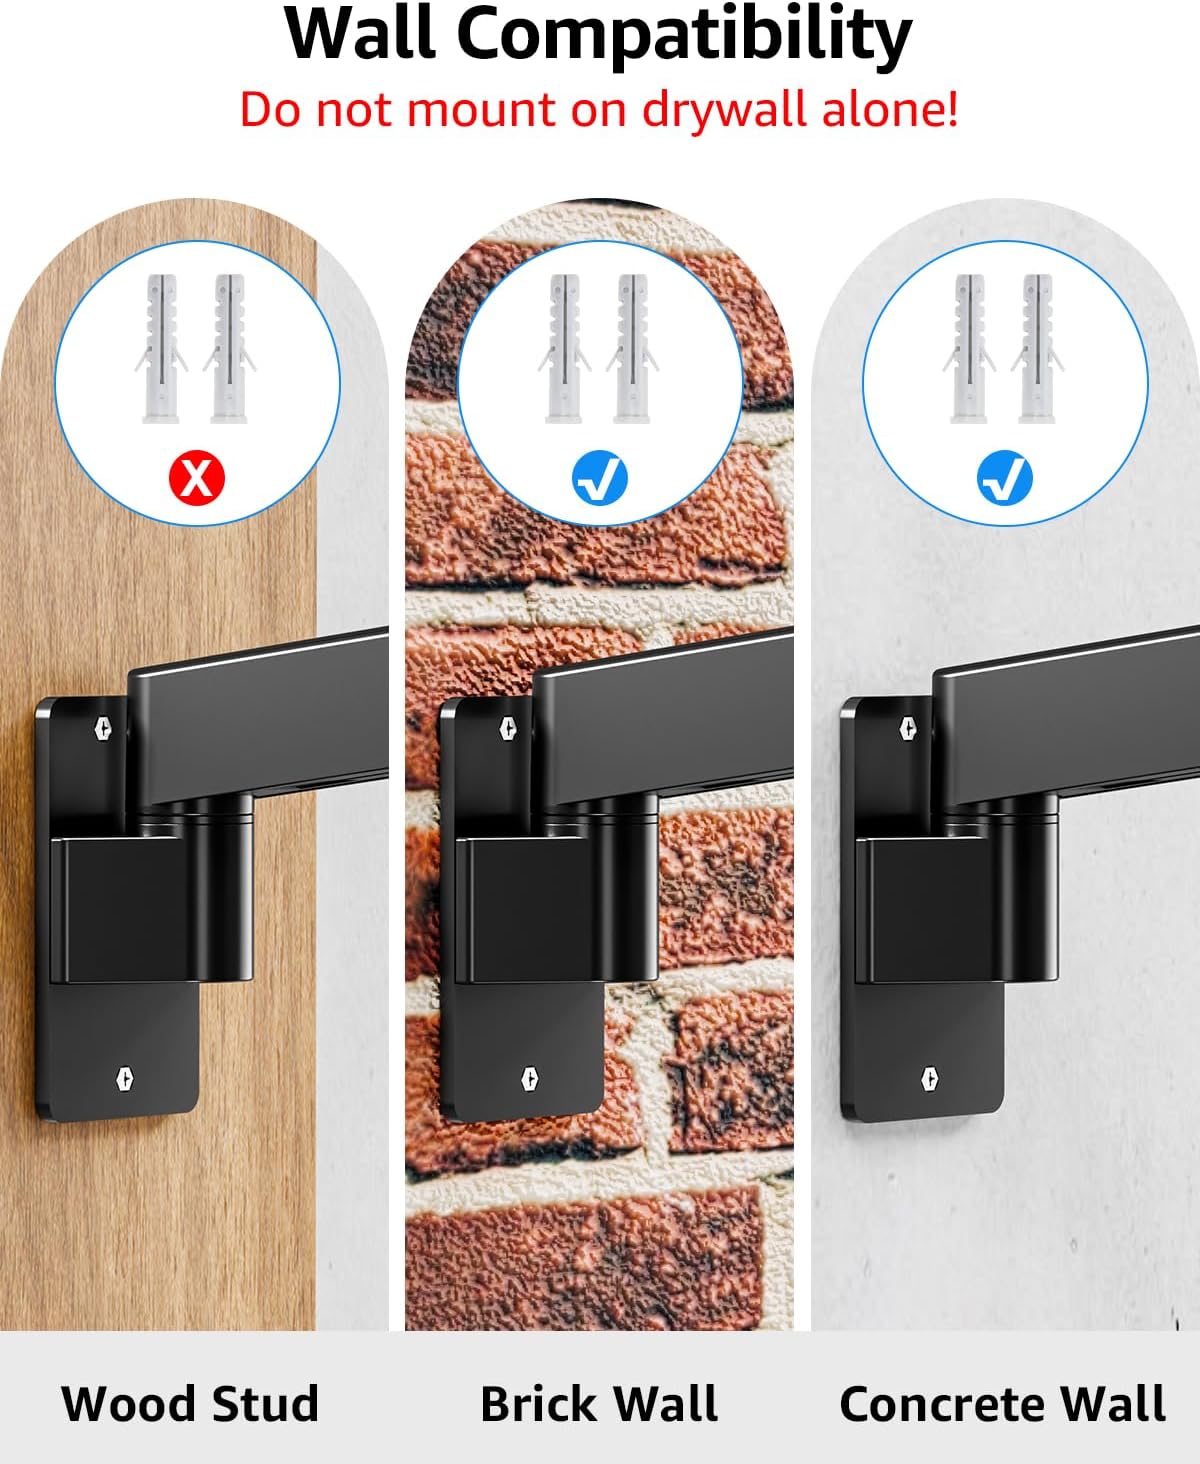
Image 2.1: Diagram illustrating compatible wall types (wood stud, brick, concrete) and explicitly warning against mounting on drywall alone.
3. Техникалык шарттар
| Өзгөчөлүк | Спецификация |
|---|---|
| Бренд | КӨТӨРҮЛҮҮ |
| Модел | MU-WM49 |
| Монитордун өлчөмү шайкештиги | 22 - 49 дюйм |
| Weight Capacity (Flat Monitors) | 4.4 - 44 фунт (2 - 20 кг) |
| Weight Capacity (Curved Monitors) | 4.4 - 33 фунт (2 - 15 кг) |
| VESA шайкештиги | 75x75мм, 100x100мм |
| Монтаж түрү | Дубалга орнотуу |
| Кыймыл түрү | Эңкейтүү, айландыруу, айландыруу, бийиктикти тууралоо, толук кыймыл |
| Тит бурч | +90° / -45° |
| Swivel Angle | ±90° (at wall plate), ±135° (at arm joint), ±90° (at VESA plate) |
| Айлануу | 360° (for monitors under 42"), ±10° (for 42"-49" monitors) |
| Бийиктигин тууралоо диапазону | 13 дюйм |
| Дубалдан узартуу | 4.2 дюймдан (жыйынтыкталган) 23.4 дюймга чейин (узартылган) |
| Материал | Эритме болот |
| Түс | Кара |
| Элемент Салмагы | 7.94 фунт (3.6 кг) |

Image 3.1: Visual representation of the mount's compatibility, including screen size range, weight limits for flat and curved monitors, and VESA patterns.
4. Орнотуу жана орнотуу
Follow these steps carefully to install your MOUNTUP Monitor Wall Mount. All necessary mounting hardware and detailed instructions are included with your product.
4.1. Орнотууга чейинки текшерүү тизмеси
- Verify your monitor's weight and VESA pattern are within the mount's specifications.
- Identify a suitable wall location (wood stud, brick, or concrete).
- Gather necessary tools (e.g., drill, stud finder, level, screwdriver, Allen wrenches).
- Пакеттин ичинде көрсөтүлгөн бардык бөлүктөр бар экенине ынаныңыз.
4.2. Дубал плитасын орнотуу
- Locate a wood stud using a stud finder, or identify a solid brick/concrete area.
- Mark the desired height for the wall plate. Use a level to ensure it is straight.
- Drill pilot holes according to the wall plate's screw pattern and your wall type.
- Secure the wall plate to the wall using the provided lag bolts.
4.3. Attaching the VESA Plate to Your Monitor
- Мониторуңузду кылдаттык менен жумшак, таза бетке ылдый караңыз.
- Attach the detachable VESA plate to the back of your monitor using the appropriate screws and spacers.
- For monitors between 42" and 49" that will be used in landscape orientation, tighten the rotation screw on the VESA plate to secure the monitor's rotation to ±10° before hanging. For monitors under 42", remove this screw for full 360° rotation.

Image 4.1: Guide on how to adjust the rotation angle for monitors based on their size (under 42" for 360° rotation, 42"-49" for ±10° rotation).
4.4. Hanging the Monitor
- With assistance, carefully lift the monitor and hook the VESA plate onto the arm mechanism.
- Secure the monitor to the arm using the safety screws or clips as indicated in the detailed manual.
5. Иштөө нускамалары
Once installed, your MOUNTUP Monitor Wall Mount offers extensive flexibility for positioning your screen.
5.1. Монитордун абалын тууралоо
- Бийиктигин тууралоо: The gas spring arm allows for smooth vertical movement within a 13-inch range. Gently push or pull the monitor to the desired height.
- Кеңейтүү жана артка тартуу: Extend the arm up to 23.4 inches from the wall or retract it to a minimum of 4.2 inches.
- Россия: Adjust the monitor's vertical angle from +90° (upward) to -45° (downward) to reduce glare or optimize viewing.
- Айлануучу: Pivot the monitor horizontally at various points: ±90° at the wall plate, ±135° at the arm joint, and ±90° at the VESA plate.
- Айлануу: Rotate the monitor 360° for portrait or landscape viewing (for monitors under 42"). For larger monitors (42"-49"), rotation is limited to ±10°.

Image 5.1: Illustration of the mount's ability to freely position the screen, highlighting the 13-inch height range, 23.4-inch maximum extension, and 4.2-inch retraction from the wall.

Image 5.2: Visual guide to the mount's full motion capabilities, detailing swivel angles at different joints, tilt range, and 360° rotation.
5.2. Чыңалууну жөнгө салуу
The gas spring tension may need adjustment to properly support your monitor's weight. If the monitor rises too easily or drops down, adjust the tension screw located on the arm.
- Monitor Raises Up (too light): Turn clockwise (-) to reduce tension for a lighter monitor.
- Monitor Drops Down (too heavy): Turn counter-clockwise (+) to increase tension for a heavier monitor.
Keep the arm in a horizontal position while adjusting tension. Turn the screw in small increments (e.g., 360° each time) and test the monitor's movement until it holds its position stably.

Image 5.3: Detailed instructions on how to adjust the tension of the monitor arm using an Allen wrench to ensure proper weight support.
5.3. Кабелдик башкаруу
The mount features integrated cable management channels to keep your workspace tidy and free of clutter. Route your monitor's power and video cables through these channels along the arm.

Image 5.4: The monitor arm with cables neatly routed through its integrated management system, contributing to a clean desk setup.
6. Техникалык тейлөө
Regular maintenance ensures the longevity and safe operation of your monitor wall mount.
- Тазалоо: монтажды жумшак менен сүртүңүз, гamp кездеме. Абразивдүү тазалагычтардан же эриткичтерден качыңыз.
- Текшерүү: Мезгил-мезгили менен бардык бурамалар менен болттордун бекемдигин текшерип туруңуз. Керек болсо кайра тартыңыз.
- Майлоо: No lubrication is typically required for the moving parts. If movement becomes stiff, contact support.
7. Кыйынчылыктарды
If you encounter issues with your MOUNTUP Monitor Wall Mount, refer to the following common solutions:
- Монитор салбырап турат же ордунда турбайт: Adjust the gas spring tension as described in Section 5.2. Ensure the monitor's weight is within the specified range.
- Difficulty Moving the Arm: Check if the tension is too high (if the monitor is too light) or if any bolts are overtightened. Adjust tension or loosen bolts slightly.
- Monitor Not Level: Ensure the VESA plate is securely attached to the monitor and the arm. For monitors 42"-49", ensure the rotation screw is tightened to prevent unwanted rotation beyond ±10°.
- Тоо туруксуз сезилет: Re-check all wall mounting screws and bolts for tightness. Confirm the mount is installed on a solid wall structure (wood stud, brick, or concrete) and not drywall alone.
8. Кепилдик жана колдоо
MOUNTUP provides reliable support for its products. If you require M6 or M8 screws for TV mounting, or have any questions or concerns regarding installation, operation, or parts, please contact MOUNTUP customer support. Refer to the product packaging or the MOUNTUP official webбайланыш маалыматы үчүн сайт.