1. Киришүү
This manual provides detailed instructions for the safe and efficient operation of your Jectse 14MP Digital Film and Slide Scanner. This device is designed to convert various film types, including 135 Film, 126KPK Film, 110 Film, Super8 Film, Monochrome, and Slides, into digital images. Please read this manual thoroughly before using the product and retain it for future reference.
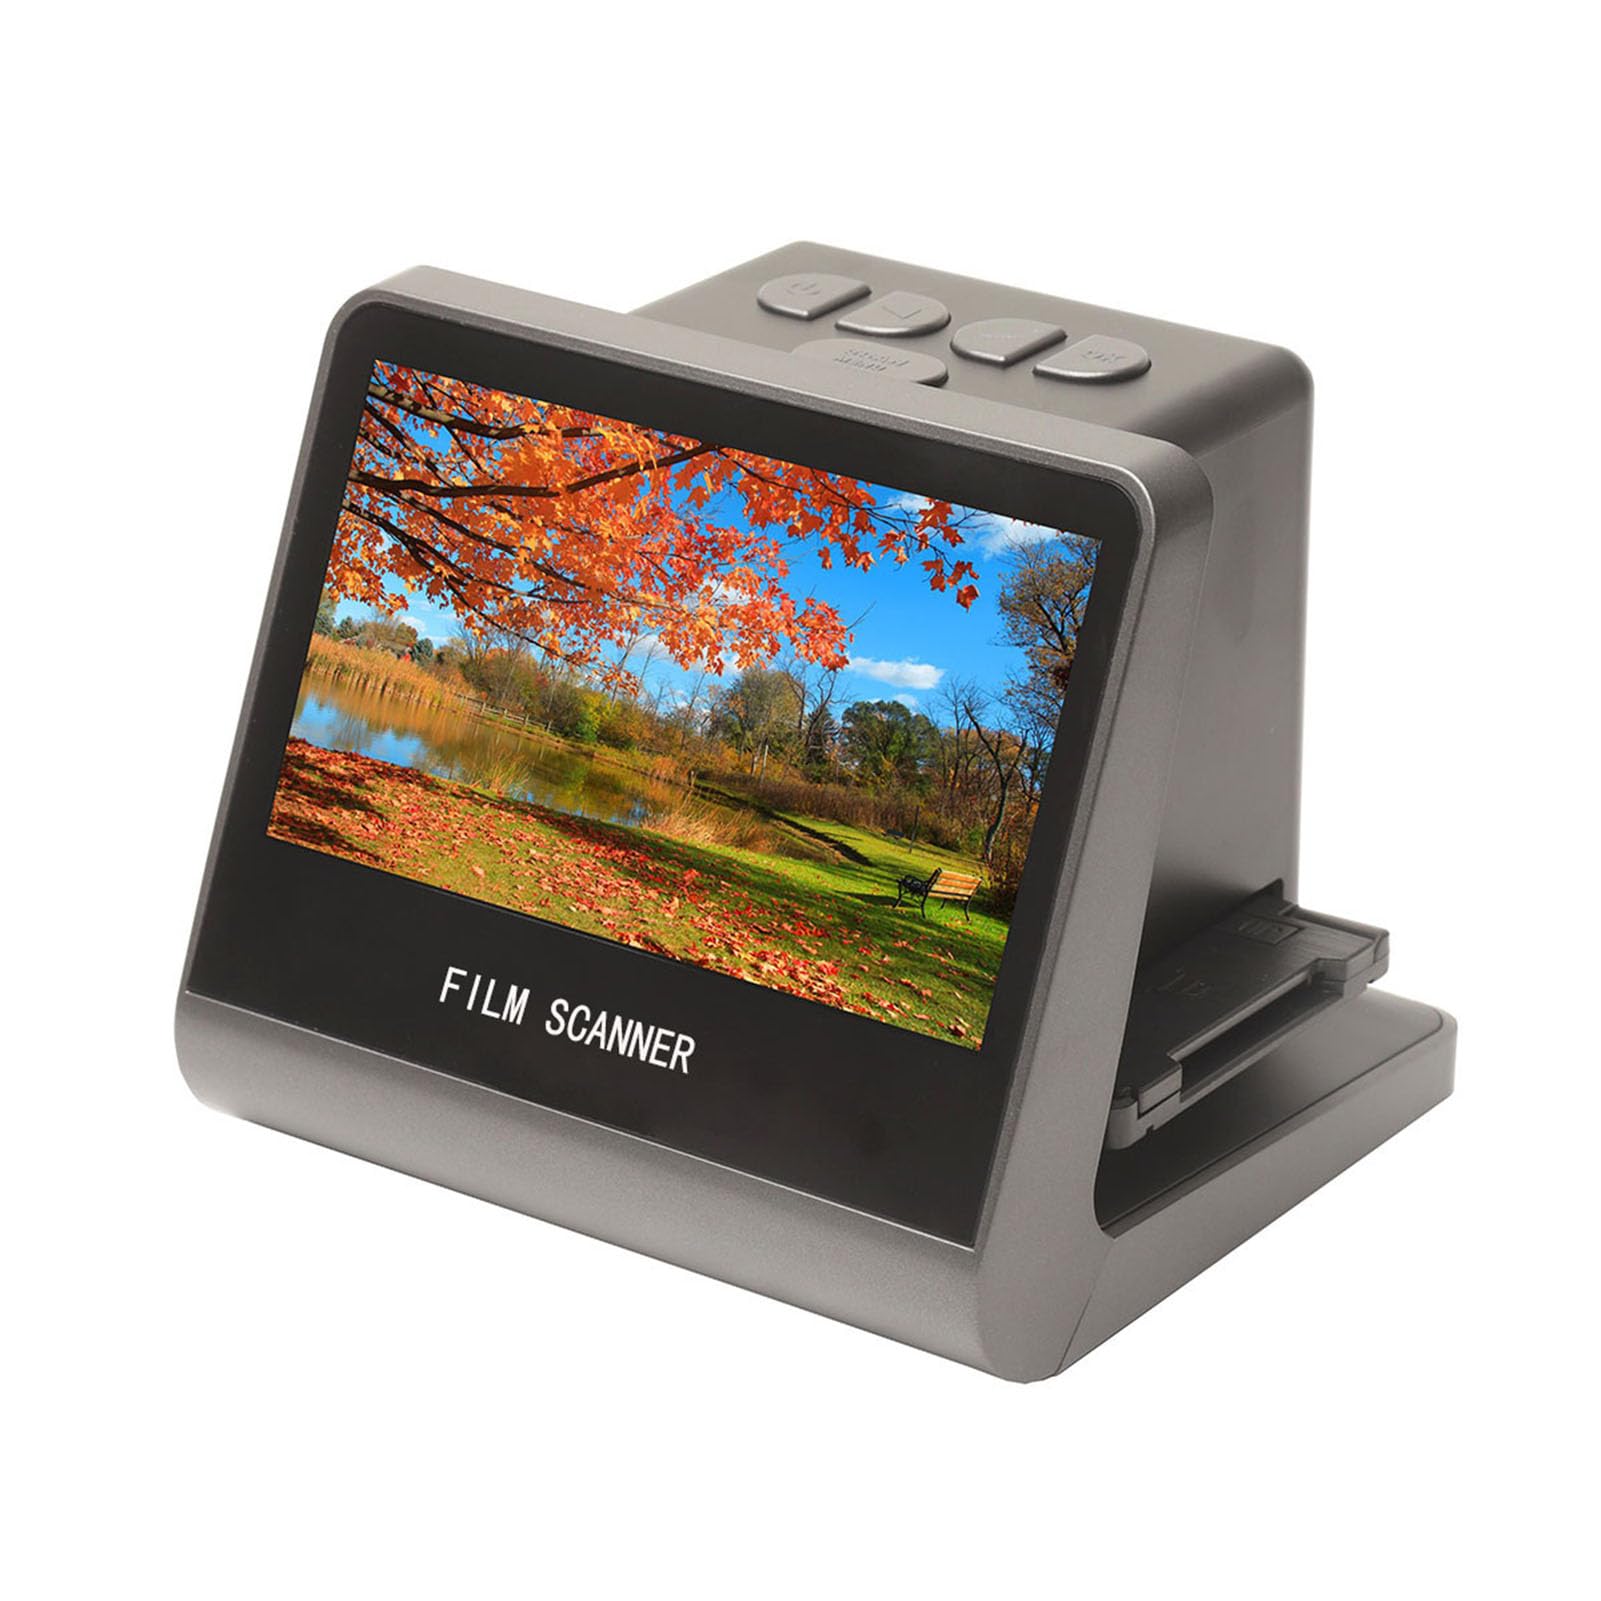
Figure 1: Jectse 14MP Digital Film and Slide Scanner, a compact device for digitizing various film formats.
2. Коопсуздук маалыматы
- Кубат булагы: Белгиленген кубат адаптерин гана колдонуңуз. Voltage сиздин аймагыңызга шайкеш келет.
- Суу жана ным: Do not expose the device to water or excessive moisture. Do not operate with wet hands.
- Вентиляция: Түзмөктүн айланасында жакшы желдетүүнү камсыз кылыңыз. Желдетүү тешиктерин жаппаңыз.
- Тазалоо: Тазалоодон мурун электр кубатынан сууруп коюңуз. Жумшак, кургак чүпүрөктү колдонуңуз. Суюк тазалоочу каражаттардан алыс болуңуз.
- Демонтаж: Аппаратты өз алдынча бөлүүгө же оңдоого аракет кылбаңыз. Бардык тейлөөлөрдү квалификациялуу кызматкерлерге тапшырыңыз.
- Балдар: Аппаратты балдар жетпеген жерде сактаңыз.
3. Пакеттин мазмуну
Төмөндө тизмеленген нерселердин баары пакетиңизге камтылганын текшериңиз:
- 1 x Фильм сканери
- 1 x HD маалымат кабели
- 1 x Type-C кабели
- 1 Brush х
- 1 х Колдонуучунун колдонмосу (бул документ)
- 1 x 110 Film Stand
- 1 x Super8 Film Stand
- 1 x 126 Film Stand
- 1 x Negative Film Stand
4. Продукт бүтүп калдыview
The Jectse Film and Slide Scanner features a 5-inch LCD screen for easy operation and previewing. It includes built-in 16GB memory for storing scanned images and supports various film types.
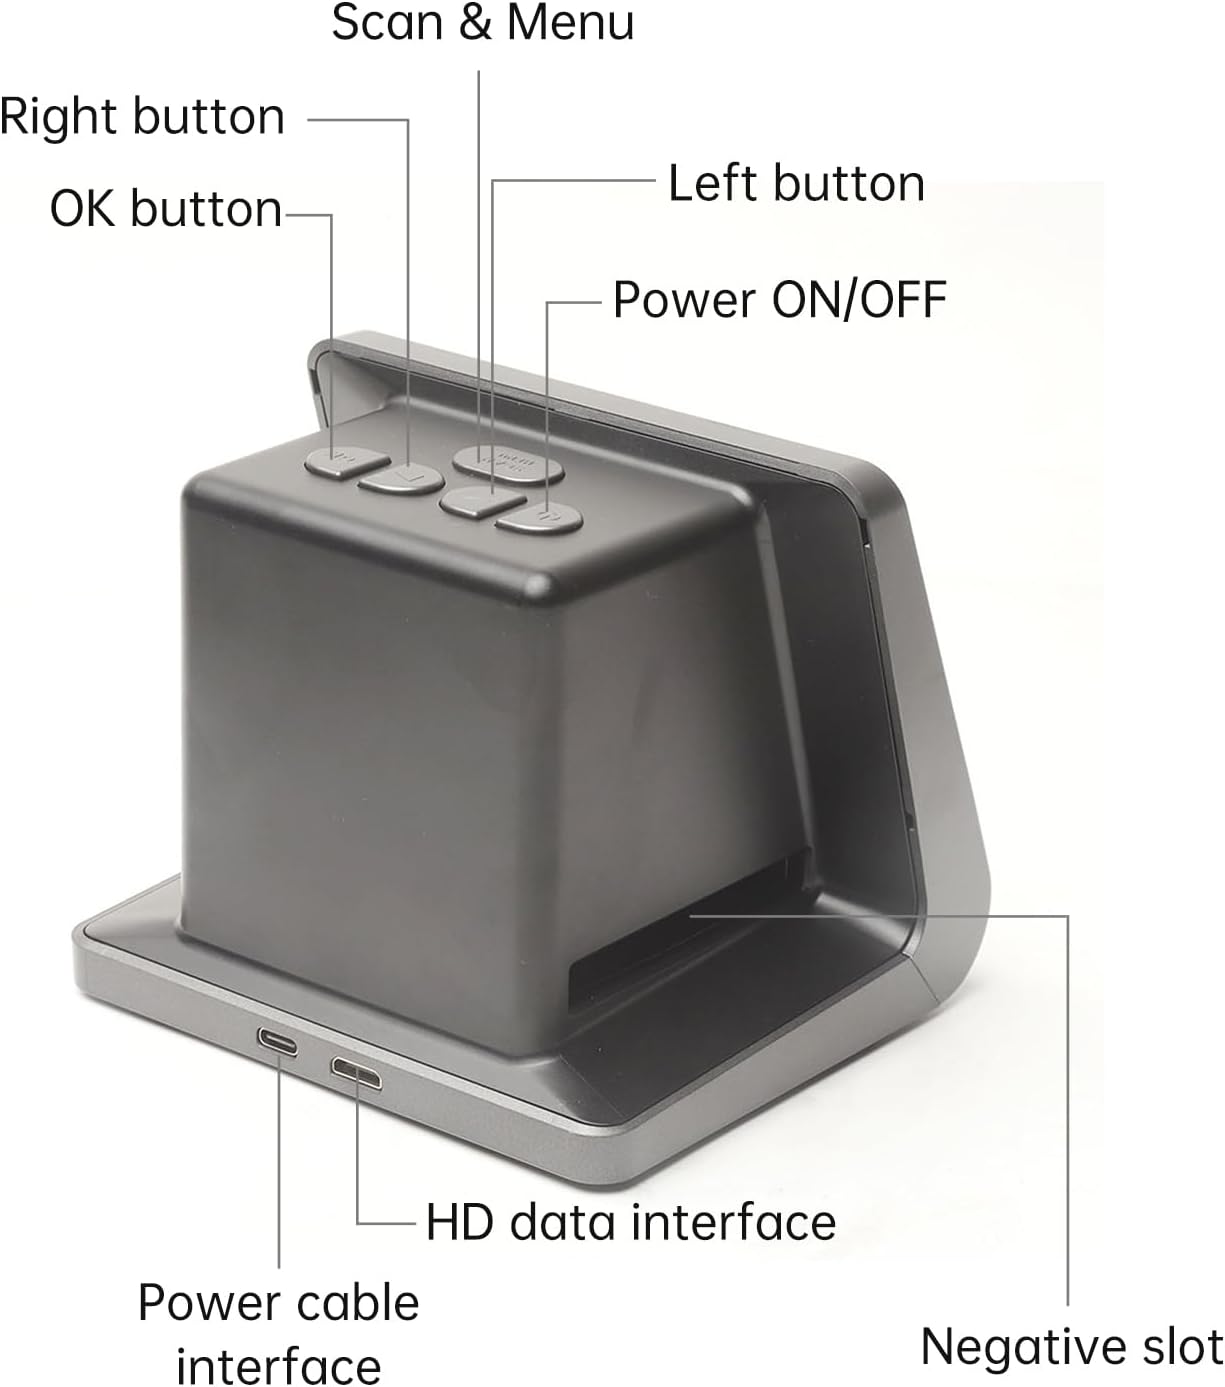
2-сүрөт: алдыңкы жана каптал view of the scanner with labeled buttons and interfaces. Key components include the Power ON/OFF button, Scan & Menu button, Left and Right navigation buttons, OK button, Power cable interface (Type-C), HD data interface, and Negative slot.
4.1 Негизги өзгөчөлүктөрү
- Тасма шайкештиги: 135 Film (36*24mm), 126KPK Film (27*27mm), 110 Film (17*13mm), Super8 Film (4.01*5.79mm), Monochrome, Slide.
- Жогорку чечим сенсор: 14.0 Mega pixels (4416*3312) 1/2.33” CMOS sensor.
- Дисплей: Color 5" LCD HD screen with 22W Pixels display.
- Ички сактагыч: Built-in 16GB memory.
- Байланыш: Type-C USB for power/data, Mini HD for TV output.
- Көп тилдүү колдоо: Chinese, T-Chinese, English, French, German, Italian, Spanish, Japanese.

Figure 3: ашыкview of the scanner's capabilities, highlighting its compatibility with various film types, 22MP interpolation, 5-inch LCD screen, and 16GB internal memory.
5. Орнотуу
5.1 Аппаратты күйгүзүү
- Connect the provided Type-C cable to the "Power cable interface" on the scanner.
- Connect the other end of the Type-C cable to a DC 5V power adapter (not included) or a USB port on your computer.
- басыңыз Күйгүзүү/ӨЧҮРҮҮ button located on the top of the scanner to turn it on. The LCD screen will illuminate.
5.2 Connecting to a Computer or TV
The scanner can be connected to a computer or TV for a larger display of scanned images.
- For Computer Connection: Use the Type-C cable to connect the scanner to your computer. The scanner will function as a USB MSDC (Mass Storage Device Class), allowing you to transfer scanned images. No additional drivers or software are required. Compatible with Windows Vista/7/8/10 and above.
- For TV Connection: Use the provided HD Data Cable to connect the "HD data interface" on the scanner to the HD input on your television. Select the appropriate input source on your TV to view the scanner's display.

Figure 4: The scanner connected to a computer monitor and a television, demonstrating its compatibility with external displays for viewing scanned content.
6. Операция
6.1 Плёнкаларды жана слайддарды жүктөө
Ensure you use the correct film stand for your film type. The scanner supports 135 Film, 126KPK Film, 110 Film, Super8 Film, Monochrome, and Slides.
6.1.1 Loading Slides
- Hold the slide up to the light to identify the correct orientation.
- Take out the slide holder. Ensure the side with the "open" logo faces you, and the side with the "<" logo faces down. Open the slide holder.
- Place the slides into the recessed area in the holder. Film strips can also be loaded into the slide holder. Close the slide holder and press the edges to lock it in place.
- Insert the loaded slide holder into the slot on the right side of the film scanner as shown in Figure 5.

Figure 5: Step-by-step guide illustrating how to correctly load individual slides into the slide holder and then insert the holder into the scanner.
6.1.2 Loading Negative Film (135, 126KPK, 110, Super8)
- Hold the negative film strip up to the light to determine the correct orientation.
- Take out the negative holder. Ensure the side with the "open" logo faces you, and the side with the "<" logo faces down. Open the negative holder.
- Place the negative film strip into the recessed area in the holder. Close the negative holder and press the edges to lock it in place.
- Insert the loaded negative holder into the slot on the right side of the film scanner as shown in Figure 6.
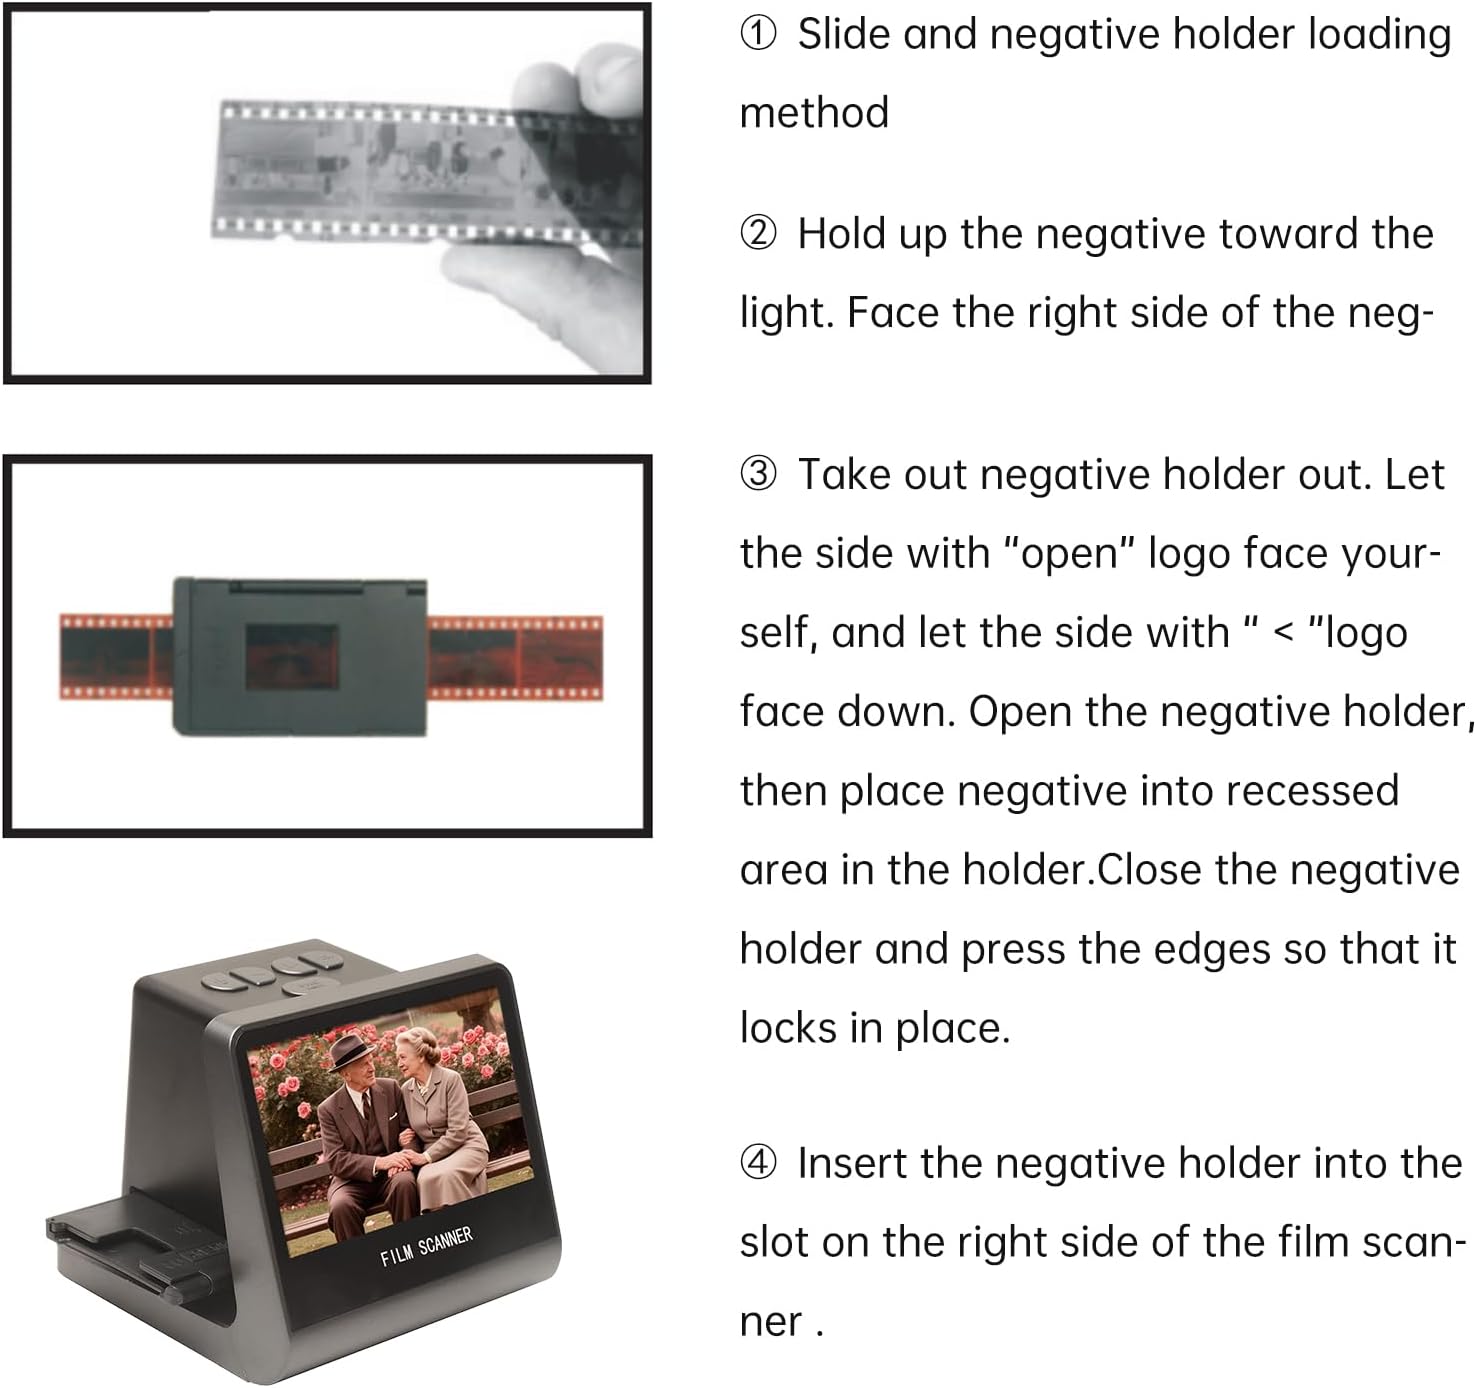
Figure 6: Step-by-step guide demonstrating how to correctly load negative film strips into the negative holder and then insert the holder into the scanner.
6.2 Сканерлөө процесси
- After loading the film/slide, the image will appear on the 5-inch LCD screen.
- колдонуу Солго жана Туура buttons to navigate through menu options or adjust settings.
- басыңыз Scan & Menu button to access the scanning options or menu.
- Select the appropriate film type (e.g., 135 Film, Slide) from the menu if prompted.
- Adjust exposure compensation (Automatic / Manual (-2.0 EV~ +2.0EV)) and white balance (Automatic) if necessary using the menu options.
- Once the image is properly framed and settings are adjusted, press the OK button to capture and save the digital image. The scanned image will be saved to the built-in 16GB memory.
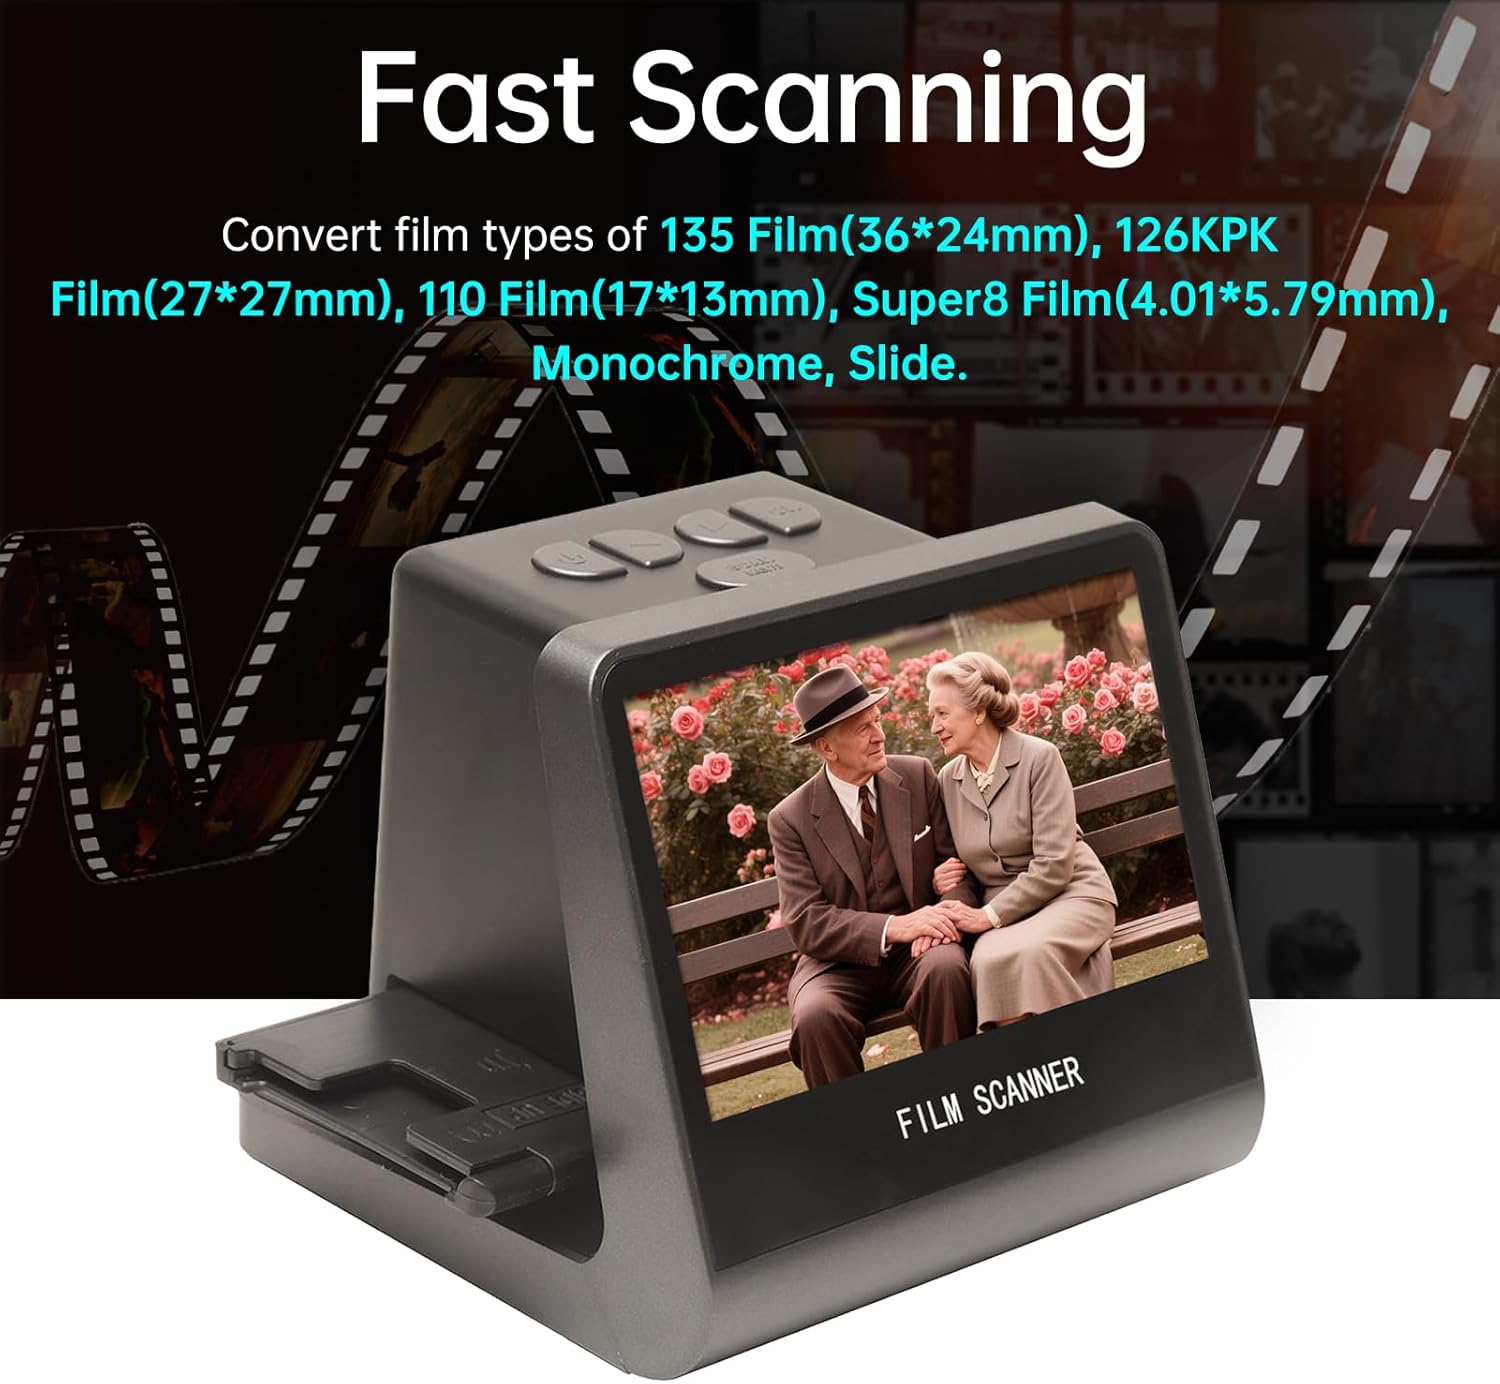
Figure 7: The scanner in operation, demonstrating its ability to quickly convert various film types into digital images, displayed on its integrated screen.
6.3 Тил орнотуулары
The scanner supports 8 system languages. To change the language:
- басыңыз Scan & Menu негизги менюга кирүү үчүн баскычты басыңыз.
- колдонуу Солго or Туура buttons to navigate to the "Language" option.
- басыңыз OK тандоо үчүн баскыч.
- Choose your desired language (Chinese, T-Chinese, English, French, German, Italian, Spanish, Japanese) and press OK ырастоо үчүн.
7. Техникалык тейлөө
7.1 Сканерди тазалоо
- Сырткы: Use a soft, dry, lint-free cloth to wipe the exterior of the scanner. Do not use liquid cleaners or abrasive materials.
- Film Slot/Sensor: Use the provided brush to gently remove dust or debris from the film slot and around the scanning sensor. Avoid touching the sensor directly.
- LCD экран: Use a soft, dry microfiber cloth specifically designed for electronics screens.
Regular cleaning helps maintain optimal scanning quality and extends the life of your device.
8. Кыйынчылыктарды
| Көйгөй | Мүмкүн себеп | Чечим |
|---|---|---|
| Түзмөк күйбөйт. | Электр байланышы жок же кабели бузулган. | Ensure the Type-C cable is securely connected to both the scanner and a working power source (DC 5V adapter or computer USB port). Try a different cable or power source. |
| Scanned images are blurry or unclear. | Dust/debris on film or sensor; incorrect film loading. | Clean the film/slide thoroughly before scanning. Use the provided brush to clean the scanner's film slot and sensor. Ensure the film/slide is correctly seated in its holder. |
| Которуу мүмкүн эмес fileс компьютерге. | Incorrect USB mode; cable issue. | Ensure the scanner is connected to the computer via the Type-C cable. The scanner should automatically enter USB MSDC mode. Check cable connection. Ensure your computer's operating system is compatible (Vista/7/8/10 and above). |
| No image on TV when connected. | Incorrect TV input; faulty HD cable. | Verify the HD Data Cable is securely connected to both the scanner and the TV. Select the correct HD input source on your television. Try a different HD cable if available. |
9. Техникалык шарттар
| Өзгөчөлүк | Деталь |
|---|---|
| Функция | Тасма сканери / USB MSDC |
| Интерфейс | Type-C, Mini HD |
| Сүрөт сенсору | 14.0 Mega pixels (4416*3312), 1/2.33” CMOS sensor |
| Дисплей | Color 5" LCD HD (22W Pixels display) |
| Экспозицияны көзөмөлдөө | Автоматтык / Кол менен (-2.0 EV~ +2.0EV) |
| Ак баланс | Автоматтык |
| Резолюция | 14.0 Mega pixels / 22 Mega pixels (interpolation) |
| Film Types Supported | 135 Film (36*24mm), 126KPK Film (27*27mm), 110 Film (17*13mm), Super8 Film (4.01*5.79mm), Monochrome, Slide |
| Сүрөт эффекттери | Slides, Negatives |
| File Формат | JPEG |
| TV-OUT Type | NTSC/PAL |
| Камтылган эс тутум | 16 ГБ |
| Электр камсыздоо | DC 5V Adapter / USB Port |
| Колдоого алынган тилдер | S-Chinese, T-Chinese, English, French, German, Italian, Spanish, Japanese |
| Операциялык системаны колдоо | For Vista/7/8/10 and above |
| Продукт өлчөмү | 132x115x110мм |
| Салмагы | 330г |

Figure 8: Dimensions of the Jectse Film and Slide Scanner, showing its compact size (14cm/5.51in width, 12cm/4.72in height, 11cm/4.33in depth).
10. Кардарларды колдоо кызматы
For technical assistance, warranty information, or service inquiries, please contact your retailer or the manufacturer's customer support channels. Refer to the product packaging or the manufacturer's official webбайланыш маалыматы үчүн сайт.