
1. Маанилүү коопсуздук нускамалары
Please read all safety instructions carefully before using this product. Failure to follow these instructions may result in electric shock, fire, and/or serious injury.
- Жок operate the unit if it is damaged or has been modified.
- Жок jump start a frozen battery.
- Жок allow the smart jumper clamps to touch each other or connect the positive and negative clamps to the same battery terminal.
- Жок expose the unit to rain or extreme temperatures.
- Балдар жетпеген жерде сактаңыз.
- Ensure proper ventilation when operating the air compressor.
- Always disconnect the jumper cables from the jump starter unit first, then from the vehicle battery, after a successful jump start.
2. Пакеттин мазмуну
Төмөндө тизмеленген нерселердин баары пакетиңизге камтылганын текшериңиз:
- 1 x BSMOOM G2 Car Battery Charger Jump Starter
- 1 x Smart Jumper кабелдери
- 1 x Tire Inflator Tube with 4 Nozzles Set
- 1 x Blower/Deflator Pump with 4 Nozzles Set
- 1 х USB-C кубаттоо кабели
- 1 х Колдонуучунун колдонмосу (Бул документ)
3. Продукт бүтүп калдыview
The BSMOOM G2 is a versatile 14-in-1 device designed for automotive emergencies and general utility. It combines a powerful jump starter, a 150PSI air compressor, and a 45W quick-charge power bank into one portable unit.
Негизги өзгөчөлүктөрү:
- 8000A эң жогорку ток: Capable of jump starting all gas engines and diesel engines up to 14L.
- 150PSI аба компрессору: For inflating car tires, bicycle tires, sports equipment, and more.
- 45W Quick Charger: USB-C output for fast charging of smartphones, tablets, and other devices.
- Көп функциялуу: Includes LED flashlight, SOS light, and warning light.
Компоненттери:
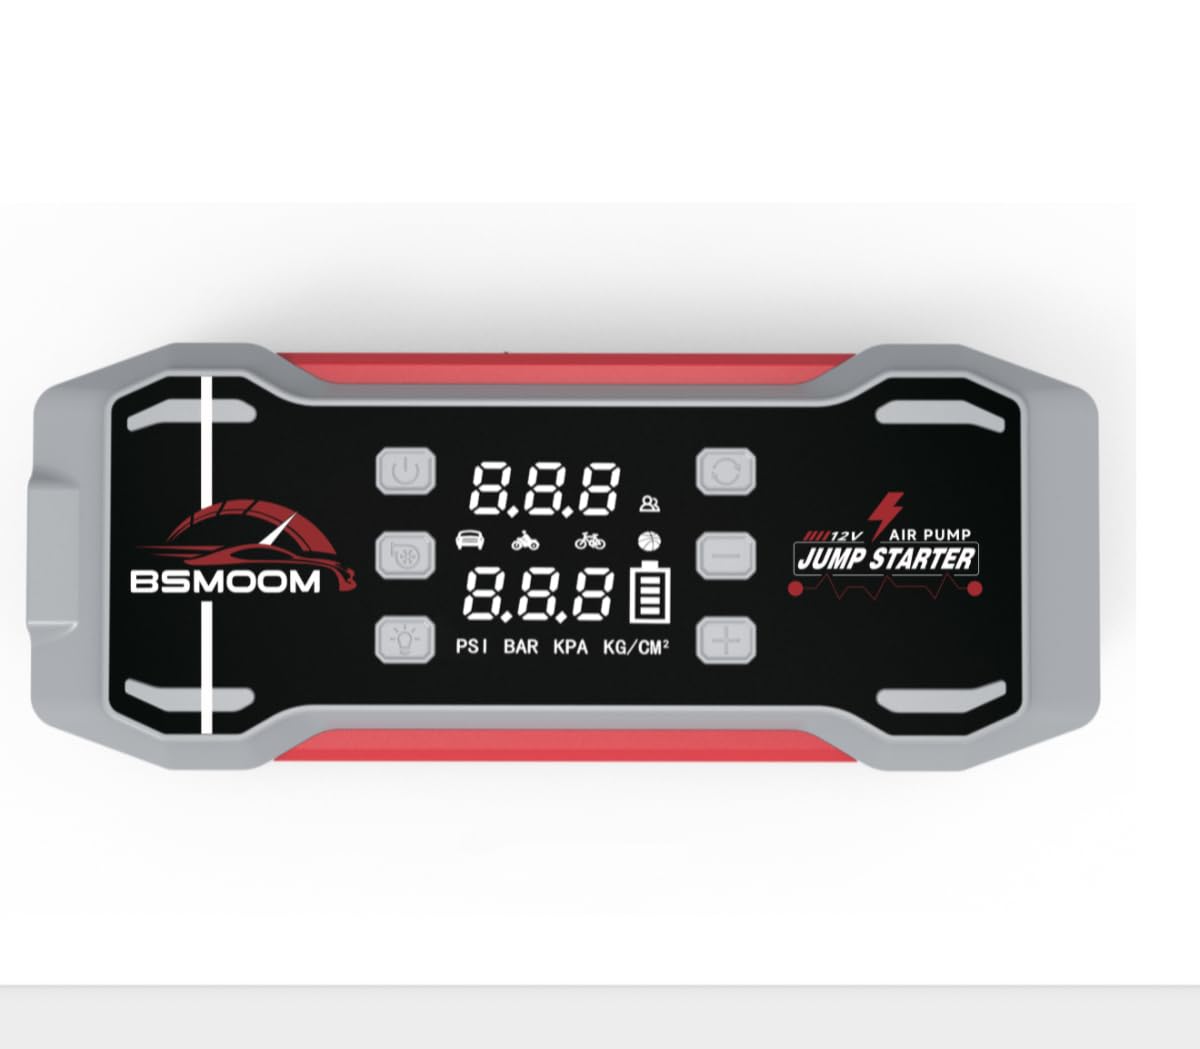
3.1-сүрөт: BSMOOM G2 Main Unit. This image displays the compact and robust design of the jump starter, featuring its various ports and display screen.
- Негизги блок: Houses the battery, jump starter port, air compressor, USB output ports, and display.
- Акылдуу секирүүчү кабелдер: Equipped with safety features to prevent reverse polarity and short circuits.
- Аба шланг: Connects to the unit for tire inflation.
- Nozzle Set: Various adapters for different inflation needs.
4. Орнотуу
4.1 Бөлүктү кубаттоо
Before first use, fully charge the BSMOOM G2 unit. It is recommended to charge the unit every 3-6 months to maintain battery health, even when not in use.
- Connect the provided USB-C charging cable to the USB-C input port on the BSMOOM G2.
- Connect the other end of the USB-C cable to a compatible USB wall adapter (not included) or a car charger.
- The display will indicate the charging status. The unit is fully charged when the battery indicator shows 100%.

4.1-сүрөт: USB-C Charging Port. This image highlights the location of the USB-C input port for charging the device.
4.2 Алгачкы текшерүүлөр
- Ensure the unit is fully charged before attempting to jump start a vehicle or inflate tires.
- Inspect all cables and accessories for any signs of damage. Do not use if damaged.
5. Иштөө нускамалары
5.1 Унаанын секирип от алдыруу
The BSMOOM G2 can jump start 12V vehicles with all gas engines and diesel engines up to 14L.
- Ensure the jump starter unit has at least 50% charge.
- Унаанын от алдыруучу системасын жана бардык кошумча жабдууларын өчүрүңүз.
- Insert the smart jumper cable plug into the jump starter's 12V output port. Ensure a firm connection.
- туташтыруу кызыл (+) clamp унаанын оң батарея терминалына туташтырыңыз.
- туташтыруу кара (-) clamp унаанын терс батарея терминалына.
- Check the indicator light on the smart jumper cable. A solid green light indicates a correct connection. If it's red or flashing, check connections and battery voltage.
- Start the vehicle's engine. If it doesn't start immediately, wait 30 seconds and try again. Do not crank for more than 3 seconds per attempt.
- Унаа от алгандан кийин, аны дароо ажыратыңыз кара (-) clamp from the vehicle battery, then the кызыл (+) clamp.
- Finally, disconnect the smart jumper cable plug from the jump starter unit.

5.1-сүрөт: Smart Jumper Cables. This image illustrates the correct connection of the smart jumper cables to a vehicle battery for jump starting.
5.2 Дөңгөлөктөрдүн инфляциясы
The integrated air compressor can inflate tires up to 150 PSI.
- Screw the tire inflator tube onto the air output port of the BSMOOM G2.
- Attach the other end of the tube to the tire valve stem. Ensure a tight seal.
- Turn on the unit and select the desired pressure unit (PSI, BAR, KPA).
- Максаттуу дөңгөлөк басымын коюу үчүн '+' жана '-' баскычтарын колдонуңуз.
- Press the start button to begin inflation. The compressor will automatically stop when the preset pressure is reached.
- Disconnect the tube from the tire valve and then from the unit.

5.2-сүрөт: Tire Inflator Hose. This image shows the tire inflator hose connected to the unit and ready for use.
5.3 Air Inflation/Deflation Pump
Use the blower/deflator pump with the appropriate nozzles for inflatables like air mattresses, swimming rings, or for quick deflation.
- Select the correct nozzle from the provided set for your inflatable item.
- Attach the nozzle to the blower/deflator port on the unit.
- For inflation, insert the nozzle into the item's air valve and turn on the pump.
- For deflation, connect the nozzle to the deflation port (if available, or reverse connection if applicable) and turn on the pump to extract air.

5.3-сүрөт: Blower/Deflator Pump and Nozzles. This image displays the blower/deflator pump attachment along with the various nozzles for different applications.
5.4 Power Bank катары колдонуу
The BSMOOM G2 features a 45W Quick Charger for charging electronic devices.
- Connect your device's charging cable to one of the USB output ports on the BSMOOM G2.
- Түзмөк автоматтык түрдө түзмөгүңүздү кубаттай баштайт.
- Түзмөгүңүздүн кубаттоо абалын көзөмөлдөңүз. Кубаттоо аяктаганда ажыратыңыз.
6. Техникалык тейлөө жана сактоо
- Тазалоо: Агрегатты кургак, жумшак чүпүрөк менен сүртүңүз. Катуу химиялык заттарды же абразивдүү материалдарды колдонбоңуз.
- Заряддоо: Recharge the unit every 3-6 months to prevent deep discharge and prolong battery life.
- Сактагыч: Store the BSMOOM G2 in a cool, dry place, away from direct sunlight and extreme temperatures. Ensure it is fully charged before long-term storage.
- Кабельге кам көрүү: Keep jumper cables and air hoses neatly coiled and free from kinks or damage.
7. Кыйынчылыктарды
| Көйгөй | Мүмкүн себеп | Чечим |
|---|---|---|
| Түзмөк күйбөйт. | Батарея түгөнүп калды. | Charge the unit fully using the provided USB-C cable. |
| Унаа секирип отпойт. | Incorrect cable connection; vehicle battery too low; unit charge too low. | Камсыз кылуу clamps are connected correctly (red to +, black to -). Check unit's charge level. Try again after 30 seconds. |
| Аба компрессору үйлүлбөйт. | Hose not securely attached; target pressure not set; unit charge too low. | Ensure hose is tightly screwed on. Set desired pressure. Charge the unit. |
| Smart jumper cable indicator is red/flashing. | Reverse polarity; short circuit; battery voltage өтө төмөн. | Ажыратып, кайра туташтырыңызamps correctly. Ensure clamps do not touch. If battery is severely damaged, jump starting may not be possible. |
8. Техникалык шарттар
| Өзгөчөлүк | Деталь |
|---|---|
| Бренд | BSMOOM |
| Модел | G2 |
| Чыгуу токунун чокусу | 8000 Amps |
| Ampөчүрүү | 8000 Amps |
| Тtage | 12 вольт |
| Батарея түрү | Lithium Polymer (4 batteries included) |
| Продукциянын өлчөмдөрү (D x W x Y) | 11.65" x 4.53" x 5.16" |
| Элемент Салмагы | 3.08 фунт |
| Унаа кызматынын түрү | ATV, Motorcycle, Passenger Car, RV, Scooter, Lawn Mower, Snowmobile, Tractor |
| Аба компрессорунун басымы | 150 PSI чейин |
| USB чыгышы | 45W Quick Charger |
9. Кепилдик жана колдоо
BSMOOM products are manufactured to high-quality standards. This product comes with a limited warranty from the date of purchase. Please refer to the warranty card included in your package for specific terms and conditions.
For technical support, warranty claims, or general inquiries, please contact BSMOOM customer service through the retailer where the product was purchased or visit the official BSMOOM webсайт (эгер бар болсо).
Please have your model number (G2) and purchase information ready when contacting support.