
Introduction
This manual provides detailed instructions for the installation, operation, and maintenance of your GAMDIAS Aura GC11 ARGB Mid-Tower PC Case. Please read this manual thoroughly before beginning installation to ensure proper setup and safe use of the product. The GAMDIAS Aura GC11 ARGB is designed to accommodate Mini-ITX, Micro-ATX, and ATX motherboards, featuring a bar-patterned mesh front panel for optimal airflow and four pre-installed 120mm ARGB fans.
Коопсуздук маалыматы
- Электр тогуна урунбоо үчүн, кандайдыр бир компоненттерди орнотуудан же алып салуудан мурун, ар дайым кубат булагын розеткадан сууруп коюңуз.
- Зыян келтирбөө үчүн бардык компоненттерди кылдаттык менен колдонуңуз.
- Ички компоненттерди кармоодон мурун статикалык электр тогун разряддоо үчүн антистатикалык билек боону тагыныңыз же жерге туташкан металл нерсеге тез-тез тийип туруңуз.
- Майда тетиктерди жана таңгактоочу материалдарды балдардан алыс кармаңыз.
- Ашыкча ысып кетүүнүн алдын алуу үчүн PC корпусунун айланасында туура желдетүүнү камсыз кылыңыз.
Пакеттин мазмуну
Verify that all the following items are present in your package:
- GAMDIAS Aura GC11 ARGB Mid-Tower PC Case
- 4 x Pre-installed 120mm ARGB Fans
- Кошумча жабдуулар топтому (бурамалар, бекиткичтер, кабелдик байлагычтар)
- Колдонуучунун Колдонмосу (бул документ)
Орнотуу жана орнотуу
1. Ишти таңгактан чыгаруу
Carefully remove the PC case from its packaging. Inspect the case for any signs of damage during transit. Remove any protective films from the tempered glass panel.

Сүрөт: бурчтуу view of the GAMDIAS Aura GC11 ARGB PC case, showcasing the tempered glass side panel and the distinctive bar-patterned mesh front panel.
2. Интерьерге кирүү
To access the interior of the case, locate and remove the thumbscrews securing the tempered glass side panel. Carefully lift and remove the panel. The opposite solid side panel can also be removed for cable management access.

Сүрөт: Интерьер view of the GAMDIAS Aura GC11 ARGB PC case, with the side panel removed, revealing the motherboard mounting area, fan cutouts, and cable management space.
3. Motherboard орнотуу
- Install the necessary motherboard standoffs into the motherboard tray according to your motherboard's form factor (Mini-ITX, Micro-ATX, or ATX).
- Install your motherboard's I/O shield into the rear opening of the case.
- Этияттык менен энелик платаңызды буроо тешикчелерин тегиздеп, стендтерге жайгаштырыңыз.
- Берилген бурамалар менен энелик тактаны бекитиңиз.
4. Электр менен камсыздоо блогун (PSU) орнотуу
- Кубат блогун корпустун арткы жагындагы атайын бөлүмгө орнотуңуз.
- PSUну корпустун артындагы бурамалар менен бекитиңиз.
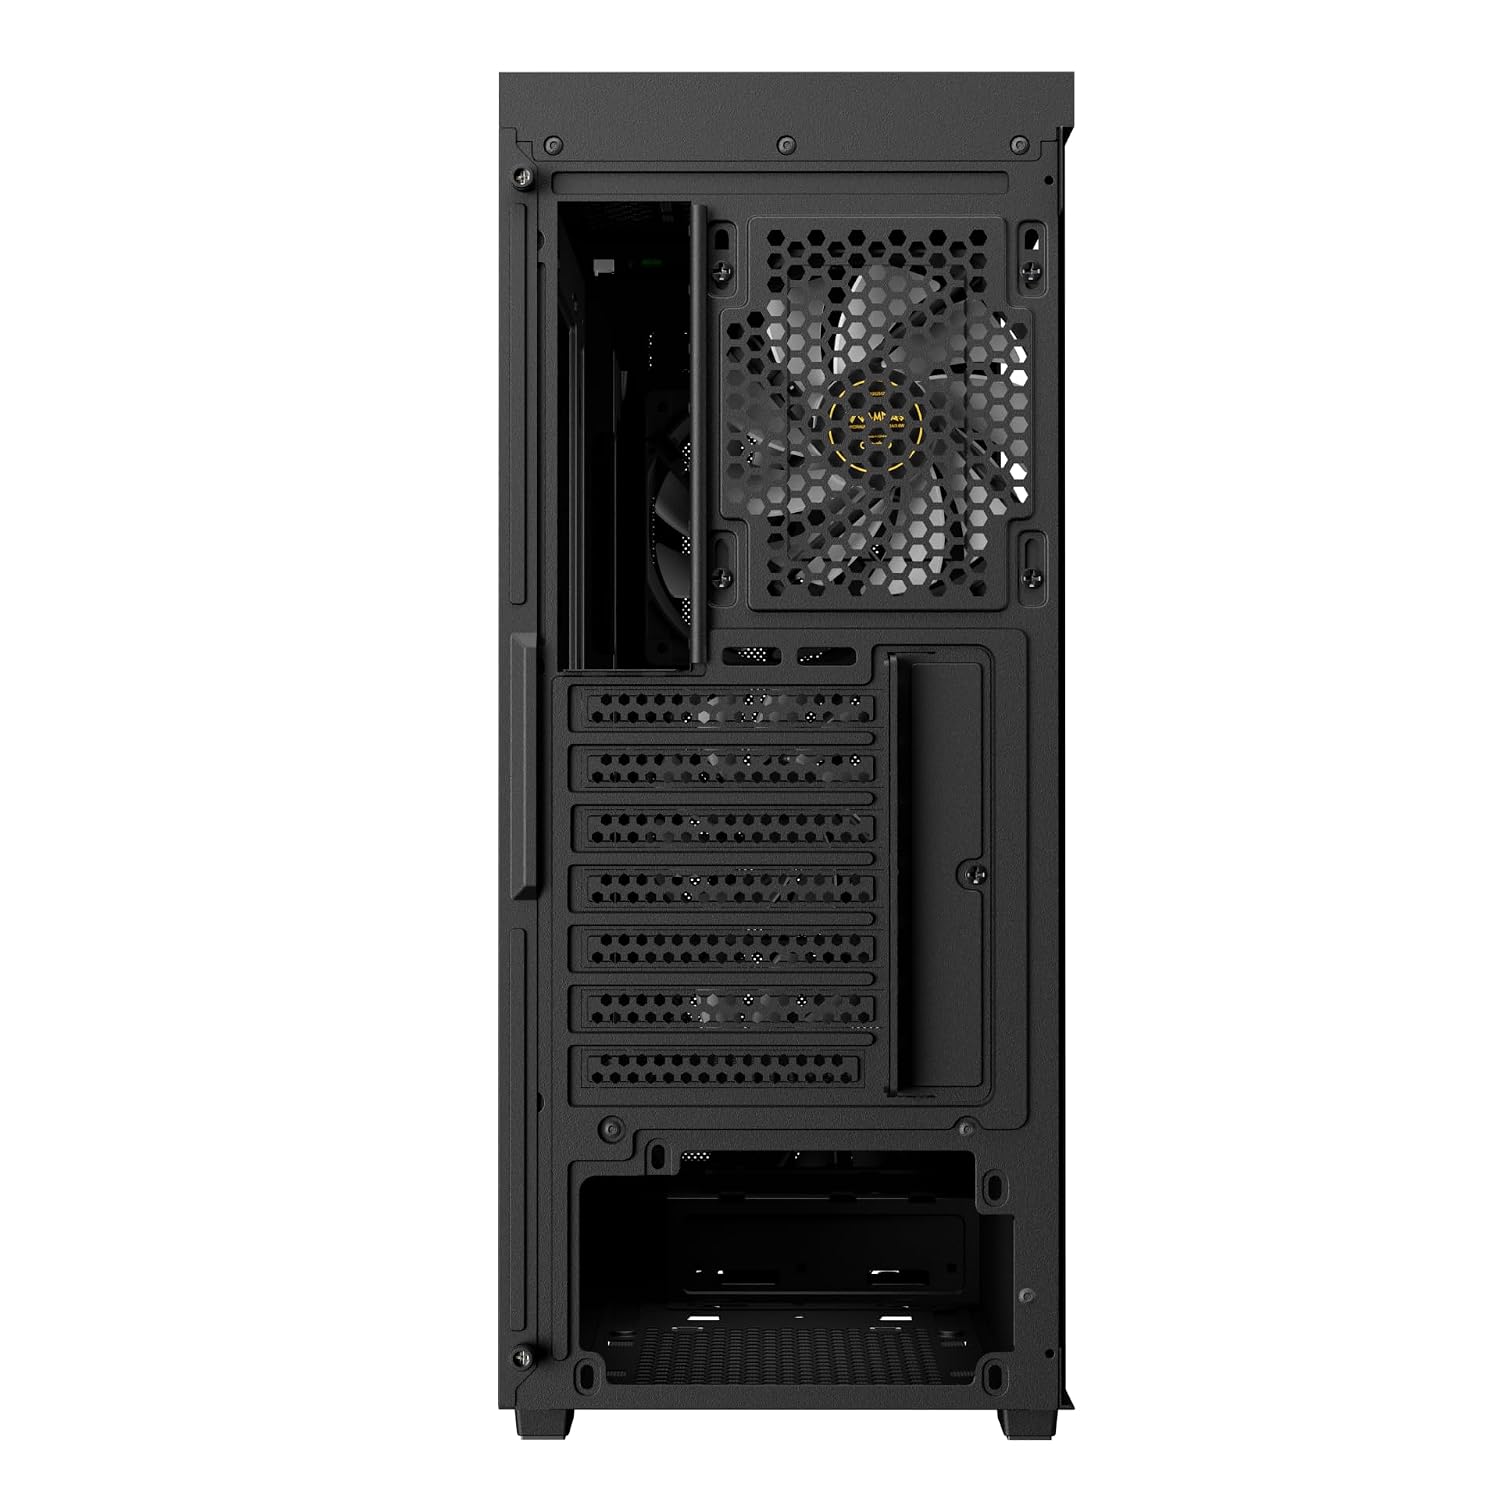
Сүрөт: Арткы view of the GAMDIAS Aura GC11 ARGB PC case, highlighting the power supply unit mounting bracket at the bottom and the expansion slots for graphics cards and other components.
5. Сактоочу дискти орнотуу
The case supports multiple storage drives. Refer to the accessory kit for specific mounting hardware.
- 2.5" SSD: Mount SSDs to the designated trays or mounting points behind the motherboard tray.
- 3.5" HDD: Катуу дисктерди кубат блогунун астындагы диск капасына орнотуңуз.
6. Graphics Card (VGA) and Expansion Card Installation
- Корпустун артындагы керектүү кеңейтүү уячасынын капкактарын алып салыңыз.
- Графикалык картаңызды же башка кеңейтүү карталарын энелик платаңыздагы тиешелүү PCIe уячаларына салыңыз.
- Карталарды бурамалар менен бекитиңиз.
7. Кабелди башкаруу жана алдыңкы панелдин туташуулары
Route all power and data cables through the cutouts in the motherboard tray for a clean build. Connect the front panel I/O cables (USB, HD Audio, Power, Reset, LED) to their corresponding headers on your motherboard. The case features a Type-C port, two USB 2.0 ports, HD Audio, and Reset button on the top panel.

Сүрөт: Үстүңкү бети view of the GAMDIAS Aura GC11 ARGB PC case, displaying the front I/O panel with Type-C, USB 2.0 ports, and audio jacks, along with the top magnetic dust filter.
8. Ишти жабуу
Once all components are installed and cables are managed, reattach the side panels, starting with the solid panel, then the tempered glass panel. Secure them with the thumbscrews.
Иштөө нускамалары
1. Биринчи жолу күйгүзүү
After ensuring all connections are secure, connect your PC to a power outlet and press the power button on the top panel of the case. The pre-installed ARGB fans will illuminate, and your system should begin to boot.

Сүрөт: алдыңкы view of the GAMDIAS Aura GC11 ARGB PC case, with the four pre-installed ARGB fans visible and illuminated behind the bar-patterned mesh front panel.
2. ARGB Fan Control
The pre-installed ARGB fans are typically connected to a controller or directly to an ARGB header on your motherboard. Refer to your motherboard's manual or the fan controller's instructions for details on how to customize the lighting effects.
Техникалык тейлөө
1. Чаң чыпкасын тазалоо
The GAMDIAS Aura GC11 ARGB case includes a magnetic dust filter on the top panel and a removable filter for the PSU intake. Regularly clean these filters to maintain optimal airflow and prevent dust buildup inside your system.
- Gently remove the magnetic dust filter from the top of the case.
- Slide out the PSU dust filter from the bottom rear of the case.
- Чыпкаларды кысылган аба менен же суу менен чайкап тазалаңыз. Кайра орнотуудан мурун алардын толугу менен кургак экенин текшериңиз.
2. Жалпы тазалоо
жумшак колдонуу, damp cloth to wipe down the exterior surfaces of the case. Avoid using harsh chemicals or abrasive materials that could damage the finish or tempered glass.
Проблемаларды чечүү
No Power After Assembly
- PSU күйгүзүлгөнүн жана розеткага туура туташтырылганын текшериңиз.
- Verify that the 24-pin ATX and 8-pin CPU power cables are securely connected to the motherboard.
- Алдыңкы панелдин кубат которгучу кабели эне платасынын алдыңкы панелинин башына туура туташтырылганын текшериңиз.
Fans Not Spinning or ARGB Not Working
- Confirm that the fan power cables are connected to the motherboard or fan controller.
- Ensure ARGB cables are properly connected to the motherboard's ARGB header or the fan controller.
- Check your motherboard's BIOS/UEFI settings or ARGB software for fan and lighting control.
Ашыкча ысып кетүү маселелери
- Ensure all case fans are spinning correctly and oriented for optimal airflow (intake at front, exhaust at rear/top).
- Clean all dust filters and internal components to remove dust buildup.
- CPU муздаткычынын жана GPU желдеткичтеринин туура иштеп жатканын текшериңиз.
Техникалык шарттар
| Өзгөчөлүк | Деталь |
|---|---|
| Бренд | ГАМДИАС |
| Модель аты | Aura GC11 ARGB |
| Иштин түрү | Ара Tower |
| Motherboard шайкештиги | Mini-ITX, Micro-ATX, ATX |
| Алдын ала орнотулган күйөрмандар | 4 x 120мм ARGB күйөрмандары |
| Муздатуу ыкмасы | Аба |
| Коргоочу материал | Металл, чыңдалган айнек |
| I/O порттору | 1 x Type-C, 2 x USB 2.0, 1 x HD Audio, 1 x Reset |
| CPU Cooler Height чектөө | 160мм |
| VGA Length Limitation | 300мм |
| PSU узундугун чектөө | 150мм |
| Internal Bays Quantity | 3 (for 2.5"/3.5" drives) |
| Өзгөчөлүктөр | Bar Patterned Mesh Front Panel, Magnetic Dust Filter |
| Элемент Салмагы | 4000 грамм |
| Элементтин өлчөмдөрү (D x W x Y) | 46D x 20W x 40H Сантиметр |
| Келип чыккан өлкө | Кытай |
Кепилдик маалымат
Бул продукт менен келет 1 YEAR MANUFACTURER warranty. Please retain your proof of purchase for warranty claims. For detailed terms and conditions, refer to the official GAMDIAS webсайтка же кардарларды колдоо менен байланышыңыз.
Колдоо
If you encounter any issues or have questions regarding your GAMDIAS Aura GC11 ARGB PC Case that are not covered in this manual, please contact GAMDIAS customer support. You can find contact information on the official GAMDIAS webсайт же сатуучу аркылуу.
Manufacturer Contact Information: GAMDIAS TAIWAN, No. 113, Jian 2nd Rd., Zhonghe, Dist., New Taipei City 235, Taiwan
Importer Contact Information: Allway Distributions Pvt Ltd, No-49, H.B. Samajha Road, Baswangudi, Bengaluru- 560004, Contact -8904307700