
1. Киришүү
This manual provides essential instructions for the safe and efficient operation, setup, and maintenance of your Procolored F13 Panda DTF Printer. Please read this manual thoroughly before using the printer to ensure optimal performance and longevity.
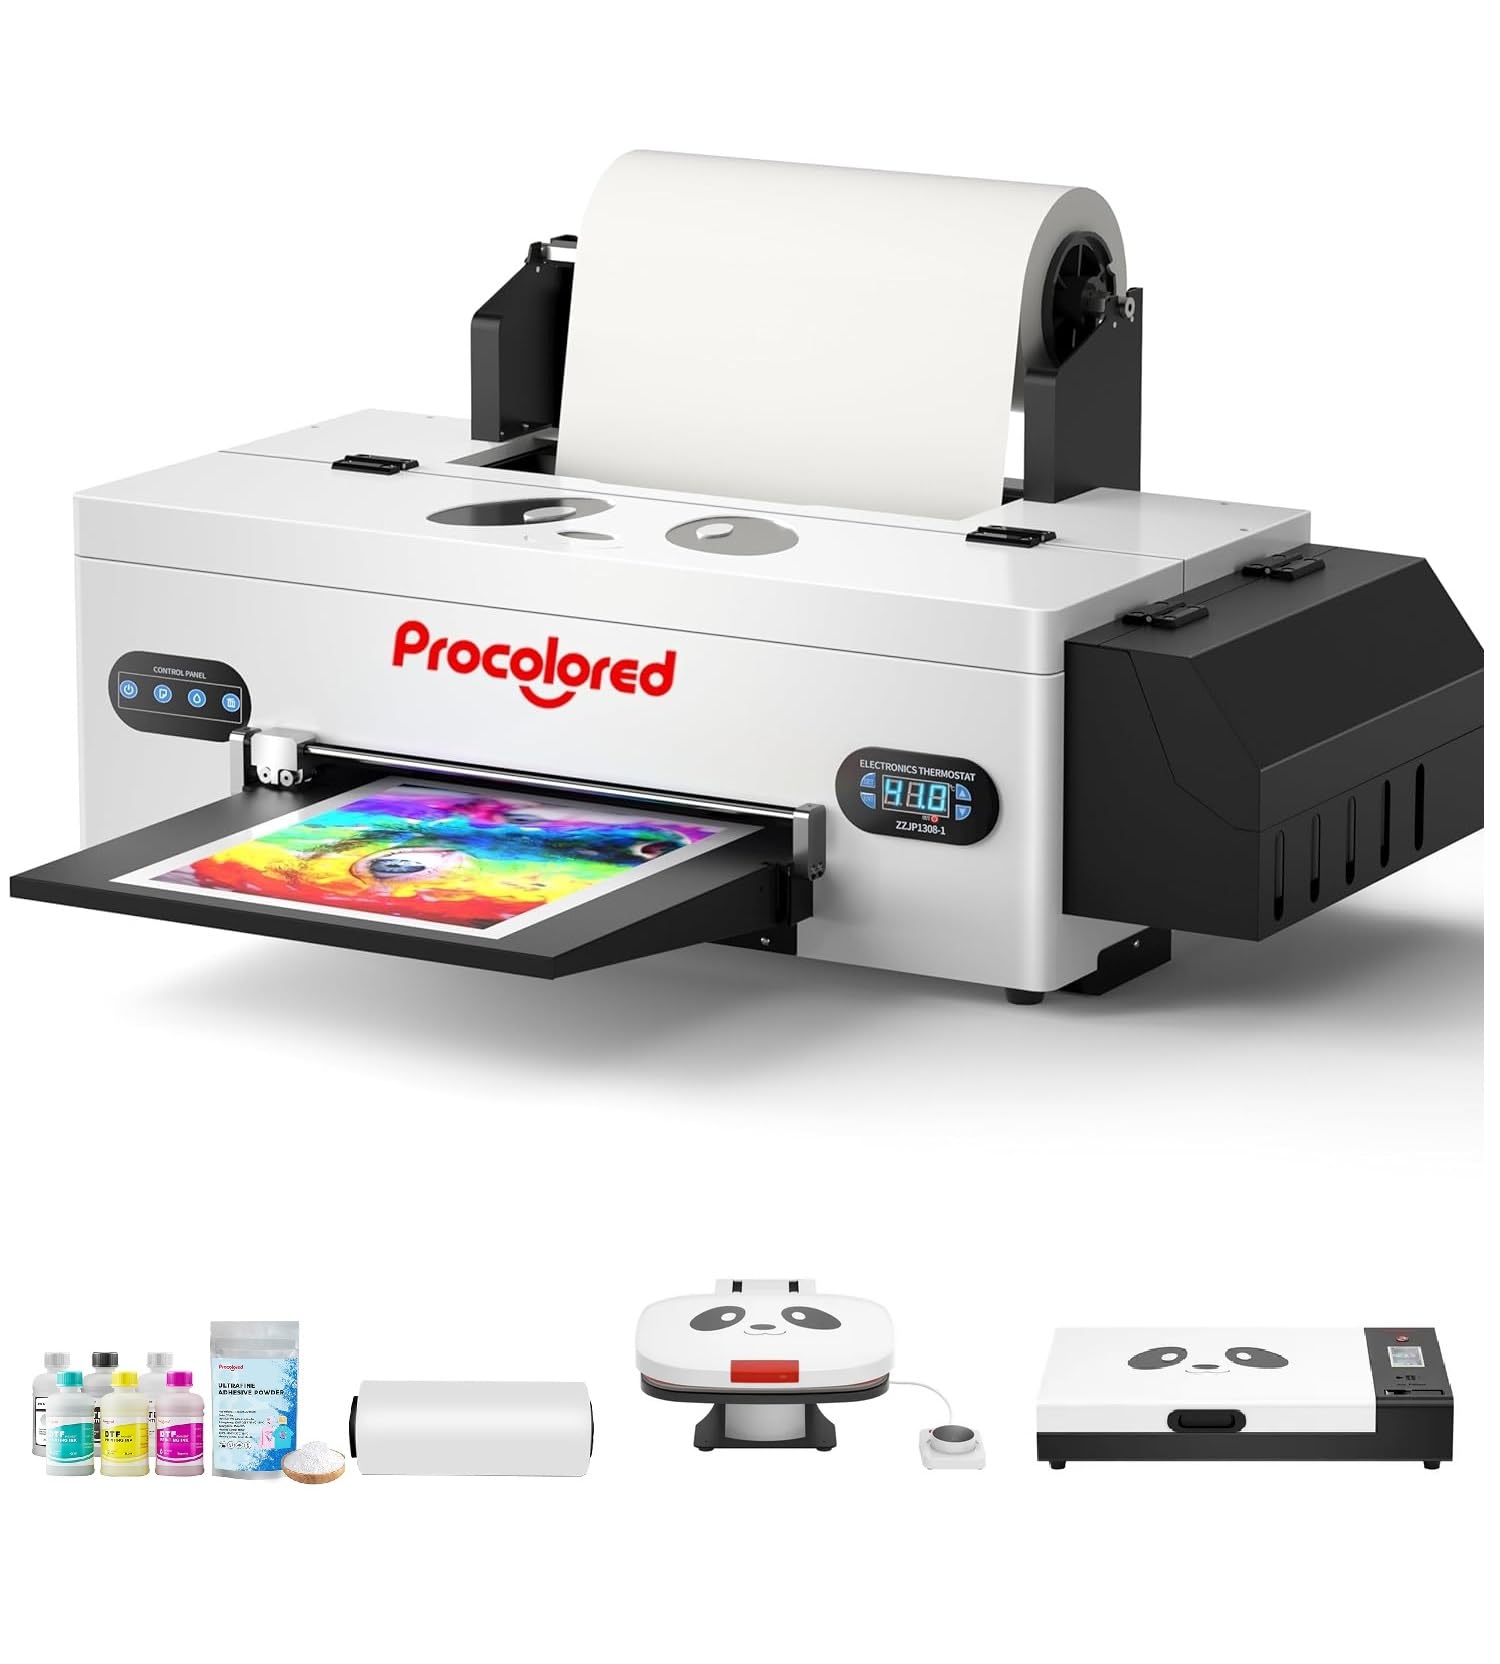
Figure 1: Procolored F13 Panda DTF Printer.
2. Коопсуздук маалыматы
Принтерге зыян келтирбөө же жаракат алып калбоо үчүн ар дайым төмөнкү коопсуздук чараларын сактаңыз:
- Принтер туруктуу, түз бетке коюлганын текшериңиз.
- Принтерди туура том менен жерге туташтырылган электр розеткасына туташтырыңызtage (AC 100-230V).
- Принтерди сууга же ашыкча нымдуулукка дуушар кылбаңыз.
- Иштеп жаткан учурда колду кыймылдуу бөлүктөрдөн алыс кармаңыз.
- Use only recommended inks and cleaning solutions.
- Балдар жетпеген жерде сактаңыз.
3. Пакеттин мазмуну
Пакетте бардык буюмдар бар экенин текшериңиз:
- Procolored F13 DTF Printer
- Roll Film 13"
- DTF Ink Set (CMYK+WW)
- Nozzle Protection Fluid
- DTF Powder
- Пластикалык колдоо
- Маалымат кабели (USB)
- Электр кабели
- Moisturizing Device
- Таштанды бөтөлкө
- Картридж
- Spare Ink Tube
- Ролик кронштейн
- Ink Pad
- тазалагыч
- Cutter Blade
- USB Dongle
- Шприц
- Screwdriver
- Roller Bar
- Узартуу түтүгү
- Needle Hub
- Жаз
- Тампон

Figure 2: Included accessories for the Procolored F13 DTF Printer.
4. Орнотуу колдонмосу
4.1 Кутудан чыгаруу жана баштапкы жайгаштыруу
Carefully remove the printer and all components from the packaging. Place the printer on a sturdy, level surface in a well-ventilated area.
Video 1: Procolored F13 DTF Printer Unboxing. This video demonstrates the unboxing process and initial setup steps for the printer.
4.2 Плёнкаларды орнотуу
Install the 13-inch DTF film roll onto the designated holder at the rear of the printer. Ensure the film feeds smoothly into the printer mechanism.
4.3 Ink System Setup
Fill the ink tanks with the corresponding DTF pigment inks (Cyan, Magenta, Yellow, Black, White, Light Cyan). Ensure the white ink circulation system is properly connected and functioning to prevent clogging.

Figure 3: Illustration of the advanced white ink system, showing circulation, siphon effect, and automatic cleaning.
4.4 Power Connection and Software Installation
Connect the power cable to the printer and a suitable power outlet. Install the Procolored RIP software (compatible with Windows 7/10/11) on your computer. Follow the on-screen instructions for software installation and driver setup.
Figure 4: ашыкview of the Procolored RIP software interface and available tutorials.
5. Иштөө нускамалары
5.1 Preparing for Print
- Power on the printer using the main switch.
- Ensure the DTF film is correctly loaded and aligned.
- Open the Procolored RIP software on your computer.
- Import your design and adjust settings such as size, resolution (up to 1440x1440dpi), and color profile.
5.2 Басып чыгаруу процесси
Initiate the print job from the software. The printer will feed the film and apply ink. The built-in cutter will automatically trim the film after printing, optimizing material usage.
Video 2: Procolored F13 DTF Printer in operation. This video demonstrates the printing process, including film feeding and ink application.
5.3 Post-Printing
After printing, apply DTF powder to the wet ink and cure it using a DTF oven or heat press. Once cured, the design is ready for transfer to textiles.

5-сүрөт: Мисamples of versatile applications for DTF prints, including shirts, flags, tote bags, and caps.
6. Техникалык тейлөө
6.1 Автоматтык тазалоо системасы
The F13 Panda DTF Printer features an automatic cleaning system that operates even when the printer is powered on. This system helps prevent print head clogs and ensures consistent print quality. Regular use of this feature is recommended.
6.2 White Ink Circulation
The printer includes a white ink circulation system with a siphon filtration diaphragm pump. This system minimizes blockages and maintains the quality of white ink. Ensure the system is always active during operation.
Video 3: F13 L1800 DTF Apparel Printer features. This video highlights the white ink circulation and automatic cleaning functions.
6.3 Жалпы тазалоо
Принтердин сыртын мезгил-мезгили менен жумшак,amp cloth. Refer to the software's maintenance section for specific print head cleaning procedures if needed.
7. Кыйынчылыктарды
If you encounter issues with your printer, consider the following common solutions:
- Басма сапаты маселелери: Perform a nozzle check and head cleaning through the software. Ensure ink levels are sufficient.
- Film Feeding Problems: Check for obstructions in the film path and ensure the film roll is correctly installed and aligned.
- Программалык камсыздоо каталары: Restart the software and the printer. Ensure your software and drivers are up to date.
- Туташуу маселелери: Verify USB cable connection and ensure the printer is powered on.
For persistent issues, contact Procolored customer service.
8. Техникалык шарттар
| Өзгөчөлүк | Спецификация |
|---|---|
| Бренд | Procolored |
| Модель аты | F13-XMJZ |
| Байланыш технологиясы | USB |
| Басма технологиясы | Inkjet |
| Өзгөчө өзгөчөлүк | Portable |
| Принтердин чыгышы | Түс |
| Максималдуу басып чыгаруу ылдамдыгы (түстүү) | 1 промилле |
| Макс басып чыгаруу ылдамдыгы монохромдуу | 1 промилле |
| Продукциянын өлчөмдөрү (D x W x Y) | 16.53"D x 34.25"W x 16.4"H |
| Сыя түсү | Cyan, Magenta, Yellow, Black, White, Light Cyan |
| Резолюция | 1440 x 1440 dpi |
| Максималдуу медиа өлчөмү | A3 (13 Inches) |
| Программалык камсыздоону колдоо | Windows 7/10/11 |
| Продукт үчүн атайын колдонуу | Textile Printing |
9. Кепилдик жана колдоо
Your Procolored F13 Panda DTF Printer comes with a comprehensive warranty:
- Print Head and Related Components: Six-month warranty.
- Башка аксессуарлар: Бир жылдык кепилдик.
Our dedicated customer service team is available 24/6 to address any queries or technical issues you may encounter. Please refer to your purchase documentation for specific contact details.