
1. Киришүү
The Radioddity HF-010 is a versatile 10-band (80m-6m) portable HF antenna designed for amateur radio operators. It offers robust construction with 304 stainless steel components, flexible deployment options, and efficient tuning for field operations such as POTA (Parks On The Air) and SOTA (Summits On The Air).
This manual provides detailed instructions for the assembly, setup, operation, and maintenance of your HF-010 antenna to ensure optimal performance and longevity.
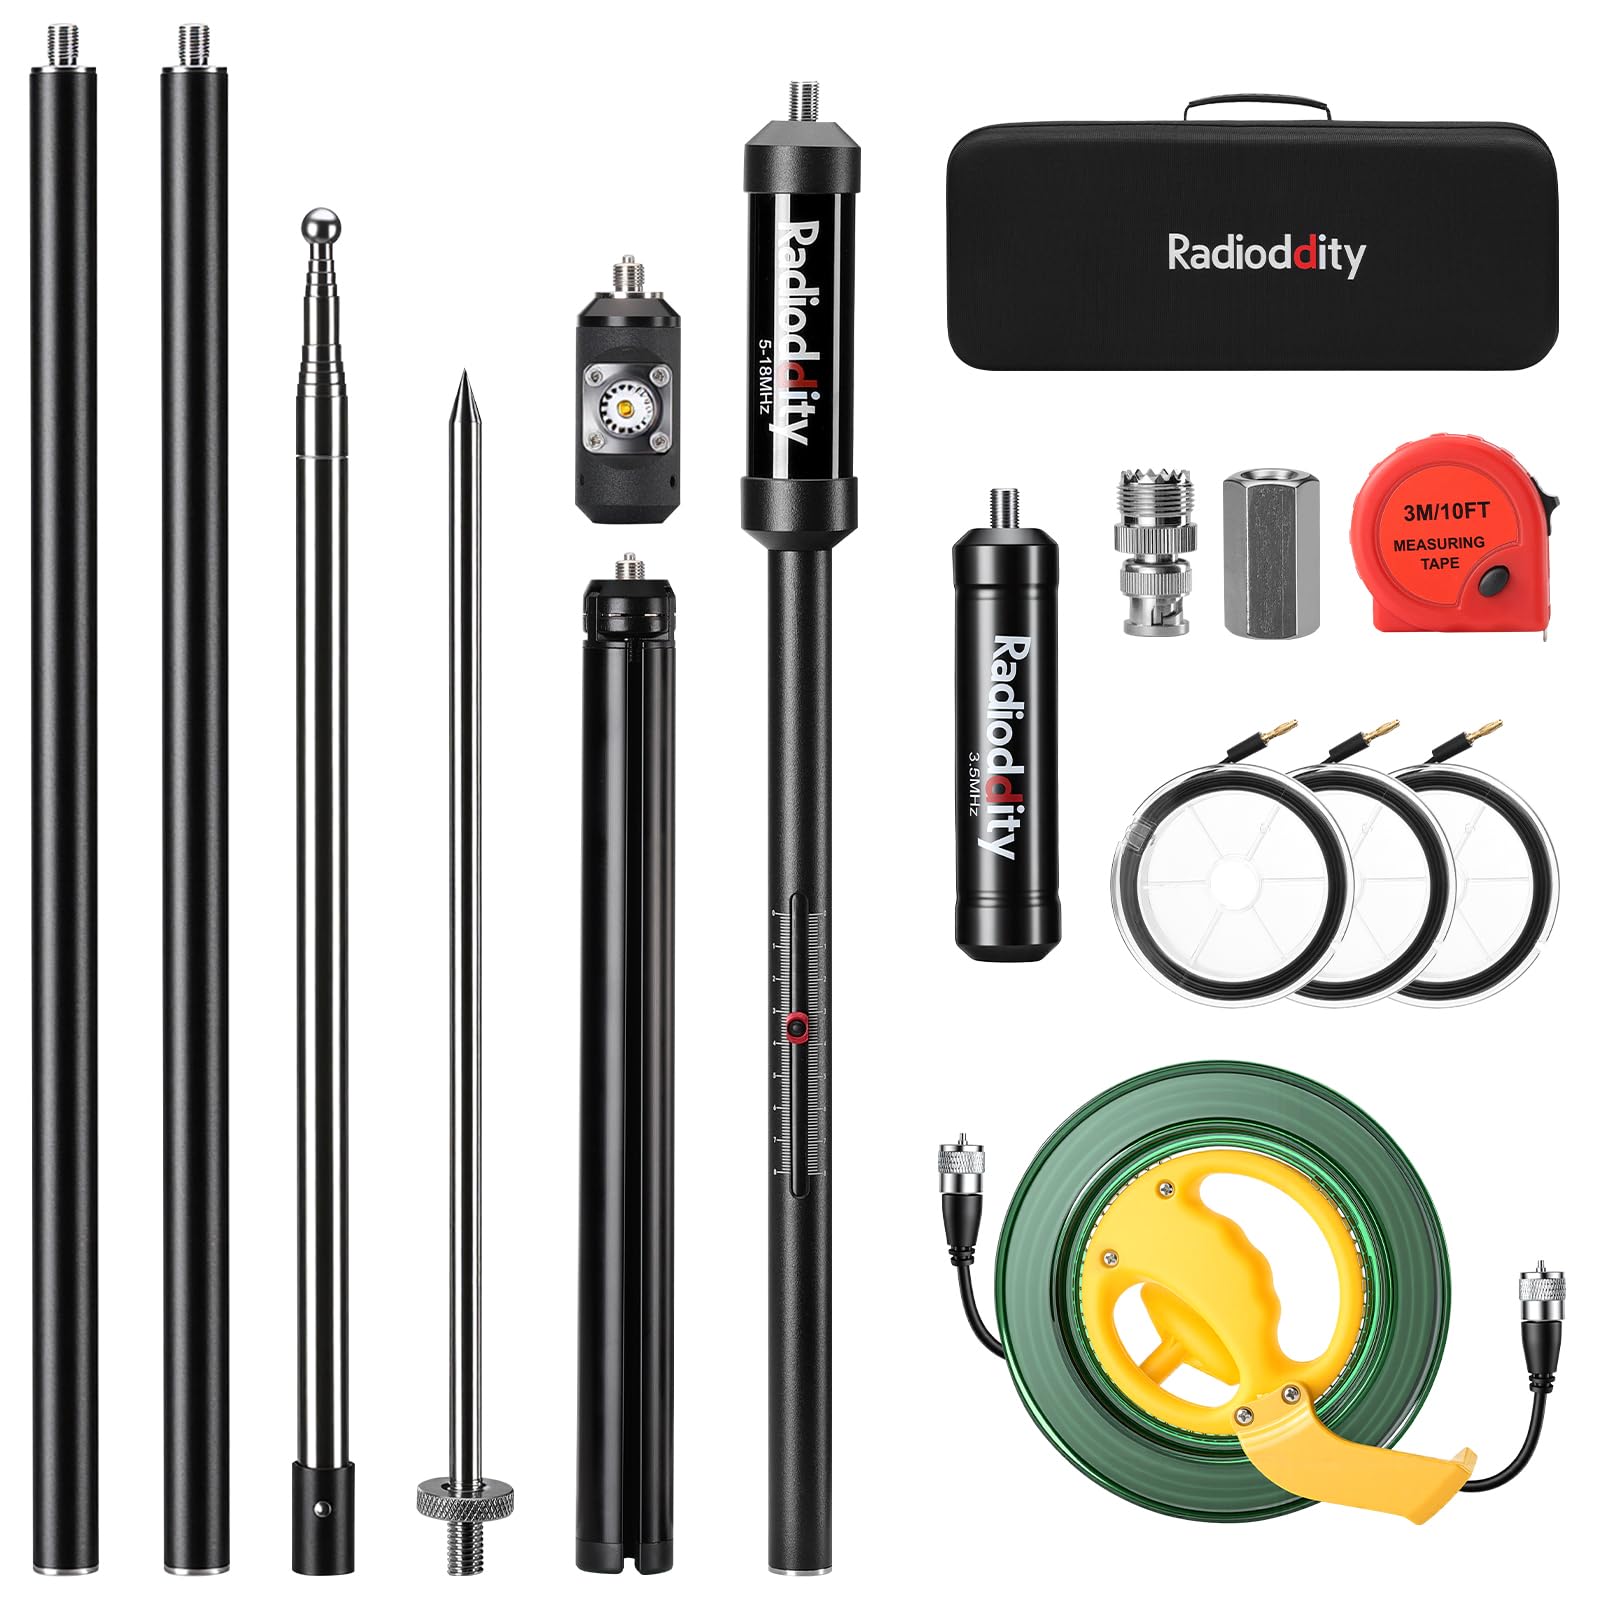
Image: The Radioddity HF-010 antenna set up in a natural outdoor environment, demonstrating its portability for field operations.
2. Коопсуздук маалыматы
- Электр линияларынан алыс болуңуз: Never install or operate the antenna near overhead power lines or other electrical installations. Contact with power lines can be fatal.
- Чагылгандын коопсуздугу: Do not operate the antenna during thunderstorms. Disconnect the antenna from your radio equipment during lightning activity.
- Secure Deployment: Always ensure the antenna is securely mounted using the tripod, ground spike, or other stable means to prevent it from falling, especially in windy conditions.
- RF таасири: Maintain a safe distance from the antenna during transmission to minimize exposure to radio frequency (RF) energy. Consult your radio's manual for specific RF safety guidelines.
- Этияттык менен мамиле кылуу: The antenna contains small parts and telescoping elements. Handle with care to avoid pinching fingers or damaging components.
3. Пакеттин мазмуну
Verify that all components listed below are present in your Radioddity HF-010 kit:
- Extension Rod (x2)
- Telescopic Whip
- Ground Spike
- Tunable Loading Coil (5-18MHz)
- Антенна базасы
- Tripod орнотуу
- Fixed Loading Coil (3.5MHz for 80m)
- Ташуу сумкасы
- Tape Measure (3m/10ft)
- Ground Radial Wires (x3)
- BNC-M to SO239 Adapter
- Connecting Piece
- Antenna Coax-Cable (32.8 ft / 10 m)
- Water Bag (for tripod stability)

Image: All components of the Radioddity HF-010 kit, clearly labeled for identification.
4. Чогултуу жана орнотуу
The HF-010 antenna offers flexible deployment options. Choose the method best suited for your operating environment.
4.1 Башкы Ассамблеянын кадамдары
- Connect Antenna Base: Screw the antenna base onto the top of the tripod mount or ground spike.
- Add Extension Rods: Attach one or both extension rods to the antenna base, depending on desired height and band requirements.
- Attach Loading Coil:
- For 80m operation, attach the Fixed Loading Coil (3.5MHz).
- For 60m-17m operation, attach the Tunable Loading Coil (5-18MHz). Adjust the sliding coil for resonance.
- For 15m-6m operation, no loading coil is typically required; connect the telescopic whip directly to the extension rod or antenna base.
- Attach Telescopic Whip: Screw the telescopic whip onto the top of the loading coil or extension rod. Extend the whip to the required length for your desired band (refer to Section 5.2).
- Коаксиалдык кабелди туташтыруу: Attach the 10m coaxial cable to the SO239 connector on the antenna base. Use the BNC-M to SO239 adapter if your radio has a BNC connector.
- Deploy Radial Wires: Connect the three ground radial wires to the designated terminals on the antenna base. Extend them outwards from the antenna, laying them on the ground. The length of the radials is critical for tuning (refer to Section 5.2).
4.2 Deployment Options
- Штатив орнотуу: For hard surfaces like concrete or patios.
- Штативдын буттарын ачыңыз.
- For added stability, fill the included water bag and place it over the tripod legs, resting on the center.
- Жер титирөө: For soft ground such as soil or grass.
- Gently push or twist the ground spike into the earth until stable. Do not hammer the spike.
- Vehicle Mount: The antenna can be mounted to a vehicle roof using a compatible magnetic antenna base (e.g., Radioddity M916, sold separately) and the optional HF-010A accessory. Ensure the magnetic base is securely attached to a clean, flat metallic surface.

Сүрөт: Мисamples of the HF-010 antenna deployed in diverse field environments, showcasinанын адаптацияланышы.
5. Tuning and Operation
The HF-010 antenna covers 10 bands from 80m to 6m (3.5-50MHz). Proper tuning is essential for efficient operation and to protect your transceiver.
5.1 Band Selection and Coil Usage
- 80m (3.5MHz): колдонуу Fixed Loading Coil (3.5MHz).
- 60m-17m (5-18MHz): колдонуу Tunable Loading Coil (5-18MHz). Adjust the sliding coil for resonance.
- 15m-6m (21-50MHz): No loading coil is typically required. Connect the telescopic whip directly to the extension rod or antenna base.
5.2 Тунинг процедурасы
Tuning involves adjusting the telescopic whip length and, for certain bands, the sliding tunable coil and radial wire lengths. Use an antenna analyzer or the SWR meter on your transceiver for precise tuning.
- Тандоо тобу: Choose your desired operating band and attach the appropriate loading coil (if any).
- Extend Whip: Extend the telescopic whip to the approximate length specified in the tuning chart (refer to the table below). Use the included tape measure for accuracy.
- Adjust Tunable Coil (if applicable): For 60m-17m, slide the tunable coil up or down to find the lowest SWR.
- Adjust Radial Wires: Ensure radial wires are deployed to the correct length for the band. The wires are marked at 100cm intervals for convenience.
- Жакшы жөндөө: Make small adjustments to the whip length and/or tunable coil position until the SWR is at its lowest point (ideally ≤1.5:1). Mark your resonant points on the tape measure for quick future setup.

Image: Demonstrates the adjustable tunable coil and the use of the tape measure for setting whip length for specific bands.
5.3 Электр менен иштөө
The Radioddity HF-010 antenna supports up to 100W CW жана 150W PEP SSB. Always operate within these limits to prevent damage to the antenna and your radio equipment.
6. Техникалык тейлөө
Regular maintenance will extend the life and performance of your HF-010 antenna.
- Тазалоо: After field use, especially in dusty or wet conditions, wipe down all components with a damp cloth to remove dirt and debris. Ensure all parts are dry before storage.
- Коррозиядан коргоо: The antenna features 304 stainless steel connectors and an internal coil design for enhanced corrosion resistance. However, it is good practice to periodically inspect all connections for signs of wear or corrosion.
- Сактагыч: Disassemble the antenna and store all components neatly in the included Oxford carrying bag. This protects the antenna from physical damage and environmental exposure during transport and storage.
- Текшерүү: Before each use, inspect the telescopic whip for smooth extension and retraction, and check all threaded connections for tightness.

Image: Illustrates the robust 304 stainless steel construction of the HF-010's connectors, designed for durability.
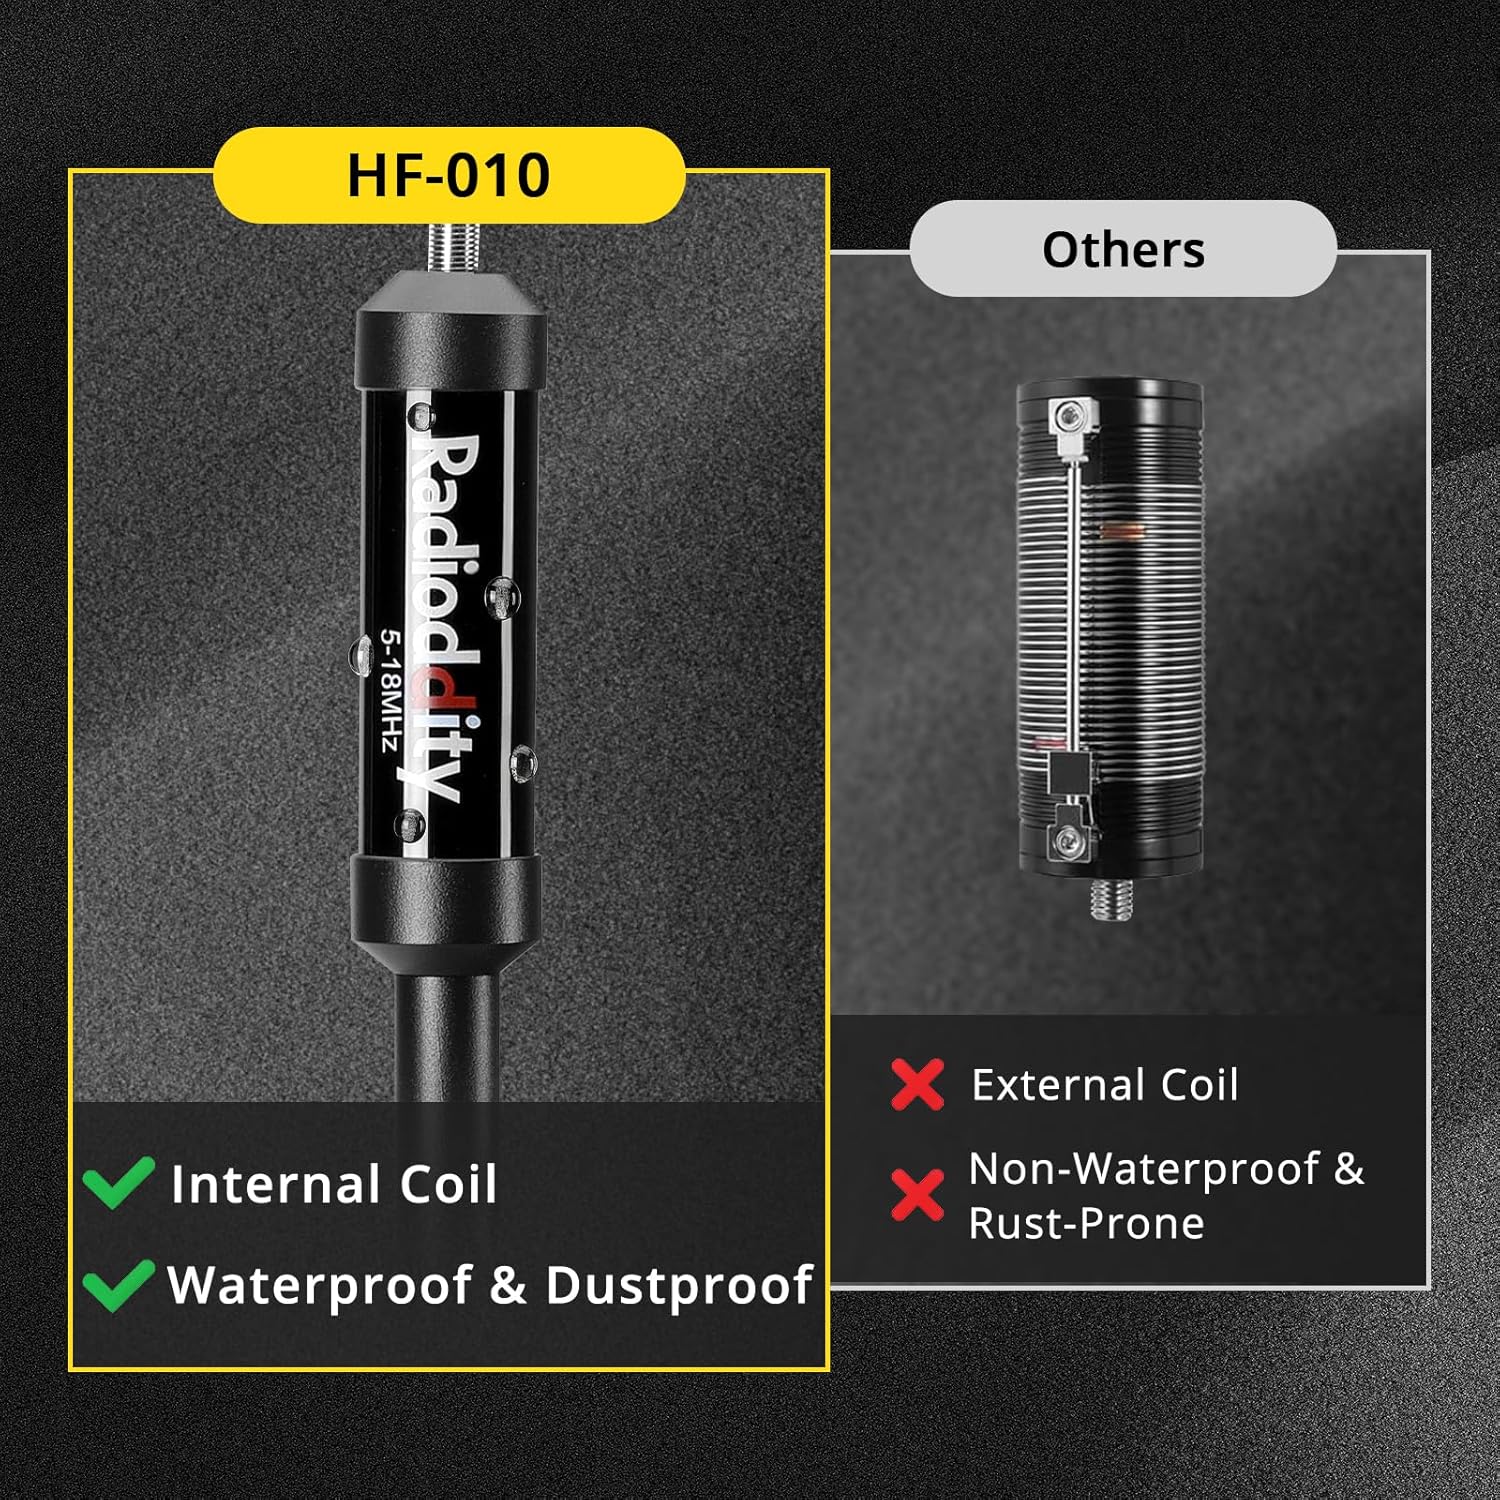
Image: Highlights the internal coil design of the HF-010, which provides superior protection against environmental elements compared to external coils.
7. Кыйынчылыктарды
If you encounter issues with your HF-010 antenna, consider the following common troubleshooting steps:
- Жогорку SWR:
- Check Whip Length: Ensure the telescopic whip is extended to the correct length for the desired band.
- Verify Coil Selection/Adjustment: Confirm the correct loading coil is used and, if tunable, that it is adjusted for minimum SWR.
- Radial Deployment: Ensure radial wires are fully extended and of the correct length for the band. Poor ground connection or improperly deployed radials can cause high SWR.
- Кабель туташуу: Check all coaxial cable connections for tightness and proper seating. Inspect the cable for damage.
- Курчап турган чөйрө: Proximity to large metallic objects, buildings, or other antennas can affect SWR. Try relocating the antenna.
- Poor Signal Reports / Low Performance:
- SWR текшерүү: High SWR directly impacts performance. Resolve SWR issues first.
- Антенна багыты: While a vertical antenna is omnidirectional, local obstructions can affect signal.
- Чыгуу кубаттуулугу: Ensure your transceiver is set to an appropriate power output for the band and conditions.
- Band Conditions: HF propagation varies significantly. Check current band conditions.
- Физикалык зыян: If any component appears damaged, do not attempt to operate the antenna. Contact customer support for assistance.
8. Техникалык шарттар
| Өзгөчөлүк | Спецификация |
|---|---|
| Антенна түрү | Portable HF Vertical Antenna |
| Жыштыктарды камтуу | 3.5 - 50 MHz (80m - 6m, 10-Band) |
| Power Handling | 100W CW / 150W PEP SSB |
| Импеданс | 50 Ом |
| Туташтыргыч түрү | SO239 (UHF Female) |
| Курулуш материалы | 304 Stainless Steel (critical connectors), Aluminum Alloy (tripod) |
| Продукциянын өлчөмдөрү (таңгакталган) | 20.1L x 8.9W x 55.1H см |
| Коаксиалдык кабель узундугу | 10m (32.8 и) |
9. Кепилдик жана колдоо
For warranty information, technical support, or to purchase replacement parts, please contact Radioddity customer service through their official webсайтка же продуктуну сатып алган сатуучуга.
Please have your product model (HF-010) and purchase details ready when contacting support.