
1. Маанилүү коопсуздук нускамалары
Сураныч, шайманды колдонуудан мурун бардык нускамаларды кылдат окуп чыгыңыз. Бул колдонмону келечекте маалымат алуу үчүн сактаңыз.
- кубат менен камсыз кылуу Voltage рейтинг белгисинде көрсөтүлгөн.
- Шайманды, электр шнурун же сууга же башка суюктуктарды розеткага салбаңыз.
- Unplug from the outlet when not in use, before cleaning, or during maintenance.
- Эч кандай шайманды зымы же сайы бузулган, же шайман иштебей калгандан кийин же кандайдыр бир түрдө бузулгандан кийин иштетпеңиз.
- Бул шайман тиричиликте гана колдонуу үчүн. Сыртта колдонбоңуз.
- Шайманды жылуулук булактарынан жана түз күн нурунан алыс кармаңыз.
- Ensure proper ventilation around the unit. Maintain at least 15cm clearance on all sides.
- Суу куюлган идиште ичүүгө жарактуу сууну гана колдонуңуз.
- Бул шаймандын ичинде күйүүчү от жагылуучу аэрозолдук кутулар сыяктуу жарылуучу заттарды сактабаңыз.
2. Продукт бүтүп калдыview
The EUHOMY IM004-CSI is an automatic ice maker designed for convenient ice production at home or for small business use. It features high-speed ice making, adjustable ice thickness, and an automatic cleaning function.

Image: The EUHOMY IM004-CSI ice maker filled with clear ice cubes, highlighting its capacity and rapid ice production capabilities.
Пакеттин мазмуну:
- EUHOMY IM004-CSI Ice Maker
- Муз себет
- Муз кашык
- User Manual
3. Орнотуу
3.1 Пакеттен чыгаруу жана жайгаштыруу
- Бардык таңгактоочу материалдарды алып салыңыз жана кандайдыр бир бузулууларды текшериңиз.
- Place the ice maker on a stable, level surface, away from direct sunlight and heat sources.
- Ensure there is at least 15cm of space around the unit for proper ventilation.
- Allow the unit to stand upright for at least 2 hours before plugging it in, especially if it was transported horizontally. This allows the refrigerant to settle.
3.2 Алгачкы тазалоо
Before first use, clean the ice maker thoroughly.
- Капкакты ачып, муз куржунун алып салыңыз.
- Clean the interior with a soft cloth and warm water with a mild detergent. Rinse thoroughly.
- Drain any remaining water by removing the drain plug at the bottom.
- Жарнама менен сыртын сүртүңүзamp кездеме.
3.3 Water Filling Methods
The ice maker offers two convenient ways to add water to its 3.2L tank:

Image: Illustration showing two ways to fill the water tank: directly pouring water into the tank or using an inverted water bottle (up to 5cm diameter opening).
- Method 1: Direct Fill
Open the lid and directly pour potable water into the water tank until it reaches the MAX fill line. - Method 2: Water Bottle Connection
Place an inverted water bottle (with a mouth diameter of 5cm or less) onto the designated water inlet. The ice maker will automatically draw water as needed.
4. Иштөө нускамалары
4.1 Башкаруу панелинин үстүнөview

Сүрөт: деталдуу view of the ice maker's control panel, showing buttons for power, timer/clean, ice full indicator, water shortage indicator, and ice size adjustment.
- ON/OFF баскычы: Аппаратты күйгүзөт же өчүрөт.
- TIMER/CLEAN баскычы: Press once to set the timer. Press and hold for 5 seconds to activate the automatic cleaning function.
- Муз толук көрсөткүчү: Lights up when the ice basket is full.
- Суу Шорtage Индикатор: Lights up when the water tank is low.
- +/- баскычтары: Муздун калыңдыгын же таймердин жөндөөлөрүн тууралаңыз.
4.2 Муз жасоо процесси
- Суу куюлган бак ичүүгө жарактуу суу менен толтурулганын текшериңиз.
- Муз жасагычты жерге туташтырылган электр розеткасына сайыңыз.
- басыңыз КҮЙГҮЗҮҮ/ӨЧҮРҮҮ муз жасоо циклин баштоо үчүн баскычын басыңыз.
- The unit will produce 24 clear ice cubes per cycle, taking approximately 12-18 minutes depending on ambient temperature and selected ice thickness.
- When the ice basket is full, the ice full indicator will light up, and the unit will pause ice production. Remove ice to resume.
- If the water level is low, the water shortage indicator will light up. Add more water to continue ice production.
4.3 Муздун калыңдыгын жөндөө
You can adjust the thickness of the ice cubes to suit your preference.
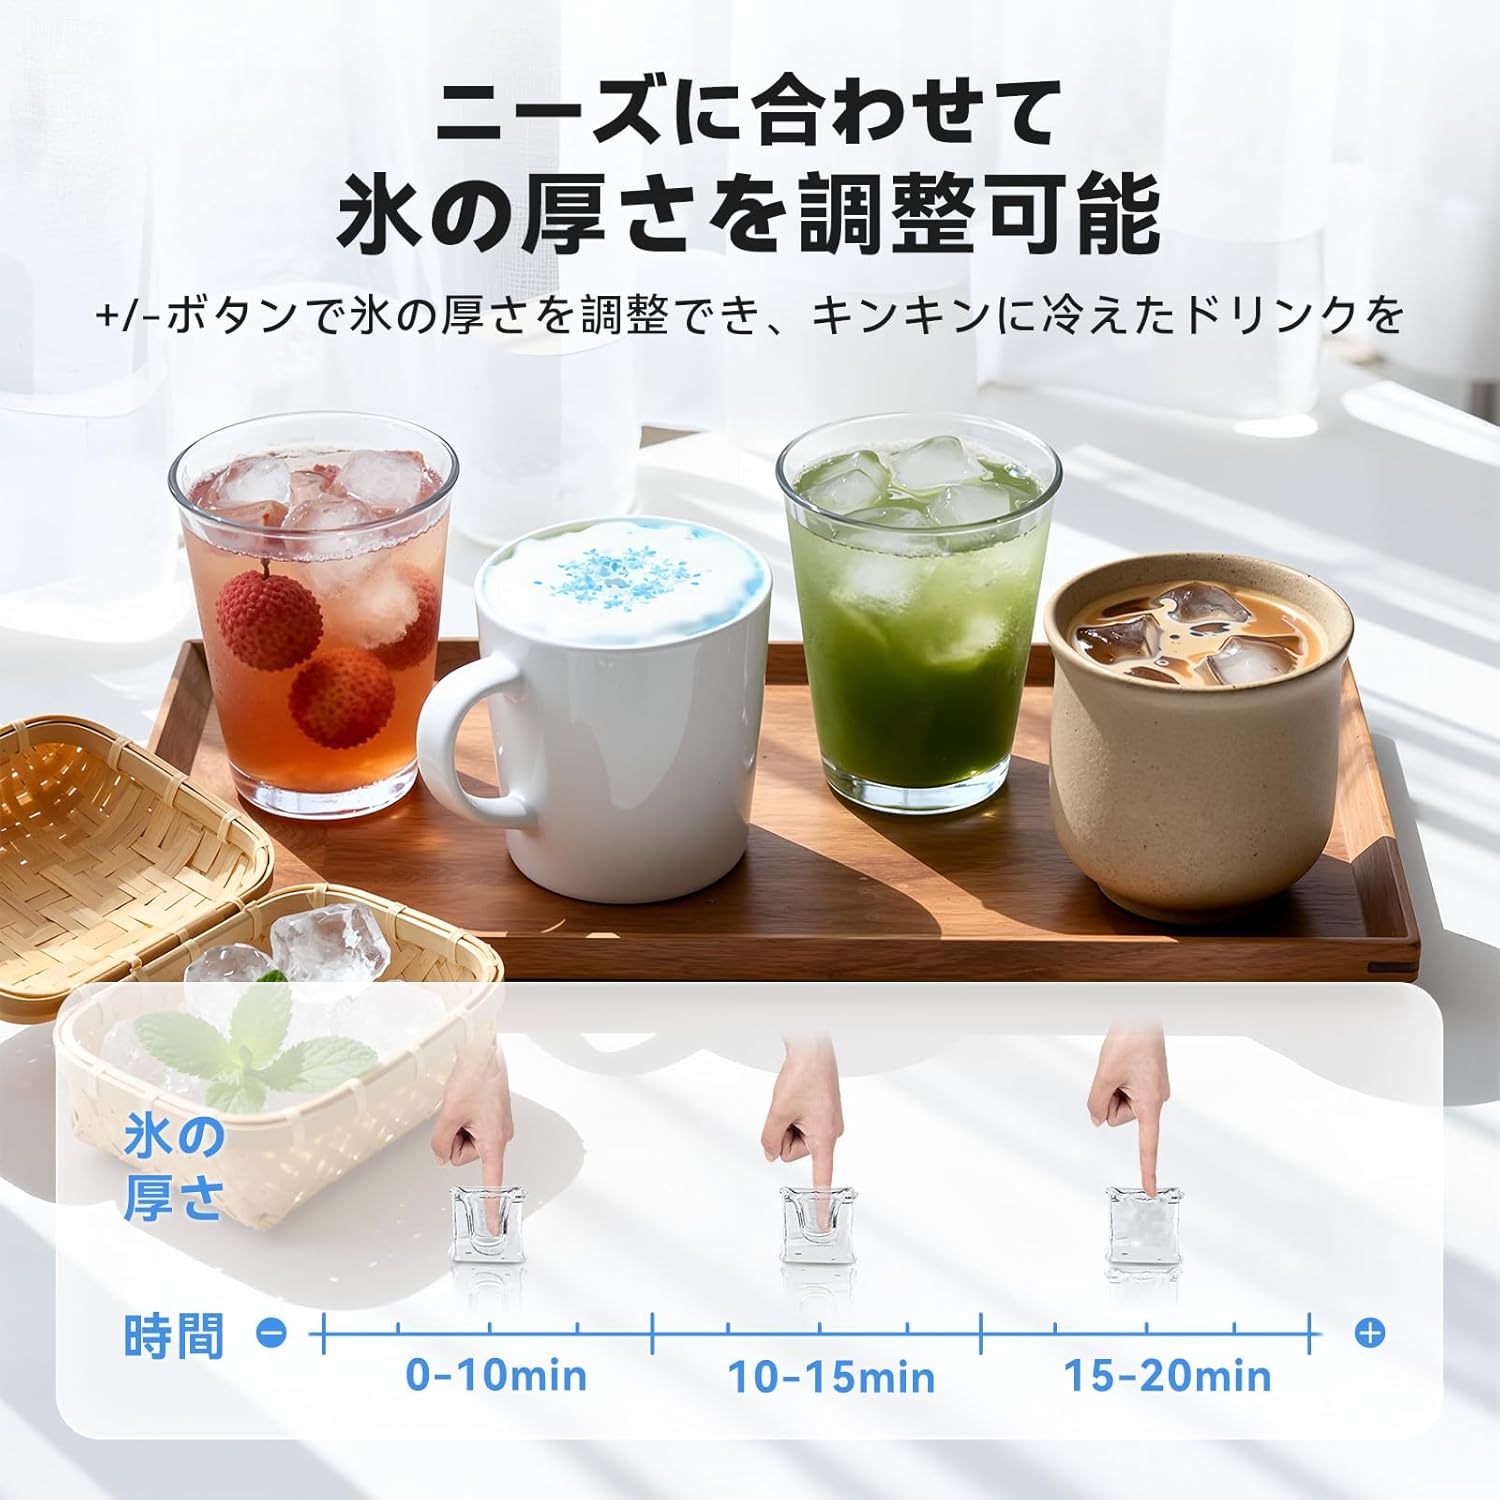
Image: Visual representation of ice thickness adjustment, showing different ice cube sizes corresponding to various production times (0-10 min, 10-15 min, 15-20 min).
колдонуу +/- buttons on the control panel to select your desired ice thickness. A longer production time results in thicker ice.
4.4 Таймер функциясы
The ice maker features a timer function, allowing you to schedule ice production up to 8 hours in advance.

Image: The ice maker with a visual indicating a 24-hour timer function, suggesting convenience for scheduled ice production.
- басыңыз TIMER/CLEAN баскычын бир жолу.
- колдонуу +/- каалаган кечигүү убактысын (саат менен) коюу үчүн баскычтар.
- The unit will start ice production after the set time has elapsed.
5. Техникалык тейлөө
5.1 Автоматтык тазалоо функциясы
The ice maker is equipped with an automatic cleaning function to simplify maintenance.

Image: An animated diagram illustrating the internal water circulation during the automatic cleaning cycle, showing water being thoroughly circulated and drained.
- Суу идиш таза суу менен толтурулганын текшериңиз.
- басып, кармап туруңуз TIMER/CLEAN баскычын 5 секунда басыңыз.
- The cleaning cycle will begin and last for approximately 20 minutes.
- After the cycle, drain the water from the unit.
5.2 Сууну агызуу
Агрегаттан сууну агызуу үчүн:
- Муз жасагычты электр розеткасынан сууруп алыңыз.
- Locate the drain plug at the bottom of the unit.
- Place a container under the drain plug and remove the plug to allow water to flow out.
- Сыгып кеткенден кийин, сайгычты бекем алмаштырыңыз.
5.3 Үзгүлтүксүз тазалоо
For optimal performance and hygiene, perform regular cleaning:
- Clean the ice basket and ice scoop with warm, soapy water.
- Агрегаттын сыртын жумшак менен сүртүңүз, гamp кездеме.
- Periodically clean the water tank and ice-making components using a solution of water and vinegar (10:1 ratio) to prevent mineral buildup. Run a cleaning cycle with this solution, then rinse by running two cycles with fresh water.
6. Кыйынчылыктарды
Жалпы маселелер жана аларды чечүү үчүн төмөнкү таблицага кайрылыңыз.
| Көйгөй | Мүмкүн себеп | Чечим |
|---|---|---|
| Суу Шорtage Indicator is on | Суу резервуары бош же суунун деңгээли өтө төмөн. | Add potable water to the water tank. |
| Ice Full Indicator is on | Муз себет толду. | Себеттен музду алып салыңыз. |
| муз өндүрүү жок | Unit not plugged in; water tank empty; ambient temperature too high; refrigerant issue. | Check power connection; add water; ensure proper ventilation; contact customer support if issue persists. |
| Муз кубиктери өтө кичинекей же жумшак | Short ice making cycle; water temperature too high; ambient temperature too high. | Adjust ice thickness setting to a longer cycle; use colder water; ensure unit is in a cool, well-ventilated area. |
| Адаттан тышкаркы ызы -чуу | бирдиги деңгээл эмес; желдеткич тоскоолдук; кадимки компрессордун иштеши. | Ensure unit is on a level surface; check for obstructions around the fan; some noise from compressor is normal. |
7. Техникалык шарттар
| Өзгөчөлүк | Спецификация |
|---|---|
| Бренд | EUHOMY |
| Модель номери | IM004-CSI |
| Өлчөмдөр (D x W x H) | 25 см х 37.4 см х 35 см |
| Суу резервуарынын сыйымдуулугу | 3.2 литр |
| Күнүмдүк муз өндүрүү | 18 кг чейин |
| Муз сактоо сыйымдуулугу | 1200г |
| Тtage | 100V AC |
| Ватtage | 120 Ватт-саат |
| Муздаткыч | R290a |
| Материал | Stainless Steel exterior, Plastic interior components |
| Ызы-чуу деңгээли | Болжол менен 45дБ |
8. Кепилдик жана Кардарларды колдоо
8.1 One-Year Quality Guarantee

Image: A badge indicating a "ONE YEAR GUARANTEE" for the product.
EUHOMY provides a one-year quality guarantee for this product. All products undergo strict quality inspection before shipment to ensure customer satisfaction.
8.2 Кардарларды колдоо

Image: Customer support representatives wearing headsets, ready to assist.
Should you encounter any issues or have questions regarding your EUHOMY ice maker, please do not hesitate to contact our customer support team. We are committed to providing prompt and courteous service.
For inquiries after purchase, please follow these steps:
- Go to your Amazon "Order History."
- Select "Problem with order."
- Choose "View проfile."
- Click "Ask a question."
Alternatively, you may contact the dedicated customer service channel provided in the Japanese instruction manual included with your product.