
1. Киришүү
The Next Cine800S GoogleTV Projector is designed to provide a versatile and immersive home entertainment experience. This manual offers essential information for the safe and efficient setup, operation, and maintenance of your projector. Please read this manual thoroughly before using the device.
2. Коопсуздук маалыматы
- Электр камсыздоо: Use only the specified power adapter. Ensure the power cord is not damaged or pinched.
- Вентиляция: Do not block ventilation openings. Maintain adequate space around the projector for proper airflow to prevent overheating.
- Жайгашкан жери: Проекторду туруктуу, тегиз жерге коюңуз. Аны күн нуру түз тийген жерге, жылуулук булактарынын жанына же нымдуулугу жогору же чаңдуу чөйрөгө койбоңуз.
- Тазалоо: Тазалоодон мурун электр кубатынан ажыратыңыз. Жумшак, кургак чүпүрөктү колдонуңуз. Суюк же аэрозоль тазалагычтарды колдонбоңуз.
- Линзага кам көрүү: Avoid touching the projector lens directly. Use a soft, lint-free cloth specifically designed for optical lenses if cleaning is necessary.
- Тейлөө: Проекторду өз алдынча оңдоого аракет кылбаңыз. Бардык тейлөө иштерин квалификациялуу адистерге тапшырыңыз.
3. Продукт бүтүп калдыview
The Next Cine800S is a Full HD LED projector featuring Google TV. Below are key components and features.

Сүрөт 3.1: Алдыңкы view of the Next Cine800S GoogleTV Projector, highlighting its design and key features like 800 ANSI Lumens and Google TV integration.
3.1. Негизги өзгөчөлүктөрү
- Дисплейдин чечилиши: Full HD 1920x1080, supporting screen sizes from 40 to 200 inches.
- Жарыктык: 800 ANSI люмен.
- Видеону иштетүү: Supports 4Kx2K @ 60fps encode/decode.
- Focus & Keystone: Automatic or Manual Focus, Automatic Keystone Correction.
- Операция системасы: Google TV with Android 14.
- Агым кызматтары: Netflix L1, Prime Video, YouTube, Disney+ with L1 DRM Certification.
- Зымсыз туташуу: Wi-Fi 802.11 a/b/g/n/ac (2.4G & 5G) and Bluetooth 5.0.
- Эстутум: 2GB LPDDR4 RAM / 8GB eMMC Storage.
- Аудио: Integrated 12W (4W) Speaker.
- Оптикалык система: Dust-Sealed Optical Mechanism.
- Экранды чагылдыруу: Air Screen and Google Cast for iOS & Android devices.
3.2. Порттар жана байланыштар
Identify the various input and output ports on your projector.
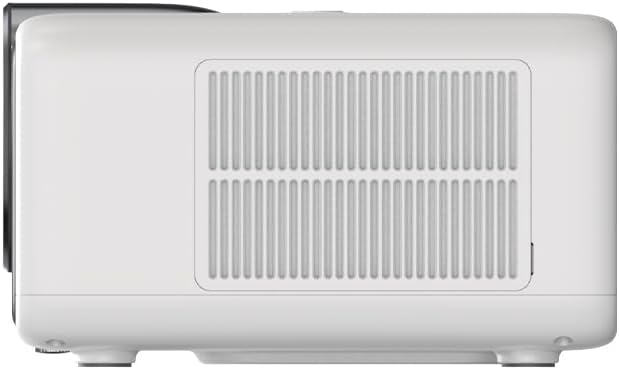
Figure 3.2: Rear panel of the projector, displaying available ports. Note: Actual ports may vary slightly by region or production batch. This model typically includes HDMI, USB, and a 2.5mm Audio Jack.
- HDMI: Connect to external video sources such as Blu-ray players, gaming consoles, or computers.
- USB: Медияны ойнотуу үчүн USB сактагыч түзмөктөрдү туташтыруу үчүн files.
- 2.5 мм аудио уячасы: Кулакчындар же динамиктер сыяктуу тышкы аудио түзмөктөрдү туташтыруу үчүн.
4. Орнотуу
4.1. Таңгактан чыгаруу жана алгачкы текшерүү
- Проекторду жана бардык аксессуарларды таңгактан кылдаттык менен чыгарып алыңыз.
- Check for any signs of damage during transit. If damage is found, contact your retailer immediately.
- Көрсөтүлгөн бардык аксессуарлардын бар экенин текшериңиз.
4.2. Проекторду жайгаштыруу
Optimal placement is crucial for the best viewтажрыйбасы.

4.1-сүрөт: Мисample of projector placement and adjustable screen sizes (40" to 200").
- Аралык: Position the projector at a suitable distance from the screen or wall to achieve your desired screen size (40 to 200 inches).
- Бийиктиги: Place the projector on a stable surface or mount it to project the image at the desired height.
- Монтаждоо: The projector includes a mounting point on its base. Ensure any tripod or mount used is compatible with the projector's screw size and weight. Note that some standard tripod screws may not fit.
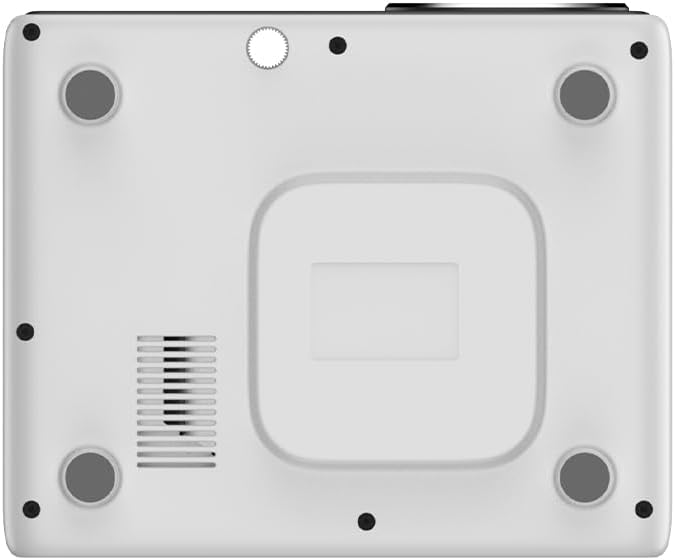
4.2-сүрөт: Төмөнкү view of the projector, indicating the mounting point and ventilation grilles.
4.3. Power Connection
- Кубат адаптерин проектордун кубат киргизүү портуна туташтырыңыз.
- Кубат адаптерин ылайыктуу электр розеткасына сайыңыз.
- Аны күйгүзүү үчүн проектордун же пульттун кубат баскычын басыңыз.
4.4. Баштапкы орнотуу жана тармакка туташуу
- Upon first power-on, the projector will guide you through the initial Google TV setup process.
- Follow the on-screen instructions to select your language, connect to a Wi-Fi network (2.4G or 5G), and log in with your Google account.
- The projector features automatic focus and keystone correction. If the image is not perfectly clear or rectangular, you can access manual adjustment options in the settings menu.
5. Иштөө нускамалары
5.1. Google TV'де багыттоо
The projector runs on Google TV, providing a user-friendly interface for accessing content.

Figure 5.1: The Google TV interface on the Next Cine800S Projector, showing recommended content and installed applications.
- Use the remote control to navigate through menus, select apps, and control playback.
- The home screen provides personalized recommendations and quick access to your favorite streaming services.
5.2. Агымдуу тиркемелер
Access popular streaming platforms directly from your projector.

Figure 5.2: Supported streaming applications and Google Play Store access.
- Pre-installed apps include Netflix, Prime Video, YouTube, and Disney+.
- Download additional applications from the Google Play Store.
- Ensure you are logged into your respective service accounts to access content.
5.3. Тышкы түзмөктөрдү туташтыруу
- HDMI: Connect your device to an HDMI port. The projector will automatically detect the input or you can manually select it from the input source menu.
- USB: Insert a USB drive into the USB port. The media player application will typically launch automatically, allowing you to browse and play supported media files (JPG, PNG, BMP, JPEG, MP3, M4A, MP2, WAV, FLAC, MP4, MOV, TS, DAT, F4V, 3GP).
5.4. Экранды чагылдыруу
The projector supports Air Screen and Google Cast for mirroring content from your iOS or Android devices.
- Мобилдик түзмөгүңүз менен проектор бир Wi-Fi тармагына туташкандыгын текшериңиз.
- On your mobile device, open the screen mirroring function (e.g., 'Screen Cast', 'Smart View', 'AirPlay').
- Жеткиликтүү түзмөктөрдүн тизмесинен проекторду тандаңыз.
6. Техникалык тейлөө
Үзгүлтүксүз тейлөө оптималдуу иштешин камсыз кылат жана проекторуңуздун иштөө мөөнөтүн узартат.
6.1. Объективди тазалоо

Figure 6.1: Close-up of the projector lens, which requires careful cleaning.
- Use a soft, lint-free cloth or a lens cleaning brush to gently remove dust from the lens surface.
- For stubborn smudges, use a specialized lens cleaning solution applied to a microfiber cloth, not directly to the lens.
- Avoid abrasive materials or excessive force, which can scratch the lens.
6.2. Cleaning Ventilation Ports
- Periodically check the ventilation grilles for dust accumulation.
- Use a soft brush or a vacuum cleaner with a brush attachment to gently clean the grilles.
- Вентиляция тешиктерине эч кандай нерселерди киргизбеңиз.
6.3. Программалык камсыздоону жаңыртуу
- Ensure your projector is connected to the internet.
- Navigate to the system settings to check for and install available software updates. Updates can improve performance and add new features.
7. Кыйынчылыктарды
Бул бөлүмдө проекторуңузда жолуга турган жалпы маселелер каралат.
| Көйгөй | Мүмкүн себеп | Чечим |
|---|---|---|
| Күч жок | Электр зымы ажыратылган, розетка маселеси | Электр шнурунун туташуусун текшериңиз. Башка электр розеткасын колдонуп көрүңүз. |
| Сүрөт жок | Input source not selected, device not connected, lens cap on | Ensure input source is correctly selected. Check HDMI/USB connections. Remove lens cap. |
| Сүрөт бүдөмүк | Фокус туураланган жок | Adjust focus manually using the projector's focus ring or through the settings menu if automatic focus is not sufficient. |
| Image is distorted/trapezoidal | Keystone not adjusted, projector not perpendicular to screen | The projector has automatic keystone correction. If the image is still distorted, access the manual keystone correction settings to fine-tune the image. |
| Үн жок же үн сапаты начар | Volume too low, external audio device not connected, speaker issue | Increase volume. Check external audio connections if used. If internal speaker sound is distorted at low volumes, consider connecting external speakers via the 2.5mm audio jack or Bluetooth. |
| Wi-Fi туташуу маселелери | Туура эмес сырсөз, роутердеги көйгөйлөр, сигналдын тоскоолдуктары | Verify Wi-Fi password. Restart router. Ensure projector is within Wi-Fi range. |
| Пульт иштебей жатат | Batteries low/dead, IR sensor blocked | Replace batteries. Ensure no obstructions between remote and projector's IR sensor. |
8. Техникалык шарттар
Detailed technical specifications for the Next Cine800S GoogleTV Projector.
| Өзгөчөлүк | Спецификация |
|---|---|
| Модел | Cine800S |
| Дисплей технологиясы | LED проектор |
| Native Resolution | Full HD 1920x1080 |
| Жарыктык | 800 ANSI челинин |
| Проекциянын өлчөмү | 40" — 200" |
| Видеону чечмелөө | 4Kx2K @ 60fps |
| Фокус | Автоматтык же Кол менен |
| Keystone Correction | Автоматтык |
| Операция системасы | Google TV, Android 14 |
| DRM Certification | Netflix L1, Prime Video, YouTube, Disney+ L1 |
| Wi-Fi | 802.11 a/b/g/n/ac (2.4G & 5G) |
| Bluetooth | 5.0 |
| RAM | 2 ГБ LPDDR4 |
| Ички сактагыч | 8 ГБ eMMC |
| Speaker Output | 12 Вт (4 Вт) |
| Порттар | HDMI, 2.5mm Audio Jack, USB |
| Колдоого алынган медиа форматтары | JPG, PNG, BMP, JPEG, MP3, M4A, MP2, WAV, FLAC, MP4, MOV, TS, DAT, F4V, 3GP, FAT, NTFS |
| Оптикалык механизм | Dust-Sealed System |
| Экранды чагылдыруу | Air Screen, Google Cast (iOS & Android) |
9. Кепилдик жана колдоо
For warranty information, please refer to the documentation provided with your purchase or visit the official Next website. For technical support, product inquiries, or service requests, please contact Next customer service through their official channels.
Колдоо кызматы менен байланышып жатканда сатып алуу дүмүрчөгүңүздү жана продуктунун сериялык номерин колдоңуз.