
Introduction
Thank you for choosing the Indesit PAI212COW Portable Air Conditioner. This manual provides essential information for the safe and efficient operation, installation, and maintenance of your appliance. Please read it thoroughly before use and keep it for future reference.
Коопсуздук маалыматы
- кубат менен камсыз кылуу Voltage рейтинг белгисинде көрсөтүлгөн.
- Электр шнурунун же сайгычтын бузулушу менен аппаратты иштетпеңиз.
- Шайманды жылуулук булактарынан жана түз күн нурунан алыс кармаңыз.
- Аба кирүүчү же чыгуучу жерлерди жаап албаңыз.
- Тазалоодон же техникалык тейлөөдөн мурун ар дайым шайманды розеткадан сууруп коюңуз.
- This appliance is not intended for use by persons (including children) with reduced physical, sensory or mental capabilities, or or lack of experience and knowledge, unless they have been given supervision or instruction concerning use of the appliance by a person responsible for their safety.
- Балдар шайман менен ойнобошу үчүн аларды көзөмөлгө алуу керек.
Продукт бүттүview
Пакеттин мазмуну
Before installation, check that all items are present and undamaged:
- Портативдик кондиционер
- Чыгаруучу шланг
- Installation Kit (for window sealing)
- Алыстан башкаруу
- Колдонуучунун Колдонмосу (бул документ)
Бирдиктин компоненттери

Figure 1: The Indesit PAI212COW portable air conditioner, shown in a modern living space, ready for use.

Figure 2: The front of the air conditioner, featuring the Indesit logo and air outlet grille.
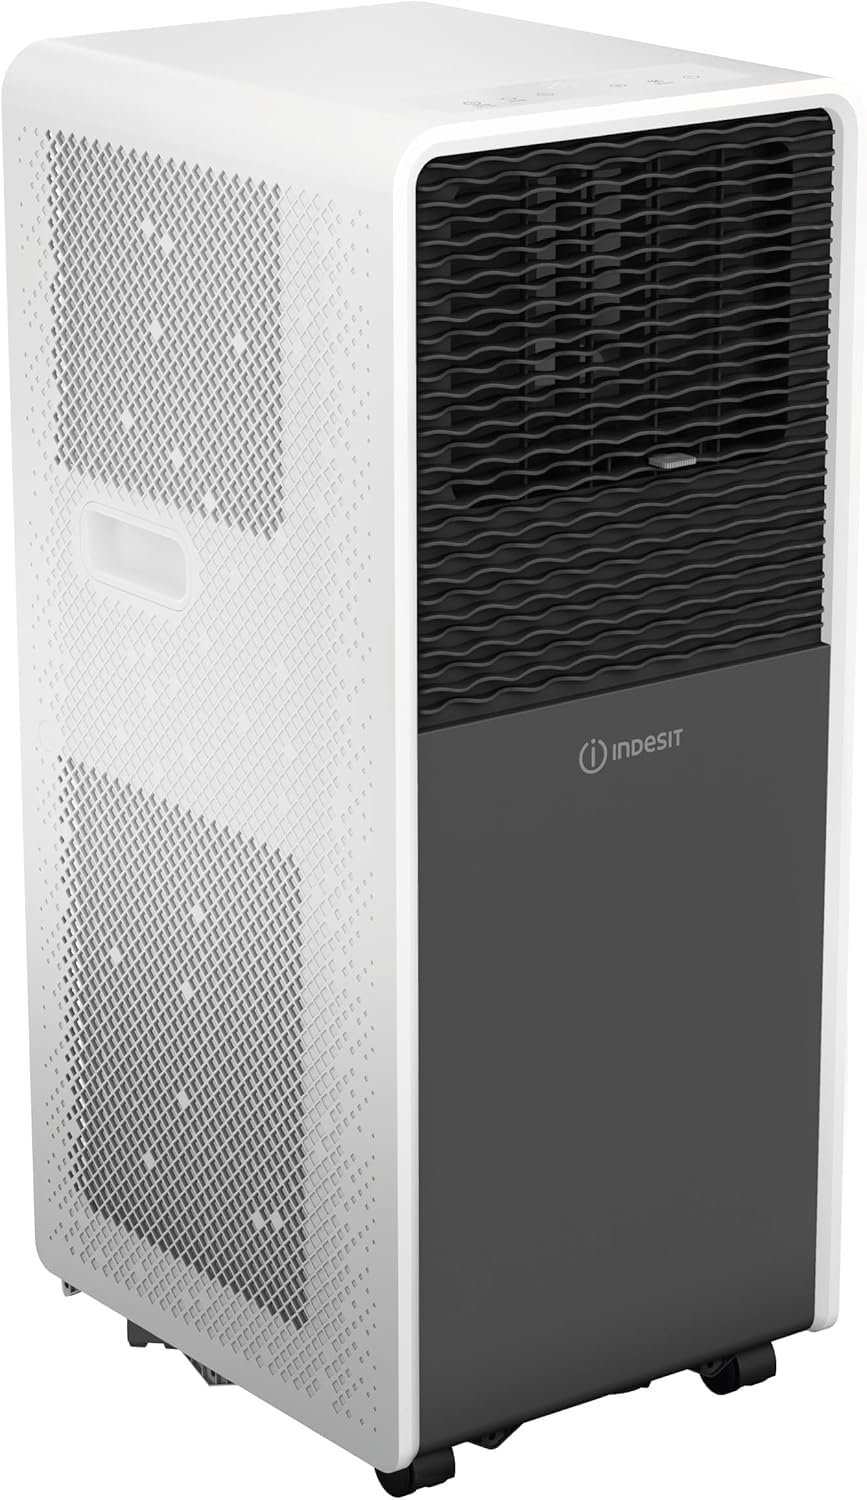
Figure 3: The side profile of the unit, showing its compact design and air intake vents.
- Аба чыгаруу: Аба агымын багыттоо үчүн жөнгө салынуучу жалюзи.
- Башкаруу панели: Touch buttons and digital display for settings.
- Air Intake Grilles: Located on the sides/rear, for drawing in room air.
- Чыгаруучу аба чыгуучу тешик: Чыгаруучу түтүктүн туташтыруучу жери.
- Дренаждык порт: For continuous drainage or manual emptying of condensed water.
- Роликтер: Аппараттын оңой кыймылдашы үчүн.
Орнотуу жана орнотуу
Proper installation is crucial for the efficient operation of your portable air conditioner. Ensure the unit is placed on a flat, stable surface and there is at least 30 cm of clear space around it for proper airflow.
1. Чыгаруучу түтүктү орнотуу

Figure 4: The flexible exhaust hose, 150 cm long with a 12.5 cm diameter, designed for expelling hot air. It is easy to clean, flexible, heat-resistant, and made of polypropylene.
- Extend the exhaust hose (length 1.5 m, diameter 12.5 cm) by gently pulling both ends.
- Attach one end of the exhaust hose to the air outlet connector on the back of the air conditioner unit. Twist clockwise until securely fastened.
- Чыгаруучу шлангдын экинчи учун терезе комплектинин адаптерине бекитиңиз.
2. Терезе топтомун орнотуу
- Open the window or sliding door where you intend to vent the hot air.
- Place the window sealing kit into the window opening. Adjust its length to fit snugly.
- Insert the exhaust hose adapter into the opening of the window sealing kit.
- Close the window as much as possible to seal around the kit and hose, minimizing air leakage.
- Ensure the exhaust hose is as straight and short as possible to maximize cooling efficiency. Avoid sharp bends.
3. Power Connection
- Электр шнурын жерге туташтырылган электр розеткасына сайыңыз.
- Ensure the outlet meets the electrical requirements of the unit (240V).
Иштөө нускамалары
Your Indesit PAI212COW can be operated using the control panel on the unit or the included remote control.
Башкаруу панели

Figure 5: The top panel features touch controls for power, mode selection, temperature adjustment, and fan speed.

6-сүрөт: Башка view of the control panel, highlighting the digital temperature display and function icons.
- Power Button ( ⏻ ): Агрегатты КҮЙГҮЗӨТ же ӨЧҮРөт.
- Режим баскычы (MODE): Cycles through operating modes: Cooling ( ❄ ), Dehumidify ( ☔ ), Fan ( 💨 ).
- Temperature Up ( + ) / Down ( - ) Buttons: Муздатуу режиминде каалаган температураны тууралайт.
- Fan Speed Button (SPEED): Желдетүүчү ылдамдыкты тандайт (Төмөн, Орто, Жогорку).
- Timer Button (TIMER): Авто-күйгүзүү же автоматтык өчүрүү таймерин орнотот.
- Sleep Button (SLEEP): Activates Sleep mode.
- Санариптик дисплей: Shows current temperature, timer settings, and mode indicators.
Алыстан башкаруу

Figure 7: The remote control for the Indesit PAI212COW, with buttons for power, speed, temperature, mode, sleep, and timer functions.
The remote control duplicates most functions of the control panel for convenient operation from a distance. Insert two AAA batteries (not included) into the remote control.
- КҮЧ: Агрегатты КҮЙГҮЗӨТ же ӨЧҮРөт.
- РЕЖИМ: Selects operating mode (Cooling, Dehumidify, Fan).
- ТЕМПЕРАТУРА+ / ТЕМПЕРАТУРА-: Температураны тууралайт.
- ЫЛДАМ: желдеткич ылдамдыгын тууралайт.
- ТАЙМЕР: Таймерди орнотот.
- УЙКУ: Activates Sleep mode.
Иштөө режимдери
- Муздатуу режими: The unit cools the room. Set your desired temperature using the TEMP+ / TEMP- buttons.
- Нымсыздандыруу режими: Reduces humidity in the air without significant cooling. The fan speed is typically fixed in this mode.
- Күйөрман режими: Circulates air without cooling. You can select the fan speed.
Атайын функциялар
- 24 сааттык таймер: Allows you to program the unit to turn ON or OFF automatically within a 24-hour period. Press the TIMER button and use TEMP+ / TEMP- to set the desired time.
- Sleep Mode (Dolce Sonno): Reduces noise and gradually adjusts the temperature for comfortable sleep. Press the SLEEP button to activate.
- Автоматтык түрдө өчүрүү: In case of a power interruption, the unit will automatically restart with the previous settings once power is restored.
- ZoneFollow технологиясы: Automatically adjusts temperature to maintain desired comfort in the area around the unit.
Техникалык тейлөө
Үзгүлтүксүз техникалык тейлөө кондиционериңиздин оптималдуу иштешин камсыздайт жана иштөө мөөнөтүн узартат. Ар кандай техникалык тейлөө иштерин жүргүзүүдөн мурун, ар дайым түзмөктү розеткадан сууруп коюңуз.
Фильтрди тазалоо
Аба чыпкасын колдонууга жана абанын сапатына жараша эки жумада же андан көп жолу тазалап туруу керек.
- Кондиционерди өчүрүп, розеткадан ажыратыңыз.
- Locate and remove the air filter from the back or side of the unit (refer to unit diagram for exact location).
- Фильтрди жылуу суу жана жумшак жуугуч каражат менен жууңуз.
- Кылдаттык менен жууп, кайра салаардан мурун аны толугу менен кургатуу керек.
- Фильтрсиз аппаратты иштетпеңиз.
Суу дренаж
The unit has an internal water collection tank. When full, the unit will stop operating and display an indicator. You will need to drain the water manually.
- Кондиционерди өчүрүп, розеткадан ажыратыңыз.
- Түзмөктүн арткы ылдый жагындагы дренаждык тешиктин астына тайыз көмөч казан же табак коюңуз.
- Дренаждын тыгынын/капкагын алып салыңыз.
- Allow all water to drain out.
- Дренаждык тығынды/капкакты коопсуз ордуна коюңуз.
- For continuous drainage, connect a drain hose (not included) to the drainage port and direct it to a floor drain or suitable container.
Түзмөктүн сыртын тазалоо
- сыртын жумшак менен сүртүңүз, гamp кездеме.
- Катуу химиялык заттарды, абразивдүү тазалагычтарды же эриткичтерди колдонбоңуз.
Сактагыч
Агрегатты узак мөөнөткө сактасаңыз:
- Бардык конденсацияланган сууну агрегаттан төгүңүз.
- Аба чыпкасын тазалаңыз.
- Ички компоненттерди кургатуу үчүн бир нече саатка бир гана желдеткич режиминде иштетиңиз.
- Электр шнурунун розеткасын сууруп, аны тыкан ороп алыңыз.
- Агрегатты кургак, салкын жерде, эң жакшысы баштапкы таңгагында сактаңыз.
Проблемаларды чечүү
Кардарларды тейлөө кызматына кайрылуудан мурун, кеңири таралган көйгөйлөр жана чечимдер үчүн төмөнкү таблицаны караңыз.
| Көйгөй | Мүмкүн себеп | Чечим |
|---|---|---|
| Түзмөк күйбөйт. | Электр кубаты жок, шнур ажыратылган, өчүргүч өчүрүлгөн. | Электр туташуусун текшериңиз, автоматтык өчүргүчтү баштапкы абалга келтириңиз. |
| Агрегат эффективдүү муздабайт. | Windows/doors open, room too large, air filter dirty, exhaust hose blocked/bent, temperature setting too high. | Close windows/doors, ensure proper room size, clean air filter, check exhaust hose, lower temperature setting. |
| Агрегат ызы-чуу. | Түзмөк тегиз жерде эмес, желдеткичтин ылдамдыгы өтө жогору, ички компоненттери дирилдеп жатат. | Place on a flat surface, reduce fan speed, ensure no obstructions. (Note: Portable ACs generate some noise during operation). |
| Суунун агып чыгышы. | Drain plug loose, continuous drainage hose improperly connected. | Дренаждык тыгындын бекем орнотулганын текшериңиз, дренаждык түтүктүн үзгүлтүксүз туташуусун текшериңиз. |
| "Full Water" indicator light is on. | Ички суу багы толуп калды. | Drain the water from the unit as per the "Water Drainage" section. |
Техникалык мүнөздөмөлөр
| Өзгөчөлүк | Спецификация |
|---|---|
| Бренд | Indesit |
| Модель аты | PAI212COW |
| Муздатуу кубаттуулугу | 12000 XNUMX BTU/саат |
| Өзгөчөлүктөр | Dehumidifier, Dust filter, Silent mode, Remote controlled |
| Продукциянын өлчөмдөрү (DxWxH) | 33.5P x 28.5l x 69.8H cm (13.2D x 11.2W x 27.5H inches) |
| Түс | Ак |
| Тtage | 240 вольт |
| Ызы-чуу деңгээли | 65 децибел |
| Муздаткыч | R-290 |
| Чыпка түрү | Электростатикалык фильтр |
| Power Source | Электр зымдары |
| Электр энергиясы | 3500 ватт |
| Элемент Салмагы | 23.5 килограмм (51.8 фунт) |
| Камтуу аймагы | Up to 40 square meters (430 sq ft) |
| Бөлмө түрү | Уктоочу бөлмө |
| Орнотуу түрү | Portable |
| External Unit Required | Жок |
| Башкаруу ыкмасы | Алыстан башкаруу, тийүү |
| Кубат деңгээли саны | 2 |
| Иштөө режимдери | Муздатуу, нымдаштыруу, желдетүү |
| Энергия эффективдүүлүгү классы | A |
Кепилдик жана Кардарларды колдоо
Кепилдик маалымат
This Indesit PAI212COW Portable Air Conditioner comes with a 2 жылдык өндүрүүчүнүн кепилдиги. Бул кепилдик нормалдуу колдонуудагы материалдардагы жана жасалгадагы кемчиликтерди камтыйт. Кепилдик дооматтары үчүн сатып алганыңыздын далилин сактап коюңуз.
The warranty does not cover damage caused by improper installation, misuse, neglect, unauthorized repairs, or normal wear and tear.
Кардарларды колдоо
For technical assistance, troubleshooting beyond this manual, or warranty service, please contact Indesit Customer Support. You can find contact details on the official Indesit webсайт же сатуучу аркылуу.
When contacting support, please have your model number (PAI212COW) and proof of purchase readily available.