Introduction
Окуу ресурстары Gearbotics робот моторизацияланган топтому робот моделдерин курууда практикалык тажрыйба берет. Бул топтомго моторизацияланган блок менен бирге тиштүү дөңгөлөктөр, тиштүү дөңгөлөктөр жана туташтыргычтар сыяктуу 118 түстүү коддолгон компоненттер кирет. Колдонуучулар контроллер аркылуу кыймылдай жана үн чыгара алган роботторду долбоорлоп жана кура алышат.
Бул колдонмо Gearbotics робот моторлоштурулган топтомун чогултуу, иштетүү жана техникалык тейлөө боюнча маанилүү маалыматтарды берет. Колдонуудан мурун бул көрсөтмөлөрдү кунт коюп окуп чыгыңыз.

Сүрөт: Gearbotics робот моторлоштурулган топтомунун продуктунун таңгагы, чогултулган роботту жана анын алыстан башкаруу пультун көрсөтөт.
Пакеттин мазмуну
Gearbotics робот моторлоштурулган топтому төмөнкү компоненттерди камтыйт:
- 118 түстүү коддолгон бөлүк (тиштүү дөңгөлөктөр, тиштүү дөңгөлөктөр, туташтыргычтар)
- Үн мүмкүнчүлүктөрү бар моторлуу блок
- Controller
- Роботтун башы
- Кармоочу колдор
- Wheels
- Моделдерди куруу боюнча нускама китепчеси
Эскертүү: Моторлуу блок үчүн төрт AA батарейка жана контроллер үчүн эки AA батарейка талап кылынат жана алар комплектке кирбейт.
Орнотуу жана чогултуу
1. Батареяны орнотуу
- Моторлуу блоктон жана контроллерден батарея бөлүмүн табыңыз.
- Кичинекей бурагычты (кошумча эмес) колдонуп, батарея бөлүкчөсүнүн капкагын ачыңыз.
- Моторлуу блокко төрт (4) AA батарейкасын туура полярдуулукту (+/-) сактап салыңыз.
- Туура полярдуулукту (+/-) сактап, контроллерге эки (2) AA батарейкасын салыңыз.
- Батарея бөлүмүнүн капкактарын ордуна коюп, аларды бурамалар менен бекитиңиз.
Маанилүү: Ар дайым бир типтеги жаңы батареяларды колдонуңуз. Эски жана жаңы батареяларды, же ар кандай типтеги батареяларды аралаштырбаңыз. Эгерде продукт узак убакыт бою колдонулбай турган болсо, батареяларды алып салыңыз.
2. Баштапкы жыйын
Gearbotics топтому чыгармачыл куруу үчүн иштелип чыккан. Белгилүү бир робот моделдерин куруу боюнча деталдуу кадамдар үчүн тиркелген нускама китепчесин караңыз. Жалпы чогултуу процесси төмөнкүлөрдү камтыйт:
- Негизги компоненттерди туташтыруу: Ар кандай туташтыргычтарды колдонуп, негизги структуралык бөлүктөрүн туташтыруудан баштаңыз.
- Тиштүү дөңгөлөктөрдү интеграциялоо: Айлануучу кыймылды түзүү үчүн тиштүү дөңгөлөктөрдү жана тиштүү дөңгөлөктөрдү бекитиңиз. Жылмакай иштеши үчүн тиштүү дөңгөлөктөрдүн торчолору туура орнотулганын текшериңиз.
- Моторлуу блокту орнотуу: Моторлуу блокту роботтун түзүлүшүнө бекем туташтырыңыз, анын чыгуучу валы кыймыл үчүн арналган тиштүү дөңгөлөктөр менен дал келишин камсыз кылыңыз.
- Аксессуарларды кошуу: Роботтун башын, кармагычтын колдорун, дөңгөлөктөрүн жана башка декоративдик элементтерди каалагандай же моделдин көрсөтмөсүндө көрсөтүлгөндөй бекитиңиз.

Сүрөт: Толугу менен чогултулган Gearbotics роботу, көргөзмөasinанын тунук тиштүү дөңгөлөктөрү, тиштүү дөңгөлөктөрү жана конструкциялык компоненттери.
Иштөө нускамалары
Роботуңуз чогултулуп, батареялар орнотулгандан кийин, сиз контроллерди колдонуп иштей баштасаңыз болот.
- Моторлуу блок роботко жана анын кубат булагына (батареяларга) бекем туташтырылганын текшериңиз.
- Роботту алдыга же артка жылдыруу үчүн башкаруу панелиндеги багыттоочу башкаруу элементтерин колдонуңуз.
- Роботтун үндөрүн угуу үчүн контроллердеги атайын баскыч аркылуу үн функциясын иштетиңиз.
- Ар кандай кыймылдарды жана функцияларды байкоо үчүн ар кандай тиштүү дөңгөлөктөрдүн конфигурациялары жана роботтордун конструкциялары менен эксперимент жүргүзүңүз.
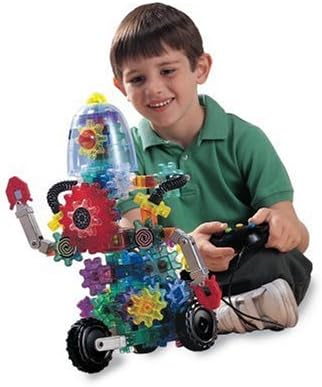
Сүрөт: Gearbotics роботу менен өз ара аракеттенип жаткан бала, анын функцияларын иштетүү үчүн пультту колдонуп жатат.
Техникалык тейлөө
Тийиштүү техникалык тейлөө Gearbotics топтомуңуздун узак мөөнөттүү иштешин жана оптималдуу иштешин камсыз кылат.
- Тазалоо: Компоненттерди кургак же бир аз кургак чүпүрөк менен сүртүңүзamp кездеме. Моторлуу блокту же контроллерди сууга салбаңыз. Күчтүү химиялык заттардан алыс болуңуз.
- Сактагыч: Бардык бөлүктөрүн таза, кургак жерде, күндүн нуру түз тийбеген жана өтө жогорку температурадан алыс сактаңыз.
- Батареяга кам көрүү: Эгерде түзүлүш көпкө чейин колдонулбаса, агып кетүүнүн алдын алуу үчүн моторлуу блоктон жана контроллерден батареяларды алып салыңыз.
- Компонентти текшерүү: Тиштүү дөңгөлөктөрдүн жана туташтыргычтардын эскирген же бузулган жерлерин мезгил-мезгили менен текшерип туруңуз. Иштеп турушу үчүн сынган же эскирген тетиктерди алмаштырыңыз.
Проблемаларды чечүү
Эгерде сиз Gearbotics робот моторлуу топтомуңуз менен көйгөйлөргө туш болсоңуз, төмөнкү кеңири таралган чечимдерди караңыз:
- Робот кыймылдабай жатат же мотор үнсүз иштеп жатат:
- Батареялардын моторлуу блокко да, контроллерге да туура орнотулганын текшериңиз, полярдуулукту сактаңыз.
- Батареялардын жаңы жана толук заряддалганын текшериңиз. Зарыл болсо, алмаштырыңыз.
- Моторлуу блок менен роботтун тиштүү дөңгөлөктөрүнүн ортосундагы бардык туташуулар бекем жана туура тегизделгенин текшериңиз.
- Тиштүү дөңгөлөктөр жылмакай айланбайт же тыгылып калбайт:
- Тиштүү дөңгөлөктөрдү тосуп турган бөтөн нерселердин же таштандылардын бар-жогун текшериңиз.
- Бардык тиштүү дөңгөлөктөр туура торчолонгондугун жана күч менен ордуна коюлбагандыгын текшериңиз.
- Жылмакай айланууга тоскоол болушу мүмкүн болгон бузулган же эскирген тиштерди текшериңиз.
- Контроллер жооп бербей жатат:
- Контроллердеги батарейкалар жаңы жана туура салынганын текшериңиз.
- Башкаруучу менен роботтун кабыл алгычынын ортосунда эч кандай тоскоолдуктар жок экенин текшериңиз.
Эгерде бул чечимдерди колдонуп көргөндөн кийин да көйгөйлөр чечилбесе, Learning Resources кардарларды колдоо кызматына кайрылыңыз.
Техникалык шарттар
| Өзгөчөлүк | Деталь |
|---|---|
| Продукциянын өлчөмдөрү | 15 x 5 x 14 дюйм |
| Элемент Салмагы | 4.06 фунт |
| Модель номери | LER9188 |
| ASIN | B00004WGJS |
| Өндүрүүчүнүн сунуш кылган курагы | 6 жаш жана андан жогору |
| Батареялар талап кылынат | Моторлуу блок үчүн 4 AA батарейка (кошулмага кирбейт), контроллер үчүн 2 AA батарейка (кошулмага кирбейт). |
| Чыгарылган күнү | 1-январь, 2007-жыл |
| Өндүрүүчү | Окуу ресурстары |
Кепилдик жана колдоо
Кепилдик жөнүндө маалымат алуу, алмаштыруучу тетиктер же кошумча жардам алуу үчүн, сураныч, түздөн-түз Learning Resources компаниясына кайрылыңыз. Алардын расмий өкүлү webсайттын же кардарларды тейлөө кызматынын байланыш маалыматтарын, адатта, продуктунун таңгагынан же интернеттен "Окуу ресурстары кардарларды колдоо" деп издөө аркылуу тапса болот.
Колдоо кызматына кайрылганда өнүмүңүздүн моделинин номерин (LER9188) жана сатып алуу жөнүндө маалыматты даярдап коюңуз.


