Introduction
Сатып алганыңыз үчүн рахматasing the Technics SL-PD807 MASH 5 Disc CD Player. This manual provides detailed instructions for the proper setup, operation, and maintenance of your new audio component. Please read this manual thoroughly before using the unit to ensure optimal performance and longevity.
The SL-PD807 features a 5-disc carousel changer, allowing for extended playback without interruption, and incorporates MASH (Multi-stage Noise Shaping) D/A conversion for high-quality audio reproduction.
Маанилүү коопсуздук маалыматы
- Кубат булагы: Ensure the unit is connected to an AC 120V, 60Hz power supply.
- Вентиляция: Вентиляция тешиктерин жаап албаңыз. Ашыкча ысып кетүүнүн алдын алуу үчүн, туура аба агымы үчүн аппараттын айланасында жетиштүү орун калтырыңыз.
- Нымдуулук: Агрегатты жамгырга же нымдуулукка дуушар кылбаңыз. Ваза сыяктуу суюктуктар толтурулган нерселерди аппараттын үстүнө койбоңуз.
- Тазалоо: Тазалоодон мурун блокту розеткадан сууруп алыңыз. Тазалоо үчүн кургак чүпүрөктү колдонуңуз.
- Тейлөө: Бул аппаратты өзүңүз тейлөөгө аракет кылбаңыз. Бардык тейлөөлөрдү квалификациялуу тейлөө кызматкерлерине тапшырыңыз.
Пакеттин мазмуну
Пакетте бардык буюмдар бар экенин текшериңиз:
- Technics SL-PD807 MASH 5 Disc CD Player
- Электр кабели
- RCA аудио кабелдери
Note: A remote control is not included with this unit.
Жайгашуу
1. таңгактан чыгаруу
Carefully remove the CD player and all accessories from the packaging. Retain the packaging materials for future transport or storage.
2. Жайгаштыруу
Place the CD player on a stable, level surface away from direct sunlight, heat sources, and excessive dust or vibrations. Ensure there is sufficient space around the unit for proper ventilation.

1-сүрөт: Фронт view of the Technics SL-PD807 CD Player with included RCA cables.
3. Байланыштар
Connect the CD player to your amplifier or receiver using the supplied RCA audio cables.
- Connect one end of the RCA audio cables (red and white plugs) to the 'LINE OUT' jacks on the rear of the SL-PD807.
- Connect the other end of the RCA audio cables to an available 'CD IN' or 'AUX IN' input on your amplifier/receiver. Match the red plug to the 'R' (right) input and the white plug to the 'L' (left) input.
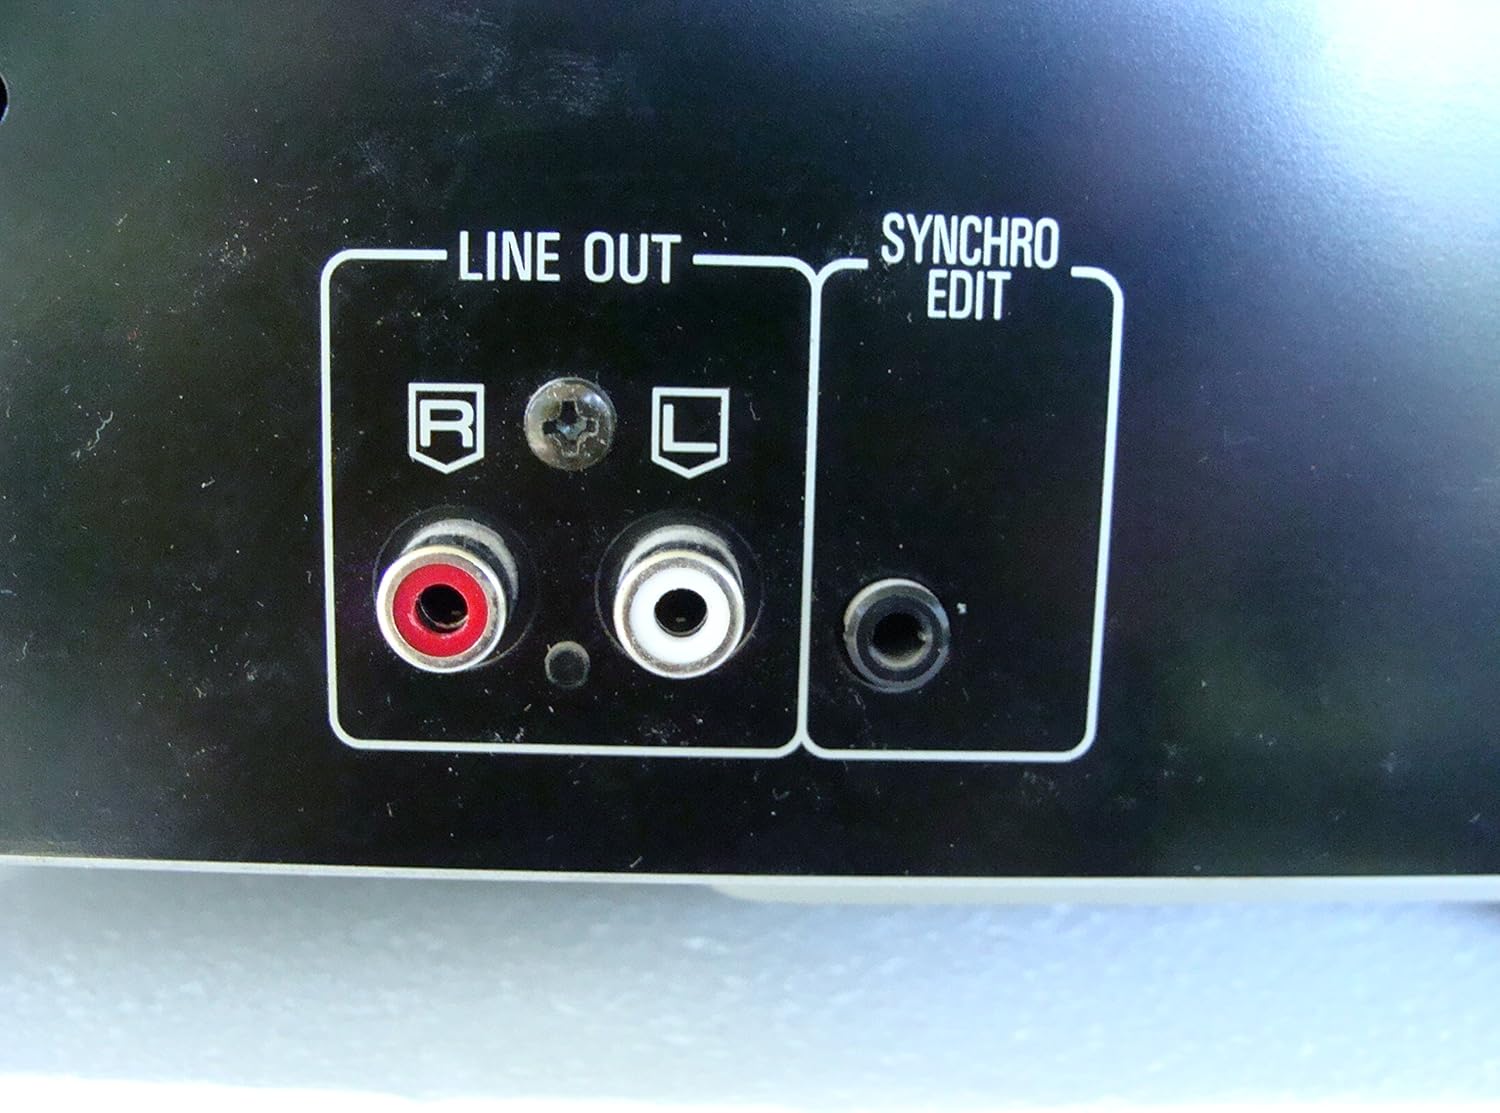
2-сүрөт: Rear panel connections, highlighting the 'LINE OUT' (RCA) and 'SYNCHRO EDIT' ports.
- Plug the power cord into the AC inlet on the rear of the CD player, then plug the other end into a standard AC wall outlet.
Иштөө нускамалары
1. Күйгүзүү/өчүрүү
басыңыз КҮЧ button located on the front left of the unit to turn the CD player on or off.
2. Loading Discs
The SL-PD807 features a 5-disc carousel. Press the АЧУУ/ЖАБУУ button to open the disc tray. Place up to five CDs onto the numbered disc slots with the label side facing up. Press АЧУУ/ЖАБУУ лотокту жабуу үчүн дагы.

3-сүрөт: Front panel controls including disc tray, display, and playback buttons.
3. Негизги ойнотуу
- Ойнотуу: басыңыз ОЙНОО button (►) to start playback.
- Тыныгуу: басыңыз ТЫНЫГУУ button (⏸) to temporarily stop playback. Press again to resume.
- Токтотуу: басыңыз ТОКТОТ ойнотууну токтотуу үчүн баскыч (■).
- Тректерди өткөрүп жиберүү: басыңыз ӨТКӨРҮҮ buttons (⏭︎ / ⏮︎) to skip to the next or previous track.
- Издөө: басып туруңуз ИЗДӨӨ buttons (⏪︎ / ⏩︎) to fast forward or rewind within a track.
4. Disc Exchange
You can exchange discs while another disc is playing. Press the ӨТКӨРҮҮ button to rotate the carousel to an empty slot or a disc you wish to remove/replace. The currently playing disc will continue to play until you select a new disc to play.
5. Ойнотуу режимдери
- Кокус ойноо: басыңыз RANDOM button to play tracks on the current disc or all loaded discs in a random order.
- Программа ойноо: колдонуу ПРОГРАММА button to create a custom playback sequence of tracks from the loaded discs. Refer to the on-screen display for programming steps.
- Кайталап ойноо: басыңыз КАЙТАЛОО button to repeat the current track, current disc, or all discs.
Техникалык тейлөө
1. Агрегатты тазалоо
Түзмөктүн сыртын жумшак, кургак чүпүрөк менен сүртүңүз. Өжөр тактар үчүн бир аз сүртүңүзampen the cloth with water and a mild detergent, then wipe dry. Do not use abrasive cleaners, benzene, thinner, or alcohol, as these can damage the finish.

4-сүрөт: Top surface of the unit, illustrating areas that may require cleaning or show wear.
2. Disc Care
- Оюн аянтында манжа издери калбашы үчүн дисктерди четтеринен кармаңыз.
- Keep discs clean. Wipe from the center outwards with a soft, lint-free cloth if necessary.
- Дисктерди чаңдан жана чийиктен коргоо үчүн аларды кутучаларында сактаңыз.
Проблемаларды чечүү
If you experience problems with your CD player, please consult the following table before seeking service.
| Көйгөй | Мүмкүн себеп | Чечим |
|---|---|---|
| Күч жок | Электр зымы бекем туташкан эмес. | Электр шнурунун түзүлүшкө жана розеткага туташуусун текшериңиз. |
| Үн жок | RCA audio cables not connected correctly. Amplifier/receiver input not selected. | Ensure RCA cables are securely connected to both the CD player and amplifier. Select the correct input on your ampкөтөргүч/алуучу. |
| Диск ойнотулбай жатат / өткөрүп жиберүүдө | Disc is dirty or scratched. Disc is inserted incorrectly. | Clean the disc with a soft, lint-free cloth. Ensure the disc is placed label-side up in the tray. Try another disc. |
| Carousel does not rotate | Obstruction in the disc tray. | Ensure no foreign objects are obstructing the carousel mechanism. |
Техникалык шарттар
The following are the technical specifications for the Technics SL-PD807 MASH 5 Disc CD Player:
| Өзгөчөлүк | Спецификация |
|---|---|
| Модель аты | SL-PD807 |
| Өндүрүүчү | Техника |
| Disc Capacity | 5 дисктер |
| Power талаптар | AC 120V, 60Hz, 13W |
| Пакеттин өлчөмдөрү | 17 x 17 x 5 дюйм |
| Элемент Салмагы | 15.02 фунт |
| Байланыш технологиясы | Auxiliary, Infrared |
| Өзгөчө өзгөчөлүк | Өткөрүп жиберүүгө каршы коргоо |

5-сүрөт: Product label displaying model number and power specifications.
Кепилдик жана колдоо
For information regarding warranty coverage and customer support for your Technics SL-PD807 CD Player, please refer to the warranty card included with your purchase or visit the official Technics website. If you require further assistance, please contact Technics customer service.


