1. Киришүү
Сатып алганыңыз үчүн рахматasing the BOSS Audio Systems ONYX N2000.4 4-Channel MOSFET Power Amplifier. This manual provides detailed instructions for proper installation, operation, and maintenance of your ampкөтөргүч. Оптималдуу аткарууну жана коопсуздукту камсыз кылуу үчүн орнотууга же иштетүүдөн мурун бул колдонмону кылдат окуп чыгыңыз.
2. Коопсуздук маалыматы
Improper installation or use can result in serious injury or damage to the amplifier or vehicle. Observe the following safety guidelines:
- Кесиптик орнотуу сунушталат: For best results and to avoid damage, installation by a qualified professional is highly recommended.
- Электр энергиясын өчүрүү: Always disconnect the vehicle's negative battery terminal before starting any installation.
- Зымдар: Ensure all wiring is correctly connected and securely fastened. Use appropriate gauge wiring for power and speaker connections.
- Вентиляция: монтаждоо ampашыкча ысып кетүүнүн алдын алуу үчүн адекваттуу аба айлануусун камсыз кылган жерде көтөргүч. жаппаңыз ampкөтөргүчтүн жылыткычтары.
- Нымдуулук: орнотуудан качыңыз amplifier in areas exposed to moisture or direct sunlight.
- Эритиндилер: Always replace fuses with the same type and rating.
3. Пакеттин мазмуну
Пакетиңизде төмөнкү заттар бар экенин текшериңиз:
- BOSS Audio Systems ONYX N2000.4 4-Channel Ampөмүрлүү
- Алыскы сабвуфердин деңгээлин көзөмөлдөө
- Монтаждоочу жабдуулар (бурамалар, шайбалар)
- Колдонуучунун Колдонмосу (бул документ)
4. Негизги өзгөчөлүктөрү
The ONYX N2000.4 amplifier is designed to deliver powerful and clear audio performance. Key features include:
- 2000 Ватт максималдуу кубаттуулук
- 4-канал конфигурациясы
- MOSFET электр булагы
- Алыскы сабвуфердин деңгээлин көзөмөлдөө
- Variable Low Pass and High Pass Crossovers
- Variable Input Gain Control
- Bridgeable Outputs for 2-Channel Operation
5. Орнотуу жана орнотуу
Before beginning installation, ensure the vehicle's battery is disconnected. Plan your wiring carefully to avoid interference and ensure proper power delivery.
5.1 Орнотуу Ampөмүрлүү
Choose a mounting location that is dry, well-ventilated, and secure. Avoid mounting on carpet or in enclosed spaces that restrict airflow. Use the provided mounting hardware to secure the ampкөтөргүчтү катуу бетке бекем бекитиңиз.
5.2 Зымдарды туташтыруу
Refer to the diagram below for proper wiring connections. Ensure all connections are tight and insulated to prevent short circuits.
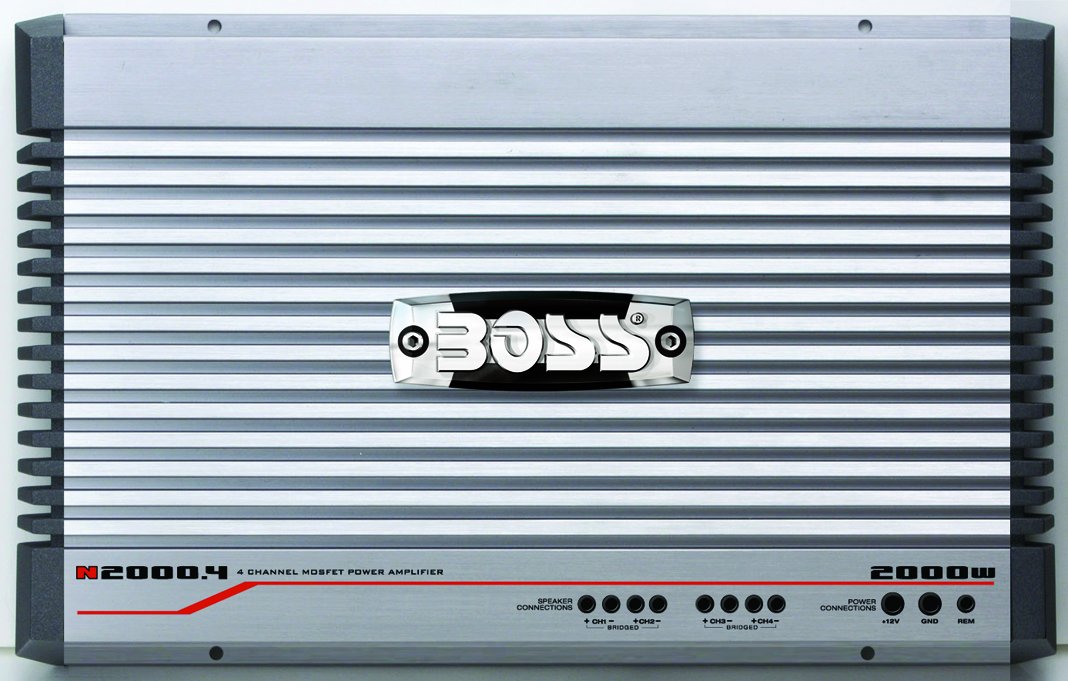
Фронт view of the BOSS Audio Systems ONYX N2000.4 amplifier, showing the BOSS logo, model number, power rating, and connection labels for speaker outputs and power input.
5.2.1 Кубат туташтыруу
- +12V (кубат): Connect to the positive terminal of the vehicle's battery using a heavy-gauge power cable (e.g., 4 AWG or larger). An inline fuse (not supplied) should be installed within 18 inches of the battery.
- GND (жер): Connect to a clean, unpainted metal surface of the vehicle chassis. Ensure a good electrical connection. Use a heavy-gauge cable of the same size as the +12V wire.
- REM (Алыстан күйгүзүү): Баш блогуңуздун алыстан күйгүзүү чыгышына туташыңыз. Бул зым айлантат ampунааңыздын стереосу менен көтөргүчтү күйгүзүп жана өчүрө аласыз.
5.2.2 Динамиктердин байланыштары
The N2000.4 supports both 4-channel stereo and 2-channel bridged configurations.
- 4 каналдуу стерео: Connect each speaker to its corresponding positive (+) and negative (-) terminals (CH1+, CH1-, CH2+, CH2-, CH3+, CH3-, CH4+, CH4-). Ensure correct polarity.
- 2-Channel Bridged: For higher power output to two speakers or subwoofers, bridge channels. Connect the positive (+) terminal of the speaker/subwoofer to CH1+ and the negative (-) terminal to CH2-. Similarly, for the second bridged output, connect to CH3+ and CH4-. Refer to the amplifier's labeling for specific bridged connection points. Minimum impedance for bridged operation is typically 4 ohms.
5.2.3 Аудио киргизүү байланыштары
Connect the RCA output cables from your head unit to the amplifier's RCA input jacks (FRONT L/R, REAR L/R).
5.2.4 Remote Subwoofer Level Control
Connect the remote level control cable to the designated port on the amplifier. Mount the control knob in an accessible location for easy adjustment of subwoofer output.
6. Иштөө жана тууралоо
Once installed, fine-tune the ampоптималдуу үн сапаты үчүн көтөргүч орнотуулары.
6.1 Башкаруу
Күчөтүүнү башкаруу төмөнкүгө дал келет amplifier's input sensitivity to the output of your head unit. Start with the gain set to minimum. Turn your head unit volume to about 75% of maximum. Slowly increase the amplifier gain until you hear slight distortion, then back off slightly. This ensures maximum clean signal without clipping.
6.2 Crossover Settings (HPF/LPF)
The N2000.4 features variable high-pass (HPF) and low-pass (LPF) crossovers to direct specific frequency ranges to your speakers or subwoofers.
- Жогорку өтүүчү чыпка (HPF): Used for full-range speakers to block low frequencies, preventing distortion and improving clarity. Set the HPF to a frequency appropriate for your speakers (e.g., 80Hz-120Hz).
- Төмөн өткөрүү чыпкасы (LPF): Used for subwoofers to block high frequencies, ensuring only bass notes are reproduced. Set the LPF to a frequency appropriate for your subwoofer (e.g., 80Hz-120Hz).
6.3 Bass Boost
If equipped, the bass boost control allows you to enhance low-frequency output. Use sparingly to avoid distortion and speaker damage.
6.4 Remote Subwoofer Level Control
This knob provides convenient adjustment of the subwoofer output level from the driver's seat without affecting other ampкөтөргүч орнотуулары.
7. Техникалык тейлөө
Үзгүлтүксүз тейлөө сиздин узак мөөнөттүү жана натыйжалуулугун камсыз кылат ampөмүрлүү.
- Тазалоо: Мезгил-мезгили менен сүртүп туруңуз ampliifier сыртын жумшак, кургак чүпүрөк менен. Катуу химиялык заттарды же абразивдүү тазалагычтарды колдонбоңуз.
- Вентиляция: камсыз кылуу amplifier's cooling fins remain free of dust and debris to maintain proper heat dissipation.
- Сактагычты алмаштыруу: If a fuse blows, replace it only with a fuse of the exact same type and amperage rating. Using an incorrect fuse can cause damage or fire.
8. Кыйынчылыктарды
Эгер сиз менен көйгөйлөр пайда болсо amplifier, consult the following troubleshooting guide before contacting support.
| Көйгөй | Мүмкүн себеп | Чечим |
|---|---|---|
| Кубат жок / Ampliifier күйгүзүлбөйт |
|
|
| Үн чыгышы жок |
|
|
| Distorted Sound |
|
|
| Ampliifier Overheating |
|
|
9. Техникалык шарттар
| Модел | N2000.4 |
| Каналдар | 4-канал |
| Ampжашоо класс | MOSFET |
| Максималдуу кубаттуулук | 2000 Ватт |
| Өлчөмдөрү (L x W x Y) | 16.42 x 10.19 x 2.22 дюйм |
| Салмагы | 10.1 фунт |
| Алыскы сабвуфердин деңгээлин көзөмөлдөө | камтылган |
| Өндүрүүчү | Boss Audio |
10. Кепилдик жана колдоо
10.1 Кепилдик маалыматы
The BOSS Audio Systems ONYX N2000.4 ampкөтөргүч а менен келет 6 жылдык кепилдик. This includes a 1-year over-the-counter exchange and 5 years for parts and labor. Please retain your proof of purchase for warranty claims.
10.2 Кардарларды колдоо
For technical assistance, troubleshooting beyond this manual, or warranty inquiries, please contact BOSS Audio Systems customer support. Refer to the official BOSS Audio Systems webакыркы байланыш маалыматы үчүн сайт.
Note: Do not attempt to repair this unit yourself. Unauthorized repairs will void the warranty.


