1. Introduction and Overview
Avision AV 320D2+ - бул документтерди натыйжалуу жана ишенимдүү санариптештирүү үчүн иштелип чыккан жогорку өндүрүмдүү A3 документ сканери. 600 dpi оптикалык чечилиши жана USB туташуусу менен ал A3 форматына чейинки ар кандай өлчөмдөгү документтерди иштете алат, бул аны ар кандай кесиптик чөйрөлөргө ылайыктуу кылат. Бул колдонмо сканериңизди орнотуу, иштетүү, техникалык тейлөө жана мүчүлүштүктөрдү оңдоо боюнча маанилүү маалыматтарды берет.
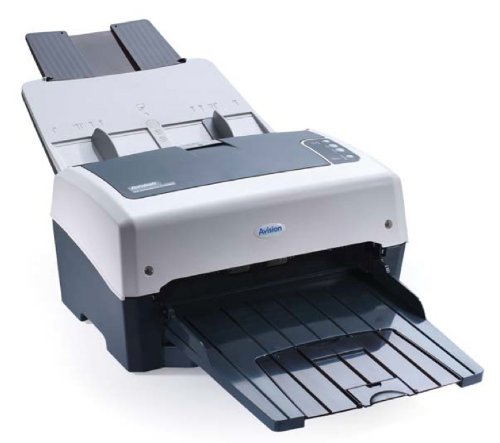
1-сүрөт: Avision AV 320D2+ A3 документ сканери. Бул сүрөттө Avision AV 320D2+ A3 документ сканери алдыңкы оң жагынан көрсөтүлгөн. Сканер ачык боз жана кочкул боз түстө, үстү жагында кагаз багыттагычтары көрүнүп турган автоматтык документ бергич (ADF) жана алдыңкы жагында кеңейтилген чыгаруу лоток бар. Avision логотиби алдыңкы панелде көрүнүп турат.
2. Орнотуу
2.1 Пакеттен чыгаруу
- Сканерди жана бардык аксессуарларды таңгактан кылдаттык менен чыгарып алыңыз.
- Таңгактоо тизмесинде саналган бардык компоненттер бар экенин текшериңиз.
- Сканерден бардык коргоочу ленталарды жана таңгактоочу материалдарды, анын ичинде документ бергичтин жана чыгаруу науасынын ичиндегилерин алып салыңыз.
2.2 Сканерди туташтыруу
- Сканерди компьютериңиздин жанындагы туруктуу, тегиз жерге коюңуз.
- Кубат адаптерин сканердин кубат киргизүү булагына туташтырып, андан кийин аны электр розеткасына сайыңыз.
- Connect one end of the supplied USB cable to the USB port on the scanner and the other end to an available USB port on your computer.
- Сканерди күйгүзүү үчүн, адатта каптал же арткы панелде жайгашкан кубат баскычын колдонуңуз.
2.3 Программалык камсыздоону орнотуу
Сканерди колдонуудан мурун, керектүү драйверлерди жана сканерлөө программасын орнотушуңуз керек. Кошумча программалык камсыздоонун CDсин караңыз же расмий Avision веб-сайтына кириңиз. webакыркы драйверлер жана утилиталар үчүн сайт.
- Программалык камсыздоону орнотуучу CDни компьютериңиздин CD/DVD дискине салыңыз же программалык камсыздоо пакетин Avision колдоо кызматынан жүктөп алыңыз webсайт.
- Сканер драйверлерин жана топтомдогу сканерлөө тиркемелерин орнотуу үчүн экрандагы көрсөтмөлөрдү аткарыңыз. Толук иштеши үчүн берилген бардык программаларды орнотуу сунушталат.
- Орнотуу аяктагандан кийин суралса, компьютериңизди өчүрүп-күйгүзүңүз.
3. Сканерди иштетүү
3.1 Документтерди жүктөө
- Автоматтык документ берүүчү (ADF): Open the ADF input tray. Adjust the paper guides to fit the width of your documents. Place the documents face-down with the top edge first into the ADF. The standard sheet capacity is 50 sheets.
- Документтерде степлер, кагаз клиптер же сканерге зыян келтириши мүмкүн болгон башка бөтөн нерселер жок экенин текшериңиз.
- Ар кандай өлчөмдөгү документтер үчүн, кыйшайып кетпеши үчүн, алардын туура тегизделгенин текшериңиз.
3.2 Сканерлөөнүн негизги жол-жоболору
- Жогоруда сүрөттөлгөндөй, документтериңизди ADFке жүктөңүз.
- Каалаган сканерлөө тиркемеңизди ачыңыз (мисалы, Avision Button Manager, TWAIN/ISIS менен шайкеш келген программалык камсыздоо).
- Сканер катары Avision AV 320D2+ тандаңыз.
- Каалаган сканерлөө жөндөөлөрүн тандаңыз (мисалы, түс режими, чечилиш, көздөгөн папка).
- Сканерлөөнү программалык интерфейстен баштаңыз. Сканер документтерди автоматтык түрдө берип, сканерлейт.
- Review сканерленген сүрөттөрдү алып, аларды каалаган жериңизге сактаңыз.
3.3 Скандоо орнотуулары
Сканер сканерлөө сапатын оптималдаштыруу үчүн ар кандай жөндөөлөрдү колдойт жана file өлчөмү:
- Чечим: 600 dpi чейин жөнгө салынат. Жогорку чечилиш сүрөттүн сапатын жакшыртат, бирок чоңураак натыйжа берет file өлчөмдөрү.
- Түс режими: Параметрлер адатта Түстүү, Боз түстүү жана Кара жана Ак (Экилик) түстөрдү камтыйт.
- Дуплекстүү сканерлөө: AV 320D2+ дуплекстүү (эки тараптуу) сканерлөөнү колдойт, бул документтин эки тарабын тең бир эле учурда тартууга мүмкүндүк берет.
- Чыгуу форматы: Common output formats include PDF, JPEG, TIFF, and searchable PDF.
4. Техникалык тейлөө
4.1 Сканерди тазалоо
Үзгүлтүксүз тазалоо оптималдуу иштешин камсыз кылат жана сканериңиздин иштөө мөөнөтүн узартат.
- Сырткы: Сырткы беттерин жумшак менен сүртүңүз, гamp, түксүз кездеме. Абразивдүү тазалагычтарды же эриткичтерди колдонбоңуз.
- Айнек беттери: жумшак кездеме колдонуу dampсканердин айнек беттерин тазалоо үчүн абразивдүү эмес айнек тазалагыч менен эритүү керек (эгер бар болсо).
- Роликтер: Мезгил-мезгили менен тоют роликтерин түксүз чүпүрөк менен бир аз тазалап туруңуз dampкагаз чаңын жана калдыктарын тазалоо үчүн изопропил спирти менен иштетилген.
- Тазалоодон мурун сканерди ар дайым өчүрүп, розеткадан ажыратыңыз.
5. Кыйынчылыктарды
This section addresses common issues you might encounter with your Avision AV 320D2+ scanner.
| Көйгөй | Мүмкүн себеп | Чечим |
|---|---|---|
| Сканер компьютер тарабынан аныкталган жок | USB кабели бошоп калды, кубат өчүрүлдү, драйвер көйгөйү | USB туташуусун текшериңиз, сканер күйгүзүлгөнүн текшериңиз, драйверлерди кайра орнотуңуз. |
| Кагаз тыгындары | Туура эмес тегизделген документтер, эскирген роликтер, бөтөн нерселер | Remove jammed paper carefully, align documents properly, clean rollers. |
| Скандоо сапаты начар (сызыктар, бүдөмүк сүрөттөр) | Dirty glass, incorrect settings, worn rollers | Сканердин айнегин жана роликтерин тазалаңыз, чечилиш/түс жөндөөлөрүн тууралаңыз. |
| Документтер берилбейт | Туура эмес жүктөлгөн, эскирген азыктандыруучу роликтер | Документтердин туура жүктөлгөнүн текшериңиз, эгер эскирген болсо, берүү роликтерин тазалаңыз же алмаштырыңыз. |
6. Техникалык шарттар
Avision AV 320D2+ сканеринин негизги техникалык мүнөздөмөлөрү:
- Продукт түрү: Документ сканери
- Кагаз форматы: A3
- Чечим: 600 dpi (Оптикалык)
- Байланыш: USB
- Түсү: Кара/Ак
- Салмагы: Болжол менен 26.46 фунт (12 кг)
- Энергияны керектөө: 38.4 Ватт
- Стандарттык барактын сыйымдуулугу (ADF): 50 барак
- Оптикалык сенсор технологиясы: CMOS
- Модель аты: AV320D2+
- Модель номери: FT-0807H
7. Кепилдик жана колдоо
7.1 Өндүрүүчүнүн кепилдиги
Avision AV 320D2+ сканери, адатта, төмөнкүлөр менен келет 2 жылдык өндүрүүчүнүн кепилдиги. This warranty covers defects in materials and workmanship under normal use. Please retain your proof of purchase for warranty claims. For specific terms and conditions, refer to the warranty card included with your product or visit the official Avision webсайт.
7.2 Техникалык колдоо
Техникалык жардам, драйверлерди жаңыртуу же бул колдонмодо камтылбаган башка мүчүлүштүктөрдү оңдоо үчүн Avision кардарларды колдоо кызматына кайрылыңыз. Колдоо кызматынын байланыш маалыматын, адатта, Avision расмий сайтынан тапса болот. webсайтында же сканериңиз менен берилген документтерде.
Эскертүү: Запастык бөлүктөрдүн жана программалык камсыздоонун жаңыртууларынын жеткиликтүүлүгү ар кандай болушу мүмкүн. Эң акыркы маалымат алуу үчүн өндүрүүчүнүн расмий каналдарын текшериңиз.


