1. Киришүү
This manual provides essential information for the proper installation, operation, and maintenance of your Technical Pro LZ6200 2U Professional 2-Channel Power Ampкөтөргүч. Сураныч, бул колдонмону колдонуудан мурун кылдат окуп чыгыңыз ampоптималдуу иштөөнү жана коопсуздукту камсыз кылуу үчүн көтөргүч.
The LZ6200 is a professional-grade 2-channel power amplifier designed for reliable audio amplification in various settings. It features a robust design, versatile input/output options, and a selectable operating voltage 110V же 220V.
2. Коопсуздук нускамалары
- Кубат булагы: камсыз кылуу amplifier is connected to a power source matching the selected voltage (110V or 220V) on the rear panel. Incorrect voltagтандоо олуттуу зыян алып келиши мүмкүн.
- Вентиляция: Do not block ventilation openings. Ensure adequate airflow around the unit to prevent overheating. Maintain at least 4 inches (10 cm) of clear space around the ampөмүрлүү.
- Нымдуулук: ачыкка чыгарбагыла ampКөтөргүчтү жамгырдан, нымдуулуктан же ашыкча нымдуулуктан алыс кармаңыз. Суюктуктарды аппараттан алыс кармаңыз.
- Жайгашкан жери: кой ampкөтөргүчтү туруктуу, тегиз бетке коюңуз. Аны жылуулук булактарынын жанына же күндүн нуру түз тийген жерге койбоңуз.
- Тейлөө: Бул аппаратты өзүңүз тейлөөгө аракет кылбаңыз. Бардык тейлөөлөрдү квалификациялуу тейлөө кызматкерлерине тапшырыңыз.
- Негиздөө: Always use a grounded power cord.
3. Пакеттин мазмуну
Пакетиңизде төмөнкү заттар бар экенин текшериңиз:
- Technical Pro LZ6200 Power Ampкөтөргүч бирдиги
- AC кубат кабели
- Көрсөтмө (бул документ)
- Key for Front Panel Lock
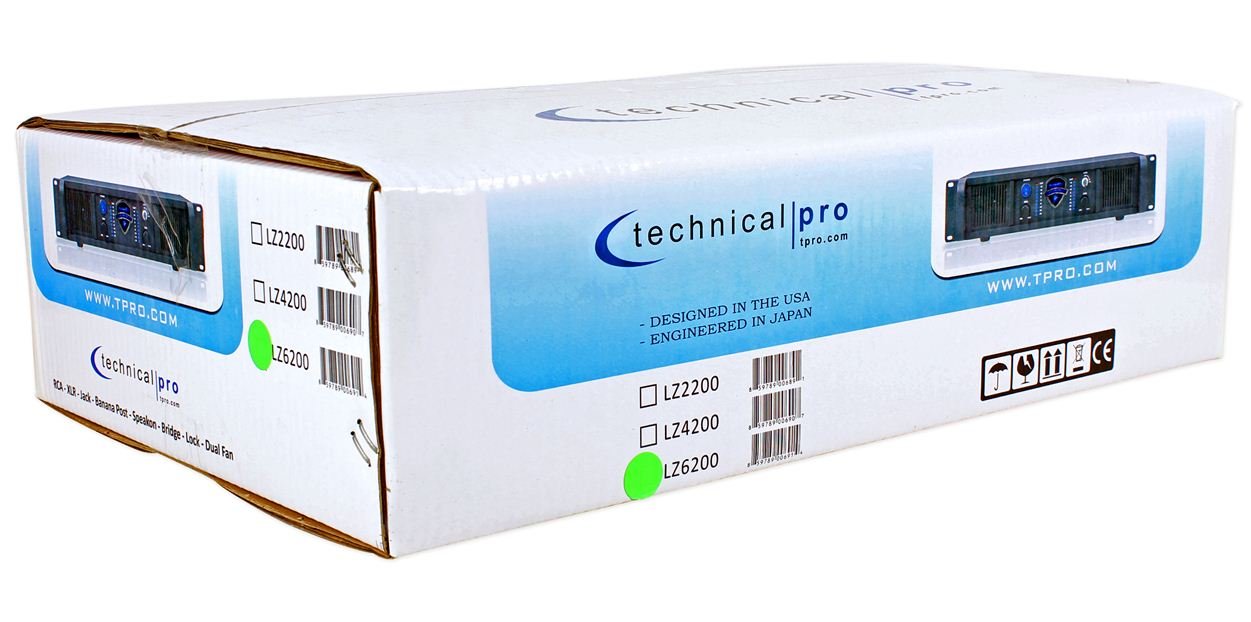
Image: Packaging box for the Technical Pro LZ6200 amplifier, showing the model number and brand logo.
4. Алдыңкы панелдин өзгөчөлүктөрү
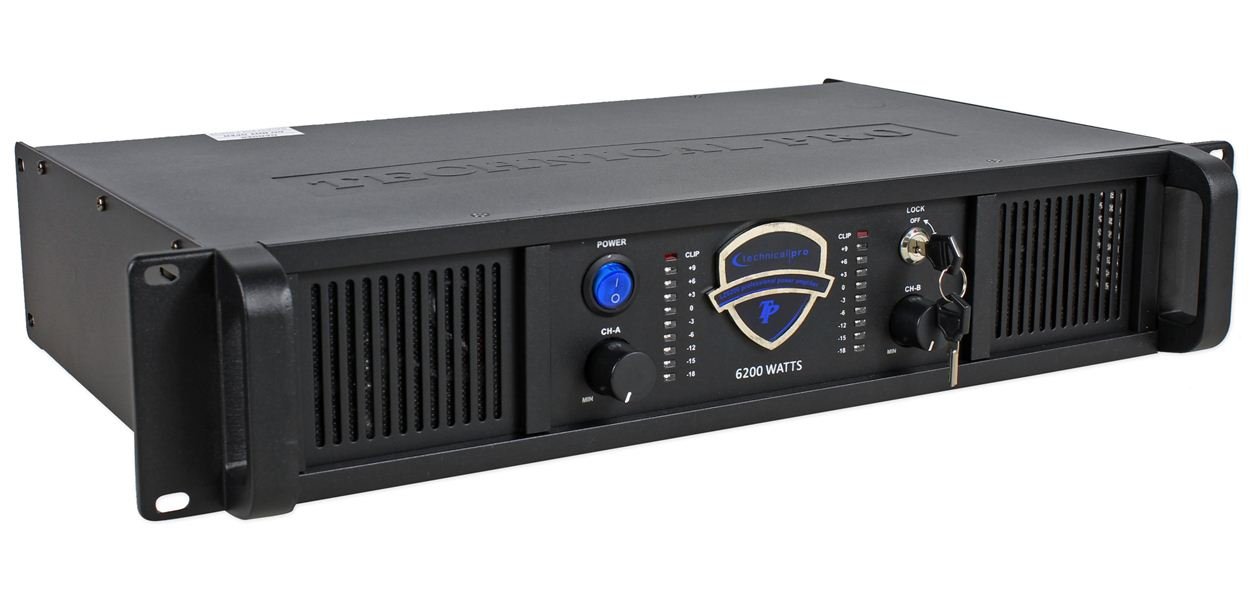
Сүрөт: алдыңкы view of the Technical Pro LZ6200 amplifier, displaying the power button, level controls, LED meters, and lock switch.
- КҮЧ баскычы: Күйгүзөт amplifier's power on and off.
- CH-A / CH-B Level Controls: Rotary knobs to adjust the output level for Channel A and Channel B independently.
- CLIP индикаторлору: Red LEDs that illuminate when the input signal is too high, indicating potential distortion. Reduce the input level if these LEDs light up frequently.
- LED метрлер: Multi-segment LED displays showing the output level for each channel.
- LOCK Switch: A key-operated switch to prevent unauthorized operation of the amplifier. Insert the provided key to enable or disable the ampкөтөргүчтөрдүн функциялары.

Сүрөт: алдыңкы view of the Technical Pro LZ6200 amplifier with the security key inserted into the lock switch.
5. Арткы панелдин туташуулары
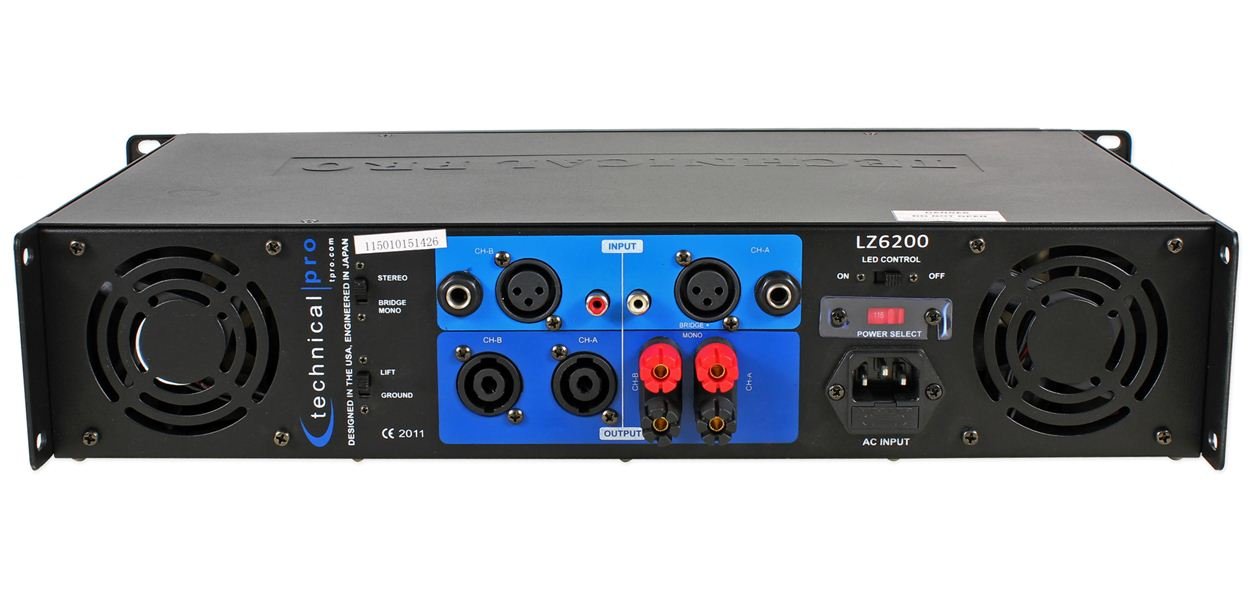
Сүрөт: Арткы view of the Technical Pro LZ6200 amplifier, showing input and output connectors, mode switches, and power input.
- INPUT (CH-A / CH-B): Balanced XLR and 1/4" TRS combo jacks for connecting audio sources.
- OUTPUT (CH-A / CH-B): Speakon and Binding Post terminals for connecting speakers.
- РЕЖИМ которуштуруу: Тандайт amplifier's operating mode: СТЕРЕО (two independent channels), КӨПҮРӨ (combines both channels for mono, higher power output), or MONO (parallel input to both channels, independent outputs).
- LIFT / GROUND Switch: Used to break the ground loop if hum or noise is present in the audio signal.
- LED CONTROL Switch: Toggles the front panel LED meters on or off.
- POWER SELECT Switch (110V/220V): Selects the appropriate operating voltagсиздин аймак үчүн e. Электр тармагына туташтыруудан мурун, бул туура коюлганын текшериңиз.
- AC КИРҮҮ: Standard IEC power inlet for the AC power cable.
6. Орнотуу
6.1 Орнотуу
жайгаштырыңыз amplifier in a location that allows for proper ventilation. Avoid enclosed spaces or stacking other heat-generating equipment directly on top of the unit. Ensure the surface is stable and can support the ampкөтөргүчтүн салмагы.
6.2 Кубат туташтыруу
- Текшериңиз POWER SELECT арткы панелдеги которгуч туура томго коюлганtage (110V or 220V) for your electrical supply.
- Connect the supplied AC power cable to the AC INPUT арткы панелге, андан кийин жерге туташтырылган электр розеткасына туташтырыңыз.
6.3 Киргизүү байланыштары
Аудио булагын туташтырыңыз (миксер, алдын алаampкөтөргүч ж.б.) үчүн INPUT jacks (XLR or 1/4" TRS) on the rear panel. Use high-quality shielded cables to minimize noise.
6.4 Output Connections (Speakers)
Динамиктерге туташтырыңыз OUTPUT terminals (Speakon or Binding Post) on the rear panel. Ensure correct polarity (+ to + and - to -) for all connections. Match speaker impedance to amplifier capabilities.
6.5 Режимди тандоо
коюңуз РЕЖИМ switch on the rear panel according to your desired configuration:
- стерео: For typical two-channel operation, with independent signals for Channel A and Channel B.
- BRIDGE: For combining both channels into a single, higher-power mono output. Connect the speaker to the designated bridge output terminals (refer to markings on the unit).
- МОНО: For parallel input to both channels, with independent outputs. Both channels receive the same input signal.
7. Иштөө нускамалары
- Ensure all connections (power, input, output) are secure and correct.
- Төмөндө буруңуз Ч-А жана CH-B Level Controls on the front panel to their minimum (MIN) position.
- басыңыз КҮЧ күйгүзүү үчүн баскыч amplifier. The power indicator will illuminate.
- If desired, insert the key into the БУЛПОО switch and turn it to the 'ON' position to enable ampкөтөрүүчү функциялары.
- Start playing audio from your source device.
- Акырындык менен көбөйтүү Ч-А жана CH-B Level Controls каалаган көлөмүнө жетүү үчүн.
- мониторинг жүргүзүү LED метрлер to observe output levels and the CLIP Indicators to prevent distortion. If a CLIP indicator flashes frequently, reduce the input level from your source or the amplifier's level control.
- өчүрүү үчүн amplifier, first reduce the level controls to minimum, then press the КҮЧ баскычы.
8. Техникалык тейлөө
- Тазалоо: ажыратыңыз amplifier from power before cleaning. Use a soft, dry cloth to wipe the exterior. Do not use liquid cleaners or solvents.
- Вентиляция: Regularly check that the ventilation grilles are free from dust and obstructions. Dust accumulation can lead to overheating.
- Байланыштары: Periodically check all cable connections for tightness and wear.
9. Кыйынчылыктарды
| Көйгөй | Мүмкүн себеп | Чечим |
|---|---|---|
| Күч жок | Power cable disconnected; Power switch off; Incorrect voltage selection; Blown fuse; Lock switch engaged. | Check power cable connection; Ensure power switch is ON; Verify 110V/220V switch setting; Check/replace fuse (by qualified personnel); Disengage lock switch with key. |
| Үн чыгышы жок | Input cables disconnected; Speaker cables disconnected/incorrectly wired; Input source not playing; Amplifier level controls at minimum; Incorrect mode selection. | Check all input and output cable connections; Ensure input source is active; Increase amplifier level controls; Verify MODE switch setting. |
| Бурмаланган үн | Киргизүү сигналы өтө жогору (кысылуу); Динамик импеданстын дал келбегендиги; Бузулган динамик. | Булактан келген киргизүү деңгээлин азайтыңыз же amplifier level controls; Ensure speaker impedance is compatible; Test with different speakers. |
| Үн же ызы-чуу | Ground loop; Poor cable shielding. | Engage the LIFT switch on the rear panel; Use higher quality shielded cables. |
| Ашыкча ысып кетүү | Бөгөттөлгөн желдетүү; Ашыкча жүк. | Ensure adequate airflow around the unit; Reduce output level or speaker load. |
10. Техникалык шарттар
- Бренд: Technical Pro
- Модел: LZ6200
- Каналдар: 2
- Чоку күчү: 6200 Вт
- Operating Voltage: 110V/220V (тандалышы мүмкүн)
- Киргизүү туташтыргычтары: XLR, 1/4" TRS
- Чыгуу туташтыргычтары: Speakon, Binding Post
- Көлөмдүү үн каналынын конфигурациясы: 2
- Өлчөмдөрү (пакет): 52.07 x 35.56 x 14.73 см (болжол менен)
- Элемент Салмагы: 7.98 кг (болжол менен)
11. Кепилдик жана колдоо
For warranty information and technical support, please refer to the documentation provided at the time of purchase or contact Technical Pro customer service directly. Keep your purchase receipt as proof of purchase.
For further assistance, visit the official Technical Pro webсайтына же алардын ыйгарым укуктуу тейлөө борборлоруна кайрылыңыз.


