1. Киришүү
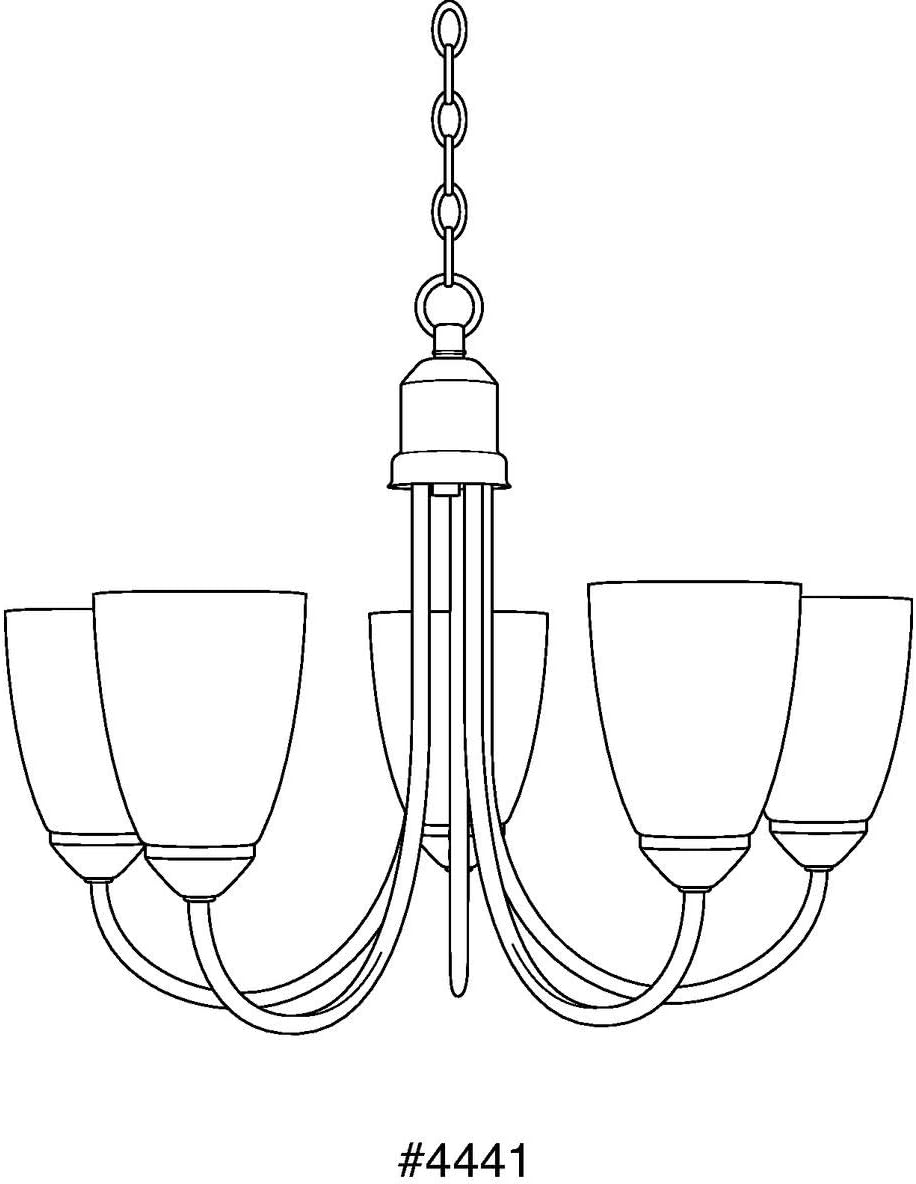
Thank you for choosing the Progress Lighting Gather Collection Five-Light Chandelier. This elegant fixture, featuring etched glass shades and a brushed nickel finish, is designed to enhance your home's ambiance. This manual provides essential information for safe installation, operation, and maintenance of your new chandelier.
2. Коопсуздук боюнча маанилүү маалымат
ЭСКЕРТҮҮ: Бул продукт сизге химиялык заттардын, анын ичинде коргошундун таасирин тийгизиши мүмкүн, ал Калифорния штатына рак жана тубаса кемтик же башка репродуктивдүү зыян алып келиши белгилүү. Көбүрөөк маалымат алуу үчүн өтүңүз www.P65Warnings.ca.gov.
Always turn off the main power supply at the circuit breaker before beginning any electrical installation. Consult a qualified electrician if you are unsure about any part of the installation process. Ensure all wiring connections are secure and comply with local electrical codes. Do not exceed the maximum wattagлампалар үчүн белгиленген.
3. Пакеттин мазмуну
Орнотууну баштоодон мурун бардык компоненттер бар экендигин текшериңиз:
- Chandelier Fixture (Brushed Nickel)
- Etched Glass Shades (5)
- Монтаждоочу аппараттык комплект
- Chain and Canopy Assembly
- Орнотуу баракчасы
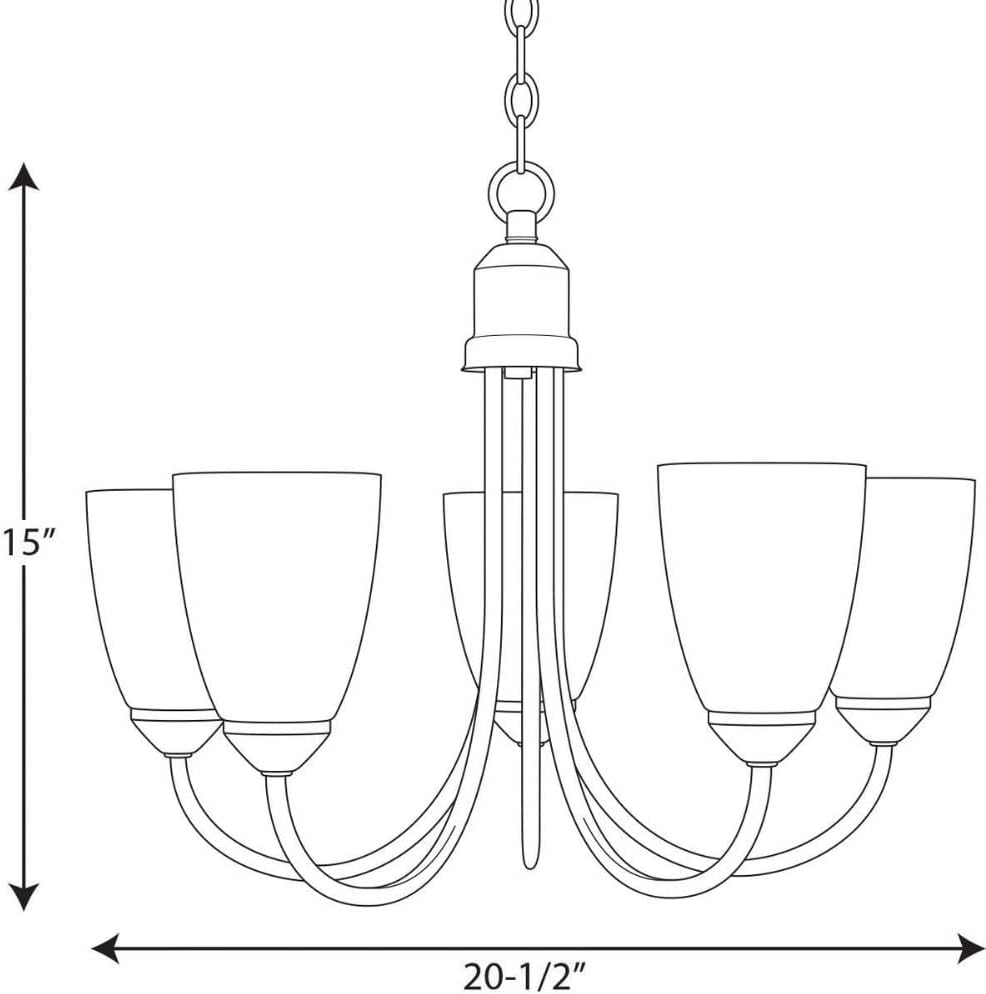
4. Продукттун спецификациялары
| Өзгөчөлүк | Спецификация |
|---|---|
| Модель номери | P4441-09 |
| Бренд | Прогресс Lighting |
| Түс | Brushed Nickel |
| Материал | Кошумча болот (арматура), айнек (көз айнек) |
| Өлчөмдөрү (L x W x Y) | 20.2" x 20.63" x 15" |
| Элемент Салмагы | 5 фунт |
| Жарык булактарынын саны | 5 |
| Макс Ватtage per Lampochka | 100 ватт |
| Тtage | 120 вольт |
| Орнотуу түрү | Туруктуу |
| Жарык булагы түрү | Жылытуу (LED, CFL, галоген менен шайкеш келет) |
| Бөлмө түрү | Dining Room, Great Room, Bathroom |
5. Орнотуу жана орнотуу
Installation of this chandelier typically requires two people for safety and ease of handling. Follow the detailed instructions provided in the included installation sheet. Below are general steps and helpful visual aids.
5.1. Алдын ала орнотуу
- Кубатты өчүрүү: Жарык бергичти башкарган автоматтык өчүргүчтү таап, электр кубатын өчүрүңүз.
- Таңылганын ачуу: Бардык компоненттерди таңгактан кылдаттык менен алып салыңыз жана кандайдыр бир бузулууларды текшериңиз.
- Керектүү куралдар: Gather necessary tools such as a screwdriver, wire strippers, pliers, and a ladder.
5.2. Чогултуу жана орнотуу
Assemble the main body of the chandelier according to the diagrams in your installation sheet. This may involve unfolding the arms and attaching the chain. Adjust the chain length to achieve the desired hanging height. For dining room tables, the bottom of the chandelier should typically hang 30-36 inches above the table surface for an 8-foot ceiling. For higher ceilings, consider the guidelines in the video below.


5.3. Chandelier Hanging Height Guidelines
For optimal lighting and aesthetic appeal, consider the following guidelines for hanging your chandelier. This video provides a comprehensive overview of recommended hanging heights for various room types.
5.4. Электр зымдары
Connect the fixture wires to the house wires according to the provided wiring diagram. Ensure all connections are secure with wire nuts. Proper grounding is crucial for safety; do not skip this step.
5.5. Жыйынтыктоочу жыйын
Once wired, secure the canopy to the ceiling junction box. Install the light bulbs (not included) into the sockets. The chandelier uses five medium base bulbs (100W max per bulb). Finally, attach the etched glass shades to each light base.
6. Operating Your Chandelier
After installation, restore power at the circuit breaker. Your chandelier is now ready for use. This fixture is fully dimmable when used with dimmable bulbs and a compatible dimmer switch (sold separately), allowing you to adjust the light intensity to suit your needs.
7. Кароо жана тейлөө
7.1. Тазалоо
To maintain the finish of your chandelier, wipe it with a soft, dry cloth. Avoid using abrasive cleaners or solvents, as these can damage the finish. For glass shades, use a mild glass cleaner and a soft cloth.
7.2. Лампаны алмаштыруу
Always turn off the power to the fixture at the circuit breaker before replacing bulbs. Allow bulbs to cool completely before handling. Replace bulbs with the same type and wattage (medium base, 100W max) to ensure proper operation and prevent damage.
8. Кыйынчылыктарды
If your chandelier is not functioning correctly, refer to the following common issues and solutions:
- Жарыктар күйбөйт:
- Автоматтык өчүргүч КҮЙҮКТҮҮ экенин текшериңиз.
- Ensure bulbs are securely screwed in and not burnt out.
- Бардык зым байланыштары коопсуз экендигин текшериңиз.
- Lights flickering or dimming improperly:
- Ensure you are using dimmable bulbs with a compatible dimmer switch.
- Бошогон зым байланыштарын текшериңиз.
- Fixture is loose:
- Ensure the mounting hardware is securely fastened to the ceiling junction box.
If problems persist, contact Progress Lighting customer support or a qualified electrician.
9. Кепилдик жана колдоо
This Progress Lighting product comes with a 1 жылдык чектелген кепилдик, guaranteeing your complete satisfaction and including professional after-sales customer service support. For warranty claims, technical assistance, or replacement parts, please contact Progress Lighting customer service directly.
Байланыш маалыматы: Refer to the contact details provided on the original product packaging or the official Progress Lighting webсайт.


