Introduction
This manual provides detailed instructions for the installation, operation, and maintenance of your Braeburn 1220NC Non-Programmable Thermostat. Please read this manual thoroughly before installation and use to ensure proper function and safety.
The Braeburn 1220NC is designed for simple and reliable temperature control in residential and light commercial applications. It is compatible with most single-stage жана көптtagкадимки жана жылуулук насостук системалар.
Коопсуздук маалыматы
Always turn off power to the heating/cooling system at the main fuse or circuit breaker panel before installing or servicing this thermostat. Failure to do so could result in electrical shock or equipment damage.
All wiring must conform to local electrical codes and ordinances. This thermostat is a low-voltage device. Do not connect it to line voltage (120V or 240V) systems.
Do not short (jumper) the terminals on the gas valve or at the air handler to test the system. This could damage the thermostat and/or the system.
Орнотуу жана орнотуу
Пакеттин мазмуну
- Braeburn 1220NC Thermostat
- Wallplate (Sub-base)
- Монтаждоочу жабдуулар (буроолор жана дубал анкерлери)
- AA щелочтуу батареялары (2)
Монтаждоо жери
Install the thermostat approximately 5 feet (1.5m) above the floor. Select an area with good air circulation, away from direct sunlight, drafts, and heat sources (e.g., lamps, fireplaces, appliances). Avoid mounting on exterior walls.
Орнотуу кадамдары
- Кубатты өчүрүү: Негизги сактандыргычтагы же автоматтык өчүргүч панелиндеги жылытуу жана муздатуу системасына электр кубатын ажыратыңыз.
- Эски термостатты алып салуу: Carefully remove the old thermostat from the wall. Note the wire connections to each terminal. It is recommended to label each wire with the terminal designation from your old thermostat.
- Mount Wallplate: Separate the thermostat from its wallplate. Position the wallplate on the wall and mark the mounting holes. Drill holes if necessary and insert wall anchors. Secure the wallplate to the wall using the provided screws. The thermostat can be mounted to a horizontal junction box.
- Зымдарды туташтыруу: Connect the system wires to the appropriate terminals on the new thermostat's wallplate. Refer to the wiring diagram for your specific system type (conventional or heat pump). The thermostat uses standard wire connection codes.
- Батареяны орнотуу: Insert the two AA alkaline batteries into the battery compartment. Ensure correct polarity. The thermostat can also be hardwired for 24 VAC power.
- Термостатты тиркөө: Align the thermostat with the mounted wallplate and gently push until it snaps securely into place.
- Күчтү калыбына келтирүү: Turn on power to the heating and cooling system at the main fuse or circuit breaker panel.

Сүрөт 1: Алдыңкы view of the Braeburn 1220NC Thermostat, showing the display, buttons, and system/fan switches.
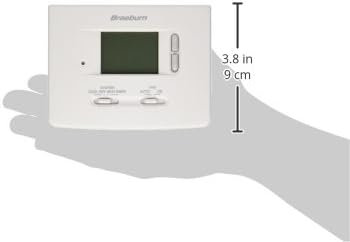
Figure 2: The Braeburn 1220NC Thermostat held in a hand, illustrating its compact size and approximate dimensions (3.8 inches / 9 cm height shown).
Иштөө нускамалары
Дисплей жана Башкаруу
The thermostat features a large 2 square inch LCD display with a bright blue backlight for easy readability. Controls include up/down buttons for temperature adjustment and slide switches for system and fan modes.
Температураны орнотуу
- басыңыз UP or ылдый arrow buttons to adjust the desired temperature setting. The display will show the set temperature.
- The temperature control range is between 45°F and 90°F (7°C and 32°C).
Системалык режимди которуу
Use the SYSTEM slide switch to select the desired operating mode:
- БАРАКЕЛДЕ: Термостат муздатуу системаңызды көзөмөлдөйт.
- ӨЧҮК: Жылытуу жана муздатуу системалары өчүрүлгөн.
- ЖЫЛУУ: Термостат сиздин жылытуу системасын көзөмөлдөйт.
- EMER (Emergency Heat): For heat pump systems only. Activates auxiliary/emergency heat.
Fan Mode Switch
Use the FAN slide switch to select the desired fan operation:
- АВТО: Вентилятор жылытуу же муздатуу системасы активдүү иштеп жатканда гана иштейт.
- КҮЙҮК: Жылытуу же муздатуу системасы активдүү экендигине карабастан, желдеткич тынымсыз иштейт.
Кошумча функциялар
- Батареянын төмөн көрсөткүчү: A low battery icon will appear on the display when the batteries need to be replaced.
- Калыбына келтирүү баскычы: A front access reset button is available. Pressing this button will return all user settings to their default values.
- F°/C° Switch: A switch is located on the back of the thermostat to select between Fahrenheit and Celsius temperature display.
- Compressor Short Cycle Protection: This feature prevents damage to your compressor by delaying its restart for a few minutes after it has been turned off.
- Туруктуу эстутум: User settings are retained even during power outages or battery changes.
Техникалык тейлөө
Батареяны алмаштыруу
When the low battery indicator appears on the display, replace the two AA alkaline batteries immediately. To replace batteries:
- Gently pull the thermostat straight off the wallplate.
- Эски батарейкаларды чыгарып, туура полярдуулукту (+/-) камсыз кылуу менен жаңы AA щелочтуу батарейкаларын салыңыз.
- Термостатты кайра дубал тактасына жабыңыз.
Тазалоо
Термостаттын сыртын жумшак, damp кездеме. Абразивдүү тазалагычтарды же эриткичтерди колдонбоңуз. Суюктуктарды түздөн-түз термостатка чачуудан алыс болуңуз.
Проблемаларды чечүү
| Көйгөй | Мүмкүн себеп | Чечим |
|---|---|---|
| Дисплей бош же күңүрт. | Low or dead batteries; No 24 VAC power. | Replace batteries. Check circuit breaker for HVAC system. |
| Система жооп бербей жатат (жылытуу/муздатуу жок). | System switch in OFF position; Incorrect wiring; Blown fuse in HVAC system. | Set system switch to HEAT or COOL. Verify wiring connections. Check HVAC system fuse. |
| Температураны окуу туура эмес көрүнөт. | Термостат түз күн нуруна, чиймелерге же жылуулук булактарына дуушар болот. | Relocate thermostat if possible. Ensure proper air circulation around the unit. |
| Thermostat does not turn on/off at set temperature. | Temperature differential setting; Compressor short cycle protection active. | Allow for temperature differential (accuracy +/- 1°F). Wait for compressor protection delay to clear. |
| Thermostat is unresponsive. | Убактылуу электрондук мүчүлүштүк. | Press the front reset button to restore default settings. |
Техникалык шарттар
| Өзгөчөлүк | Деталь |
|---|---|
| Модел | 1220NC |
| Өлчөмдөрү (H x W x D) | 3.62 x 4.72 x 1.38 дюйм (9.2 x 12.0 x 3.5 см) |
| Салмагы | 9.6 унция (272 грамм) |
| Power Source | 24 VAC or 2 AA Alkaline Batteries (3.0 Volts DC) |
| Температураны көзөмөлдөө диапазону | 45°F – 90°F (7°C – 32°C) |
| Температуранын тактыгы | +/- 1°F (+/- 0.5°C) |
| нымдуулук колому | 5% - 95% Салыштырмалуу нымдуулук (конденсацияланбаган) |
| Дисплей түрү | LCD with Blue Backlight (2 sq. in.) |
| Шайкештик | Multi-stage conventional (2H/1C) or heat pump systems (1C/1Aux) |
| Монтаж түрү | Wall Mount (Horizontal Junction Box compatible) |
| Өзгөчөлүктөр | Low Battery Indicator, Non-Volatile Memory, Adjustable Temperature Limits, Auxiliary Heat Indicator, Compressor Short Cycle Protection, Front Reset Button, F°/C° Switch |
Кепилдик жана колдоо
Specific warranty details for the Braeburn 1220NC Non-Programmable Thermostat are not provided in the available product information. Please refer to the product packaging or the manufacturer's official webкепилдик шарттары жана эрежелери менен таанышуу үчүн сайтты караңыз.
For technical support or further assistance, please contact Braeburn customer service. Contact information can typically be found on the manufacturer's webсайт же продукт таңгак.


