1. Киришүү
This manual provides detailed instructions for the installation, setup, operation, and maintenance of your Sunlite 04995-SU In-Wall Digital Timer. This device is designed to automatically control light fixtures or outlets by replacing a traditional single-pole switch, offering convenience and energy management.

Сүрөт 1.1: Алдыңкы view of the Sunlite 04995-SU In-Wall Digital Timer. The timer is white with a small digital display at the top and a larger manual control panel below, designed to fit into a standard wall switch plate.
2. Коопсуздук маалыматы
WARNING: Risk of Electric Shock. Installation requires working with electrical wiring. If you are not familiar with electrical wiring, consult a qualified electrician.
- Орнотуудан же тейлөөдөн мурун дайыма автоматтык өчүргүчтүн кубатын өчүрүңүз.
- This timer is for indoor installation only.
- Do not exceed the maximum load rating: 15 Amps, 1800 Watts Resistive at 120 VAC.
- Ensure all wire connections are secure and comply with local electrical codes.
- The product is UL Listed, indicating it meets safety and quality standards.
3. Пакеттин мазмуну
Орнотууну баштоодон мурун бардык компоненттер бар экендигин текшериңиз:
- Sunlite 04995-SU In-Wall Digital Timer
- Декоративдик дубал плитасы
- Монтаждоо бурамалар
- Wire Nuts
- Көрсөтмө (бул документ)
4. Техникалык шарттар
| Өзгөчөлүк | Спецификация |
|---|---|
| Модель номери | 04995-СУ |
| Тtage | 120 Вольт |
| Максималдуу жүк | 15 Amps, 1800 Watts Resistive |
| Программалануу | 7-Day, up to 18 ON/18 OFF settings |
| Иштөө режимдери | Manual On/Off, Auto Override, Random, DST |
| Камдык көчүрмө | Auto backup saves programming during power outages |
| Dimensions (H x L) | 4.2 дюйм x 1.6 дюйм (болжолдуу) |
| Материал | Металл, пластик |
| Түс | Ак финиш |
| Сертификаттар | UL тизмеленген |

Image 4.1: Diagram showing the approximate dimensions of the Sunlite 04995-SU In-Wall Digital Timer: 4.2 inches in height and 1.6 inches in length.

Image 4.2: Visual representation of key features including 15 Amps (1800 Watts), Manual On/Off with Auto Override, 7-Day Programmable functionality, and ease of installation.
5. Орнотуу
This section outlines the steps for installing the Sunlite 04995-SU In-Wall Digital Timer. Ensure power is OFF at the circuit breaker before proceeding.
- Кубатты өчүрүү: Locate the circuit breaker controlling the switch you intend to replace and turn it OFF. Verify power is off using a voltage сыноочу.
- Эски которгучту алып салуу: Carefully remove the existing wall plate and unscrew the old switch from the electrical box. Disconnect the wires from the old switch, noting their connections.
- Зымдарды аныктоо: You will typically find a LINE (hot) wire, a LOAD wire (to the fixture), and a NEUTRAL wire. A ground wire should also be present. If a neutral wire is not available in your electrical box, this timer cannot be installed.
- Жаңы таймерди туташтырыңыз: Using the provided wire nuts, connect the wires from the electrical box to the corresponding wires on the Sunlite timer. Refer to the wiring diagram provided with the physical product for specific connections. Ensure all connections are secure.
Маанилүү: The timer requires a neutral wire for proper operation. - Орнотуу таймери: Gently push the connected wires back into the electrical box. Secure the timer to the electrical box using the provided mounting screws.
- Дубал плитасын орнотуу: Attach the decorative wall plate over the timer.
- Күчтү калыбына келтирүү: Turn the power back ON at the circuit breaker. The timer's digital display should illuminate.
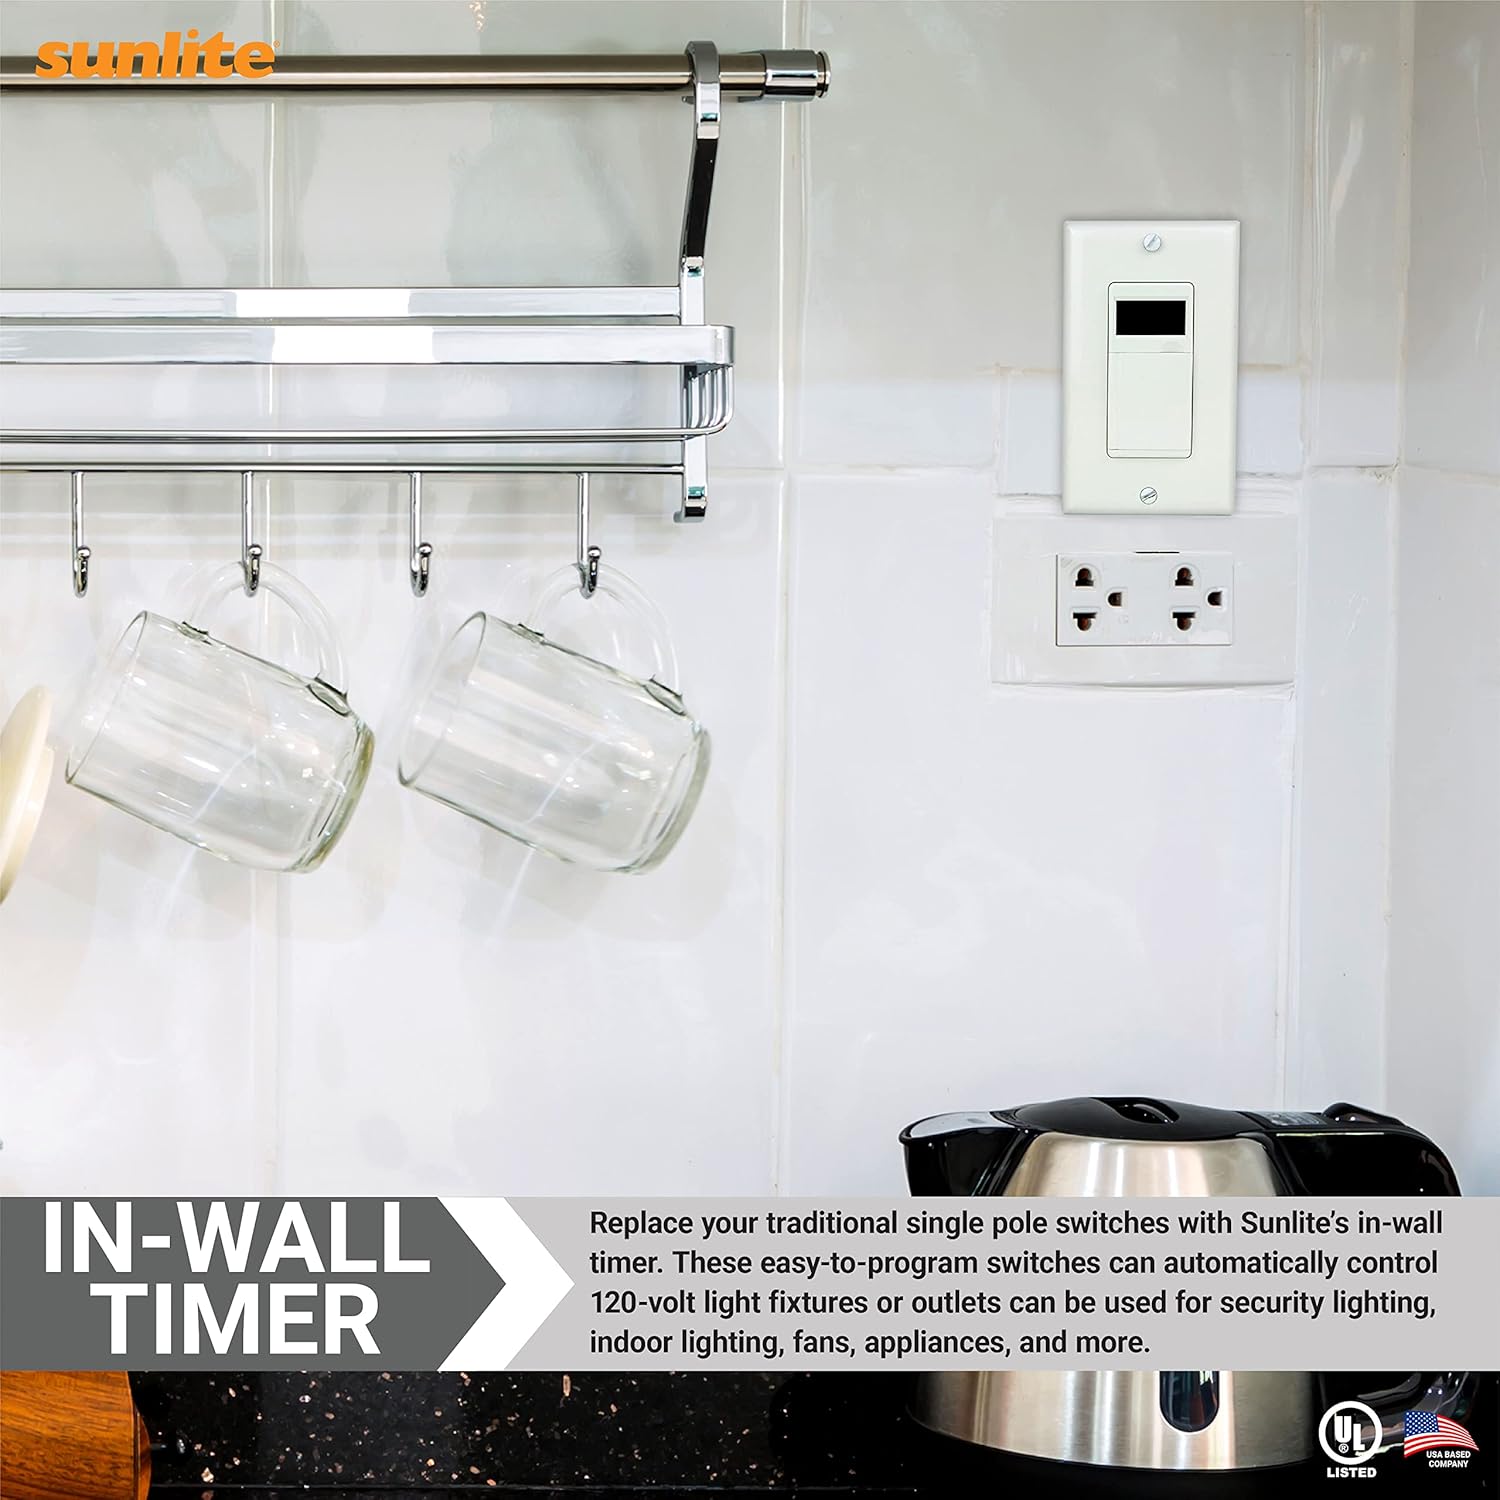
Сүрөт 5.1: Мурункуample of the Sunlite In-Wall Digital Timer installed in a kitchen setting, replacing a traditional single-pole switch to control an outlet.
6. Баштапкы орнотуу
After installation and restoring power, the timer will require initial setup of the current time and day.
- Башкаруу панелин ачуу: Gently press the bottom part of the timer's cover to reveal the programming buttons.
- Учурдагы убакытты коюу:
- басыңыз HOUR саатты жөндөө үчүн баскыч.
- басыңыз MIN мүнөттү жөндөө үчүн баскыч.
- Учурдагы күндү коюу: басыңыз КҮН button to cycle through the days of the week until the correct day is displayed.
- Башкаруу панелин жабуу: Once the time and day are set, close the control panel cover. The display will show the current time and day.
7. Иштөө нускамалары
The Sunlite 04995-SU timer offers various operating modes and programming options.
7.1. Manual On/Off Operation
You can manually turn the connected device ON or OFF at any time by simply pressing the control panel cover. This action overrides any active program until the next scheduled ON/OFF event.
7.2. Programming ON/OFF Settings
The timer allows for up to 18 ON and 18 OFF settings per day or across a 7-day cycle. To program:
- Башкаруу панелин ачуу: Press the bottom part of the timer's cover.
- Программа режимине кириңиз: басыңыз ПРОГ button. The display will show '1 ON'.
- КҮЙГҮЗҮҮ Убактысын коюу: колдонуу HOUR жана MIN 1-программа үчүн каалаган КҮЙГҮЗҮҮ убакытын коюу үчүн баскычтарды басыңыз.
- Select Days for ON Event: басыңыз КҮН button repeatedly to cycle through day options:
- All 7 days (Mon-Sun)
- Individual days (Mon, Tue, Wed, etc.)
- Иш күндөрү (Дүйшөмбү-Жум)
- Weekends (Sat-Sun)
- ӨЧҮРҮҮ Убактысы: Басыңыз ПРОГ again. The display will show '1 OFF'. Use HOUR жана MIN buttons to set the desired OFF time for program 1. Select days using the КҮН мурункудай баскыч.
- Repeat for Additional Programs: Басууну улантыңыз ПРОГ to set up to 18 ON/OFF programs. Each press will advance to the next program number (e.g., '2 ON', '2 OFF', '3 ON', etc.).
- Программа режиминен чыгуу: Бардык керектүү программаларды орноткондон кийин, баскычын басыңыз RCL Учурдагы убакытты көрсөтүүгө кайтуу үчүн баскычты басыңыз.

Сүрөт 7.1: Жакын пландан view of the Sunlite 04995-SU In-Wall Digital Timer's control panel, showing buttons for PROG, DAY, HOUR, MIN, DST, RND, ON, OFF, and MAN for setting and adjusting schedules.
7.3. Random Setting (Vacation Mode)
The random setting varies the ON/OFF times by a few minutes, giving a
Тектеш документтер - 04995-СУ
 |
Sunlite LED Flush Mount Fixture орнотуу нускамалары Sunlite LED Flush Mount Fixture (100-277VAC, Dimmable) үчүн комплекстүү орнотуу көрсөтмөсү. Коопсуздук эскертүүлөрүн, этап-этабы менен монтаждоо нускамаларын, тетиктердин тизмесин жана тейлөө кеңештерин камтыйт. |
 |
Sunlite SCT Up/Down Tubular Fix Wall Sconce орнотуу боюнча колдонмо Sunlite SCT Up/Down Tubular Fix дубал шамы үчүн толук орнотуу нускамалары (Модель 88142-SU). Бул сырткы жарык берүүчү түзүлүш үчүн монтаждоо кадамдарын, зымдарды тартуу боюнча көрсөтмөлөрдү жана орнотуу процедураларын камтыйт. |
 |
Sunlite LED T-Grid Fixture орнотуу боюнча колдонмо | Модели 88789-SU Sunlite LED T-Grid Fixture (Модель 88789-SU) үчүн комплекстүү орнотуу көрсөтмөлөрү. T-grid сызыктуу жарыгыңызды кантип коопсуз орнотууну жана зым кылууну үйрөнүңүз. |
 |
Sunlite LED T8 Tubular Lamp Орнотуу боюнча колдонмо Sunlite's LED T8 түтүкчөсү үчүн этап-этабы менен орнотуу көрсөтмөлөрүamp кайра жабдуу. Бир жана бир нече л үчүн коопсуздук эскертүүлөрүн, электр схемаларын камтыйтampс, жана негизги орнотуу маалыматы. |
 |
Sunlite LED Panel Light орнотуу нускамалары Sunlite LED Back-Lit Panel Lay-In Fixtures үчүн комплекстүү орнотуу көрсөтмөлөрү, жабуу шып, суспензия жана жер үстүндөгү монтаждоо ыкмалары. Зымдарды туташтыруу боюнча көрсөтмөлөрдү жана ватты жөндөө боюнча нускамаларды камтыйтtage жана түс температурасы. |
 |
Sunlite Ceiling Light орнотуу боюнча колдонмо Коопсуздук чараларын, жалпы көрсөтмөлөрдү жана монтаждоо үчүн бөлүктөрдүн тизмесин камтыган Sunlite шыптын жарык берүүчү түзүлүшүн орнотуу боюнча нускамалар. |