Introduction
The Stryker SR-655HPC is a high-performance 10 Meter Amateur Radio designed for reliable and clear long-range communication. This radio features a unique design for high power output, utilizing four IRF-520 MOSFET transistors to achieve 60+ watts PEP. It is equipped with an 8-color LED-backlit faceplate with dimmer control, ensuring comfortable viewing in various lighting conditions. The SR-655HPC supports AM, FM, and SSB modes, and includes advanced features such as variable transmit frequency response, receiver tone control, digital echo, and multiple Roger beeps.

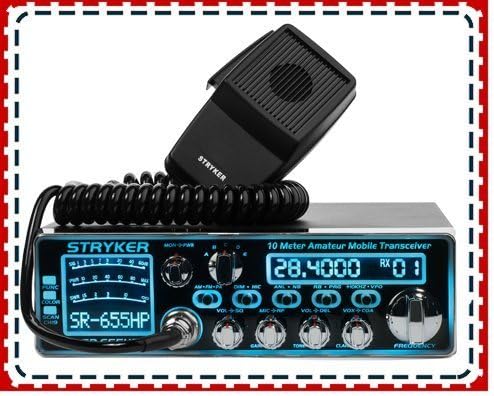
Figure 1: Stryker SR-655HPC 10 Meter Amateur Radio with connected microphone.
Негизги өзгөчөлүктөрү
- Жогорку кубаттуулугу: Utilizes four FQP13N10 MOSFET transistors for 70W PEP.
- Көп режимдүү иштөө: Supports AM, FM, and SSB.
- Brilliant 7-Color LED Backlit Faceplate: User-selectable colors or automatic scanning, with 32-position dimmer control.
- Advanced Audio Features: Loud & Clear Receiver, Excellent Stock Mic, Digital Echo with dual front-mounted controls, Variable Talkback Control, Six Roger Beeps.
- Жыштыкты көзөмөлдөө: Advanced Clarifier, VFO (Variable Frequency Oscillator), PC Programmable.
- Up-Armored Receiver: Exclusive receiver protection for superior adjacent channel rejection, even in high-interference environments.
- Digital Frequency Display: 7-Color frequency display.
Орнотуу жана орнотуу
Proper setup is crucial for optimal performance and safety. Ensure all connections are secure before powering on the unit.
1. Power Connection
Connect the radio to a stable 13.8V DC power source. A 14.2V source is recommended for best performance. Ensure correct polarity (red to positive, black to negative) to prevent damage to the unit.
2. Антенна туташтыруу
Connect a suitable 10-meter amateur radio antenna to the UHF SO239 connector on the rear of the radio. Use high-quality coaxial cable with proper impedance (typically 50 ohms) for efficient power transfer and minimal signal loss. Ensure the antenna is properly tuned for the 10-meter band.
3. Микрофонду туташтыруу
Plug the supplied microphone into the front microphone jack. Ensure the connector is fully seated.
4. Баштапкы күйгүзүү
Once all connections are made, turn the radio on using the ON/OFF/Volume control. The display should illuminate.

Figure 2: Front panel layout of the SR-655HPC, illustrating various controls and the display.
Иштөө нускамалары
This section details the functions of the various controls and how to operate your SR-655HPC radio.
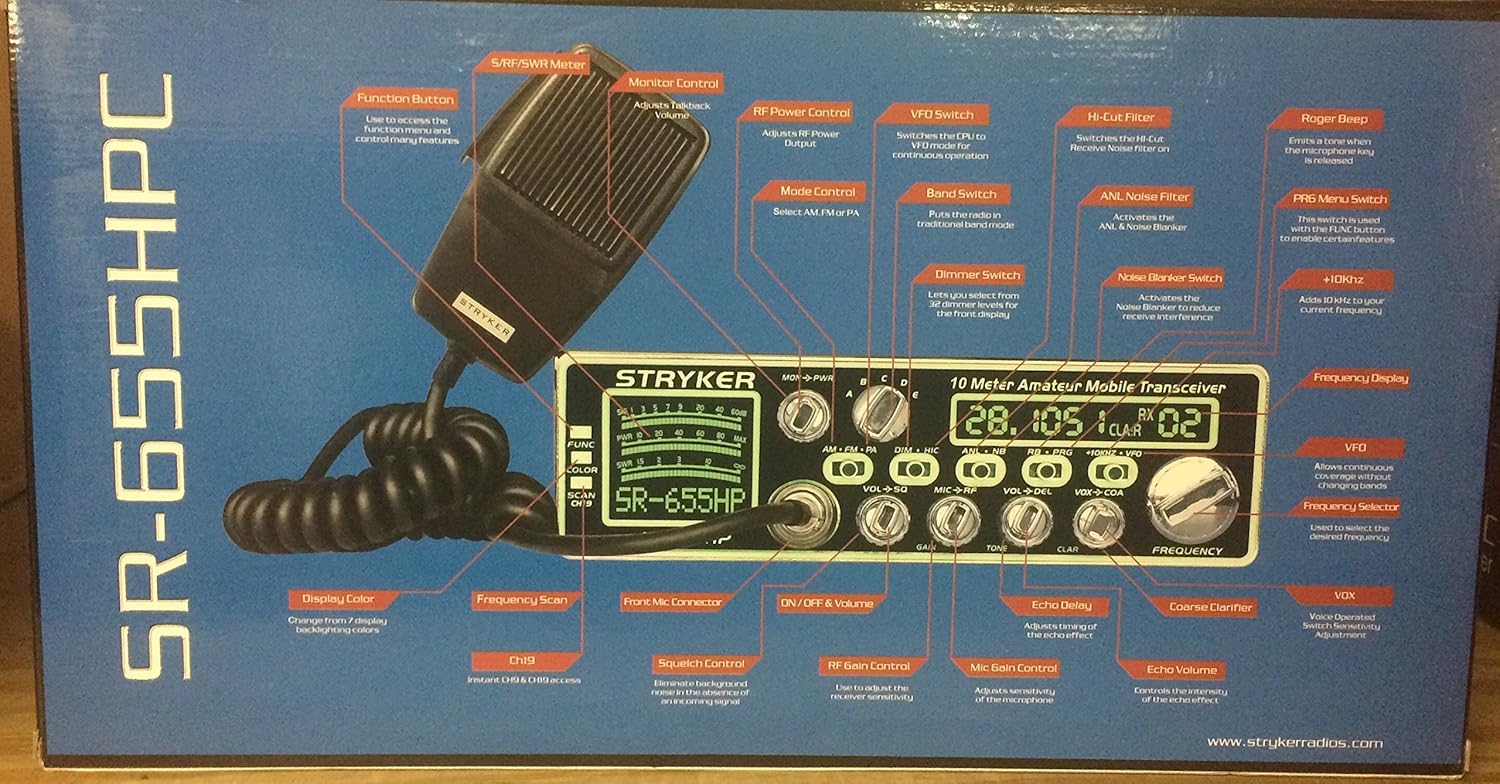
Figure 3: Detailed diagram of SR-655HPC controls and their functions, as depicted on the product packaging.
Негизги операция
- ON/OFF & Volume: Rotate the leftmost knob to turn the radio on/off and adjust the receiver audio volume.
- Squelch (SQ): Adjust the SQ knob to eliminate background noise when no signal is present. Turn clockwise until the noise disappears.
- Mode Control (AM/FM/SSB): Select the desired modulation mode using the dedicated switch.
- Жыштыкты көзөмөлдөө: Use the main FREQUENCY knob to tune to the desired operating frequency. The VFO function allows continuous frequency adjustment.
- Топтун тандоосу: The radio supports multiple frequency bands (A-L, VFO). Refer to the manual for specific band ranges.
Advanced Controls
- Dimmer Control: The DIM knob adjusts the brightness of the LED display and backlighting (32 positions).
- Digital Echo: Use the ECHO and DELAY knobs to adjust the echo effect for your transmitted audio.
- Roger Beeps: The radio features six selectable Roger beeps. Activate and select them via the PRG/RB button.
- Variable Power Control: Adjust your transmit power output using the PWR control.
- Variable Talkback Control: The TALKBACK control allows you to monitor your own transmitted audio.
- Тазалоочу: The CLARIFIER knob provides fine-tuning for SSB reception to ensure clear audio.
- Noise Blanker (NB) / Automatic Noise Limiter (ANL): These functions reduce impulse noise and continuous noise respectively.
- Компьютер программалануучу: The radio can be programmed via a PC for advanced customization. Refer to the separate PC programming guide for details.
- Дисплейдин түсү: Press the COLOR button to cycle through the 7 available LED display colors.


4-сүрөт: Мисamples of the multi-color LED display options on the SR-655HPC.
Техникалык тейлөө
To ensure the longevity and optimal performance of your Stryker SR-655HPC, follow these maintenance guidelines:
- Тазалоо: Regularly wipe the exterior of the radio with a soft, dry cloth. For stubborn dirt, a slightly damp чүпүрөктү колдонсо болот, бирок бирдикке ным кирбеши керек. Абразивдүү тазалагычтардан же эриткичтерден качыңыз.
- Вентиляция: Ensure the radio's ventilation fins are clear of dust and obstructions to prevent overheating. Do not operate the radio in enclosed spaces without adequate airflow.
- Байланыштары: Бардык кабелдик байланыштарды (кубат, антенна, микрофон) бекем жана коррозияга учурабагандыгын текшерүү үчүн мезгил-мезгили менен текшерип туруңуз.
- Сактагыч: When not in use for extended periods, store the radio in a cool, dry place, away from direct sunlight and extreme temperatures.
Проблемаларды чечүү
If you encounter issues with your SR-655HPC, refer to the following common problems and solutions:
| Көйгөй | Мүмкүн себеп | Чечим |
|---|---|---|
| Күч жок | Loose power connection, blown fuse, incorrect voltage. | Check power cable connections. Verify power source voltage. Зарыл болсо, сактагычты текшерип, алмаштырыңыз. |
| No Receive Audio | Volume too low, squelch set too high, antenna disconnected. | Increase volume. Reduce squelch level. Check antenna connection. |
| Poor Transmit Audio | Microphone not connected properly, microphone gain too low/high. | Ensure microphone is fully plugged in. Adjust MIC GAIN control. |
| Excessive Noise on Receive | Squelch too low, NB/ANL off, external interference. | Increase squelch. Activate NB/ANL. Identify and mitigate external noise sources. |
If the problem persists after attempting these solutions, contact Stryker customer support or a qualified technician.
Техникалык шарттар
| Жыштык диапазону | 28.000-29.700MHz & 24.890–24.990MHz |
| Жыштык тилкелери | A, B, C, D, E, F, G, H, I, J, K, L & VFO |
| Каналдар | 40 (programmable) in each band |
| Киргизүү көлөмүtage | 13.8V (14.2V recommended) |
| Антенна туташтыргычы | UHF SO239 |
| Frequency Control | Фазалык кулпуланган цикл синтезатору |
| Жыштык кадамы | 100Hz/1KHz/10KHz/100KHz/1MHz |
| Frequency Tolerance | 0.005% |
| Жыштыктын туруктуулугу | 0.001% |
| Температура диапазону | -20°Cден +50°Cге чейин |
| Өлчөмдөрү (W x Y x D) | 7-7/8"W x 2-3/8"H x 9-1/4"D (approx. 17 x 9 x 3 inches) |
| Элемент Салмагы | 5.79 фунт |
| Чыгуу күчү | 60+ watts PEP (up to 70W PEP) |
Кепилдик жана колдоо
The Stryker SR-655HPC 10 Meter Radio comes with a warranty from its respective manufacturer. For warranty claims or technical support, please refer to the documentation included with your product or visit the official Stryker website. 10-Meter Radios are intended for use by amateur radio operators only, and a license from the FCC is required for operation in the United States.

Figure 5: Important note regarding the radio's classification.


