Introduction
This manual provides essential instructions for the safe and effective use of your Pentax MX-1 Digital Camera. Please read this manual thoroughly before using the camera and keep it in a safe place for future reference.
Продукт бүттүview
The Pentax MX-1 is a high-end compact digital camera featuring a 12-megapixel back-illuminated CMOS sensor and a 4x optical zoom lens (28-112mm equivalent) with an f/1.8-2.5 aperture. It includes a 3-inch tilting LCD display and a dual shake reduction system for clear images and video.

Сүрөт 1: Алдыңкы view of the Pentax MX-1 Digital Camera.
Жайгашуу
1. Батареяны орнотуу жана заряддоо
- Камеранын ылдый жагында жайгашкан батарея бөлүкчөсүнүн капкагын ачыңыз.
- Insert the provided Lithium-Ion battery, ensuring the correct orientation as indicated inside the compartment.
- Батарея уясынын капкагын бекем жабыңыз.
- Connect the camera to the AC adapter using the supplied USB cable. The charging indicator will illuminate.
- Charge the battery fully before first use. A full charge typically takes approximately 3 hours.
2. Эстутум картасын орнотуу
- Эстутум картасынын уячасын, адатта батарея бөлүмүнүн жанында же камеранын капталында жайгашканын табыңыз.
- Insert an SD, SDHC, or SDXC memory card into the slot with the label facing the correct direction until it clicks into place.
- To remove the card, push it in gently until it springs out.

2-сүрөт: Каптал view of the camera showing the open port cover for USB/HDMI connections.
3. Баштапкы орнотуулар
- баскычын басып камераны күйгүзүңүз КҮЙГҮЗҮҮ/ӨЧҮРҮҮ баскычы.
- Тилди, күндү жана убакытты коюу үчүн экрандагы көрсөтмөлөрдү аткарыңыз.
- Format the memory card before first use to ensure optimal performance. Navigate to the МЕНЮ, тандаңыз ЖАЙГАШУУ, анан КАРТА КОЛДОНУУ.
Камераны иштетүү
1. Негизги сүрөт
- Күйгүзүү: басыңыз КҮЙГҮЗҮҮ/ӨЧҮРҮҮ баскычын басыңыз. Линза созулат.
- Режимди тандоо: Rotate the mode dial on the top of the camera to select your desired shooting mode (e.g., Auto Pict, Program, Aperture Priority, Shutter Priority, Manual).
- Фокус: Point the camera at your subject. Press the shutter button halfway down to focus. The focus frame will turn green when focus is achieved.
- Атуу: Сүрөткө тартуу үчүн жапкычты толугу менен ылдый басыңыз.

3-сүрөт: Жогорку view of the camera showing the mode dial, shutter button, and exposure compensation dial.
2. Using the Tilting LCD Monitor
The 3-inch LCD monitor can be tilted up or down to facilitate shooting from various angles, such as low-angle shots or overhead shots. Gently pull the top or bottom edge of the LCD screen to adjust its position.
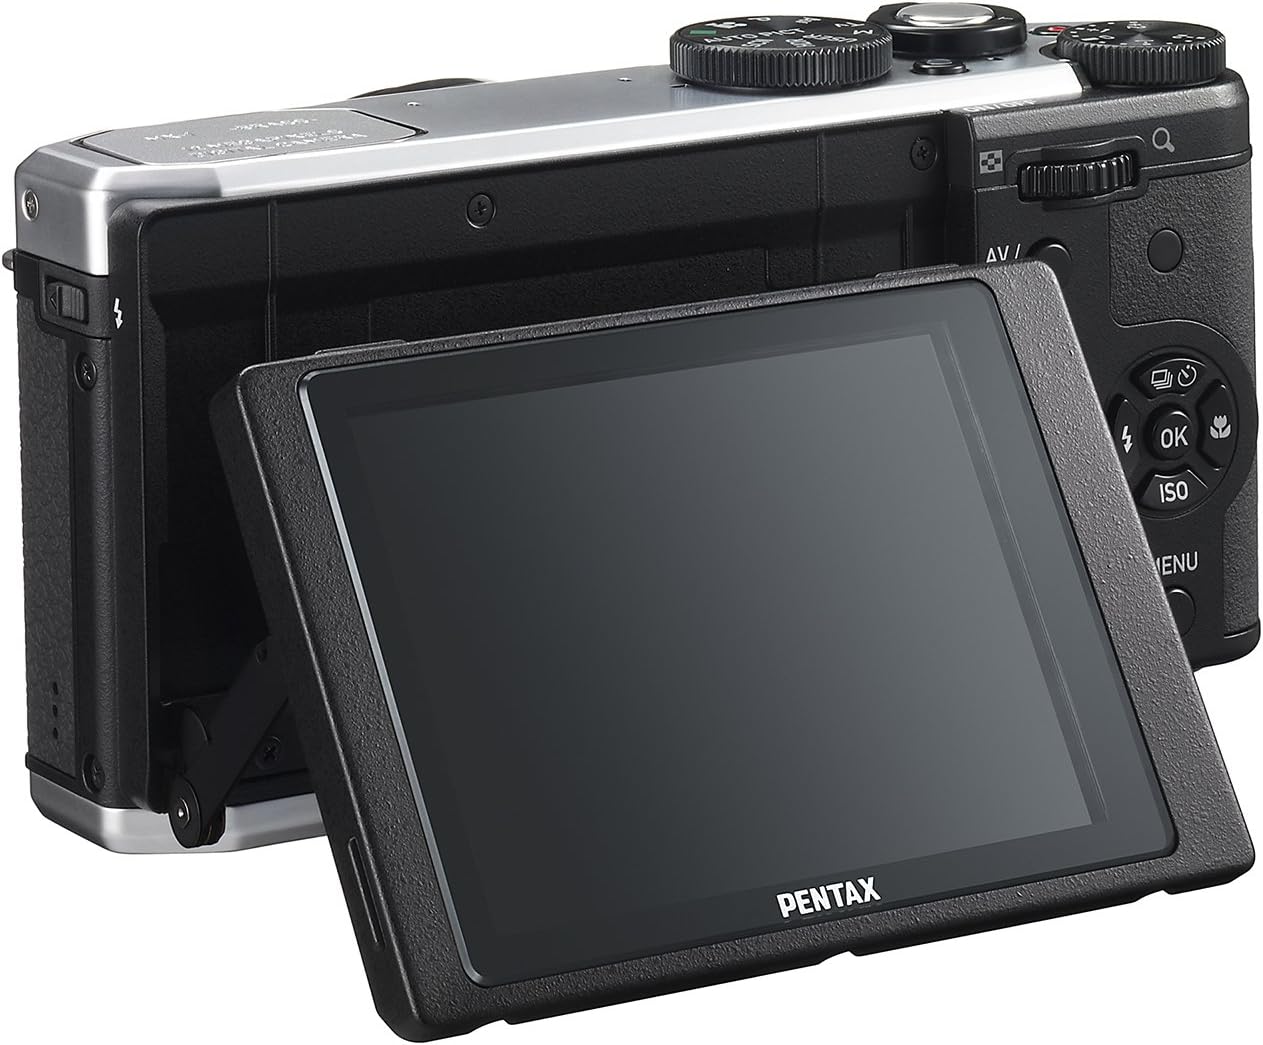
4-сүрөт: Арткы view of the camera demonstrating the tilting LCD screen.
3. Flash Operation
To use the built-in flash, slide the flash release lever to pop up the flash unit. The flash modes (Auto, On, Off, Slow Sync, Rear Curtain Sync) can be selected via the camera's menu or a dedicated button, depending on the shooting mode.

Сүрөт 5: Алдыңкы view of the camera with the pop-up flash in the extended position.
4. Ойнотуу режими
- басыңыз ОЙНОО ойнотуу режимине өтүү үчүн баскыч.
- Сүрөттөрүңүздү жана видеолоруңузду жылдыруу үчүн багыттоочу баскычты колдонуңуз.
- басыңыз OK баскычына view information about the selected image or to play a video.
- басыңыз МЕНЮ button to access playback options such as deleting, rotating, or resizing images.
Техникалык тейлөө
1. Камераны тазалоо
- Камеранын корпусу: Камеранын корпусун сүртүү үчүн жумшак, кургак чүпүрөктү колдонуңуз. өжөр кир үчүн, бир аз гampчүпүрөктү суу же жумшак тазалоо эритмеси менен жууп салыңыз. Органикалык эриткичтерди колдонуудан алыс болуңуз.
- Объектив: Чаңды кетирүү үчүн линза щеткасын же үйлөгүчтү колдонуңуз. Тактарды кетирүү үчүн линза тазалоочу чүпүрөктү жана линза тазалоочу суюктукту колдонуңуз. Линзанын бетине манжаларыңыз менен тийбеңиз.
- ЖК монитор: Экранды жумшак, мамыксыз чүпүрөк менен акырын сүртүңүз. Экранды катуу басуудан алыс болуңуз.
2. Сактоо
- Узак мөөнөткө колдонулбаганда, батареяны камерадан чыгарыңыз.
- Store the camera in a cool, dry, and well-ventilated place, away from direct sunlight, high temperatures, and humidity.
- Use a desiccant to prevent mold growth if storing in humid environments.
Проблемаларды чечүү
If you encounter issues with your Pentax MX-1, refer to the table below for common problems and their solutions.
| Көйгөй | Мүмкүн себеп | Чечим |
|---|---|---|
| Камера күйбөйт. | Батарея түгөнүп калган же туура эмес салынган. | Батареяны заряддаңыз же туура кыстарыңыз. |
| Сүрөткө тартуу мүмкүн эмес. | Эстутум картасы толуп, кулпуланган же кыстарылган эмес. | Insert a memory card, unlock it, or delete unnecessary files. |
| Сүрөттөр бүдөмүк. | Камера титиреп, туура эмес фокус же кир линза. | Камераны туруктуу кармап, туура фокусту камсыз кылыңыз же линзаны тазалаңыз. |
| Flash күйбөйт. | Flash is set to "Off" or not popped up. | Pop up the flash and set the flash mode to "Auto" or "On". |
| LCD screen is difficult to see in bright light. | Абдан жогорку жарык. | Adjust the tilting LCD for a better viewing angle or find shade. |
Техникалык шарттар
| Өзгөчөлүк | Деталь |
|---|---|
| Модель аты | Pentax MX-1 |
| Сүрөт сенсорунун чечилиши | 12 депутат |
| Фото сенсордун өлчөмү | 1/1.7 дюйм |
| Оптикалык масштаб | 4x |
| Объективдин фокустук узундугу | 28-112мм (35мм эквиваленти) |
| Апертура диапазону | f/1.8-2.5 |
| Image Stabilization | Сенсор-жылуу |
| Screen Size | 3 дюйм |
| Дисплей түрү | Tilting LCD |
| Колдоого алынган File Формат | JPEG 2.3, RAW |
| Video Resolution | FHD 1080p (H.264) |
| ISO Range (Expanded) | 100-12800 |
| Жабык ылдамдыгы диапазону | 30 секунддан 1/8000 секундага чейин |
| Эстутум картасынын түрү | SD/SDHC/SDXC |
| Байланыш | HDMI (Mini HDMI type-D), USB |
| Батарея түрү | Литий ион |
| Элемент Салмагы | 13.76 унция |
Кепилдик жана колдоо
Кепилдик маалымат
The Pentax MX-1 Digital Camera comes with a 1 жылдык кепилдик covering parts and labor from the date of purchase. This warranty covers manufacturing defects and malfunctions under normal use. It does not cover damage caused by misuse, accidents, unauthorized repairs, or normal wear and tear. Please retain your proof of purchase for warranty claims.
Кардарларды колдоо
For technical assistance, service, or further inquiries, please visit the official Pentax support website or contact their customer service department. Refer to the product packaging or the official Pentax webакыркы байланыш маалыматы үчүн сайт.
Visit the Pentax Store on Amazon кошумча продукт маалымат жана аксессуарлар үчүн.


