1. Киришүү
The Neewer RF-550D Macro LED Ring Flash is designed for close-up photography, scientific research, medical applications, and personal photography. It provides continuous and stable illumination or flash light to enhance image quality in macro environments. This manual provides detailed instructions for the proper setup, operation, and maintenance of your device.
2. Коопсуздук маалыматы
- Аппаратты сууга же нымга тийгизбеңиз.
- Көздүн LED жарыгынын түздөн-түз таасиринен алыс болуңуз.
- Көрсөтүлгөн батареянын түрүн гана колдонуңуз (4 AA батарейка).
- Балдар жетпеген жерде сактаңыз.
- Агрегатты өз алдынча бөлүүгө же оңдоого аракет кылбаңыз. Квалификациялуу тейлөө кызматкерлерине кайрылыңыз.
- Ensure the device is securely mounted to prevent accidental drops.
3. Пакеттин мазмуну
Пакетиңизде бардык буюмдар бар экенин текшериңиз:
- Neewer RF-550D Macro LED Ring Flash (48 LEDs)
- Control Unit with LCD Display
- Кубат адаптери/заряддагыч
- 8 x Adapter Rings (49mm, 52mm, 55mm, 58mm, 62mm, 67mm, 72mm, 77mm)
- 4 x Flash Diffusers (White, Transparent, Blue, Yellow)

Image: All components of the Neewer RF-550D Macro LED Ring Flash, including the ring light, control unit, power adapter, and various adapter rings and diffusers.

Image: A set of eight black adapter rings, clearly labeled with sizes 49mm, 52mm, 55mm, 58mm, 62mm, 67mm, 72mm, and 77mm, used to attach the ring flash to various camera lenses.
4. Продукт бүтүп калдыview
The control unit features an LCD display and several buttons for managing the flash and light functions.

Сүрөт: жакын план view of the control unit's LCD screen and buttons. Labels indicate: Mode Switch Button (MODE), LED Light Steady On Button (LIGHT), Test Button (PILOT), Power Switch (ON/OFF), Brightness - and Brightness + controls.
5. Орнотуу
5.1. Батареяларды орнотуу
The control unit requires 4 AA batteries (not included). Open the battery compartment cover on the back of the control unit and insert the batteries, ensuring correct polarity (+/-). Close the cover securely.

Image: A diagram showing the correct insertion of four AA batteries into the battery compartment of the control unit. A note indicates that batteries are not included.
5.2. Attaching to Camera Lens
- Select the appropriate adapter ring that matches your camera lens filter thread size (e.g., 49mm, 52mm, etc.).
- Screw the selected adapter ring onto the front of your camera lens.
- Align the Macro LED Ring Flash with the adapter ring. Press the two release buttons on the ring flash and rotate it clockwise until it locks securely onto the adapter ring.

Image: A hand demonstrating how to attach the ring flash to a camera lens using an adapter ring. The ring flash is shown securely mounted on the lens.
5.3. Башкаруу блогун орнотуу
Slide the control unit onto your camera's hot shoe mount until it clicks into place. Ensure it is firmly seated.
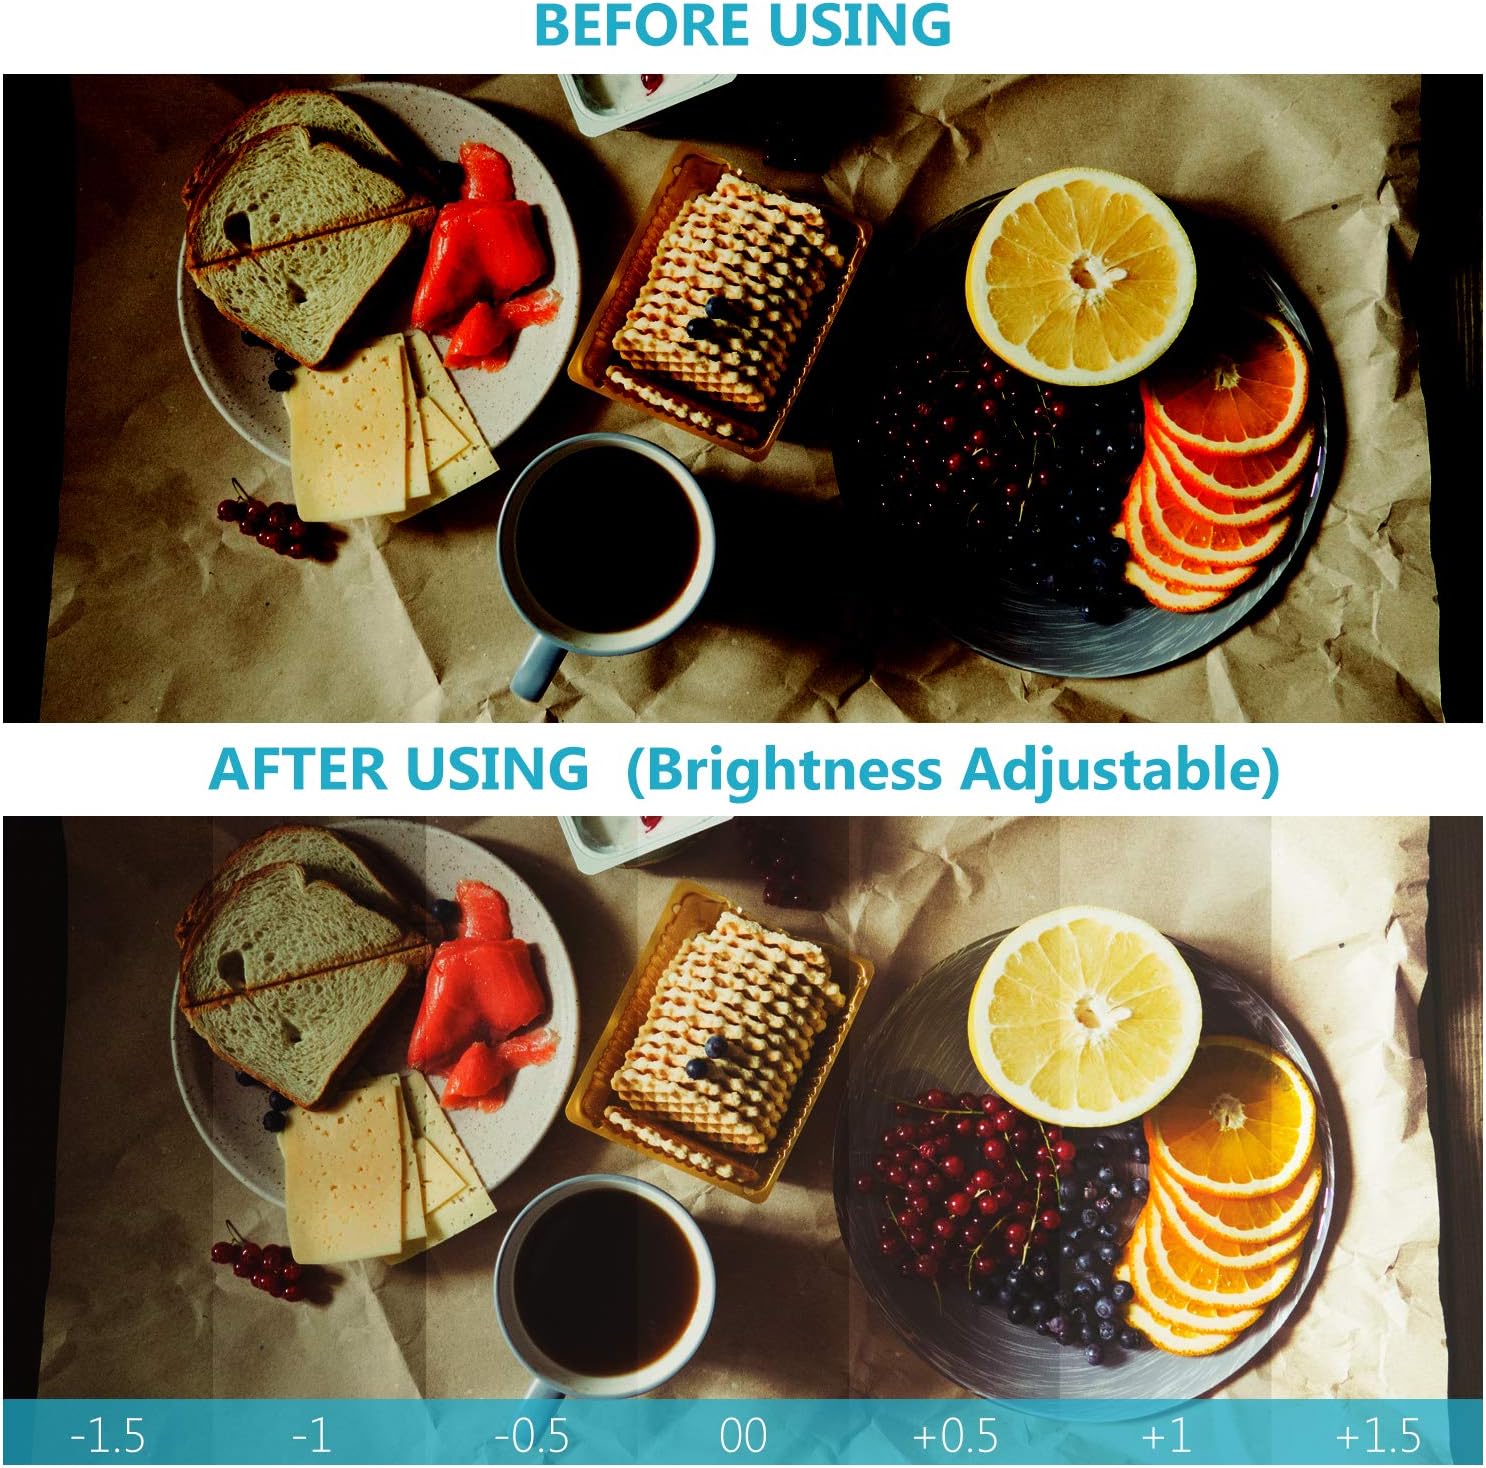
Image: The control unit of the ring flash is shown mounted on the hot shoe of a DSLR camera, connected to the ring light via a coiled cable.
6. Операция
6.1. Күйгүзүү / Өчүрүү
басып, кармап туруңуз КҮЙГҮЗҮҮ/ӨЧҮРҮҮ button on the control unit for a few seconds to power the device on or off.
6.2. Режимдерди тандоо
басыңыз РЕЖИМ button to cycle through different lighting modes:
- Full-Flash Mode: All 48 LEDs flash simultaneously.
- Left-Flash Mode: Only the left half of the LEDs flash.
- Right-Flash Mode: Only the right half of the LEDs flash.
- Full Light Steady-On Mode: All 48 LEDs provide continuous light.

Image: A collage showing example photographs taken with the four light modes: Left-Flash Mode, Right-Flash Mode, Full-Flash Mode, and Full Light Steady-On Mode, illustrating their effects on subjects.
6.3. Жарыктыкты жөндөө
колдонуу Жарыктык + жана Жарыктык - buttons to adjust the intensity of the light or flash. The LCD display will show the current brightness level.

Image: A comparison showing a scene before and after using the ring flash with adjustable brightness. The 'After Using' section displays a gradient from -1.5 to +1.5, indicating the range of brightness adjustment.
6.4. Түс чыпкаларын колдонуу
The bundle includes four color diffusers (White, Transparent, Blue, Yellow) to modify the color temperature and lighting style of your photographs. Simply snap the desired filter onto the front of the LED ring flash.

Image: A display of four translucent color filters (Blue 9000K, Yellow 3000K, White 5000K, Transparent 5500K) and their corresponding effects on sample portraits, demonstrating different color temperatures and lighting styles.
7. Техникалык тейлөө
- Тазалоо: Use a soft, dry cloth to clean the exterior of the ring flash and control unit. Do not use abrasive cleaners or solvents.
- Сактагыч: When not in use, store the device in a cool, dry place, away from direct sunlight and extreme temperatures. Remove batteries if storing for extended periods.
- Линзага кам көрүү: Keep adapter rings and diffusers clean to ensure optimal light transmission.
8. Кыйынчылыктарды
| Көйгөй | Мүмкүн себеп | Чечим |
|---|---|---|
| Flash күйбөйт. | Low or dead batteries; incorrect camera settings; loose connection. | Replace batteries; check camera flash settings; ensure control unit is securely mounted and cable is connected. |
| Жарык өтө күңүрт/жарык. | Жарыктык туура эмес коюлган. | Adjust brightness using the '+' and '-' buttons on the control unit. |
| Ring flash does not attach to lens. | Incorrect adapter ring size. | Ensure the correct adapter ring size is selected for your lens. |
9. Техникалык шарттар
| Өзгөчөлүк | Деталь |
|---|---|
| Модел | RF-550D (10020025) |
| LED саны | 48 даана |
| Шайкеш орнотуулар | Canon, Nikon (and other DSLR cameras with compatible lens thread sizes) |
| Flash синхрондоштуруу ылдамдыгы | 1/200 or 1/250 seconds |
| Байланыш технологиясы | Зымдуу |
| Зымсыз технология | Оптикалык импульс |
| Тоо түрү | On-camera hot shoe |
| Power Source | 4 AA батарейкалар (киргизилген эмес) |
| Адаптердин шакек өлчөмдөрү | 49мм, 52мм, 55мм, 58мм, 62мм, 67мм, 72мм, 77мм |
| Элемент Салмагы | 1.1 фунт (болжол менен 0.5 кг) |
10. Кепилдик жана колдоо
For warranty information and customer support, please refer to the documentation included with your purchase or visit the official Neewer webсайт. Ар кандай кепилдик дооматтары үчүн сатып алганыңыздын далилин сактаңыз.


