1. Киришүү
Thank you for choosing the Avidsen 107104 Digital Multimeter. This compact, handheld device is designed for measuring various electrical parameters, including DC voltage, AC томtage, DC current, and resistance. It features a 3.5-digit digital display for clear readings and double insulation for enhanced safety. Please read this manual thoroughly before use to ensure proper operation and to prevent potential hazards.
2. Коопсуздук маалыматы
Always observe the following safety precautions when using the multimeter:
- Кош изоляция: The multimeter features double insulation for user protection. Do not attempt to bypass or modify this safety feature.
- Өлчөө категориялары: This device is rated CAT III 300V and CAT II 500V. Ensure that the measurement category and voltage rating are appropriate for the circuit being tested.
- Сыноо өткөргүчтөрүн текшерүү: Before each use, inspect the test leads for any damage to the insulation or exposed metal. Do not use damaged leads.
- Do Not Exceed Maximum Input Values: Refer to the specifications section for maximum input values for each function. Exceeding these limits can damage the meter and pose a safety risk.
- Fuse коргоо: The multimeter is protected by fuses (500mA 500V Fastrapid and 10A 500V Fastrapid). If a fuse blows, replace it only with a fuse of the specified type and rating.
- Батарея деңгээли: Ensure batteries are adequately charged. A low battery indicator may affect measurement accuracy.
- Экологиялык шарттар: Operate the multimeter within the specified operating temperature range (0°C to +40°C).
- Туура туташуу: Always connect the common (COM) test lead first, then the live test lead. Disconnect the live test lead first, then the common test lead.
- Нымдуу шарттардан качыңыз: Do not use the multimeter in wet or damp чөйрөлөр.
3. Продукт бүтүп калдыview
The Avidsen 107104 Digital Multimeter features a clear digital display, a rotary function switch, and input jacks for test leads.

1-сүрөт: Фронт view of the Avidsen 107104 Digital Multimeter, showing the display, rotary switch, and input terminals.
Негизги компоненттер:
- Санариптик дисплей: 3.5-digit LCD for displaying measurement values, with automatic polarity indication. Maximum display: 1999.
- Айлануучу функциянын которгучу: Used to select the desired measurement function and range (e.g., DCV, ACV, DCA, Resistance, Diode, Continuity).
- Киргизүү уячалары:
- COM (Жалпы) Джек: Кара (терс) сыноо зымы үчүн.
- VΩmA Jack: Көлөмдү өлчөөдө кызыл (оң) сыноо өткөргүчү үчүнtage, каршылык же 200 мА чейинки ток.
- 10A Jack: For the red (positive) test lead when measuring current up to 10A. Note: Maximum 10 seconds every 10 minutes for 10A measurements.
- Test Probes: Two insulated test probes (red and black) are included for making connections to the circuit under test.
4. Орнотуу
4.1 Батареяны орнотуу
The Avidsen 107104 Multimeter operates on two 3V AAA batteries (included). To install or replace batteries:
- Мультиметр өчүрүлгөнүн текшериңиз.
- Аппараттын артындагы батарея бөлүкчөсүнүн капкагын табыңыз.
- Use a screwdriver to remove the screw securing the battery compartment cover.
- Этияттык менен капкакты алып салыңыз.
- Бөлүмдүн ичинде көрсөтүлгөндөй, туура полярдуулукту (+ жана -) сактап, эки 3V AAA батарейкасын салыңыз.
- Батарея уясынын капкагын ордуна коюңуз жана аны бурама менен бекитиңиз.
Note: An accumulator level indicator is present to show battery status. Replace batteries when the indicator shows low power to maintain measurement accuracy.
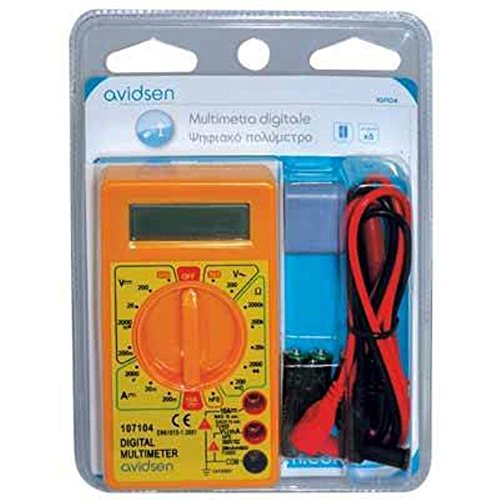
2-сүрөт: Avidsen 107104 Digital Multimeter shown in its retail packaging, which includes the multimeter, test leads, and batteries.
5. Иштөө нускамалары
Before taking any measurements, ensure the test leads are securely plugged into the correct input jacks.
5.1 Өлчөө DC Voltage (V=)
- Insert the red test lead into the VΩmA jack and the black test lead into the COM jack.
- Set the rotary switch to the desired DCV range (e.g., 200m, 2000m, 20, 200, 500). If the voltage белгисиз, эң жогорку диапазондон баштап, зарылчылыкка жараша азайтыңыз.
- Сыноо зонддорун өлчөй турган компонент же схема боюнча туташтырыңыз.
- Томду окуңузtagсанариптик дисплейдеги e мааниси.
5.2 AC ченөө Voltage (V~)
- Insert the red test lead into the VΩmA jack and the black test lead into the COM jack.
- Set the rotary switch to the desired ACV range (e.g., 200, 500). If the voltage белгисиз, эң жогорку диапазондон баштаңыз.
- Сыноо зонддорун AC том аркылуу туташтырыңызtage булагы.
- Томду окуңузtagсанариптик дисплейдеги e мааниси.
5.3 Туруктуу токту өлчөө (A=)
- For currents up to 200mA: Insert the red test lead into the VΩmA jack and the black test lead into the COM jack.
- 10А чейин ток үчүн: Insert the red test lead into the 10A jack and the black test lead into the COM jack. Caution: Do not measure more than 10 seconds every 10 minutes when using the 10A range.
- Set the rotary switch to the desired DCA range (e.g., 2000µ, 20m, 200m, 10A).
- Turn off the power to the circuit. Open the circuit where the current is to be measured.
- Мультиметрди чынжыр менен катар туташтырыңыз.
- Схемадагы кубаттуулукту күйгүзүңүз.
- Санарип дисплейдеги учурдагы маанини окуңуз.
- Turn off the power, disconnect the multimeter, and restore the circuit.
5.4 Каршылыкты өлчөө (Ω)
- Insert the red test lead into the VΩmA jack and the black test lead into the COM jack.
- Set the rotary switch to the desired Resistance range (e.g., 200, 2000, 20k, 200k, 2000k).
- Өлчөнүүчү чынжырдын же компоненттин энергиясы өчүрүлгөнүн текшериңиз.
- Сыноо зонддорун компоненттин үстүнө туташтырыңыз.
- Санарип дисплейдеги каршылыктын маанисин окуңуз.
5.5 Диод сыноо ( )
)
- Insert the red test lead into the VΩmA jack and the black test lead into the COM jack.
- Set the rotary switch to the Diode test position.
- Кызыл зондду анодго, ал эми кара зондду диоддун катодуна туташтырыңыз. Алдыга вольтtagтөмөндөө (кремний диоддору үчүн адатта 0.5 Вдан 0.8 Вга чейин) көрсөтүлөт.
- Зонддорду тескери буруңуз. Жакшы диод үчүн дисплейде "OL" (Open Loop) көрсөтүлүшү керек.
5.6 Үзгүлтүксүздүк тести ()
- Insert the red test lead into the VΩmA jack and the black test lead into the COM jack.
- Set the rotary switch to the Continuity test position.
- Connect the test probes across the component or circuit.
- If the resistance is below a certain threshold (typically around 50Ω), the multimeter will emit an audible beep, indicating continuity. The display will also show the resistance value.
6. Техникалык тейлөө
6.1 Тазалоо
Ишти жарнама менен сүртүңүзamp cloth and mild detergent. Do not use abrasives or solvents. Ensure the multimeter is completely dry before use.
6.2 Батареяны алмаштыруу
Refer to section 4.1 for battery replacement instructions. Replace batteries promptly when the low battery indicator appears to ensure accurate readings.
6.3 Сактагычты алмаштыруу
If the multimeter fails to measure current, the fuse may be blown. To replace a fuse:
- Мультиметрдин ӨЧҮРҮҮЛҮГҮН жана сыноо өткөргүчтөрү ажыратылганын текшериңиз.
- Remove the battery compartment cover (refer to 4.1).
- Carefully locate the fuse(s) inside the compartment.
- Gently remove the blown fuse.
- Replace it only with a fuse of the exact specified type and rating:
- For VΩmA input: 500mA 500V Fastrapid (FØ 5 x 20 mm)
- For 10A input: 10A 500V Fastrapid (FØ 5 x 20 mm)
- Батарея уясынын капкагын ордуна коюп, аны бекитиңиз.
7. Кыйынчылыктарды
| Көйгөй | Мүмкүн себеп | Чечим |
|---|---|---|
| Эч кандай дисплей же начар дисплей | Өлгөн же аз батареялар | Replace batteries (see Section 4.1) |
| "OL" (Ашыкча жүктөө) көрсөтүлөт | Input value exceeds selected range or meter's maximum capacity | Select a higher range or ensure input is within meter's limits. |
| Туура эмес же туруксуз көрсөткүчтөр | Low battery, poor test lead connection, incorrect range selection, external interference | Replace batteries, check connections, select appropriate range, move away from strong electromagnetic fields. |
| Токту өлчөө мүмкүн эмес | Blown fuse, incorrect test lead connection (e.g., using VΩmA jack for 10A measurement) | Check and replace fuse (see Section 6.3), ensure test lead is in the correct current jack (VΩmA or 10A). |
8. Техникалык шарттар
- Дисплей: 3.5-digit LCD, Max. 1999, with automatic polarity indication.
- Өлчөө коэффициенти: 2-3 updates per second.
- Кубат булагы: 2 x 3V AAA batteries (included).
- Эритиндилер:
- 500mA 500V Fastrapid (for VΩmA input)
- 10A 500V Fastrapid (for 10A input)
- Кош изоляция: Ооба.
- Коопсуздук рейтинги: CAT III 300V, CAT II 500V.
- Иштөө температурасы: 0°Cден +40°Cге чейин.
- Сактоо температурасы: -10°Cден +50°Cге чейин.
- Өлчөмдөрү: 126 мм x 70 мм x 27 мм.
- Салмагы: Approximately 210g (with batteries).
- Функциялары: DC Voltage, AC Voltage, DC Current, Resistance, Diode Test, Continuity Test.
9. Кепилдик жана колдоо
Avidsen products are manufactured to high-quality standards. For warranty information or technical support, please refer to the warranty card included with your product or visit the official Avidsen webсайт. Сатып алганыңыздын далили катары сатып алуу дүмүрчөгүңүздү сактаңыз.


