1. Киришүү
This manual provides comprehensive instructions for the safe and efficient operation of your VERITAS Sarah Sewing Machine, Model 1301. Designed for ease of use, this machine is suitable for beginners and experienced sewers alike, offering essential functions for various sewing projects. Please read this manual thoroughly before using the machine to ensure proper setup, operation, and maintenance.

Сүрөт 1.1: The VERITAS Sarah Sewing Machine. This image displays the compact white sewing machine with red accents, featuring two rotary dials on the front for stitch selection and length adjustment.

Сүрөт 1.2: Key benefits for users. This image highlights the machine's suitability for all who want to start sewing, requiring no prior experience, offering particularly simple operation, and being excellent for all common fabrics, including fine materials like chiffon, silk, and satin.
2. Коопсуздук эскертүүлөрү
Коопсуз иштөөнү камсыз кылуу жана жаракаттарды же бузулууларды болтурбоо үчүн, төмөнкү коопсуздук эрежелерин сактаңыз:
- Children and individuals with limited physical, sensory, or mental capabilities should only use the machine after receiving thorough instruction and under constant supervision.
- Never leave the machine unattended, especially in areas accessible to children.
- Always disconnect the machine from the power supply before cleaning, performing maintenance, or when not in use.
- Keep fingers away from all moving parts, especially the needle, during operation.
- Өндүрүүчү тарабынан сунушталган аксессуарларды жана тиркемелерди гана колдонуңуз.
- Эгерде анын шнуру же сайы бузулса, же ал туура иштебей жатса, аны иштетпеңиз.
- Колдонуу учурунда машинанын туруктуу, түз бетине коюлганын текшериңиз.
3. Кутунун Мазмуну
Upon unpacking your VERITAS Sarah Sewing Machine, please verify that all the following items are included:
- VERITAS Sarah Sewing Machine
- 5 Quality Needles
- All-round Sewing Foot
- Сыдырма буту
- Buttonhole Foot
- Brush
- Seam Ripper
- 3 Бобин
- Embroidery and Darning Plate
- Screwdriver
- Edge Ruler
- 2 Felt Pads
- Instruction Manual

Сүрөт 3.1: Extensive accessories included with the VERITAS Sarah. This image shows various accessories such as quality needles, a zipper foot, and highlights the machine's suitability for multi-layer fabrics.
4. Негизги өзгөчөлүктөрү
The VERITAS Sarah Sewing Machine is equipped with features designed for efficient and versatile sewing:
- 13 Stitch Programs: Offers a variety of essential stitches for different sewing needs.
- 4-Step Buttonhole Function: Ырааттуу топчу тешиктерин түзүүнү жөнөкөйлөштүрөт.
- Жөнгө салынуучу Тигүү узундугу: Easily set stitch length between 0 and 4 mm using a rotary wheel.
- Жогорку моменттүү мотор: Capable of handling thicker fabrics such as denim and canvas.
- Integrated Wire Cutter: Жипти ыңгайлуу кыркуу үчүн.
- Free Arm Function: Ideal for sewing cylindrical items like sleeves, cuffs, and pant hems.
- Glare-Free LED Light: Көрүнүүнү жакшыртуу үчүн тигүүчү жерди жарыктандырат.
- Automatic Thread Tensioner: Helps maintain optimal thread tension for balanced stitches.
- Snap-On Presser Foot System: Allows for quick and easy changing of presser feet, includes 6 different feet.
- Тигүү ылдамдыгы: Up to 750 stitches per minute.
- Removable Accessory Compartment: Provides convenient storage for tools and accessories.
- Мыкты курулуш: Features a stable, durable aluminum die-cast frame.

Сүрөт 4.1: Performance features of the VERITAS Sarah. This image highlights a sewing speed of 750 stitches per minute, the Snap-On presser foot system including 6 presser feet, and the integrated LED sewing light.

Сүрөт 4.2: Stitch capabilities of the VERITAS Sarah. This image illustrates the maximum stitch length of 4 mm, maximum stitch width of 5 mm, 13 different stitches, a 4-step automatic buttonhole function, and adjustable stitch length.
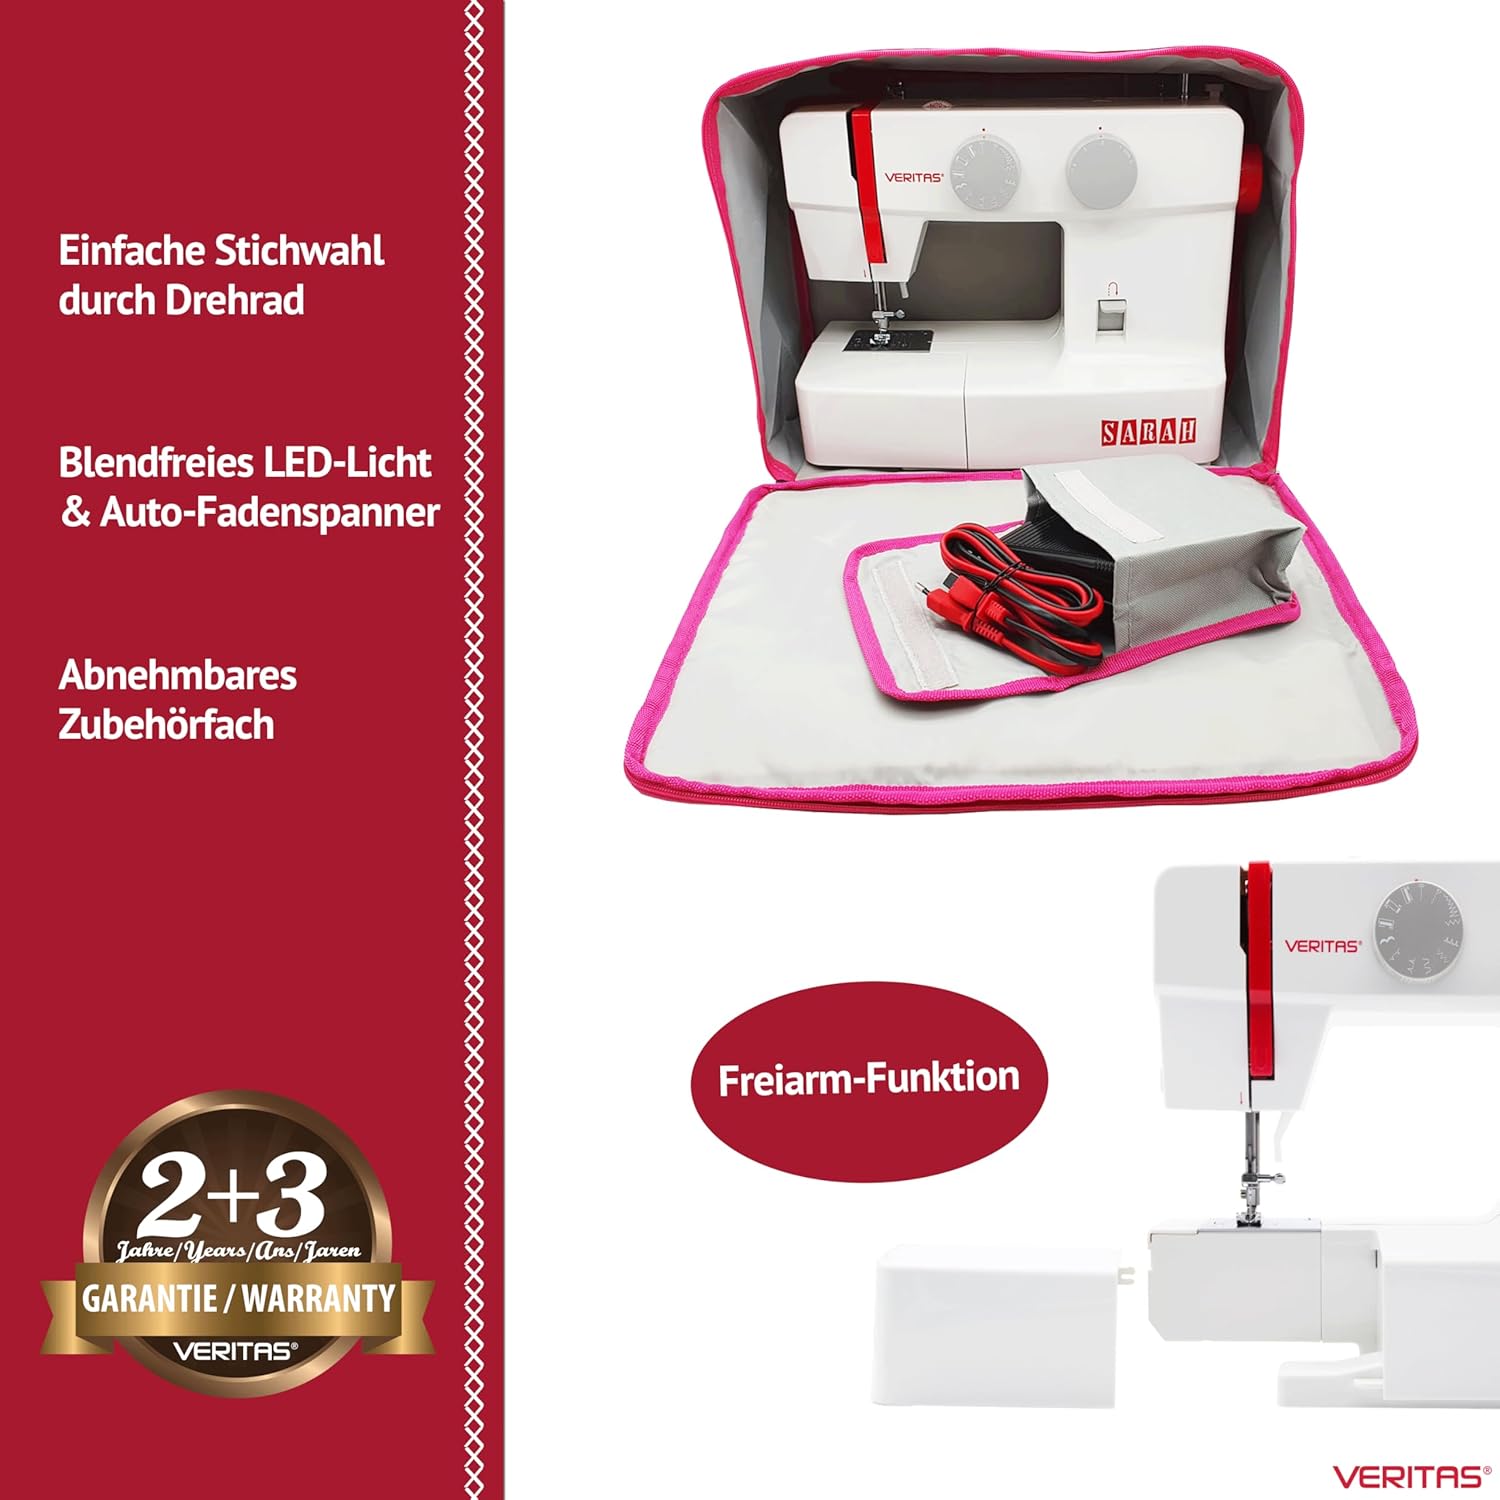
Сүрөт 4.3: Convenience features of the VERITAS Sarah. This image shows easy stitch selection via a rotary dial, glare-free LED light, auto-thread tensioner, a removable accessory compartment, and the free-arm function.
5. Орнотуу
5.1 Пакеттен чыгаруу жана жайгаштыруу
- Тигүүчү машинаны таңгагынан этияттык менен чыгарыңыз.
- Машинаны туруктуу, тегиз жана жетиштүү жарыктандырылган жерге коюңуз.
- Машинанын айланасында ыңгайлуу иштөө жана кездемени кармоо үчүн жетиштүү орун бар экенине ынаныңыз.
5.2 Кубат туташтыруу
- Бутту башкаруучу сайгычты машинанын электр розеткасына туташтырыңыз.
- Электр шнурын ылайыктуу электр розеткасына сайыңыз.
- Turn on the machine using the power switch, usually located on the side or back.
5.3 Бобинди ороо
- Спулдун төөнөгүчтүн үстүнө жиптин катушкасын коюңуз.
- Жипти үстүнкү жиптин багыттоочусу аркылуу жана катушка оромунун тарткыч дискинин айланасынан өткөрүңүз.
- Insert the thread through the hole in the bobbin and place the bobbin onto the bobbin winder spindle.
- Орап оруучу шпиндельди оңго түртүңүз.
- Gently press the foot controller to start winding. Stop when the bobbin is full.
- Жипти кесип, бобин орогучтун шпинделди кайра солго түртүңүз.
5.4 Бобинди салуу
- Бобин капкагын ачыңыз.
- Жиптин туура багытта (көбүнчө саат жебесине каршы) жайылышын камсыз кылуу менен, оролгон бобинди бобин кутусуна киргизиңиз.
- Жипти тартуу пружинасы аркылуу өткөрүп, жипти багыттоочу уячага киргизиңиз.
- Бобин капкагын жабыңыз.
5.5 Үстүнкү жипти жип салуу
- Басуу бутунун рычагын көтөрүңүз.
- Спулдун төөнөгүчтүн үстүнө жиптин катушкасын коюңуз.
- Машинада көрсөтүлгөн номерленген жип өтүү жолун басып, жипти бардык багыттагычтар жана тартуу дисктери аркылуу өткөрүңүз.
- Bring the thread down and through the needle eye from front to back.
- Pull about 15 cm (6 inches) of thread through the needle eye and under the presser foot.
5.6 Катушка жибин көтөрүү
- Сол колуңуз менен үстүнкү жипти акырын кармаңыз.
- Ийнени ийне пластинасына түшүрүү үчүн руль дөңгөлөгүн өзүңүзгө буруңуз, андан кийин аны кайра көтөрүңүз.
- The upper thread will catch the bobbin thread, forming a loop. Pull the loop to bring the bobbin thread up through the needle plate hole.
- Эки жипти тең (үстүнкү жана катушка) басуучу буттун астына жана машинанын артына тартыңыз.
6. Иштөө нускамалары
6.1 Тигүүнү тандоо
The VERITAS Sarah offers 13 different stitch patterns. To select a stitch, turn the stitch selection dial (left rotary wheel) until the desired stitch pattern aligns with the indicator mark.
6.2 Тигүү узундугун тууралоо
Adjust the stitch length using the stitch length dial (right rotary wheel). You can set the length between 0 and 4 mm. For most general sewing, a length of 2.5 mm is suitable.
6.3 Тигүүнү баштоо
- Кездемени басуучу буттун астына кой.
- Басуу бутунун рычагын түшүрүңүз.
- Gently press the foot controller to start sewing. The harder you press, the faster the machine will sew.
- Guide the fabric gently with both hands, but do not push or pull it forcefully.
6.4 Тескери тигүү
Тигиштин башындагы жана аягындагы тигиштерди бекемдөө үчүн, тескери рычагды/баскычты басып, кармап туруңуз. Машина артка карай тигет. Алдыга карай тигүүнү улантуу үчүн рычагды/баскычты коё бериңиз.
6.5 Finishing a Seam
- Тигишти бекитүү үчүн бир нече тескери тигиштерди тигиңиз.
- Ийнени өзүңүзгө карай буруп, эң жогорку абалга көтөрүңүз.
- Басуу бутунун рычагын көтөрүңүз.
- Pull the fabric towards the back of the machine.
- Use the integrated thread cutter or scissors to cut the threads, leaving about 10-15 cm (4-6 inches) of thread.
6.6 Buttonhole Sewing (4-Step)
- Илгичтин бутун тиркеңиз.
- Mark the buttonhole position on your fabric.
- Select the first step of the buttonhole program on the stitch selection dial.
- Топчу тешигинин биринчи тарабын тигиңиз.
- Change to the next step on the dial and sew the bar tack.
- Continue through all four steps, following the machine's instructions for each segment of the buttonhole.
- Use the seam ripper to carefully open the buttonhole.
6.7 Кол менен эркин тигүү
To use the free arm, simply slide off the accessory compartment. This exposes the narrow free arm, making it easier to sew small, circular items.
7. Техникалык тейлөө
Regular maintenance ensures the longevity and optimal performance of your sewing machine. Always disconnect the machine from the power supply before performing any maintenance.
7.1 Бобин аймагын тазалоо
- Ийнени, басуучу бутту жана ийне пластинасын алып салыңыз.
- Бобин кутусун алып салыңыз.
- Use the small brush provided to remove any lint and dust accumulated in the bobbin area and feed dog teeth.
- Бөлүктөрдү кайра чогултуңуз.
7.2 Oiling (If Applicable)
Refer to the detailed instruction manual for specific oiling points and frequency. Generally, a few drops of sewing machine oil in designated areas can keep moving parts running smoothly. Avoid over-oiling.
7.3 Ийне алмаштыруу
Replace the needle regularly (after 8-10 hours of sewing) or if it becomes bent, dull, or broken. Use the screwdriver to loosen the needle clamp screw, remove the old needle, insert a new one with the flat side facing the back, and tighten the screw. Ensure the needle is fully inserted.
8. Кыйынчылыктарды
This section addresses common issues you might encounter. For more detailed troubleshooting, consult the full instruction manual.
8.1 Өткөрүлгөн тигүү
- Себеби: Туура эмес ийне, ийилген ийне, жип туура эмес өткөрүлгөн, кездеменин ийне өлчөмү туура эмес.
- Чечим: Replace the needle with a new, correct type and size for your fabric. Re-thread the machine completely, ensuring all guides are followed.
8.2 Thread Breakage (Upper Thread)
- Себеби: Incorrect upper thread tension, improperly threaded, burr on needle eye or thread path, poor quality thread, needle inserted incorrectly.
- Чечим: Check and adjust upper thread tension. Re-thread the machine. Inspect the needle and thread path for rough spots. Use good quality thread. Ensure needle is correctly inserted.
8.3 Thread Breakage (Bobbin Thread)
- Себеби: Improperly wound bobbin, incorrect bobbin insertion, lint in bobbin case, incorrect bobbin tension.
- Чечим: Re-wind the bobbin evenly. Re-insert the bobbin correctly. Clean the bobbin case area.
8.4 Uneven Stitches / Looping
- Себеби: Incorrect thread tension (upper or bobbin), improper threading, wrong needle size, pulling fabric.
- Чечим: Adjust thread tensions. Re-thread both upper and bobbin threads. Use the correct needle. Allow the feed dogs to move the fabric naturally.
8.5 Машина иштебей жатат
- Себеби: Power cord not plugged in, power switch off, bobbin winder spindle engaged, machine jammed.
- Чечим: Check power connections. Ensure power switch is on. Disengage bobbin winder spindle. Check for thread jams in the bobbin area or needle plate.
9. Техникалык шарттар
| Бренд | VERITAS |
| Модель номери | 1301 |
| Продукциянын өлчөмдөрү (L x W x Y) | 37 x 16 x 29.5 см |
| Элемент Салмагы | 5 кг |
| Материал | Metal (Aluminum Die-Cast Frame), Plastic |
| Тигүү программалары | 13 |
| Топчу тешик түрү | 4-Step Automatic |
| Макс. Тигүү узундугу | 4 мм |
| Max. Stitch Width | 5 мм |
| Тигүү ылдамдыгы | 750 тигүү/мүнөт |
| Жарыктандыруу | LED |
| Power Source | Электр зымдары |

Сүрөт 9.1: Dimensions of the VERITAS Sarah Sewing Machine. This image provides a visual representation of the machine's length (37 cm), width (16 cm), and height (29.5 cm).
10. Кепилдик жана колдоо
10.1 Кепилдик маалыматы
The VERITAS Sarah Sewing Machine comes with a 5 жылдык өндүрүүчүнүн кепилдиги. This typically includes a standard 2-year warranty, which can be extended by an additional 3 years upon product registration. Please refer to the warranty card included in your packaging or the manufacturer's official website for detailed terms and conditions regarding warranty claims and registration procedures.

Сүрөт 10.1: Comparison highlighting VERITAS quality and warranty. This image emphasizes the stable aluminum die-cast frame, high piercing power for all fabrics, modern manufacturing, and the 5-year extended manufacturer's warranty upon registration.
Сүрөт 10.2: Visual representation of the 2+3 year warranty for the VERITAS Sarah. This image clearly shows "2+3 Jahre/Years/Ans/Jaren GARANTIE/WARRANTY VERITAS".
10.2 Кардарларды колдоо
For technical assistance, spare parts, or further inquiries, please contact VERITAS customer support. Contact details can typically be found on the manufacturer's webсайтында же продуктуңузга кошулган документтерде.


