1. Киришүү
This manual provides detailed instructions for the safe and effective operation of your Profile 191000001 Digital Multimeter. This device is designed for measuring DC/AC voltage, DC current, resistance, diode forward voltage drop, and transistor hFE. Please read this manual thoroughly before use and retain it for future reference.
2. Коопсуздук маалыматы
WARNING: Failure to follow these safety instructions can result in electric shock, fire, or personal injury.
- Always ensure the multimeter is in good working condition before use. Inspect test leads for damage.
- Баалангандан ашык колдонбоңузtage (600V DC/AC) between the terminals or between any terminal and ground.
- Том менен иштөөдө өтө этият болуңузtag30V AC RMS, 42V пик же 60V DC жогору. Бул томtagшок коркунучун жаратат.
- Функцияларды өзгөртүүдөн мурун ар дайым сыноо өткөргүчтөрүн чынжырдан ажыратыңыз.
- Do not attempt to measure current on a circuit with voltage 600V ашкан.
- Өлчөө үчүн туура функция жана диапазон тандалганын текшериңиз.
- Батареяны так көрсөткүчтөрдү камсыз кылуу үчүн батарейка аз индикатор пайда болгондо алмаштырыңыз.
- Мультиметрди жарылуучу атмосферада же тез күйүүчү газдар же чаң бар жерде иштетпеңиз.
3. Пакеттин мазмуну
Төмөндө тизмеленген нерселердин баары пакетиңизде бар экенин текшериңиз:
- Profile 191000001 санарип мультиметр
- One pair of Test Leads (Red and Black)
- Transistor hFE Test Adapter
- 2 x 1.5V AAA Batteries (may be pre-installed)
- User Manual

Figure 1: The Profile 191000001 Digital Multimeter, including the main unit, red and black test leads, and the hFE transistor test adapter.
4. Орнотуу
4.1. Батареяны орнотуу
The multimeter requires two 1.5V AAA batteries for operation. These are typically included and may be pre-installed. If not, or if replacement is needed:
- Мультиметр өчүрүлгөнүн текшериңиз.
- Аппараттын артындагы батарея бөлүкчөсүнүн капкагын табыңыз.
- Капкакты бекитүүчү буроону алып салуу үчүн бурагычты колдонуңуз.
- Insert the two AAA batteries, observing the correct polarity (+ and - markings).
- Батарея уясынын капкагын ордуна коюңуз жана аны бурама менен бекитиңиз.
4.2. Сыноо линияларын туташтыруу
The test leads are essential for making measurements. Connect them as follows:
- Кара тест өткөргүчтү "COM" (Жалпы) уячасына салыңыз.
- Көпчүлүк үчүн томtage, resistance, and diode measurements, insert the red test lead into the 'VΩmA' jack.
- For current measurements up to 10A, insert the red test lead into the '10A' jack.
5. Иштөө нускамалары
The multimeter features a rotary switch to select the desired measurement function and range. The display will show the measurement value.
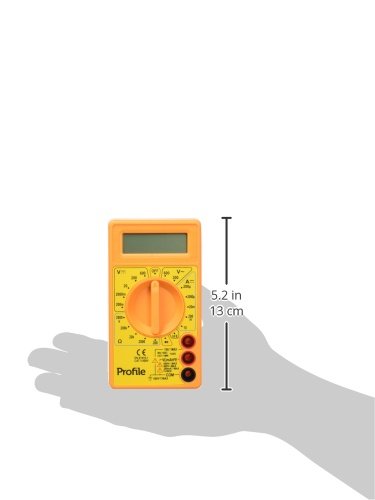
Figure 2: The Profile 191000001 Digital Multimeter with an overlay indicating its approximate dimensions (13 cm height).
5.1. DC Voltage (V---)
- Connect the red test lead to the 'VΩmA' jack and the black test lead to the 'COM' jack.
- Айлануучу которгучту каалаган DC Voltage range (e.g., 20V, 200V, 600V). If the voltage белгисиз, эң жогорку диапазондон баштап, зарылчылыкка жараша азайтыңыз.
- Сыноо өткөргүчтөрүн өлчөнө турган компонент же схема боюнча параллелдүү туташтырыңыз.
- Томду окуңузtage мааниси дисплейде.
5.2. Өлчөө AC Voltage (V~)
- Connect the red test lead to the 'VΩmA' jack and the black test lead to the 'COM' jack.
- Айлануучу которгучту керектүү AC Voltage диапазону (мисалы, 200V, 600V).
- Connect the test leads in parallel across the AC source or component.
- Томду окуңузtage мааниси дисплейде.
5.3. Measuring DC Current (A---)
CAUTION: To avoid damage to the multimeter or the circuit, never connect the multimeter in parallel when measuring current. Always connect it in series.
- For currents up to 200mA, connect the red test lead to the 'VΩmA' jack. For currents up to 10A, connect the red test lead to the '10A' jack. The black test lead always connects to 'COM'.
- Айланма которгучту каалаган туруктуу токтун диапазонуна коюңуз (мисалы, 200µA, 2mA, 20mA, 200mA, 10A).
- Ток күчү өлчөнө турган чынжырды ачып, мультиметрди удаалаш туташтырыңыз.
- Дисплейдеги учурдагы маанини окуңуз.
5.4. Каршылыкты өлчөө (Ω)
- Connect the red test lead to the 'VΩmA' jack and the black test lead to the 'COM' jack.
- Айланма которгучту каалаган каршылык диапазонуна коюңуз (мисалы, 200Ω, 2kΩ, 20kΩ, 200kΩ, 2MΩ).
- Каршылыкты өлчөөдөн мурун чынжыр же тетиктин энергиясы өчүрүлгөнүн текшериңиз.
- Компонент боюнча сыноо өткөргүчтөрүн туташтырыңыз.
- Дисплейдеги каршылык маанисин окуп чыгыңыз.
5.5. Диод сыноо
- Connect the red test lead to the 'VΩmA' jack and the black test lead to the 'COM' jack.
- Set the rotary switch to the diode symbol (→|).
- Кызыл зымды анодго, ал эми кара зымды диоддун катодуна туташтырыңыз. Дисплейде алдыга карай вольт көрсөтүлөт.tagд тамчы.
- Reverse the leads. The display should show 'OL' (Overload) for a good diode.
5.6. Транзистор hFE сыноо
- Айланма которгучту 'hFE' абалына коюңуз.
- Insert the transistor hFE test adapter into the designated sockets on the multimeter.
- Identify if the transistor is NPN or PNP and its Emitter (E), Base (B), Collector (C) terminals.
- Insert the transistor leads into the corresponding holes on the hFE adapter.
- Read the hFE (DC current gain) value on the display.
6. Техникалык тейлөө
6.1. Батареяны алмаштыруу
Дисплейде батареянын заряды аз калганын көрсөткөн индикатор пайда болгондо, өлчөөлөрдүн тактыгын камсыз кылуу үчүн батареяларды тез арада алмаштырыңыз. Батареяны орнотуу боюнча нускамаларды 4.1-бөлүмдөн караңыз.
6.2. Тазалоо
Мультиметрди тазалоо үчүн корпусту жарнама менен сүртүңүзamp кездеме жана жумшак жуугуч. Абразивдерди же эриткичтерди колдонбоңуз. Колдонуудан мурун аппарат толугу менен кургак экенин текшериңиз.
6.3. Сактоо
If the multimeter is not used for an extended period, remove the batteries to prevent leakage and store the device in a cool, dry place away from direct sunlight.
7. Кыйынчылыктарды
- Дисплей жок же дисплей алсыз: Check battery charge and ensure they are correctly installed. Replace batteries if necessary.
- 'OL' (Overload) on display: Ченелген маани тандалган диапазондон ашып кетти. Жогорку диапазонго которулуңуз.
- Туура эмес окуулар: Ensure test leads are properly connected, the correct function and range are selected, and the batteries are not low. Verify the circuit is de-energized for resistance measurements.
- No reading for current: Ensure the multimeter is connected in series with the circuit and the correct current jack (VΩmA or 10A) is used for the red lead.
8. Техникалык шарттар
| Өзгөчөлүк | Спецификация |
|---|---|
| Модель номери | 191000001 |
| Max DC/AC Voltage | 600V |
| Max DC Current | 10A |
| Resistance Measurement | Ооба |
| Diode Measurement | Ооба |
| Транзистор hFE өлчөө | Ооба |
| Power Source | 2 x 1.5V AAA батареялары |
| Продукциянын өлчөмдөрү (L x W x Y) | 13.5 x 3 x 18.9 см (5.3 x 1.2 x 7.4 дюйм) |
| Продукт Салмагы | 0.22 кг (0.48 фунт) |
| Өндүрүүчү | Eltra N.V. |
9. Кепилдик жана колдоо
9.1. Кепилдик
This Profile 191000001 Digital Multimeter comes with a 2-year warranty from the date of purchase, covering manufacturing defects. This warranty does not cover damage caused by misuse, unauthorized modification, accident, or normal wear and tear.
9.2. Кардарларды колдоо кызматы
For technical assistance, warranty claims, or further inquiries, please contact your retailer or the manufacturer's customer support channels. Please have your product model number and proof of purchase ready when contacting support.


