Introduction
This manual provides comprehensive instructions for the installation, operation, and maintenance of your Baldwin L024.MR L024 Style Door Levers. Please read these instructions carefully before beginning installation to ensure proper function and longevity of your product. This product is designed for residential use and features a Non-Lacquered Brass finish, which will naturally patina over time.
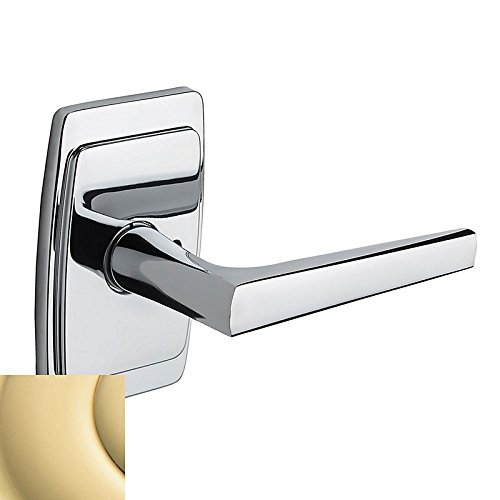
Image: Baldwin L024.MR L024 Style Door Levers. This image displays the complete set of door levers in their Non-Lacquered Brass finish, showcasing the design and components.
Коопсуздук маалыматы
Always follow basic safety precautions when installing or maintaining door hardware. Failure to do so may result in injury or damage to the product.
- Орнотуу учурунда коопсуздук көз айнек сыяктуу тиешелүү жеке коргоочу шаймандарды тагыныңыз.
- Ensure all screws are tightened securely, but do not overtighten, which can strip threads or damage components.
- Тумчугуп калуу коркунучун болтурбоо үчүн кичинекей бөлүктөрүн балдардан алыс кармаңыз.
- Эгер кандайдыр бир кадамга ишенбесеңиз, квалификациялуу адиске кайрылыңыз.
Пакеттин мазмуну
Орнотууну баштоодон мурун бардык компоненттер бар экендигин текшериңиз.
- Сырткы рычагды чогултуу
- Ички рычагдын жыйындысы
- Лач механизми
- Strike Plate
- Монтаждоо бурамалар (ар кандай өлчөмдөгү)
- Шпиндель
- Орнотуу шаблоны (эгер камтылган болсо)
Сүрөт: жарылды view of Baldwin L024.MR L024 Door Lever components. This diagram illustrates all individual parts included in the package, helping to identify each component before assembly.
Орнотуу жана орнотуу
Керектүү куралдар
- Филлипс баш бурагычы
- Өлчөө лентасы
- Карандаш
- Drill (optional, for new installations)
- Wood Chisel (optional, for strike plate mortise)
Орнотуу кадамдары
- эшикти даярдоо: If installing on a new door, use the provided template to mark and drill holes for the latch and lever assemblies. For existing doors, remove old hardware. Ensure the door bore is standard (typically 2-1/8 inches) and the backset is correct (2-3/8 or 2-3/4 inches).
Image: Door prepared for installation. This image shows a door with the necessary holes drilled for the latch and lever, ready for hardware mounting.
- Кулпу механизмин орнотуу: Кулпу механизмин эшиктин четки тешигине салыңыз. Кулпу болтунун кыйшайган жери эшиктин рамасына караганын текшериңиз. Аны берилген бурамалар менен бекитиңиз.
Image: Latch mechanism being installed. This image demonstrates the correct orientation and placement of the latch mechanism within the door edge.
- Сырткы рычаг топтомун орнотуу: Place the exterior lever assembly onto the door, aligning the spindle through the latch mechanism.
Image: Exterior lever assembly placement. This image shows the exterior lever assembly positioned on the door, with the spindle inserted into the latch.
- Ички рычаг топтомун орнотуу: Position the interior lever assembly over the spindle and align the mounting holes with the exterior assembly. Secure both assemblies together using the through-bolts or screws provided. Tighten evenly.
Image: Interior lever assembly being secured. This image illustrates the process of attaching the interior lever to the exterior assembly using mounting screws.
- Strike Plate орнотуу: Close the door and mark the position of the latch bolt on the door frame. Mortise the frame if necessary and install the strike plate with the provided screws. Ensure the latch bolt engages smoothly.
Image: Strike plate installation on door frame. This image shows the strike plate being mounted on the door frame, aligned with the latch bolt.
- Сыноо операциясы: Open and close the door several times, operating the levers to ensure smooth and proper latching. Adjust screws if necessary.
Операция
The Baldwin L024.MR L024 door levers are designed for simple and reliable operation.
- Эшикти ачуу: Depress the lever handle downwards to retract the latch bolt. Pull or push the door open.
- Эшикти жабуу: Simply push the door shut. The spring-loaded latch bolt will retract as it contacts the strike plate and then extend to secure the door.
- Бөгөттөө механизми: To lock the door from the exterior, insert the key and turn. To lock from the interior, use the turn-button or push-button mechanism (if present).
Image: Hand operating a Baldwin L024.MR L024 door lever. This image demonstrates the natural motion of depressing the lever to open the door.
Техникалык тейлөө
Proper care will ensure the lasting beauty and functionality of your Baldwin door levers.
- Тазалоо: Clean the Non-Lacquered Brass finish with a soft, damp cloth. Avoid abrasive cleaners, solvents, or polishing agents, as these can damage the natural finish.
- Патина: The Non-Lacquered Brass finish is designed to age naturally, developing a unique patina over time. This is a characteristic of the material and not a defect.
- Майлоо: Periodically apply a small amount of silicone-based lubricant to the latch bolt and internal mechanisms to ensure smooth operation. Do not use oil-based lubricants, which can attract dust.
- Катуу бурамалар: Check mounting screws periodically and tighten if they have become loose. Do not overtighten.
Проблемаларды чечүү
| Көйгөй | Мүмкүн себеп | Чечим |
|---|---|---|
| Рычаг бош же солкулдап турат. | Монтаждоо бурамдары бош. | Монтаж бурамаларын тегиз бекемдеп тартыңыз. |
| Бекер болт жылмакай тартылбайт. | Mechanism is dry or obstructed. | Apply silicone-based lubricant to the latch bolt and internal components. Check for debris. |
| Эшик туура бекитилбейт. | Стрейк плитасынын туура эмес түзүлүшү же туура эмес арткы бети. | Adjust the strike plate position. Verify the backset measurement during installation. |
| Lever does not return to horizontal position. | Spring mechanism is damaged or obstructed. | Check for obstructions. If spring is damaged, contact customer support for replacement parts. |
Техникалык шарттар
- Модел: L024.031.MR
- Бренд: Болдуин
- Бүтүрүү: Non-Lacquered Brass (Polished)
- Материал: Жез
- Колдун түрү: Левер
- Кулпу түрү: Key Lock (Functionality may vary based on specific configuration)
- Элемент Салмагы: 3.49 фунт
- Камтылган компоненттер: Lever Assemblies, Latch, Strike Plate, Screws
- Өзгөчөлүктөр: Орнотуу оңой
- UPC: 884011858825
Кепилдик маалымат
Baldwin products are manufactured to the highest standards of quality and performance. For specific warranty details regarding your L024.MR L024 door levers, please refer to the warranty card included with your purchase or visit the official Baldwin website. Generally, Baldwin offers a limited lifetime mechanical warranty and a limited finish warranty against defects in material and workmanship.
Кардарларды колдоо
If you require further assistance, have questions about installation, or need to report a missing or damaged part, please contact Baldwin customer support.
- Webсайт: www.baldwinhardware.com
- Телефон: Refer to the Baldwin webаймактык байланыш номерлери үчүн сайт.


