1. Киришүү
This manual provides comprehensive instructions for the installation, operation, and maintenance of your Powermaster AD244 220A Alternator. This high-output alternator is designed as a direct replacement for specific GM Corvette models, enhancing your vehicle's electrical system performance. Please read this manual thoroughly before installation and use to ensure proper function and safety.
2. Коопсуздук маалыматы
Always observe the following safety precautions when working with automotive electrical systems:
- Орнотуу же техникалык тейлөө иштерин баштоодон мурун, унаанын аккумуляторун сууруп алыңыз.
- Тиешелүү жеке коргоочу шаймандарды, анын ичинде коопсуздук көз айнектерин жана кол каптарды кийиңиз.
- Ensure the vehicle is securely supported if lifted.
- ысык мотор компоненттери менен тийбегиле.
- Consult a qualified automotive technician if you are unsure about any part of the installation process.
3. Пакеттин мазмуну
Орнотууну улантуудан мурун бардык компоненттердин бар экендигин текшериңиз:
- Powermaster AD244 220A Alternator with Decoupler Pulley (Model 48969)
- Көрсөтмө (бул документ)
4. Техникалык шарттар
| Өзгөчөлүк | Спецификация |
|---|---|
| Бренд | Powermaster |
| Модель аты | 48969 |
| Output Current | 220 Amps |
| Шкив түрү | Decoupler Pulley |
| Унаа шайкештиги | GM Corvette 1997-2014 (Excluding ZR1) |
| Зымдар | 4-pin VR, 1-Wire or Hookup |
| Элемент Салмагы | 8.5 фунт (болжол менен 3.86 кг) |
| Өлчөмдөрү (LxWxH) | 9 x 7.3 x 6.7 дюйм (болжол менен 22.86 x 18.54 x 17.02 см) |
5. Орнотуу боюнча колдонмо
This section outlines the general steps for installing your new Powermaster alternator. Specific vehicle procedures may vary. Refer to your vehicle's service manual for detailed instructions.
5.1 Даярдоо
- Унааны түз жерге токтотуп, токтоочу тормозду коюңуз.
- Disconnect the negative (-) battery terminal first, then the positive (+) terminal.
- Allow the engine to cool completely if it has been running.
- Locate the existing alternator and identify all electrical connections and mounting bolts.
5.2 Removal of Old Alternator
- Тарткычты бошотуп, генератордун шкивинен серпентин курун алып салыңыз.
- Disconnect all electrical connections from the old alternator (main power wire, regulator plug).
- Remove the mounting bolts securing the alternator to the engine bracket.
- Эски генераторду кыймылдаткычтын уясынан этияттык менен алып салыңыз.
5.3 Installation of New Alternator
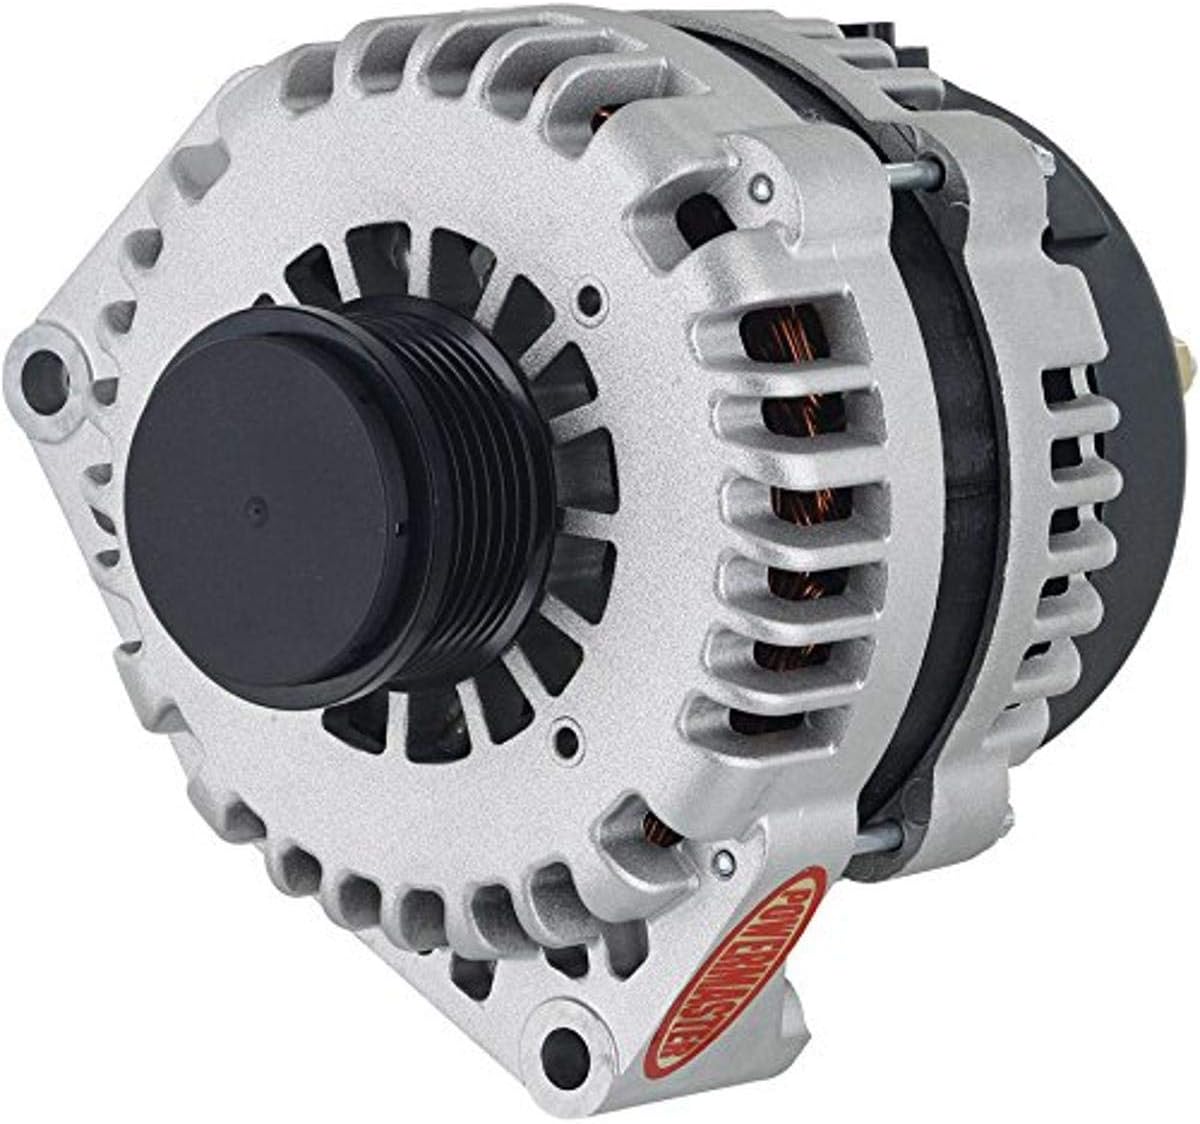 Image 1: Powermaster AD244 220A Alternator. This image shows the front view of the alternator, highlighting the silver-colored casing, cooling fins, and the black decoupler pulley. The Powermaster logo is visible in red on the lower right side.
- Position the new Powermaster alternator into the mounting bracket.
- Install and tighten the mounting bolts according to vehicle specifications.
- Reconnect all electrical connections: the main power wire to the B+ terminal and the regulator plug to the appropriate connector. Ensure connections are secure.
- Install the serpentine belt onto the decoupler pulley. Ensure proper belt tension.
- Important Note on Drive Belt: Due to the design and output of this high-performance alternator, your existing OEM drive belt may be too tight or incompatible, potentially leading to charging issues or premature wear. It is highly recommended to verify belt fitment and consider a slightly longer belt if necessary. For 2006 C6 Corvette models, a Gates K060815RPM belt (or equivalent) has been noted to provide better fitment than the OEM GM 12579229 belt. Always confirm the correct belt length for your specific vehicle and setup.
- Reconnect the positive (+) battery terminal, then the negative (-) battery terminal.
5.4 Орнотуудан кийинки текшерүү
- Start the engine and check for proper charging voltage (typically 13.8V to 14.8V) using a voltmeter at the battery terminals.
- Listen for any unusual noises from the alternator or belt.
- Verify that no battery warning lights are illuminated on the dashboard.
6. Иштөө нускамалары
The Powermaster AD244 alternator operates automatically to maintain your vehicle's electrical system voltage and recharge the battery. Once installed correctly, no specific user interaction is required for its operation.
- The alternator begins charging when the engine is running.
- The 220A output provides ample power for demanding electrical accessories and ensures efficient battery charging.
- The decoupler pulley helps reduce belt vibrations and improves accessory drive system longevity.
7. Техникалык тейлөө
Regular maintenance helps ensure the longevity and optimal performance of your alternator:
- Курду текшерүү: Periodically check the serpentine belt for cracks, fraying, or excessive wear. Ensure proper tension.
- Байланыштарды текшерүү: Ensure all electrical connections to the alternator remain clean, tight, and free of corrosion.
- Тазалык: Keep the alternator free from excessive dirt, oil, and debris. Use compressed air to clean cooling fins if necessary.
- Батареянын ден соолугу: A healthy battery is crucial for alternator performance. Ensure your battery is in good condition and properly charged.
8. Кыйынчылыктарды
If you experience issues with your alternator, consider the following common troubleshooting steps:
- No Charge / Low Voltage:
- Батарея терминалдарынын коррозияга жана бекемдикке болгондугун текшериңиз.
- Verify all alternator electrical connections are secure.
- Inspect the serpentine belt for proper tension and condition. A slipping belt will not drive the alternator effectively.
- Test the battery. A faulty battery can prevent proper charging.
- Unusual Noise (Whining, Squealing):
- Inspect the serpentine belt for wear or improper tension.
- Check for proper alignment of the decoupler pulley with other pulleys.
- Ensure mounting bolts are tight.
- Battery Warning Light On:
- This indicates a charging system fault. Follow steps for "No Charge / Low Voltagе".
- If all connections and belt are good, the alternator itself may require further diagnosis by a professional.
If troubleshooting steps do not resolve the issue, contact Powermaster customer support or a certified automotive technician.
9. Кепилдик маалыматы
This Powermaster alternator is covered by a Manufacturer Warranty. For specific details regarding warranty terms, coverage, and claims procedures, please refer to the warranty documentation included with your purchase or visit the official Powermaster webсайт.
10. Кардарларды колдоо кызматы
For technical assistance, parts inquiries, or further support, please contact Powermaster customer service. Contact information can typically be found on the manufacturer's webсайтында же продуктунун таңгагында.
Webсайт: www.powermastermotorsports.com (Чыгampле шилтеме, чындыгын текшерүү URL)


