1. Киришүү
This manual provides detailed instructions for the safe and effective use of your BRESSER BRM-300AM Studio Flash Kit. This kit includes two powerful 300W studio flash units, designed for product and portrait photography. Please read this manual thoroughly before operating the equipment and retain it for future reference.
2. Коопсуздук маалыматы
Жарааттарды же жабдууларды бузууну болтурбоо үчүн ар дайым төмөнкү коопсуздук чараларын сактаңыз:
- Do not expose the flash units to rain, moisture, or extreme temperatures.
- кубат менен камсыз кылуу Voltagтүзмөктө көрсөтүлгөн талаптар.
- Always disconnect the power cable before cleaning or performing any maintenance.
- Avoid touching the flash tube or modeling lamp колдонуудан кийин дароо, алар өтө ысык болушу мүмкүн.
- Do not operate the flash unit if it has been dropped or damaged.
- Балдар жетпеген жерде сактаңыз.
- Use only BRESSER approved accessories and replacement parts.
3. Пакеттин мазмуну
Төмөндө тизмеленген нерселердин баары пакетиңизде бар экенин текшериңиз:
- 2 x BRESSER BRM-300AM Studio Flash Units
- 2 x Light Stands (200 cm)
- 2 x Softboxes (60 x 90 cm)
- 1 x Sync Flash Cable
- 2 x 150W Modeling Lamps
- 2 x 300W Flash Tubes
- 2 х Power Cables
- 2 x запастык сактагычтар

3.1-сүрөт: Бүттүview of the BRESSER BRM-300AM Studio Flash Kit components, including two flash heads, two softboxes, and two light stands.
4. Продукт бүтүп калдыview
The BRESSER BRM-300AM is a compact and powerful studio flash unit. It features a Bowens-S bayonet mount for compatibility with various light modifiers.
4.1 Flash Unit Components

4.1-сүрөт: Деталдаштырылган view of the BRM-300AM flash unit, showing the flash tube, modeling lamp, and Bowens-S mount.
- Flash Tube: Provides the main light output.
- Моделдөө Л.amp: A 150W halogen lamp чейинки үчүнviewing lighting effects.
- Bowens-S Mount: For attaching softboxes, reflectors, and other light modifiers.
- Монтаждык кронштейн: For attaching the flash unit to a light stand.
4.2 Башкаруу панели

4.2-сүрөт: The control panel of the BRM-300AM flash unit in an off state.

4.3-сүрөт: The control panel of the BRM-300AM flash unit in an operational state, showing the digital display and various buttons.
- Санариптик дисплей: Shows flash power level (1.0 to 6.0).
- Кубат которгучу: Main on/off switch for the unit.
- LAMP Баскыч: Toggles the modeling lamp күйгүзүү/өчүрүү.
- CELL Button: Activates/deactivates the optical slave cell for wireless triggering.
- SOUND Button: Укулган жаркылдайт индикаторун которуштуруу.
- TEST баскычы: Сыноо жарыгын күйгүзөт.
- +/- баскычтары: Adjust flash power output.
- SYNC порту: 3.5mm jack for wired sync connection.
5. Орнотуу нускамалары
5.1 Жарык стенддерин чогултуу
- Туруктуу негиз түзүү үчүн жарык стендинин буттарын сунуңуз.
- Буттарды бекитүү үчүн түбүндөгү бекитүүчү тутканы бекемдеңиз.
- Extend the telescopic sections of the stand to the desired height and secure each section with its locking knob.
5.2 Installing the Flash Tube and Modeling Lamp
- Жаркылдак блогунун өчүрүлгөнүн жана розеткадан суурулганын текшериңиз.
- Carefully insert the 300W flash tube into its socket, aligning the pins. Do not force it.
- Screw the 150W modeling lamp into its socket. Avoid touching the glass part of the lamp directly with bare hands.
5.3 Softboxту орнотуу
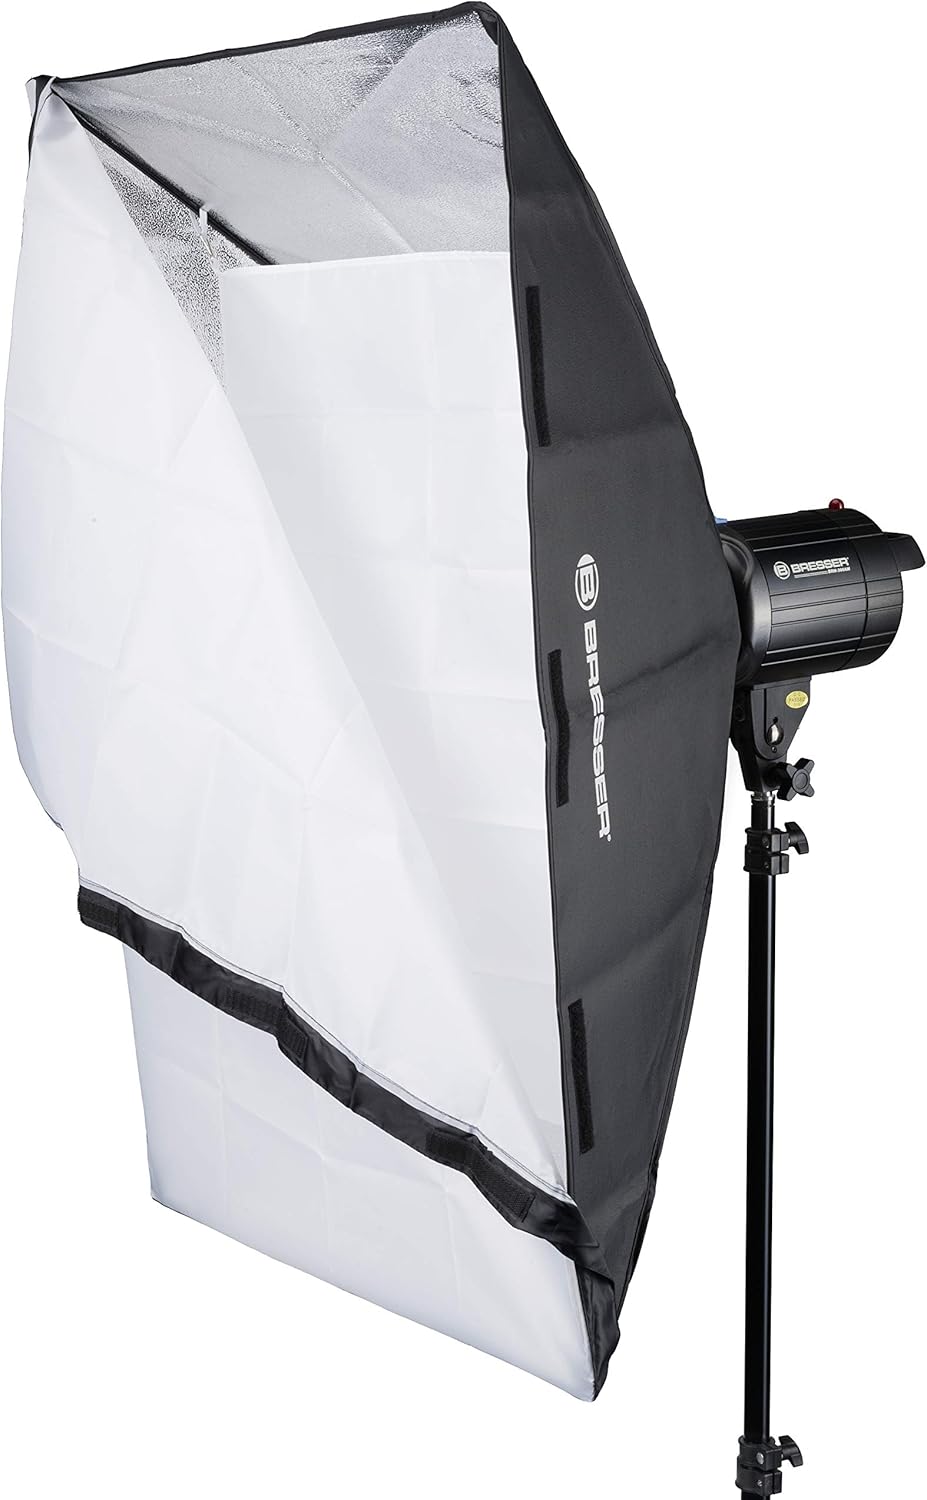
5.1-сүрөт: Illustration of a softbox being attached to the flash unit via the Bowens-S mount.
- Assemble the softbox rods into the speedring, forming the softbox shape.
- Align the speedring of the softbox with the Bowens-S mount on the flash unit.
- Insert the speedring into the mount and rotate it clockwise until it locks securely into place.
- Attach the inner and outer diffusers to the softbox using the Velcro fasteners.
5.4 Жарык блогун орнотуу

5.2-сүрөт: Two BRM-300AM flash units with softboxes mounted on light stands, ready for use.
- Place the flash unit's mounting bracket onto the top spigot of the light stand.
- Tighten the locking knob on the flash unit's bracket to secure it to the stand.
- Adjust the angle of the flash unit using the tilt adjustment knob on the bracket.
6. Иштөө нускамалары
6.1 Күйгүзүү жана өчүрүү
- Кубат кабелин жаркылдоо блогуна, андан кийин ылайыктуу розеткага туташтырыңыз.
- Flip the main КҮЧ switch on the control panel to the "ON" position. The digital display will illuminate.
- To power off, flip the КҮЧ switch to the "OFF" position and disconnect the power cable.
6.2 Жаркылдактын кубаттуулугун жөндөө
The flash power is adjustable from 1/32 to full power (300W). The digital display shows the power level from 1.0 to 6.0.
- басыңыз + button to increase flash power.
- басыңыз - button to decrease flash power.
6.3 Моделдөө Лamp Операция
150 Вт моделдөөчү лamp helps visualize the lighting effect before taking a picture.
- басыңыз LAMP button to toggle the modeling lamp күйгүзүү же өчүрүү.
6.4 Triggering the Flash
The BRM-300AM offers multiple triggering options:
- Sync Cable: Connect your camera's PC sync port to the flash unit's SYNC port using the provided sync cable.
- Оптикалык кул: The built-in optical slave cell can trigger the flash when it detects another flash firing. Press the CELL button to activate/deactivate this function.
- Сыноо баскычы: басыңыз СЫНОО button on the control panel to manually fire a flash.
The flash unit has a fast recycling time of 0.5 to 1.0 seconds, indicated by the audible sound (if enabled) and the display.
6.5 Audible Ready Indicator
The flash unit can emit an audible beep when it has recycled and is ready to fire again.
- басыңыз ҮН button to toggle the audible indicator on or off.
7. Техникалык тейлөө
7.1 Тазалоо
- Тазалоодон мурун ар дайым розеткадан ажыратыңыз.
- Жарк этүүчү аппараттын сыртын сүртүү үчүн жумшак, кургак чүпүрөктү колдонуңуз.
- Флеш түтүк жана моделдөө үчүн лamp, use a clean, lint-free cloth. Avoid abrasive cleaners.
7.2 Flash Tube and Modeling Lamp Алмаштыруу
Эгерде жаркылдаган түтүк же моделдөө lamp needs replacement:
- Ensure the unit is powered off and unplugged, and allow sufficient time for the lampмуздатуу үчүн.
- Carefully remove the old flash tube or modeling lamp.
- Install the new replacement part as described in Section 5.2.
- Use only genuine BRESSER replacement parts to ensure compatibility and safety.
8. Кыйынчылыктарды
| Көйгөй | Мүмкүн себеп | Чечим |
|---|---|---|
| Flash unit does not power on. | No power supply; faulty power cable; blown fuse. | Check power connection; try a different outlet; replace fuse (refer to Section 7.2). |
| Flash күйбөйт. | Flash not fully recycled; sync cable not connected; optical slave not activated or blocked; flash tube faulty. | Wait for ready indicator; check sync cable connection; ensure CELL is active and sensor is clear; replace flash tube. |
| Моделдөө лamp жанбайт. | LAMP button off; modeling lamp бузук. | L баскычын басыңызAMP button; replace modeling lamp. |
| Түзмөк ысып кетти. | Ашыкча үзгүлтүксүз колдонуу. | The unit has overheat protection. Allow it to cool down before resuming operation. Reduce frequency of flashes. |
9. Техникалык шарттар
| Өзгөчөлүк | Деталь |
|---|---|
| Flash Power | 300 Ws (Watt-seconds) |
| Кубатты жөндөө | 1/32 to Full Power |
| Гид номери (GN) | GN56 |
| Кайра иштетүү убактысы | 0.5 - 1.0 секунд |
| Түс температурасы | 5300-5600 К |
| Моделдөө Л.amp | 150W Halogen, On/Off switchable |
| Тоо түрү | Bowens-S Bayonet |
| Триггерлөө ыкмалары | Sync Cable, Optical Slave, Test Button |
| Ашыкча ысып кетүүдөн коргоо | Ооба |
| Салмагы (бирдик үчүн) | Болжол менен 11.6 кг (комплект үчүн) |
| Модель номери | F003215 |
| ASIN | B0744GJVYR |
10. Кепилдик жана колдоо
For warranty information and technical support, please refer to the documentation provided with your purchase or visit the official BRESSER webсайт. Ар кандай кепилдик дооматтары үчүн сатып алганыңыздын далилин сактаңыз.


