1. Киришүү
This manual provides detailed instructions for the installation, operation, and maintenance of your Hunter 54-inch Contemporary Ceiling Fan. Please read all instructions carefully before beginning installation to ensure safe and proper operation. Retain this manual for future reference.

Figure 1.1: Hunter 54-inch Contemporary Ceiling Fan with remote control.

Figure 1.2: Key features of the Hunter 54-inch Contemporary Ceiling Fan.
2. Коопсуздук маалыматы
Электр тогуна урунуу, өрт чыгуу же жеке жаракат алуу коркунучун азайтуу үчүн ар дайым төмөнкү негизги коопсуздук чараларын сактаңыз:
- Вентиляторду орнотуудан мурун бардык көрсөтмөлөрдү окуп чыгыңыз.
- Бардык зымдар улуттук жана жергиликтүү электр эрежелерине ылайык болушу керек. Эгерде сиз зымдарды жакшы билбесеңиз, квалификациялуу электрикке кайрылыңыз.
- Before installation, disconnect power by turning off the circuit breakers to the fan's electrical box.
- Ensure the outlet box is securely attached to the building structure and can support the fan's weight (approximately 18.1 lbs).
- Вентиляторду бычактары бузулган абалда иштетпеңиз. Эгерде бирөөсү бузулган болсо, бардык бычактарды алмаштырыңыз.
- Желдетүүчү лопаткалардын жолуна объекттерди коюудан алыс болуңуз.
- Бул желдеткич имараттын ичинде гана колдонуу үчүн иштелип чыккан.
3. Пакеттин мазмуну
Төмөндө саналып өткөн бардык компоненттер пакетиңизге камтылганын текшериңиз:
- 1 x Fan Motor Assembly
- 3 x Fan Blades (Reversible: Light Gray Oak / Greyed Walnut)
- 1 x Light Kit
- 3 x LED Bulbs (E26 Medium Base)
- 1 x 4-inch Downrod
- 1 x 2-inch Downrod (for standard profile монтаждоо)
- 1 x Handheld Remote Control
- 2 x AAA батарейкалар (алыстан башкаруу үчүн)
- Аппараттык комплект (бурамалар, шайбалар, зым гайкалар ж.б.)
4. Орнотуу жана орнотуу
Кесипкөй орнотуу сунушталат. Улантуудан мурун автоматтык өчүргүчтөн электр кубаты өчүрүлгөнүн текшериңиз.
4.1 Желдеткичти орнотуу
- Securely attach the mounting bracket to the ceiling outlet box. The outlet box must be listed for fan support.
- Select the appropriate downrod (4-inch or 2-inch) for your ceiling height. Insert the downrod through the canopy and connect it to the fan motor assembly.
- Желдетүүчү түзүлүштү кылдаттык менен көтөрүп, аны монтаждык кронштейнден илип коюңуз.
4.2 Зымдарды туташтыруу
- Connect the fan's electrical wires to the household wiring according to local electrical codes. Typically, this involves connecting the black (hot) wire from the fan to the black (hot) wire from the ceiling, the white (neutral) wire from the fan to the white (neutral) wire from the ceiling, and the green (ground) wire from the fan to the bare copper (ground) wire from the ceiling.
- Ensure all wire connections are secure using the provided wire nuts.
- Бардык зымдарды розетка кутусуна кылдаттык менен салыңыз.
4.3 Бычактарды жана жарыктын комплектин бекитүү
- Attach the fan blades to the motor housing using the provided screws. Ensure the desired blade finish (Light Gray Oak or Greyed Walnut) is facing downwards.
- Install the light kit to the bottom of the fan motor assembly, following the specific instructions for your model.
- Screw the three E26 Medium Base LED bulbs into the light kit sockets.
- Attach the glass shade to the light kit.

4.1-сүрөт: Аннотацияланган view of fan components and features.

4.2-сүрөт: Мисample of the fan installed in a room.
5. Иштөө нускамалары
Your Hunter ceiling fan is operated using the included handheld remote control.
5.1 Алыстан башкаруу функциялары

Figure 5.1: Handheld Remote Control.
- Fan On/Off & Speed Control: Use the fan speed buttons (up/down arrows) to cycle through the three available fan speeds (low, medium, high) or turn the fan off.
- Light On/Off & Dimming: Press the light bulb button to turn the light on or off. To dim the light, press and hold the light bulb button. Release when the desired brightness is reached.
- Fan Direction (Reversible Motor): The remote control includes a button to reverse the fan's blade direction. This feature allows for seasonal use:
- Downward Airflow (Summer): Creates a cooling effect.
- Upward Airflow (Winter): Circulates warm air trapped near the ceiling.
5.2 айланма бычак
The fan features reversible blades with Light Gray Oak on one side and Greyed Walnut on the other. You can choose the finish that best complements your room's decor during installation.
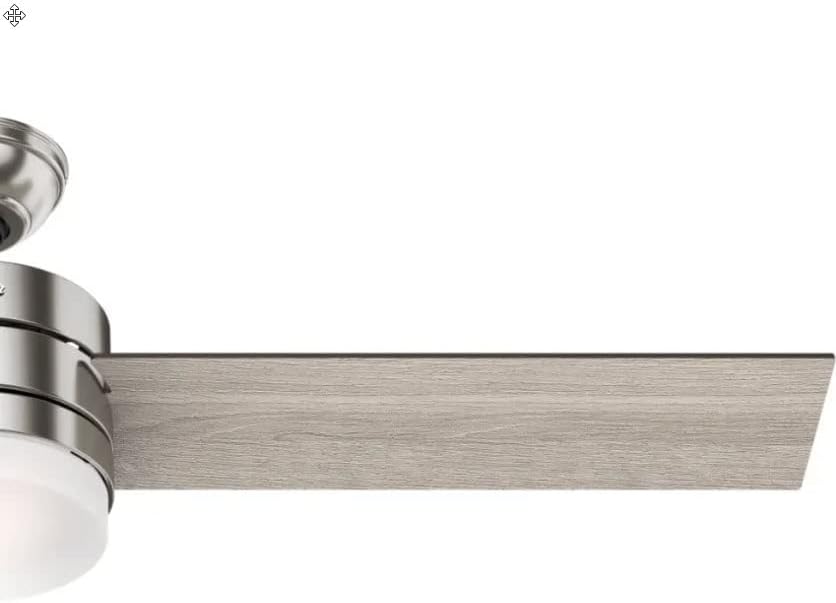
5.2-сүрөт: Мисample of the Light Gray Oak blade finish.
6. Техникалык тейлөө
Үзгүлтүксүз тейлөө сиздин шыптын желдеткичиңиздин оптималдуу иштешин жана узак иштөөсүн камсыз кылат.
6.1 Тазалоо
- Тазалоодон мурун ар дайым желдеткичти өчүрүңүз.
- жумшак колдонуу, damp cloth to clean the fan blades and motor housing. Avoid abrasive cleaners that may scratch the finish.
- Clean the glass shade with a mild glass cleaner.
6.2 Лампаны алмаштыруу
The fan uses E26 Medium Base LED bulbs. When replacing, ensure the power is off and allow bulbs to cool before handling.
- Unscrew the glass shade.
- Carefully unscrew the old LED bulb(s) and screw in new ones.
- Айнек линзасын кайра бекитиңиз.
6.3 Blade Balancing
If the fan wobbles during operation, ensure all blade screws are tight. A balancing kit (often included with fans, though not explicitly listed here) can be used to correct persistent wobbling.
7. Кыйынчылыктарды
Жалпы маселелер жана аларды чечүү үчүн төмөнкү таблицага кайрылыңыз.
| Көйгөй | Мүмкүн себеп | Чечим |
|---|---|---|
| Күйөрман иштебейт | желдеткичке кубат жок; Бошоң зым байланыштары; Алыстан башкаруунун батареясы аз. | Автоматтык өчүргүчтү текшериңиз; Бардык зымдардын туташууларынын бекем экенин текшериңиз; Алыстан башкаруу пультунун батарейкаларын алмаштырыңыз. |
| Жарык иштебейт | Loose wire connections; Faulty bulb(s); Light switch off. | Check wiring to light kit; Replace bulb(s); Ensure light is turned on via remote. |
| Күйөрман солкулдайт | бош бурамалар; салмактуу эмес бычактар; Бош монтаждык кронштейн. | Tighten all blade screws; Use a blade balancing kit; Ensure mounting bracket is securely fastened. |
| Алыстан башкаруу жооп бербей жатат | Low or dead batteries; Remote not paired with fan. | Replace AAA batteries; Refer to remote pairing instructions (usually involves cycling power and pressing a button on the remote). |
8. Техникалык шарттар
| Өзгөчөлүк | Деталь |
|---|---|
| Бренд | Hunter |
| Модель номери | CC5C91C61 |
| Өлчөмү | 54 дюйм |
| Бүтүрүү | Brushed Nickel |
| Бычактын материалы | Wood (Reversible: Light Gray Oak / Greyed Walnut) |
| Мотор түрү | AC Motor, Whisperwind |
| Жарык булагы | Integrated Dimmable LED (3 bulbs) |
| Лампанын базасы | E26 Орто |
| Түс температурасы | 3000 Келвин |
| Light Output | 800 Lumens |
| Башкаруу ыкмасы | Алыстан башкаруу |
| Тtage | 120 вольт |
| Ватtage | 44 ватт (вентилятор менен гана) |
| Элемент Салмагы | 18.1 фунт |
| Продукциянын өлчөмдөрү | 54"L x 54"W x 14.5"H |
| Ички/тышкы колдонуу | Indoor |
| Энергиянын бир жылдык баасы | $12 (based on 6.4 hours/day, 12 cents/kWh, excluding lights) |
| Аба агымы | Мүнөтүнө 3,590 куб фут |
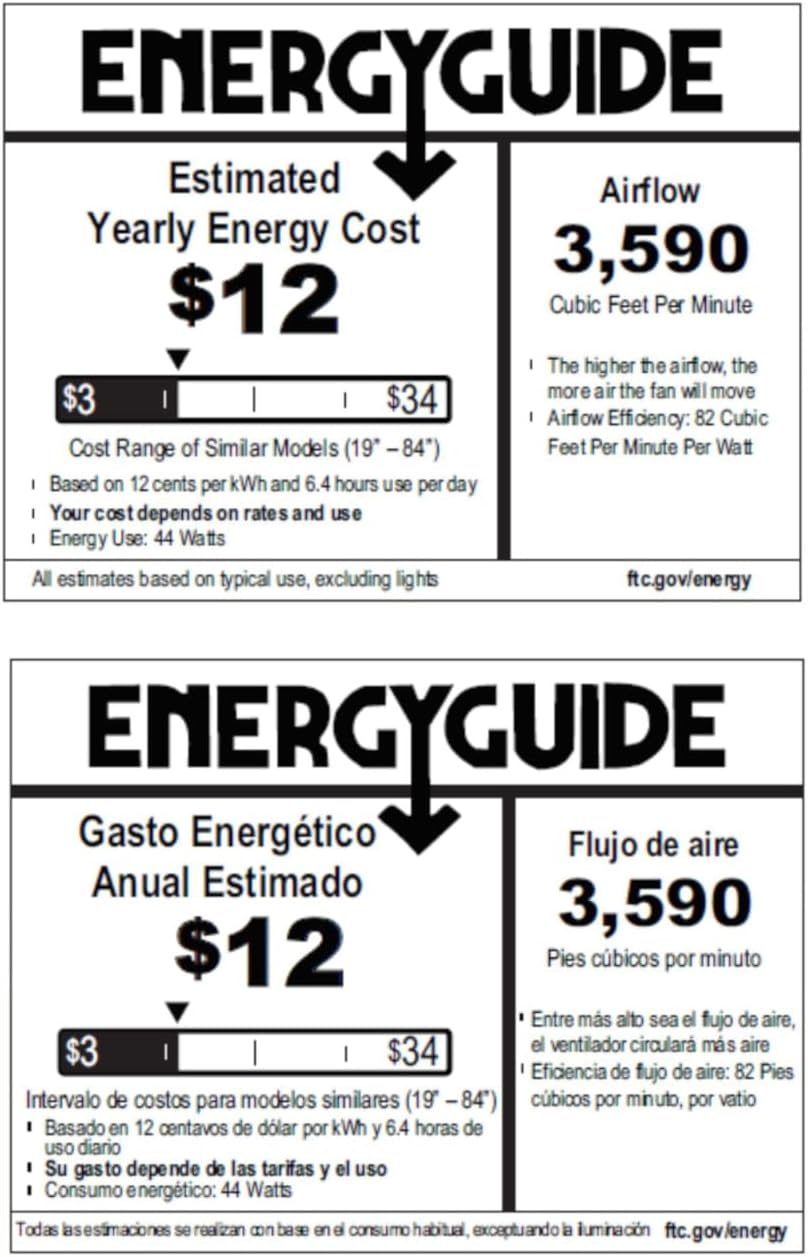
Figure 8.1: Energy Guide for the Hunter 54-inch Ceiling Fan.
9. Кепилдик жана колдоо
For warranty information or technical support, please refer to the official Hunter webсайтка же кардарларды тейлөөгө кайрылыңыз. Сатып алуу квитанциясын кепилдик дооматтары үчүн сатып алуунун далили катары сактаңыз.


