1. Киришүү
Сатып алганыңыз үчүн рахматasing the Pyle PRJG74 Portable Home Theater LED Projector. This device is designed to provide a versatile and immersive viewing experience, supporting 1080p resolution for movies, video games, and presentations. Its compact and lightweight design makes it suitable for various environments, from home entertainment to small office use. This manual provides detailed instructions for setup, operation, maintenance, and troubleshooting to ensure optimal performance and longevity of your projector.
2. Маанилүү коопсуздук нускамалары
Please read and follow all safety instructions carefully before using the projector to prevent fire, electric shock, or injury.
- Вентиляция: Проектордун айланасында жетиштүү желдетүүнү камсыз кылыңыз. Желдетүүчү тешиктерди жаппаңыз.
- Кубат булагы: Use only the specified power adapter and connect to a grounded power outlet.
- Нымдуулук: Do not expose the projector to rain, moisture, or immerse it in water.
- Жылуулук: Проекторду жылуулук булактарынын жанына же тике күн нуруна коюудан алыс болуңуз.
- Тазалоо: Unplug the projector before cleaning. Use a dry, soft cloth. Do not use liquid or aerosol cleaners.
- Тейлөө: Бул продуктту өзүңүз тейлөөгө аракет кылбаңыз. Бардык тейлөөнү квалификациялуу тейлөө кызматкерлерине тапшырыңыз.
- Көздү коргоо: l болгондо проектордун объективине тике карабаamp күйүк.
3. Кутуда эмне бар
Таңгактан чыгарууда бардык компоненттер бар экенин текшериңиз:
- Compact Projector (Pyle PRJG74)
- Алыстан башкаруу
- Электр кабели
- AV Cable
4. Продукт бүтүп калдыview
Familiarize yourself with the projector's components and ports.
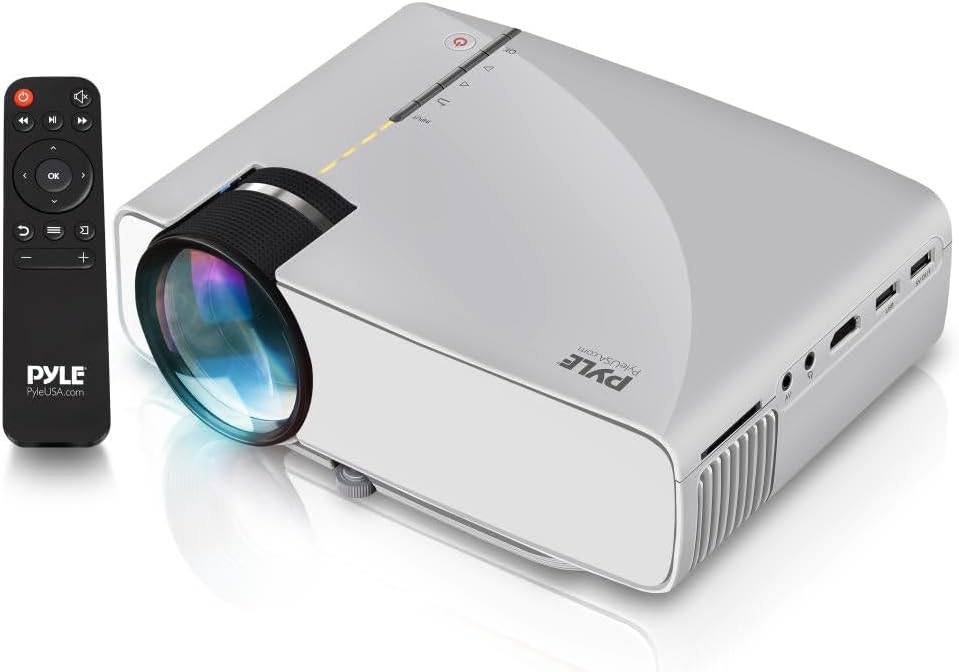
Image: The Pyle PRJG74 projector shown with its included remote control. The projector features a lens on the front, control buttons on top, and various input ports on the side.
4.1 алдыңкы панели
- Проекциялык линза: Сүрөттү чыгарат.
- Фокус шакеги: Сүрөттүн тунуктугун тууралайт.
4.2 Жогорку панель
- Кубат баскычы: Проекторду күйгүзөт/өчүрөт.
- Input Source Button: Киргизүү булактарын тандайт.
- Чабыттоо баскычтары (өйдө/төмөн/сол/оң/ОК): Менюда навигация жана тандоо үчүн.
4.3 Side/Rear Panels
- HDMI порту: Connects to HDMI-enabled devices (laptops, gaming consoles, Blu-ray players).
- USB порт: Медиа ойнотуу үчүн USB сактагыч түзмөктөрдү туташтырат.
- SD карта уячасы: Inserts SD cards for media playback.
- AV порт: Connects to devices using RCA composite video/audio cables.
- VGA порту: Connects to computers with VGA output.
- Audio Out (3.5mm): Connects to external speakers or headphones.
- Кубат киргизүү: Электр шнурун туташтырат.
5. Орнотуу
5.1 Орнотуу
Position the projector on a stable, flat surface or mount it overhead. Ensure the projection path is clear of obstructions. The optimal projection distance and screen size are:
- Экрандын өлчөмү: Adjustable from 50 to 130 inches.
- Проекциялык аралык: Varies based on desired screen size. Refer to the table below for guidance.
| Экрандын өлчөмү (дюйм) | Projection Distance (feet) |
|---|---|
| 50 | ~5.5 |
| 80 | ~8.5 |
| 100 | ~10.5 |
| 130 | ~13.5 |
5.2 Кубат туташтыруу
- Электр шнурун проектордун электр киргизүү портуна туташтырыңыз.
- Электр шнурунун экинчи учун стандарттуу электр розеткасына сайыңыз.
5.3 Киргизүү түзүлүштөрүн туташтыруу
The PRJG74 supports multiple input sources:
- HDMI: Connect an HDMI cable from your device (e.g., laptop, game console) to the projector's HDMI port.
- USB/SD: Insert a USB flash drive or SD card into the respective port/slot.
- OF: Use the provided AV cable to connect devices with RCA output.
- VGA: Connect a VGA cable from your computer to the projector's VGA port.
5.4 Фокусту жана Keystone жөндөөсүн
- Фокус: Rotate the focus ring on the front of the projector until the image appears sharp and clear.
- Негизги таш: If the projected image appears trapezoidal (wider at the top or bottom), use the keystone correction dial (if available, or digital keystone in menu) to adjust it to a rectangular shape.
6. Иштөө нускамалары
6.1 Күйгүзүү/өчүрүү
- Күйгүзүү: Press the Power button on the projector or remote control. The indicator light will turn on.
- Өчүрүү: Press the Power button again. Confirm shutdown if prompted.
6.2 Киргизүү булагын тандоо
After connecting your input device:
- Press the 'Input' button on the projector or remote control.
- Use the navigation buttons to select the desired input source (HDMI, USB, SD, AV, VGA).
- Тандооңузду ырастоо үчүн "OK" баскычын басыңыз.
6.3 Меню Навигациясы
Use the 'Menu' button on the remote or projector to access settings. Navigate using the arrow keys and 'OK' to select. Common settings include:
- Сүрөт жөндөөлөрү: Brightness, Contrast, Color, Aspect Ratio.
- Үн орнотуулары: Volume, Audio Mode.
- Убакыт жөндөөлөрү: Уйку таймери.
- Опциянын жөндөөлөрү: Language, Factory Reset.
6.4 Медиа ойнотуу (USB/SD)
When a USB drive or SD card is inserted and selected as the input source, the projector will display a media browser. You can play various file types including:
- Видео: MP4, AVI, MKV, etc.
- Аудио: MP3, WMA, AAC ж.б.
- Сүрөт: JPEG, BMP, PNG, etc.
- Текст: TXT.
Папкалар аркылуу чабыттоо жана files using the remote control and press 'OK' to play or view.
7. Техникалык тейлөө
Үзгүлтүксүз техникалык тейлөө проектордун оптималдуу иштешин камсыздайт жана анын иштөө мөөнөтүн узартат.
7.1 Линзаны тазалоо
Оптикалык линзалар үчүн атайын жасалган жумшак, түксүз кездемени колдонуңуз. Чаңды же тактарды кетирүү үчүн линзаны акырын сүртүңүз. Абразивдүү материалдарды же катуу химиялык заттарды колдонуудан алыс болуңуз.
7.2 Проектордун корпусун тазалоо
Проектордун сыртын жумшак, кургак чүпүрөк менен сүртүңүз. Өтө кир болсо, бир аз сүртүңүз.amp cloth can be used, followed by a dry cloth. Ensure no liquid enters the ventilation openings.
7.3 Вентиляция
Periodically check the ventilation openings for dust accumulation. Use a soft brush or compressed air to gently clear any blockages. Proper airflow is crucial for preventing overheating.
8. Кыйынчылыктарды
Эгер көйгөйлөргө туш болсоңуз, төмөнкү жалпы көйгөйлөрдү жана чечимдерди караңыз:
| Көйгөй | Мүмкүн себеп | Чечим |
|---|---|---|
| Сүрөт көрсөтүлгөн жок | Туура эмес киргизүү булагы тандалды; кабель туташуусу бош; түзмөк күйгөн жок. | Select the correct input source. Check all cable connections. Ensure the source device is powered on. |
| Сүрөт бүдөмүк | Фокус туураланган эмес; проектор экранга өтө жакын/алыс. | Adjust the focus ring. Reposition the projector according to recommended distances. |
| Сүрөт трапеция түрүндө | Проектор экранга перпендикуляр эмес. | Adjust the keystone correction dial or digital keystone setting. |
| Үн жок | Volume too low; audio cable not connected; source device audio settings. | Increase projector volume. Check audio cable connections. Adjust audio output settings on the source device. |
| Пульт иштебей жатат | Batteries dead or incorrectly inserted; obstruction between remote and projector. | Батареяларды алмаштырыңыз. Проектордун инфракызыл кабыл алгычы ачык көрүнүп турушу керек. |
9. Техникалык шарттар
Key technical specifications for the Pyle PRJG74 Projector:
- Модел: PRJG74
- Дисплейдин чечилиши: 1920 x 1080 (1080p Support)
- Проекциялык экрандын өлчөмү: 50" to 130" inches
- Байланыш технологиясы: HDMI, USB, VGA, AV, Mini SD
- Жарык булагы: LED
- Элемент Салмагы: 2.06 фунт
- Продукциянын өлчөмдөрү: 7.9 x 5.7 x 3 дюйм
- Өзгөчөлүктөр: Lightweight, Portable, Built-in Dual Stereo Speaker
- Сунушталган колдонуу: Home Theater, Gaming, Presentations
10. Кепилдик жана колдоо
Pyle products are designed and manufactured to the highest quality standards. For warranty information, technical support, or service inquiries, please refer to the warranty card included with your product or visit the official Pyle webсайт. Сатып алганыңыздын далили катары сатып алуу дүмүрчөгүңүздү сактаңыз.
Онлайн колдоо: For additional resources, FAQs, and contact information, please visit www.pyleusa.com.


